Hardwood Discoloration Under an Area Rug

Clara Townsend
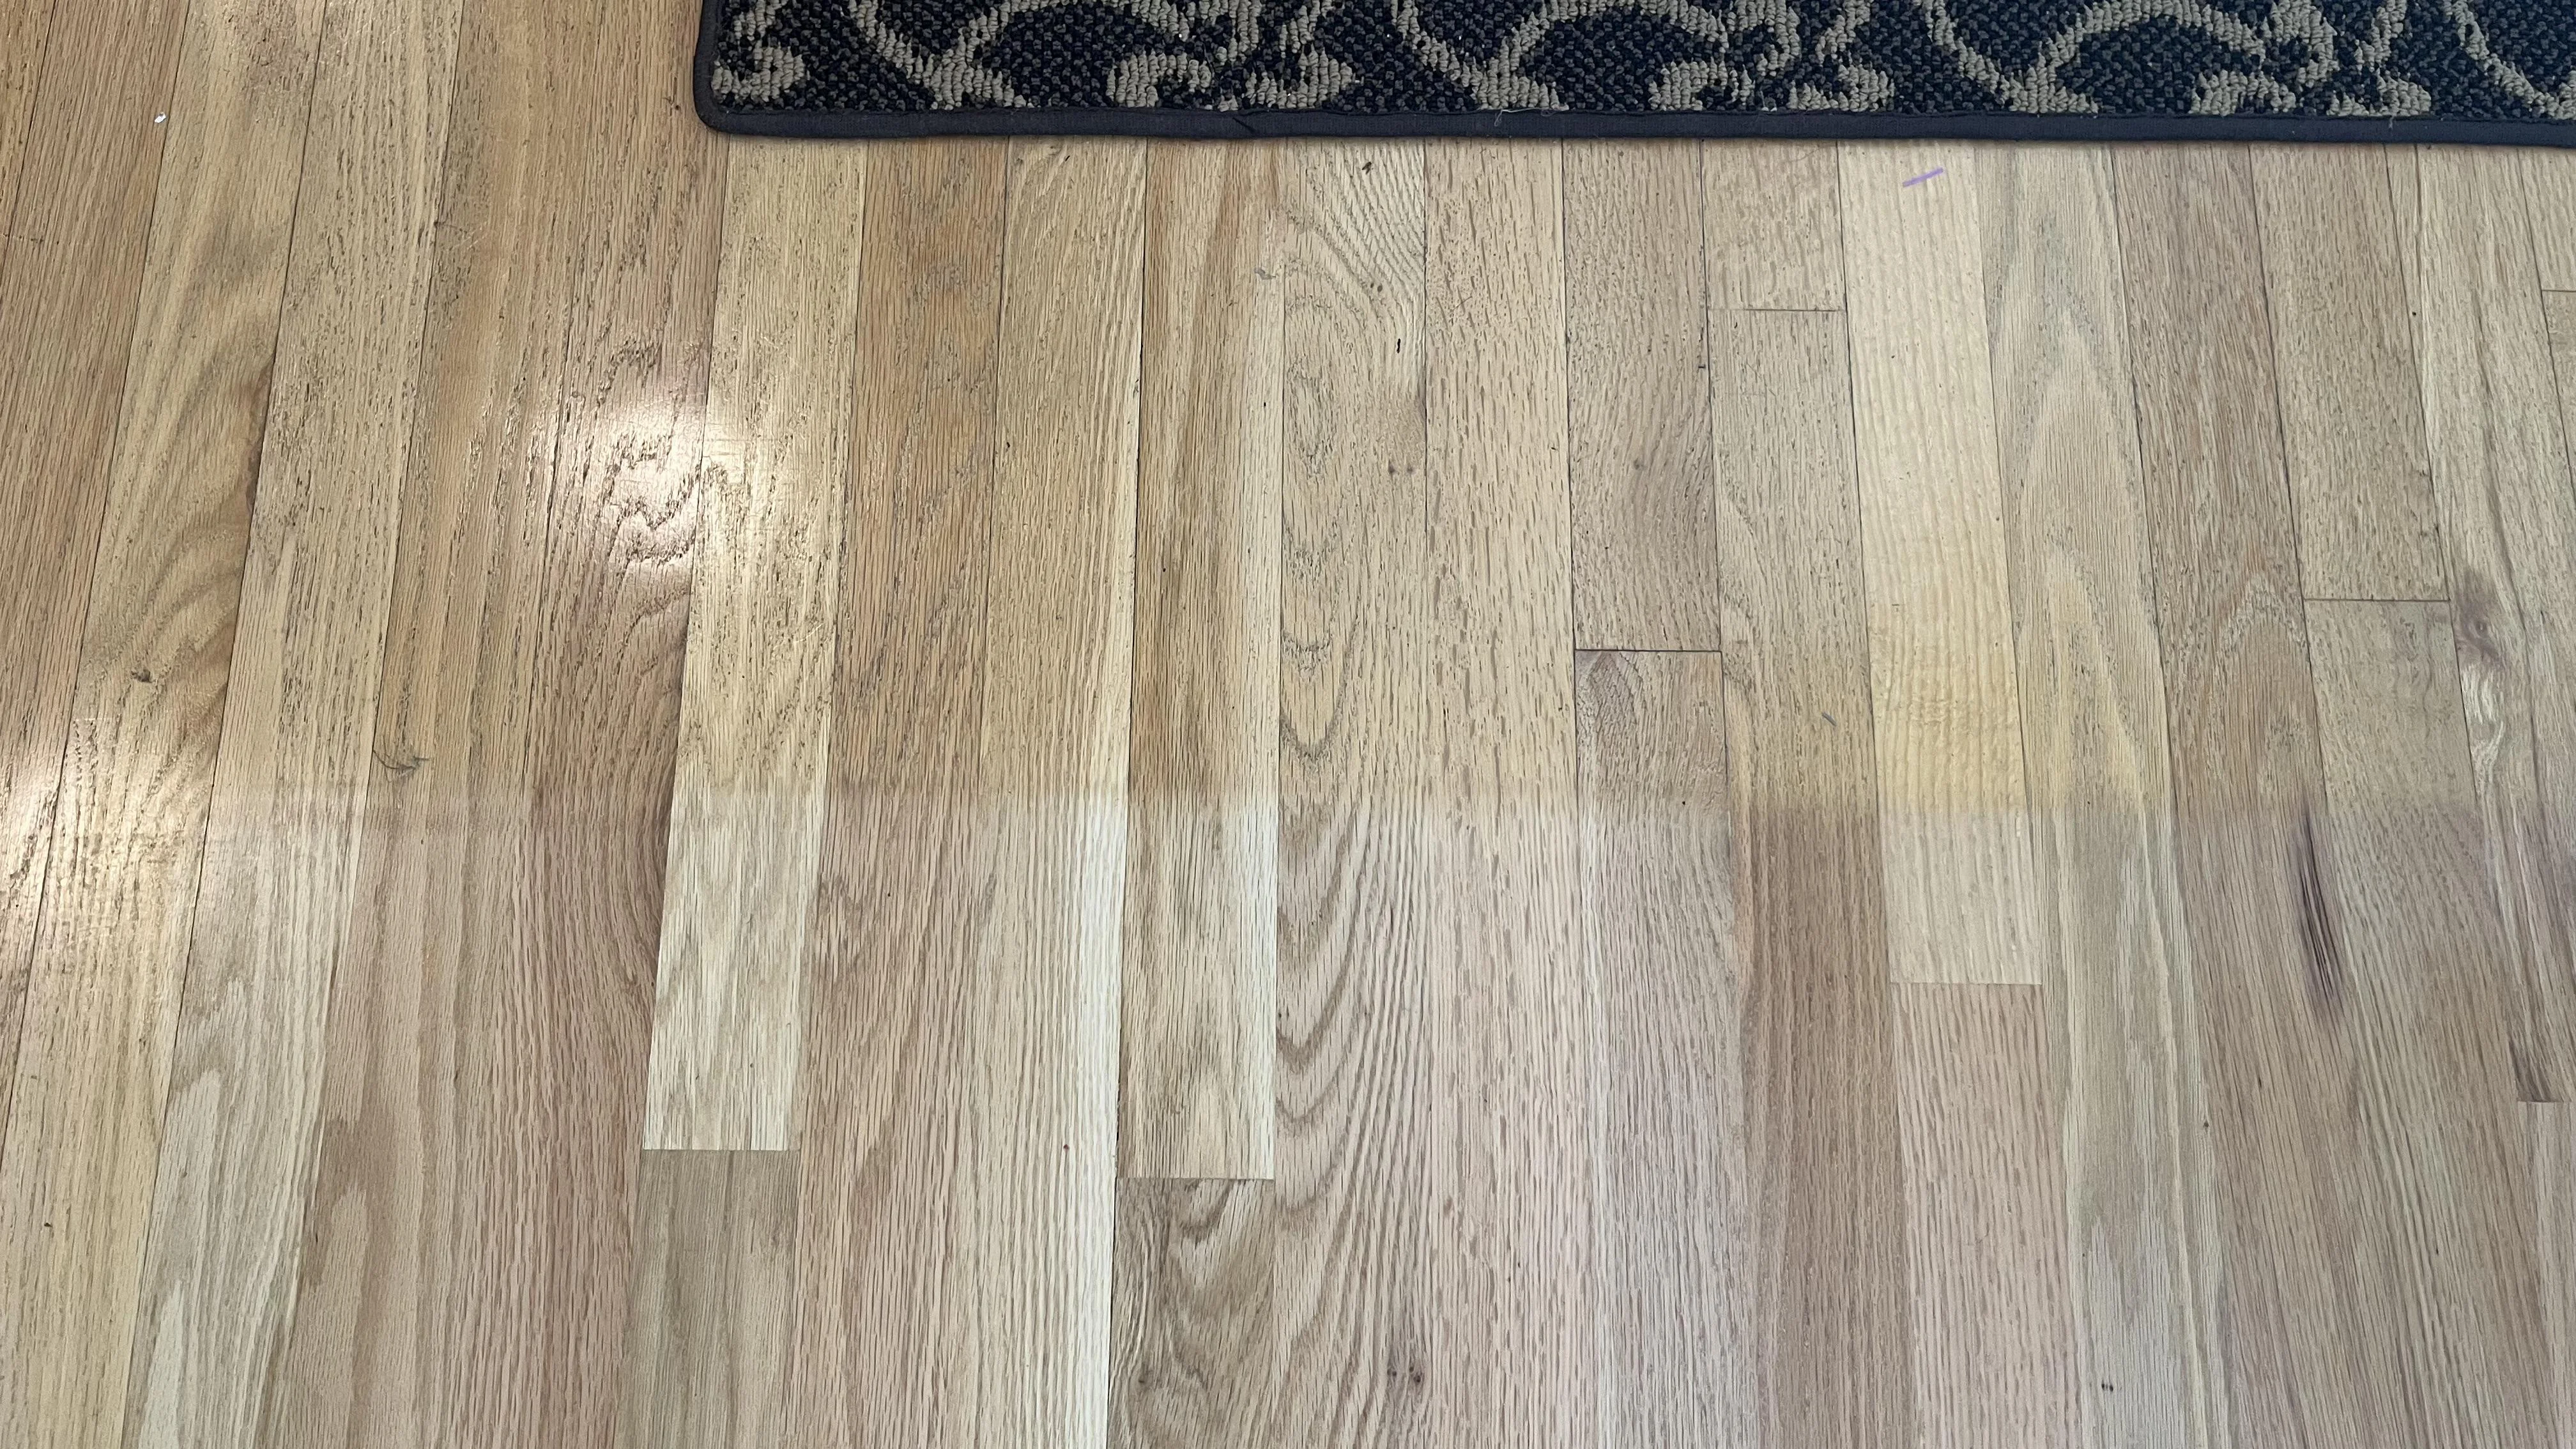
The first time I pulled up an area rug and found a perfect, sharp-edged rectangle on the hardwood, my stomach dropped. No stickiness. No gunk. Just a ghostly outline like the floor had been wearing a tan line.
If this is you right now, take a breath. A dry color change under a rug is very common, and it usually comes down to one of three things: the finish has changed color from light exposure (oxidation), the wood or finish was affected by trapped humidity (a moisture shadow), or the rug or pad transferred colorants (often rubber or latex). There are a few other less-common culprits too, like dye bleed from the rug itself, old polish or wax differences, or a reaction between a floor finish and certain vinyl or PVC backings. Each cause has different clues and different next steps.
Before you scrub: quick checks
Because you are not feeling any sticky film, you are likely dealing with a color shift, not residue. That matters, because aggressive cleaners can dull or etch a finish even when the problem is not dirt.
Do these 4 quick checks
- Feel the surface: Does it feel the same under the rug as the surrounding floor? If it feels rougher, cupped, or wavy, think moisture.
- Smell test: If there is any musty smell, do not cover it back up. Moisture or mold is a different problem than a dry color change.
- Look at the edges: Crisp, ruler-straight edges often, but not always, point to light exposure differences. They can also show up with pad transfer or rug dye bleed. Use other clues like whether it is near windows, whether the color shift is uniform, and whether you see haze.
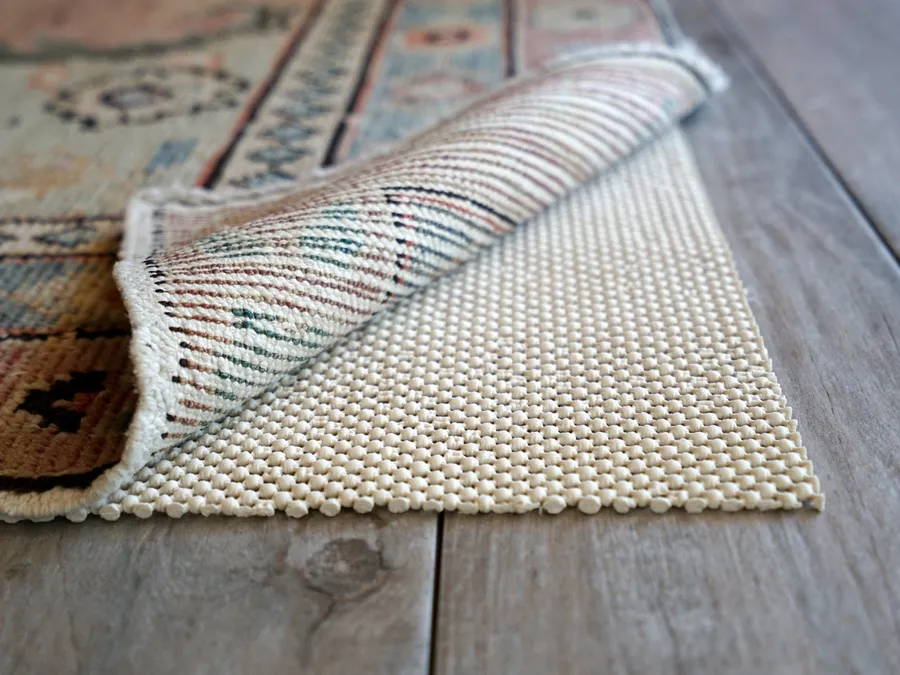
- Identify your pad: Flip the pad and look for rubbery waffle texture, latex backing, vinyl-like backing, or crumbling foam. These are common culprits for staining even when the floor feels dry.
If you are unsure what finish you have (polyurethane, oil, wax), treat it gently. When in doubt, start with the least invasive option: dry microfiber dusting, then a lightly damp microfiber with plain water, then stop and reassess.
A few common “don’t” items: Skip steam mops, Magic Erasers (melamine sponges), and “rejuvenator” or “restorer” coatings when you do not know the finish. Those are frequent DIY moves that can leave you with a bigger, harder-to-fix problem.
Fast diagnosis
If you just want the quickest read before you do anything else, here is a simple decision guide:
- Uniform and lighter, especially near windows: Often oxidation and light exposure.
- Cloudy or milky haze, sometimes darker or patchy: Often trapped moisture, but a similar haze can also come from certain cleaners or polishes reacting with the finish.
- Matches the pad footprint or shows pad texture: Often pad transfer (rubber, latex, foam breakdown) or dye transfer from the rug backing.
The most common causes
1) Oxidation and light exposure
This is the most common scenario: the floor around the rug has been exposed to sunlight and oxygen for months or years, so it has changed color, while the protected area under the rug stayed closer to the original tone.
What it looks like: A clean-edged footprint that is lighter than the surrounding floor, especially near windows or glass doors. On some species and stains, it can read as yellowing around the rug instead.
Why it happens: UV light and oxygen slowly change the color of many wood finishes, and some woods also naturally amber or deepen over time. The rug simply acted like sunscreen.
What helps:
- Time and even exposure: Leaving the area uncovered can allow the difference to blend. A realistic range is often 4 to 12+ weeks, sometimes longer, depending on sunlight, species, stain, and the finish.
- Rug rotation: If you are putting the rug back, rotate it 180 degrees to avoid locking the contrast line in place.
- Reposition furniture: Move a table or chair occasionally so the whole space ages more evenly.
What not to do: Do not try to bleach or aggressively clean the darker surrounding floor to match. You cannot wash UV aging out of a finish.
2) Trapped moisture shadow
Even without a puddle event, rugs can trap everyday humidity, steam from mopping, plant misting, or damp air from a ground-floor unit. Over time, that can create a dull, cloudy, or darker patch, sometimes with a softened-looking finish.
What it looks like: A footprint that may be darker, slightly cloudy, or uneven. Edges can still be rug-shaped, but the interior often looks patchy instead of uniformly different.
Clues that point to moisture or humidity:
- The area looks hazy or milky in certain light.
- The floor feels a bit different underfoot, sometimes cooler or less slick.
- The rug sat over a basement, slab, or a space with higher humidity.
What helps (safe first steps):
- Let it breathe: Keep the rug off the area for several days.
- Run a fan: Gentle airflow across the surface, not blasting heat.
- Use a dehumidifier: Especially in summer or in a humid climate.
- Check indoor humidity: If you can, aim for a typical indoor RH range around 35 to 55 percent. If you are routinely outside that range, the floor may keep having issues.
When to call a pro: If the wood is cupping, the finish is peeling, you see black staining at the seams, or the musty smell persists, get a flooring professional involved quickly. Moisture issues can escalate under a rug because they stay hidden.
3) Rubber, latex, or backing transfer
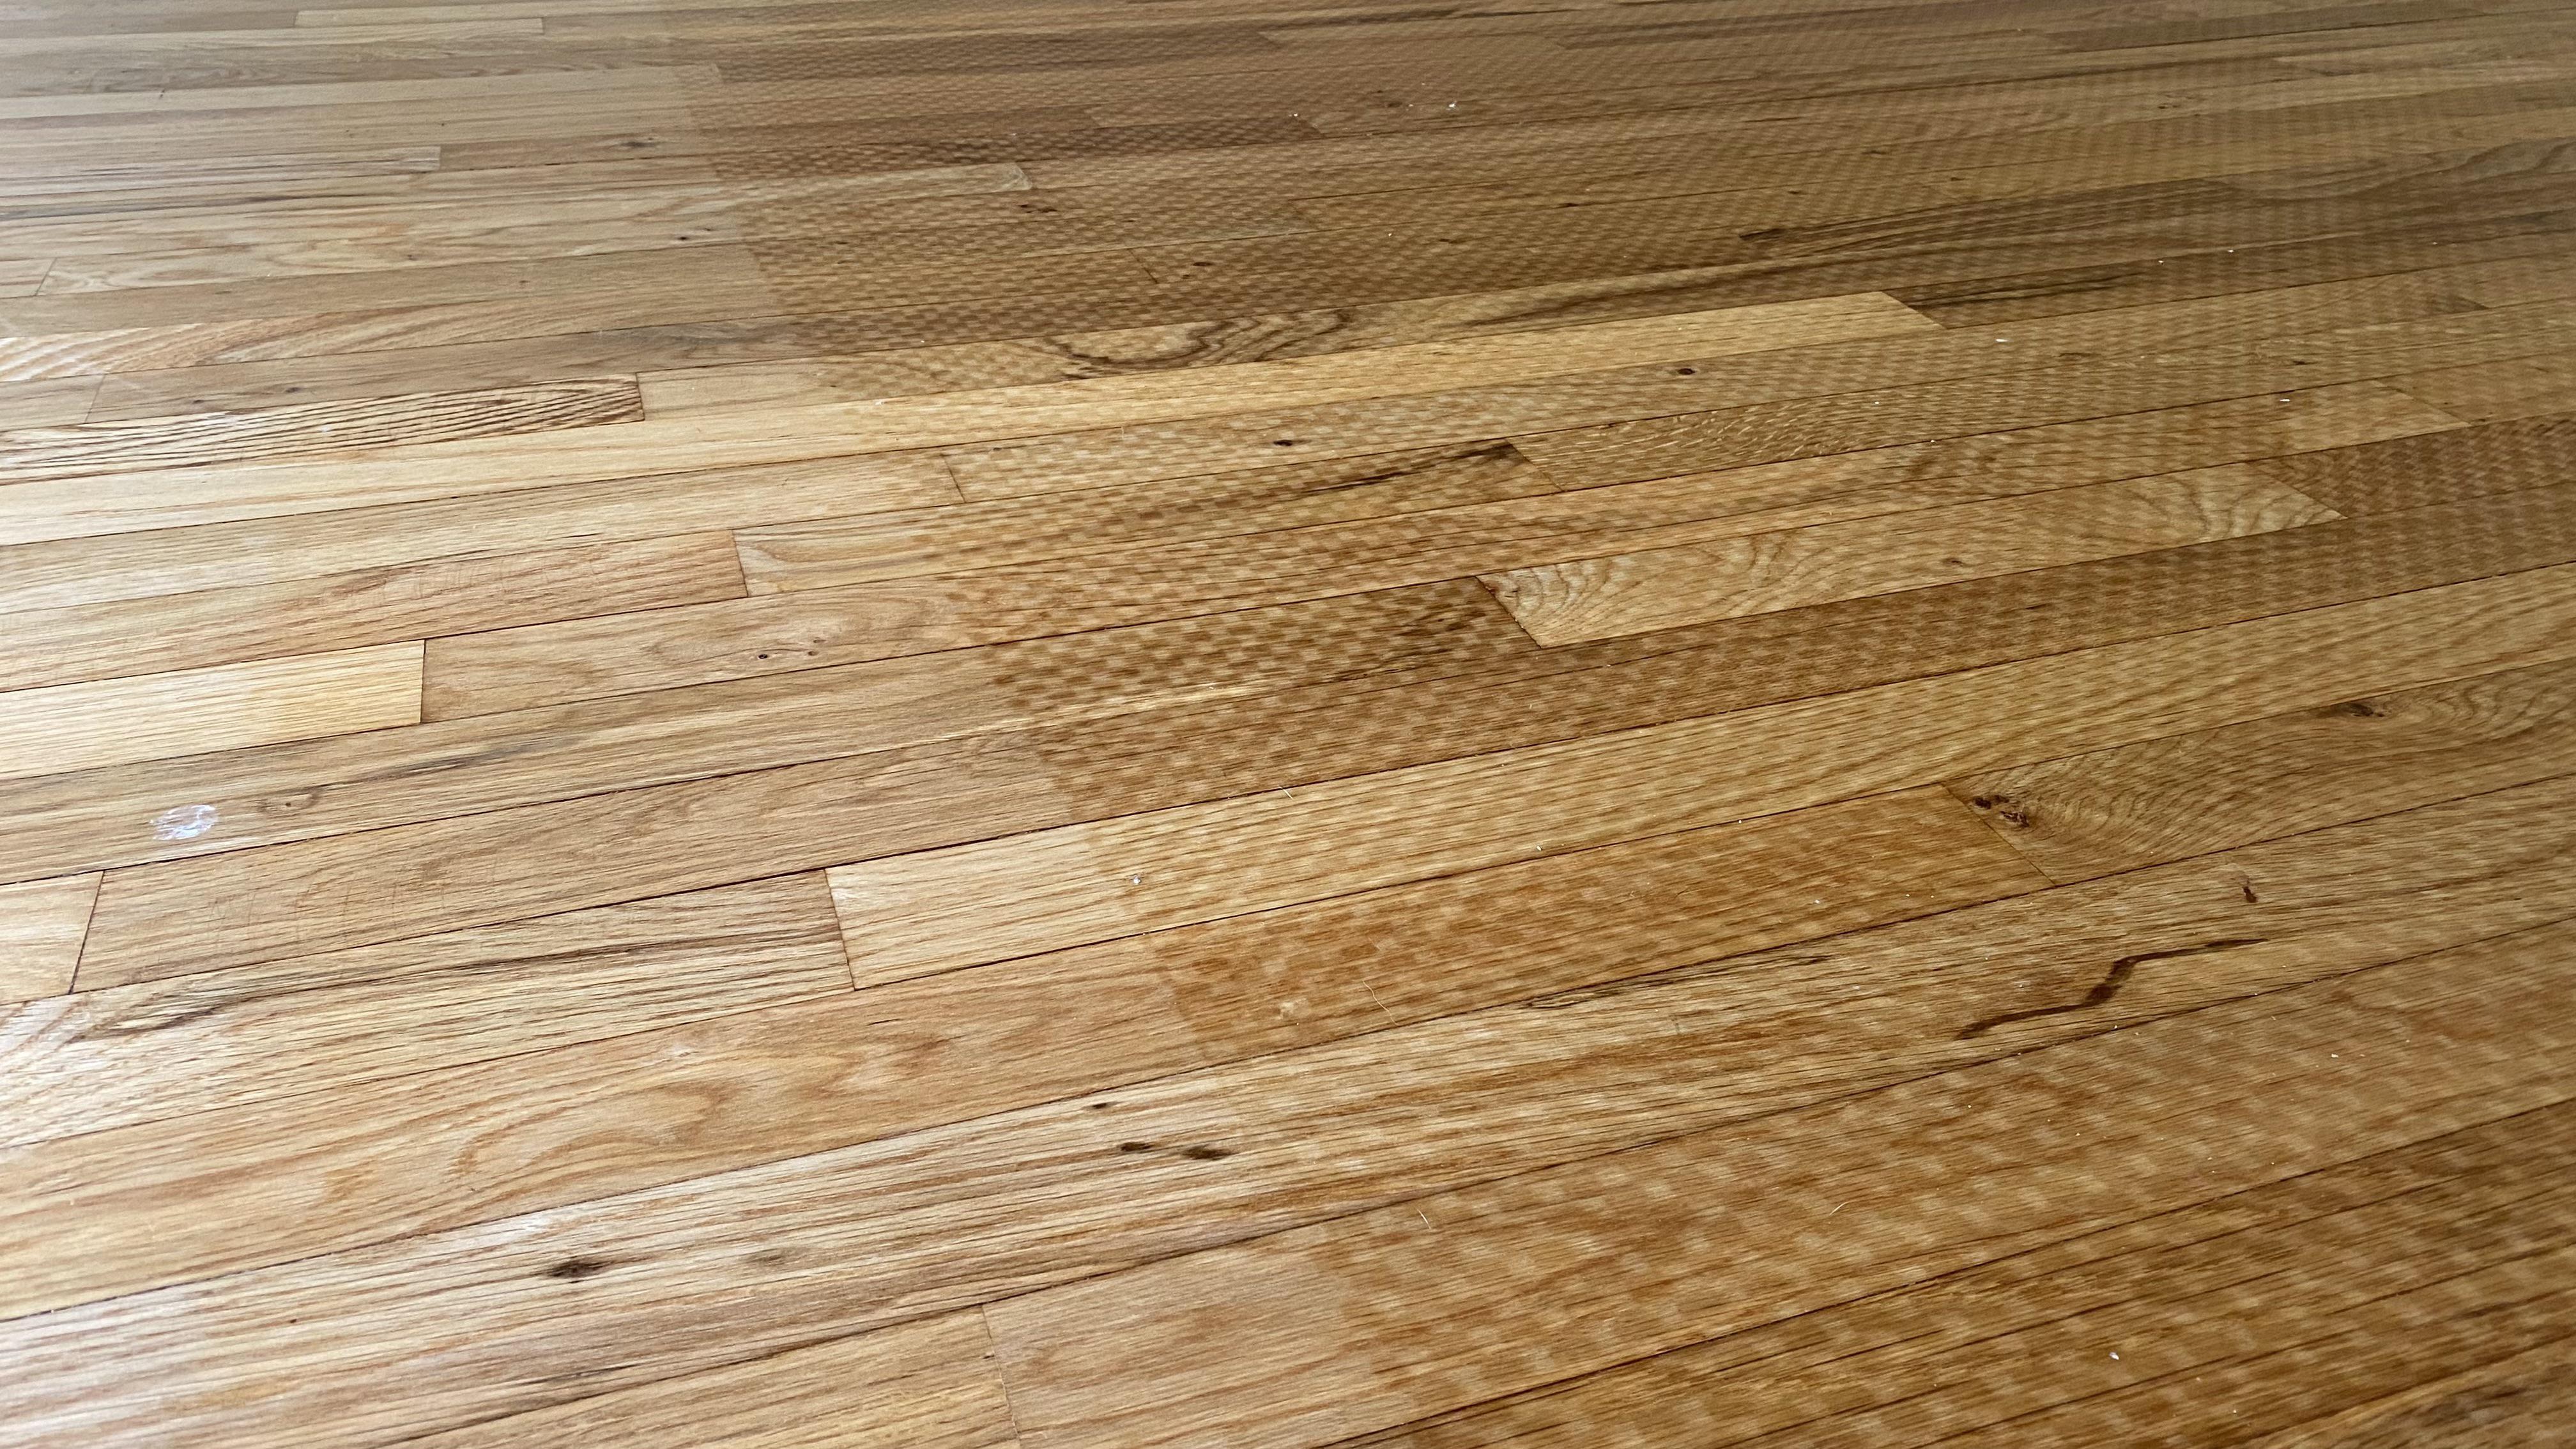
Not all pad problems feel sticky. Some rubber and latex products can leave a dry discoloration that reads as yellow, amber, gray, or even slightly greenish depending on the finish and the pad’s additives. Some vinyl and PVC-style backings can also react with certain finishes.
What it looks like: A footprint that is yellowed or darker in a way that feels embedded, often matching the exact outline of the pad more than the rug. Sometimes you can see a faint texture pattern if the pad had ridges.
Common triggers:
- Rubber-backed rugs (especially in kitchens, entries, or hallways).
- Waffle-pattern rubber pads.
- Older foam pads breaking down.
- Vinyl or PVC-backed mats.
What helps: True rubber or dye transfer is often not a cleaning problem. It may require screening and recoating, spot refinishing, or board replacement depending on severity and finish type. A flooring finisher can usually tell you what is realistic after seeing it in person.
What not to do: Avoid harsh solvents. They can soften the finish and spread discoloration.
What you can safely try at home
Since you have no sticky film, think in terms of gentle cleaning first, then blending strategies, and only then repair.
Step 1: Clean lightly
- Vacuum the exposed area with a soft floor brush attachment.
- Wipe with a clean microfiber cloth lightly dampened with water.
- Dry immediately with a second microfiber cloth.
If the footprint does not change at all, that is a clue you are looking at finish or wood color shift, not soil.
Step 2: Give it time uncovered
If you suspect oxidation, leave the rug off and let the area see the same light as the rest of the floor. This is the slowest fix, but also the safest. Expect it to be gradual, and expect it to look a little different throughout the day as light changes.
Step 3: If it is haze, try airflow first
Fans and a dehumidifier can improve a surprising number of moisture-shadow situations. If the haze persists, a flooring pro can advise whether a recoat is needed.
Step 4: If staining seems likely, stop early
Rubber transfer, backing reactions, and rug dye bleed are not DIY-friendly. The temptation is to keep trying products until something happens. That usually ends with a dulled finish and a larger repair area.
One more guardrail: If your floor is engineered hardwood, be especially cautious with anything that implies sanding or heavy abrasion. The wear layer can be thin, and it is possible to sand through the veneer. Site-finished solid hardwood and factory-finished engineered planks can also respond differently to spot repairs, so when in doubt, get eyes on it.
If you rent: what to photograph first
I am all for being proactive, but rentals can get complicated fast. Before you scrub, polish, or apply any product, document what you found. If this turns into a deposit dispute, clear photos taken immediately can help you immensely.
Take these photos in good natural light
- Wide shot of the room: Show the rug location in context, including windows and doors (light exposure matters).
- Rug lifted halfway back: Capture the full outline line and its sharpness.
- Close-ups of corners: Corners show whether it is crisp oxidation, patchy haze, or a pad-shaped transfer.
- The underside of the rug: Especially if it has rubber or vinyl backing.
- The rug pad, both sides: Get texture and any crumbling, tackiness, or printed labeling if present.
- A detail shot at floor level: Side lighting can reveal haze, cupping, or surface texture changes.
Then email the photos to yourself (timestamped) and notify your landlord or property manager with a calm, factual note: when you discovered it, whether there is any odor, and whether the floor feels uneven. If you decide to attempt any cleaning, ask for written permission first.
How to prevent the next outline
- Use a felt pad on hardwood: Felt and natural fiber rug underlays are generally safer than rubber on many finishes.
- Avoid rubber-backed rugs: If you love the look, place a barrier layer approved for hardwood beneath, or choose a different backing style.
- Let floors breathe: In humid seasons, occasionally lift and air out rugs in problem rooms.
- Rotate rugs seasonally: This is the styling trick that also saves your floors.
- Skip wet mopping under rugs: If you mop, let the floor fully dry before the rug goes back down.
- Watch humidity on slabs and basements: If you are over a slab or below-grade space, a dehumidifier can be a quiet hero.
FAQ
Will the discoloration go away on its own?
If it is oxidation or a light exposure difference, it can blend over time once the rug is removed, but it is slow. If it is rubber transfer, a backing reaction, or deep moisture staining, it usually will not disappear without refinishing work.
Why is the outline lighter, not darker?
A lighter footprint is classic tan-line flooring. The exposed area has aged or ambered, while the covered area stayed closer to the original color.
Can I use vinegar or baking soda?
Generally, I would not. Vinegar is acidic and can dull some finishes, and baking soda is abrasive. Neither addresses oxidation, and both can create a new problem on top of the old one.
Does this mean my rug pad was the wrong type?
Not always. Sometimes the pad is fine and the difference is purely sunlight and time. But if your pad is rubbery, waffle-textured, vinyl-backed, or breaking down, it is worth swapping to a felt option to reduce the risk of future staining.