Lampshade Scorched by the Bulb: What to Do Next

Clara Townsend
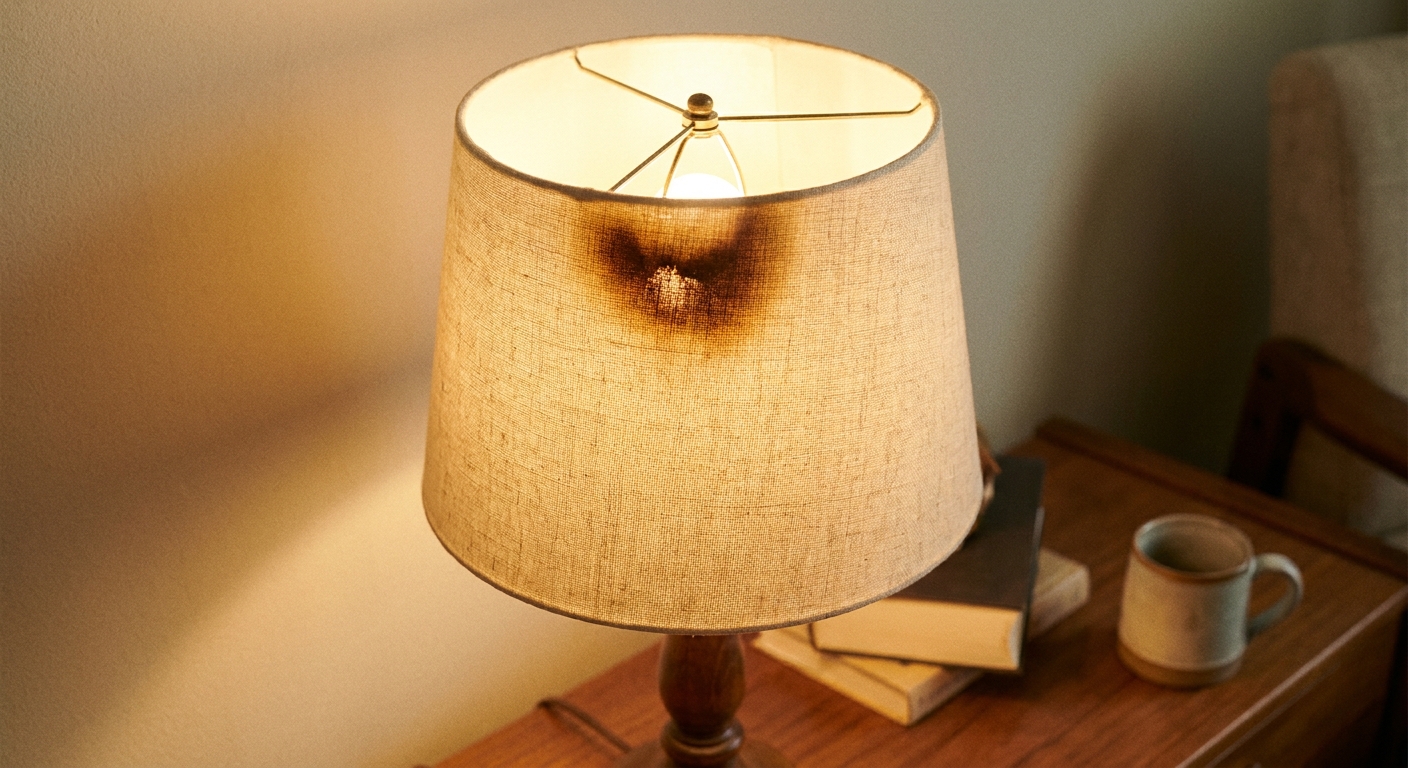
The first time I scorched a shade, I did what every stubborn homebody does. I pretended it was a “shadow” and rotated the shade so the brown spot faced the wall. It looked fine until I caught that faint hot-paper smell again. That was my cue: treat it as a safety issue until proven cosmetic.
If your lampshade has browned, blistered, or melted near the bulb, you are dealing with heat stress, meaning discoloration or distortion caused by prolonged heat exposure. Sometimes it is a simple surface scorch you can live with or lightly clean. Sometimes the shade is no longer safe and needs replacing. Let’s sort it quickly and set your next shade up for a cooler, calmer life.
Stop the heat first
Before you inspect anything, make it safe.
- Turn the lamp off and unplug it.
- Let everything cool for at least 20 to 30 minutes. A shade can feel “not hot” and still be warm enough to keep damaging its lining.
- Remove the shade and set it on a non-flammable surface.
- Check the bulb type and wattage printed on the lamp socket or lamp label, not what you remember buying.
If you saw smoke, active melting, sparking, or you smell a strong electrical or plastic-burn odor, skip ahead to the “Replace it” section and consider having the lamp inspected. A scorched shade can be the symptom, not the cause.
Surface scorch or replace it?
Here is the honest dividing line: a shade is usually salvageable only when the damage is cosmetic and stable. If the material structure is compromised, it is replacement time.
Likely a surface scorch (sometimes salvageable)
- A light brown or yellowed patch on the inside lining near the top, with no warping.
- The shade feels firm and keeps its shape.
- No cracking, flaking, stickiness, bubbling, or pinholes.
- No lingering burnt smell after the shade has cooled and aired out.
Replace the shade (safety first)
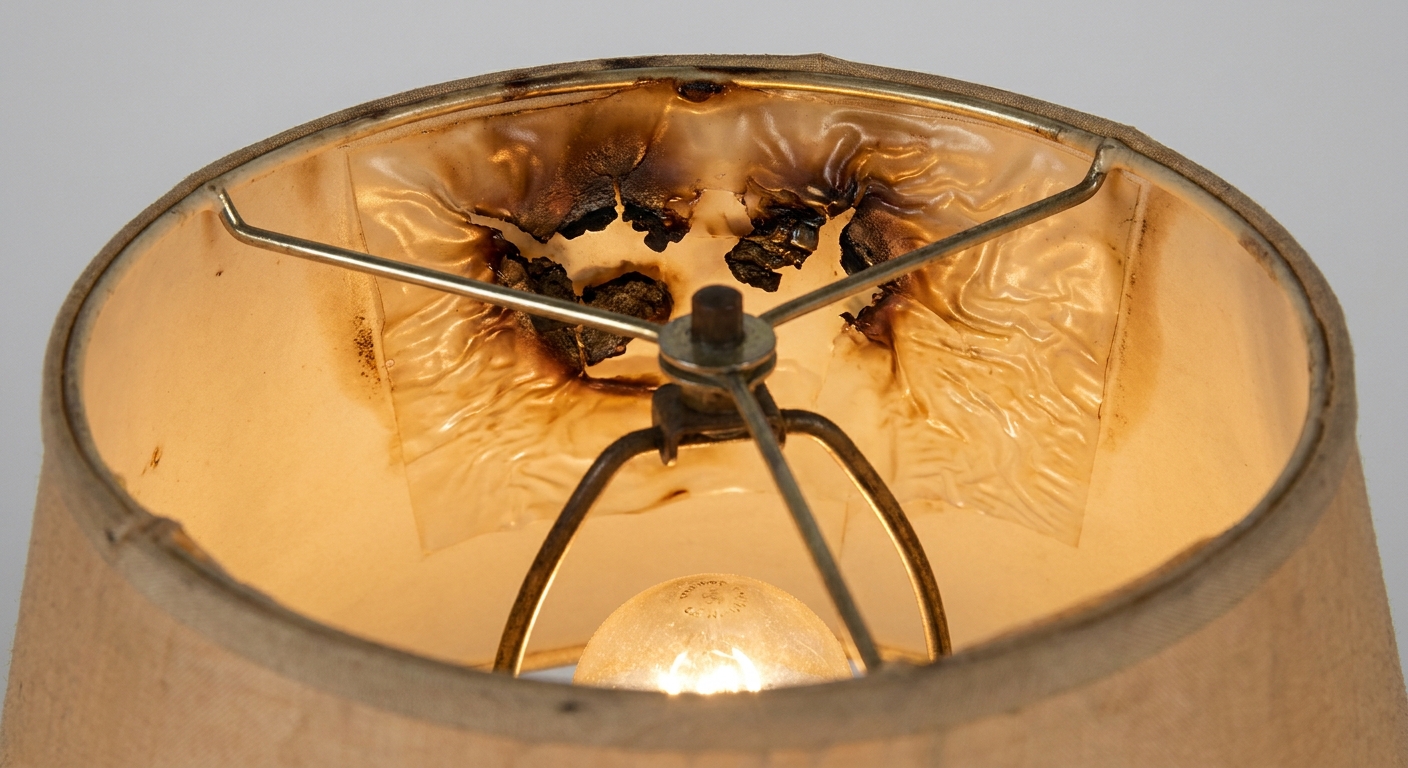
- Melted plastic, glossy blisters, bubbling, or drips. This is common with styrene, PVC, and some laminated linings.
- Charred fabric that looks blackened, brittle, or turns to dust when rubbed.
- Warping or a shade that suddenly sits crooked because the top ring has overheated or the lining has shrunk.
- Cracks in a hard lining (styrene can crack once it has been heat stressed).
- Any hole, even tiny, where the bulb is close. Holes can enlarge, and the damaged edge is more likely to worsen with heat.
- Adhesive failure (lifting fabric, peeling trim, loosening seams) near the scorch area.
If you are on the fence, treat it as a replace. Lampshades are not worth gambling on. The “right” answer is the one that lets you turn on a lamp and walk out of the room without worry.
If it is only browned
Heat discoloration is often permanent, especially on white linings. Your goal is not perfection. Your goal is to remove loose soot and reduce obvious staining without weakening the material.
Step 1: Dry clean first
- Vacuum with a brush attachment on low suction, inside and out.
- Use a clean, soft paintbrush to flick away dust in seams and trim.
- If there is a sooty look, try a dry cleaning sponge (also sold as a soot sponge). Dab and lift, do not scrub.
Step 2: Spot test any cleaner
Pick an unseen area near the bottom inside edge. If the lining gets tacky, cloudy, or starts to pill, stop.
Step 3: Only if the shade material allows it
- Fabric shades (cotton or linen look): lightly dab with a barely damp microfiber cloth and a drop of mild dish soap in water. Blot with a dry cloth immediately.
- Paper, parchment, silk, or pleated shades: avoid water. Stick to dry methods only.
- Hard plastic linings: a slightly damp cloth can work, but if the plastic has heat stress it can crack. Be gentle.
Important: If you are seeing brown plus distortion, cleaning will not help. Distortion means the shade has been cooked, not just stained.
Why shades scorch
In my experience styling older homes and thrifted lamps, scorch marks almost always come down to one of these.
- Bulb runs hot: incandescent and halogen bulbs throw a lot of heat upward.
- Bulb draws too much power for the setup: more watts means more heat. LEDs are more efficient, so you can often get the brightness you want with less wattage and less heat, but an LED still makes heat at the base and driver.
- Not enough clearance: the bulb is too close to the shade material, especially at the top where heat pools.
- Wrong bulb shape: a tall bulb, globe bulb, or exposed filament sits higher, closer to the shade.
One more to keep on your radar: avoid heat-lamp or other specialty high-heat bulbs in regular household lamps. If it is built to warm food or reptiles, it does not belong under your living room shade.
Keep the next shade cool
This is the part that prevents the repeat. You are aiming for a cooler light source and a little breathing room.
Choose a cooler bulb
If your lamp fixture allows it, LED is the safest everyday choice for shades because it produces far less heat than incandescent or halogen.
- Avoid halogen in shaded lamps whenever possible unless the fixture is clearly rated for it and you have generous clearance. Halogen runs hot.
- Use LED with a warm color temperature (around 2700K to 3000K) if you love that cozy glow.
- Match brightness wisely: higher-output bulbs usually draw more power and generate more heat. Compare watts and choose an LED with the lumen level you actually need.
Follow the lamp label
Look on the socket, under the felt, or on a small tag along the cord. Many lamp labels were written with incandescent in mind, but the key rule still stands: follow the fixture label, and use the bulb type and shape specified (for example, “Type A”). With LED, you will typically be well under the heat limit, but the socket and shade still need to be compatible.
Give the bulb clearance
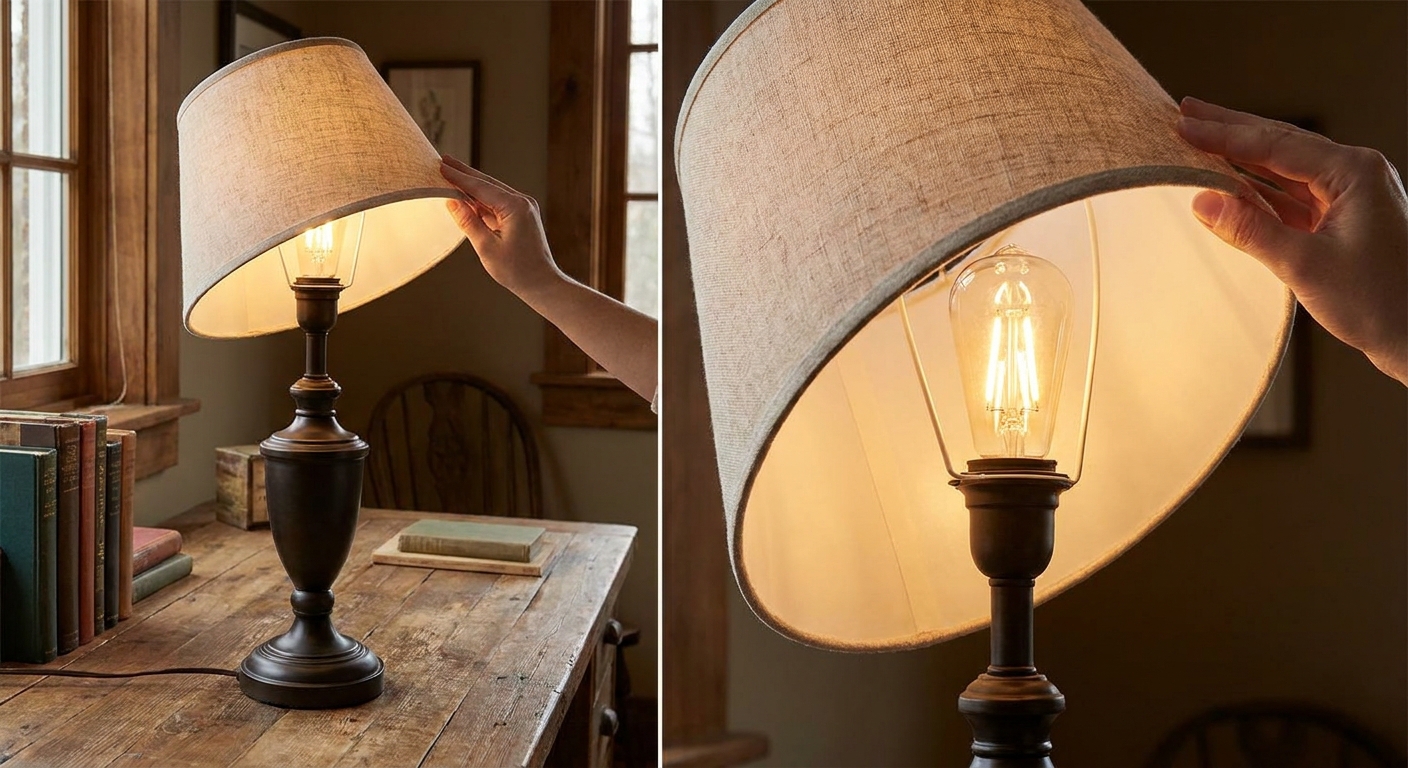
For most shaded table and floor lamps, I aim for at least 2 inches between the top of the bulb and the shade’s top interior. More is better, especially with anything other than LED.
- If the bulb is kissing the lining, it will scorch again.
- If the bulb sits high in the shade, switch to a shorter bulb shape (often a standard A19 instead of a taller variant) or consider a lower-profile LED.
Check the fitter and hardware
A shade that sits too low can trap heat right where the bulb is hottest.
- Make sure the shade is seated correctly on the harp and the finial is secure.
- If the lamp uses a clip-on shade, confirm it is designed for your bulb type and size. Clip-ons can sit very close to the bulb, especially on candelabra-style bulbs.
- Replace a bent harp. A crooked harp can push the shade into the bulb on one side.
When the lamp might be the issue
Sometimes the shade is not the only problem. Consider a closer look if:
- The socket is discolored, brittle, or smells burnt.
- The lamp flickers, buzzes, or runs unusually hot at the socket.
- The cord is cracked, stiff, or warm to the touch.
- The scorch happened quickly, within minutes.
If any of those are true, it is worth having the lamp checked by a qualified repair shop, especially for vintage finds. I love a flea market lamp as much as anyone, but I love sleeping at night more.
FAQs
Is a browned lampshade a fire hazard?
It can be. A light discoloration that is stable and not near active heat is often just cosmetic, but any melting, charring, brittle fabric, holes, or persistent burnt odor means the shade is no longer safe to use.
Can I paint over a scorch mark?
I would not. Paint can change how a shade handles heat, and it can highlight the damaged area by stiffening the fibers or making the lining patchy. If the mark bugs you, replacement is the cleaner solution.
Why did it happen even with an LED bulb?
LEDs run cooler, but they still create heat at the base and electronics. If the bulb is too close to the lining, airflow is poor, or the bulb is enclosed in a tight shade, heat can build up over time.
Do I need a special bulb for a tight shade?
Look for bulbs rated for enclosed fixtures if your shade is very tight at the top or you are using a globe-like shade. It helps the bulb handle heat buildup better, and it is another layer of safety.
One-minute plan
- Unplug, cool, remove the shade.
- If there is melting, warping, charring, holes, or odor, replace the shade.
- If it is only light browning, try gentle dry cleaning and live with a bit of patina.
- Switch to LED if you can, follow the lamp label, and aim for about 2 inches of clearance above the bulb.
A good lamp should feel like atmosphere, not anxiety. Once you fix the heat source and spacing, you can go back to what lamps do best: making your whole room feel softer at the edges.