Solid Surface Countertop Seam Opening Up

Clara Townsend
The first time I noticed a solid-surface seam “moving,” I did what every anxious homebody does. I stood there with my coffee, ran my fingertip over it about twelve times, and tried to convince myself it was just a little dirt. Sometimes it is. Sometimes it is a seam that has actually let go.
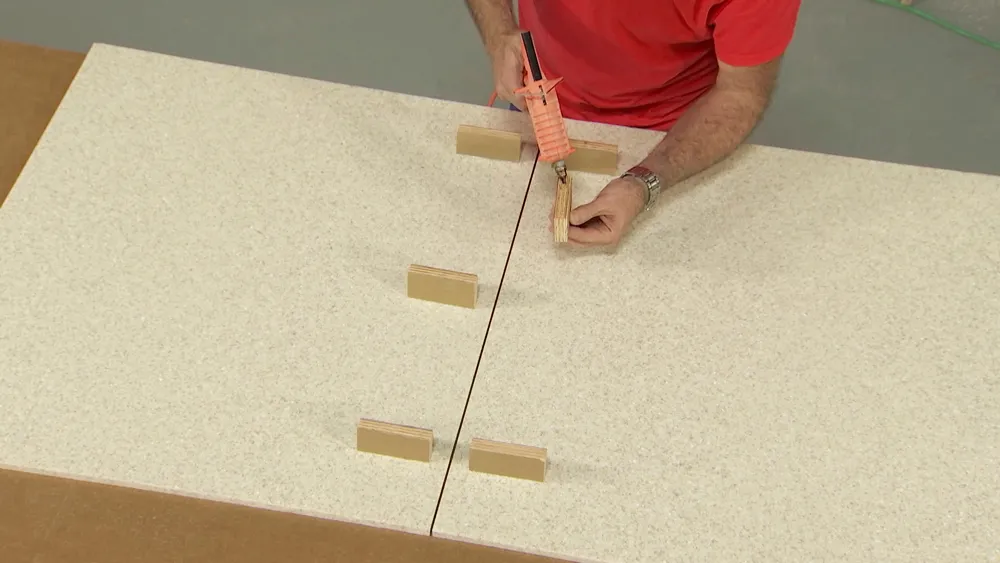
Corian and other solid-surface counters are often installed in multiple sheets, then joined with a color-matched adhesive and sanded so the seam nearly disappears. When that bond fails or the sheets shift, you can end up with a gap, a ridge (one side higher than the other), or a seam that seems to “catch” a sponge.
One quick clarification that saves a lot of confusion: not every “line” in a kitchen is a countertop seam. People often mix up a true sheet-to-sheet seam with a sink rim caulk line, a backsplash joint, or even a laminate post-form seam (which is a different material system entirely). This page is about the seam between two solid-surface pieces, not the caulk where the sink or backsplash meets the top.
This page is about the seam itself, not everyday surface scratches, heat marks, or stains on an intact sheet. A seam opening is a joint issue, and it is often best handled by a pro, not a quick polish.
What you are seeing
Before anyone sands, scrapes, or fills, figure out which situation you are dealing with. Here are the most common seam complaints I see and what they typically mean.
1) The seam looks darker, but feels flat
If the seam is flat to the touch and you cannot catch a fingernail on it, you may simply be seeing embedded grime sitting in a hairline seam. This is especially common around sinks, dishwashers, and coffee stations where moisture and oils live.
- Tell: It is a visual line more than a physical gap.
- Usually means: Cleaning issue, not structural failure.
2) You can feel an edge or lip
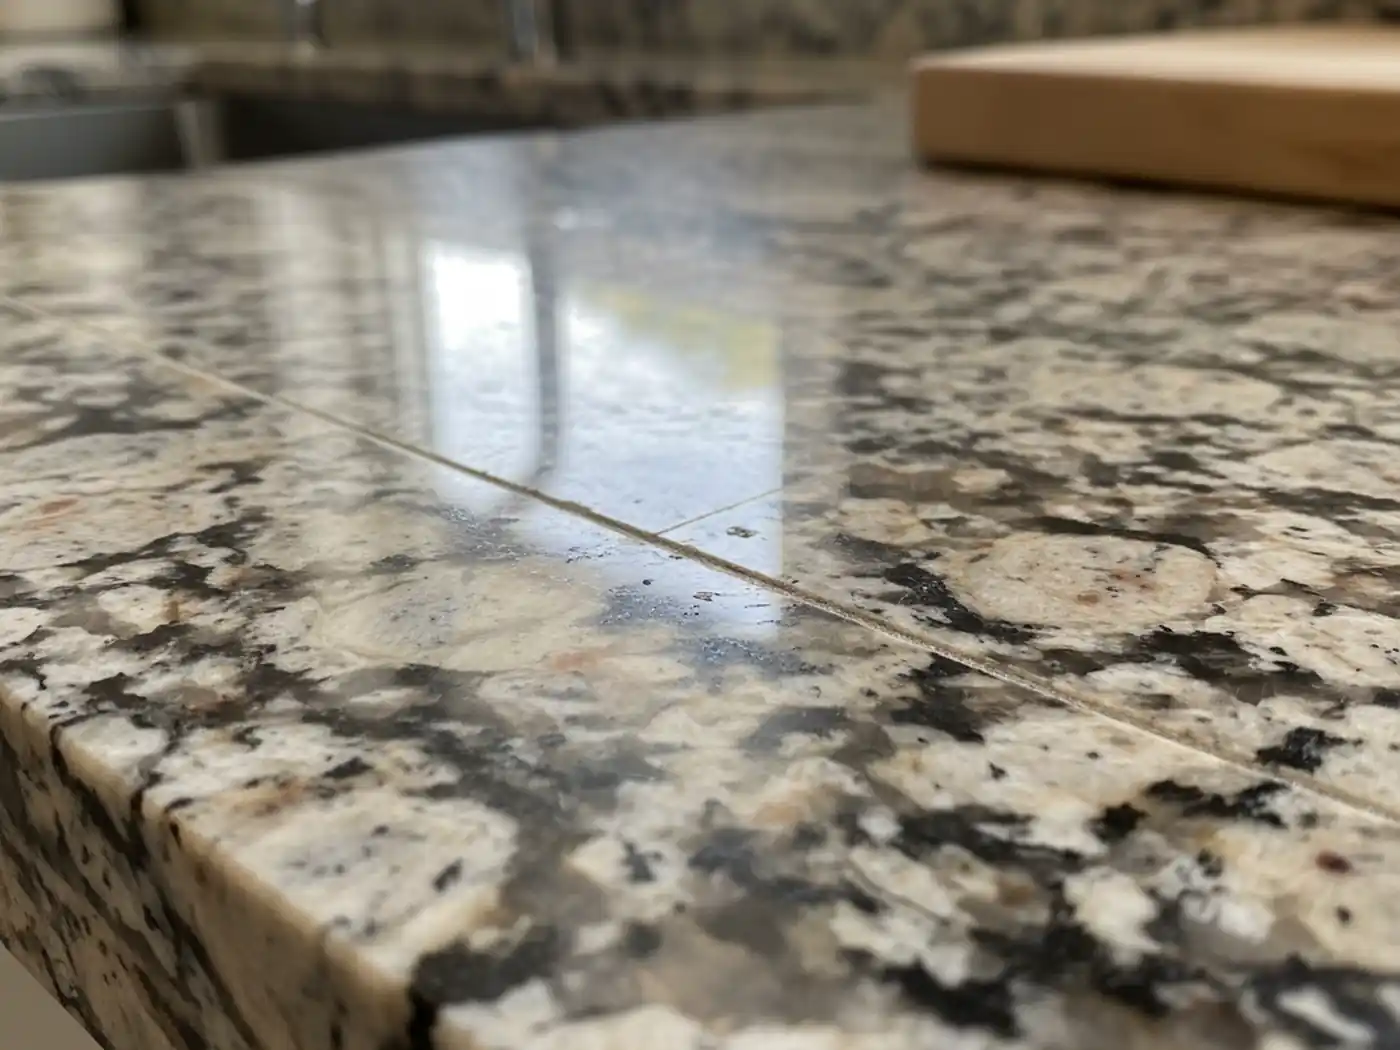
If one side sits slightly higher than the other, the seam has shifted or was not perfectly flushed during installation and is now more noticeable. Temperature swings, cabinet movement, and long spans without enough support can all contribute.
- Tell: A sponge catches, crumbs snag, your finger clearly feels a step.
- Usually means: Movement or stress in the joint, often repairable but not just a cleaning task.
3) There is a true gap you can see
If you can see a distinct opening, if water disappears into it, or if you can fit the corner of a paper towel into the separation, treat it as a joint failure until proven otherwise.
Small caveat: make sure you are looking at the countertop seam between two sheets, not the sink or backsplash caulk line. Bright light reflecting off an undermount sink reveal can make a normal joint look like a gap from the wrong angle.
- Tell: Visible separation, worsening over time, moisture getting in.
- Usually means: The adhesive bond has partially failed, or the sections are being pulled apart by cabinet shift or inadequate support.
4) The seam is cracking or crumbling
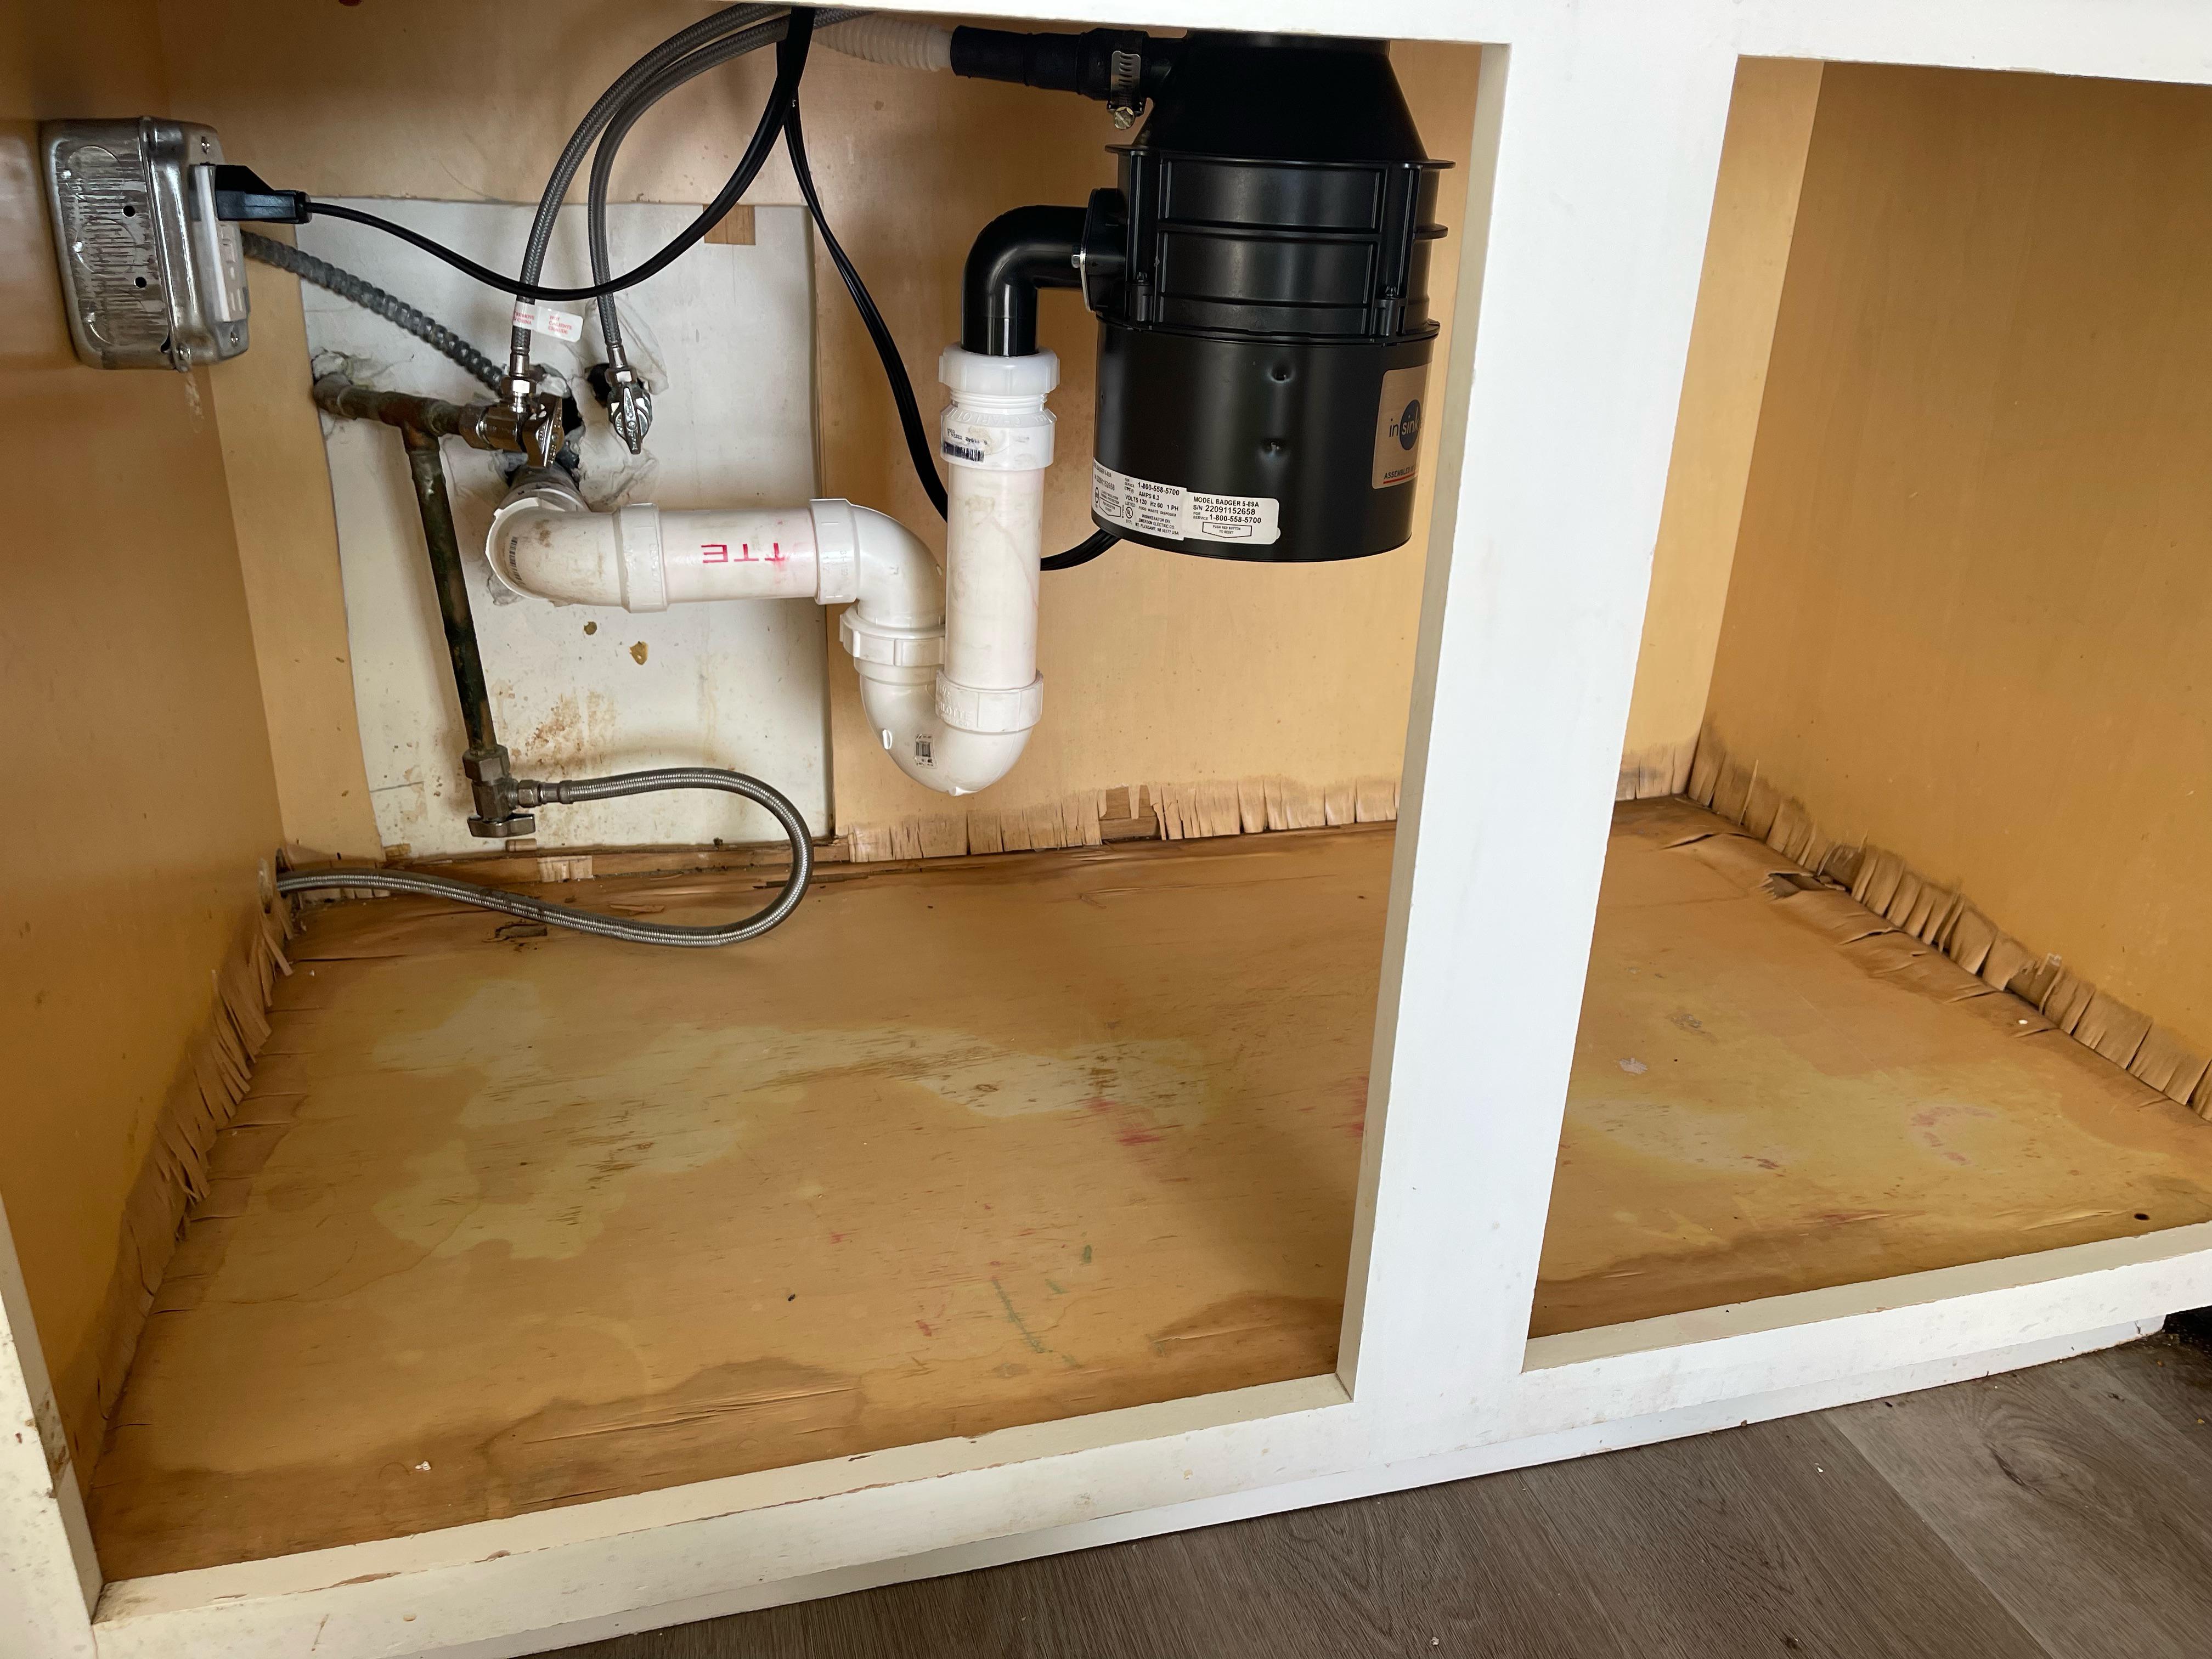
Cracking or chalky-looking adhesive can show up with age, water exposure, harsh chemicals, or stress. If there is any swelling in adjacent particleboard or MDF cabinets, that is a red flag for ongoing moisture.
- Tell: Jagged seam line, tiny flakes, roughness, or a widening crack.
- Usually means: Repair needed, and you should check for water sources immediately.
Quick triage
Think of this as “stop the situation from getting worse” mode.
- Keep it dry: Wipe up water right away, especially if the joint is near the sink or dishwasher. If water is getting into the joint, it can stress the bond and also damage the cabinets below.
- Do not pick at it: No knives, safety pins, or scrubby pads aimed at the seam line. You can turn a hairline issue into a chipped edge.
- Avoid heat at the joint: Skip placing hot pans or appliances that vent heat (air fryer, toaster oven) directly over the seam until it is assessed.
- Limit heavy pressure: Do not lean your full weight on that area, and avoid pounding meat or rolling stiff dough right over the joint.
At-home checks
You do not need special tools, and you definitely do not need sandpaper. You just need good light and a couple of simple tests.
The fingernail test
Run a clean fingernail across the seam.
- If it glides smoothly: Likely a visual issue (staining or grime in a tight seam).
- If it catches: There is a ridge, a gap, or chipped adhesive. Document it and consider it a repair issue.
The paper test
Try sliding the corner of a thin piece of paper across the seam (like printer paper).
- If it barely snags: Could still be normal texture variation or a slightly dirty seam.
- If it dips in or tears: That is a gap worth escalating. As a rule of thumb, anything that will accept the corner of paper, a fingernail, or wicks water is worth flagging.
The water watch
Place a few drops of water near the seam, not directly into it.
- If it beads and you wipe it away normally: Fine.
- If it wicks into the seam line or disappears: Treat it as urgent, especially around a sink. Dry the area and plan to notify the landlord or fabricator.
Why seams open
I know it is tempting to blame the countertop itself, but seams usually fail because something else is asking them to do too much.
- Cabinet movement: Settling floors, loose cabinet boxes, or a base cabinet that is out of level can torque the joint.
- Insufficient support: Long spans, dishwasher gaps, or sink cutouts need proper bracing. If the counter flexes when you press on it, the joint is under stress.
- Thermal stress: Heat cycling from appliances or hot cookware can contribute, particularly if a seam sits in a high-heat zone.
- Moisture issues: Chronic water exposure around sinks can weaken adhesives and swell cabinets, which then pushes or pulls the top.
- Installation variables: Incorrect adhesive, poor clamping pressure during cure, rushed sanding, or seam placement in a high-stress area can all show up later.
What not to do
Solid surface is wonderfully renewable when you are dealing with surface wear, but seams are different. A bad DIY here can make the repair more expensive, or make it obvious forever.
- Do not fill a failing seam with silicone caulk. Caulk is not a structural bond, it tends to collect grime at the edges, and it can complicate a proper re-seam later.
- Do not use super glue or two-part hardware-store epoxies. They are rarely color-matched, can yellow, and do not behave like the manufacturer seam adhesives.
- Do not sand or scrape until you document it. Sanding can remove evidence of height difference, cracking, or adhesive failure. If you rent, this matters.
- Do not pry the two sides “back together.” If the substrate or cabinets are moving, forcing it can crack the sheet.
When it is urgent
Some seam changes are cosmetic, but a few scenarios deserve same-day attention.
- Water is entering the seam near a sink, faucet, or dishwasher.
- The seam is widening quickly over days, not months.
- The countertop feels bouncy or unsupported around the seam or sink cutout.
- There is a crack radiating from the seam toward a cutout corner (sink or cooktop).
- You see swelling or staining in the cabinet directly under the seam.
If any of these are true, stop using that area for washing dishes and notify the appropriate person.
If you rent
If you are a renter, your goal is simple: create a clear, time-stamped record of what you found and the surrounding conditions. Once someone sands or fills, it can be hard to prove the seam was raised, separated, or wicking water.
Take these photos
- Wide shot of the whole counter run so the seam location is obvious (include sink and nearby appliances for context).
- Medium shot straight down at the seam showing how long the issue runs.
- Close-up at a shallow angle to capture any ridge or lip. Angled photos show height differences better than overhead shots.
- Close-up with a simple scale like a coin or a ruler placed next to the seam (do not force anything into the gap).
- Photo of the seam at the sink rim and faucet area if it is nearby, since water exposure changes urgency.
- Inside the base cabinet below showing the underside of the countertop, the sink, and any moisture staining, swelling, warped shelves, or drips.
- Any nearby heat source like a toaster oven or cooktop if the seam is adjacent.
Capture a short video too
A 10 to 20 second clip is incredibly helpful: pan from a wide view to the seam, then run a fingertip across it to show catching or ridging. Keep it gentle and slow.
Who to call
For homeowners, the right pro is usually a solid-surface fabricator or a countertop repair specialist who works with solid-surface materials. For renters, start with property management or your landlord and share your photos.
If your countertop is newer, or you know who installed it, it is also worth contacting the original fabricator or installer first. Some shops warranty their seam work for a period of time, and even when they do not, they may be the fastest path to a clean color match.
Helpful questions
- Can you confirm whether the seam has separated or if this is surface-level discoloration?
- Will you check cabinet level and support under the seam, especially around the sink and dishwasher opening?
- If the seam is being re-bonded, will you address the underlying cause (support, moisture source) so it does not reopen?
- Will sanding be localized and blended so the sheen matches the rest of the countertop?
How repairs work
Repair methods vary by brand, color, and the severity of the separation, but in general a professional repair may involve:
- Re-seaming: Removing compromised adhesive, re-aligning the sheets, re-bonding with a color-matched solid-surface adhesive, then sanding and polishing to blend.
- Leveling a ridge: If the bond is intact but the seam is proud, a pro may sand and refinish a wider area to re-level and re-match the sheen.
- Addressing support: Adding bracing around sink cutouts, correcting cabinet level, or reinforcing spans so the seam is not under constant stress.
If someone offers to simply “run a bead of caulk” as the main fix for a widening seam, push for a second opinion. Caulk can have a place in other countertop joints, but a failing solid-surface seam is meant to be bonded, not sealed like a bathtub joint.
FAQ
Is a visible seam in Corian normal?
A faint seam line can be normal, especially in darker colors or busy patterns. What is not normal is a seam you can feel as a step, a seam that widens, or a seam that accepts water.
Can I just clean the seam and see if it goes away?
If it is flat and only looks darker, gentle cleaning is reasonable. If the seam is catching, ridged, or separating, focus on documentation and professional assessment rather than aggressive scrubbing.
Will sanding fix an opening seam?
Sanding can make a ridge feel less noticeable, but it does not restore a failed bond. If the joint has let go, it needs re-bonding and often a support check underneath.
Could my dishwasher be involved?
Yes, sometimes. The dishwasher area is a common trouble spot because there is often a support gap at the opening, plus repeated heat cycling, vibration, and the possibility of a slow leak. If a seam sits near the dishwasher, ask for the support under that section to be evaluated and check for any signs of moisture.
What if the seam is right next to the sink?
Treat that as higher priority. Water intrusion and cabinet swelling can turn a small seam issue into a bigger repair quickly. Keep the area as dry as possible and report it.
A calm next step
If you take nothing else from me, take this: a seam opening is not your typical countertop “wear and tear.” It is a sign of movement, moisture, or bond failure, and it deserves a careful look.
If you rent, document first and then report. If you own, protect the area from water and heat, then call a solid-surface pro who can repair the seam and check what is happening underneath. Your future self, the one who just wants to wipe down the counter and move on with the evening, will be very grateful.