How to Hang a Fabric Headboard in a Rental

Clara Townsend
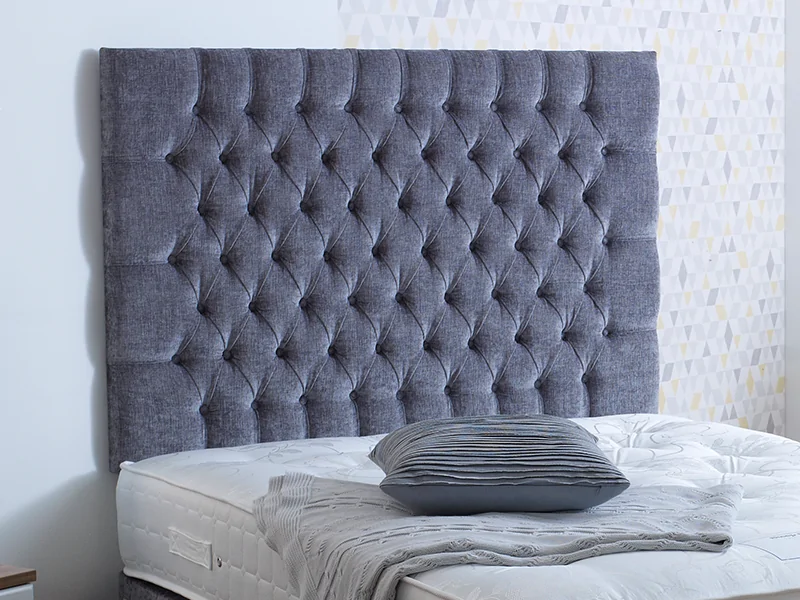
I love a fabric headboard for rentals because it does something paint cannot always do: it instantly softens a room. It quiets the echo, makes a basic bed look intentional, and gives you that cozy, upholstered backdrop for reading in amber lamplight. The catch is that a fabric headboard is wide, sometimes heavy, and always in a spot where you will lean on it, so hanging it like a lightweight picture is not the move.
Below is exactly how I approach it in rentals, whether you have standard drywall or older plaster. The goal is simple: secure enough to actually use, clean enough to look tailored, and removable enough that future-you is not patching craters at move-out.
Before you drill: check your lease
Some leases allow “small nail holes” but forbid drilling. Others allow wall anchors if they are patched. A few require written approval for anything mounted to walls. Before you buy hardware, confirm these points:
- Are you allowed to drill into walls? If yes, is there a size limit (for example, no holes larger than 1/4 in.)?
- Are you allowed to drill into studs? Most landlords prefer studs to random anchors, but it still counts as drilling.
- What is considered normal wear and tear? This matters for patching expectations.
- Are there restrictions for plaster, tile, brick, or concrete? Some buildings treat these as “no drill” surfaces even if drywall is fine.
- Do you need maintenance to locate pipes or wiring? Uncommon for a bed wall, but not impossible in older buildings.
If you are unsure, a quick email to your landlord or property manager is worth it. I keep the message boring and practical: “I would like to mount a headboard using screws into studs. I will patch and touch up on move-out. Is that permitted?”
Pick a mounting method
Most upholstered headboards land in one of three categories: wall-mounted panels, floor-standing panels, or headboards designed to bolt to a bed frame. Rentals can handle all three, but they behave differently.
One important note before we get into it: use the headboard manufacturer’s mounting instructions first, then choose hardware (cleat, screws, anchors) that is rated for your wall type and for the kind of load you are creating. Published ratings vary by drywall thickness, plaster condition, and whether the force is shear (downward) or pull-out (away from the wall). A headboard gets both.
French cleat
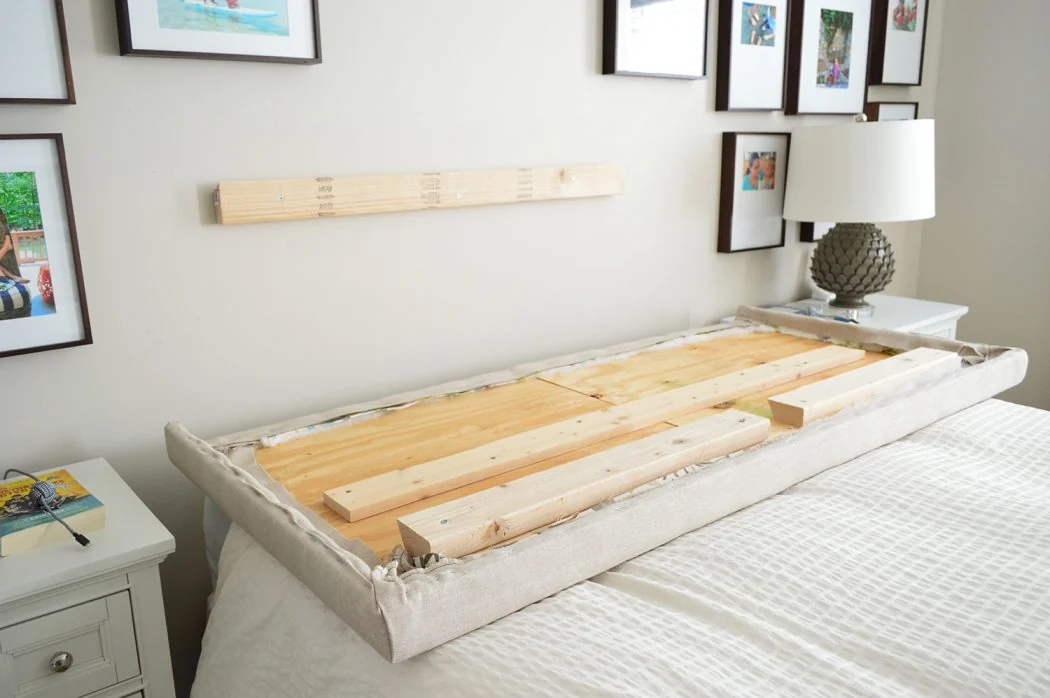
A French cleat is two interlocking angled pieces (often wood or metal). One attaches to the wall, the other to the back of the headboard. The weight is distributed across the cleat, which is why it feels so stable.
- Pros: very secure, easy to lift off for cleaning or moving, spreads weight nicely
- Cons: requires careful leveling and multiple fasteners
- My rule of thumb: I reach for a cleat for wider headboards, anything that will be leaned on daily, or pieces that feel substantial (often in the 25 to 30 lb range and up). Consider that a general range, not a universal limit. Always follow the cleat’s rating and your headboard’s design.
D-rings
D-rings are metal loops on the back of the headboard that hang on screws in the wall, similar to large art. This can work well if the headboard is light and rigid, and if it will be mostly decorative.
- Pros: minimal hardware, fast installation
- Cons: can shift if bumped, puts more stress on two small points, easier to hang slightly crooked
- My rule of thumb: D-rings can be great for lighter headboards (often under 20 to 25 lb). Treat that as a general range, and defer to the manufacturer’s instructions and the wall fastener rating.
Frame-mounted
If your headboard is designed to attach to a metal bed frame (common with upholstered headboards sold as sets), this is often the best rental choice because you are not relying on drywall or plaster at all.
- Pros: no wall drilling, very stable
- Cons: not every bed frame is compatible, height options can be limited
If you are truly in a no-drill rental, consider a headboard that mounts to the frame or a floor-standing headboard that wedges snugly behind the bed. Adhesive hanging strips are not a safe choice for a headboard that will be leaned on.
Know your wall type
Drywall
Drywall is friendly to standard stud finders and common anchors. If you can hit studs, do it. If you cannot, choose anchors rated comfortably above your headboard weight and the real-life force of someone leaning back.
Plaster
Plaster walls are harder and more brittle. Stud finding can be finicky, and drilling requires a steadier hand. Also, “plaster” can mean a few different things:
- Lath-and-plaster: common in older homes. It is usually best to drill slowly and avoid impact or hammering action that can crack the keys behind the wall.
- Plaster over masonry: more common in some buildings. This can behave more like masonry, and may call for masonry bits and more specialized drilling. If you suspect this, it is worth asking building maintenance or a handy friend before you commit.
If your home has lath-and-plaster:
- Use a strong magnet to find nails or screws that often follow stud lines.
- Use painter’s tape over your mark to help reduce chipping.
- Drill slowly and start with a small pilot hole.
- Consider toggles if you cannot reliably hit studs, but only if your lease allows that size of hole.
If plaster is cracking or crumbling, stop and switch to a frame-mounted headboard. No headboard is worth a wall repair saga.
Tools and hardware I use
- Stud finder (a model with AC detection is a nice upgrade)
- Strong magnet (great backup for tricky walls)
- Level (longer is better for wide headboards)
- Tape measure
- Pencil
- Painter’s tape (helps reduce plaster chipping and protects paint while marking)
- Drill and bits (plus masonry bit if needed for plaster over masonry)
- Screws appropriate for studs (commonly 2 to 2.5 in., depending on cleat thickness and headboard frame)
- If not in studs: heavy-duty wall anchors rated for the load and wall type
- Felt pads or rubber bumpers for the back corners (prevents scuffs and helps it sit quietly)
Hardware note: headboard mounting is not the place to “match whatever came in the junk drawer.” Use new hardware with a clear rating, and size it for your wall type.
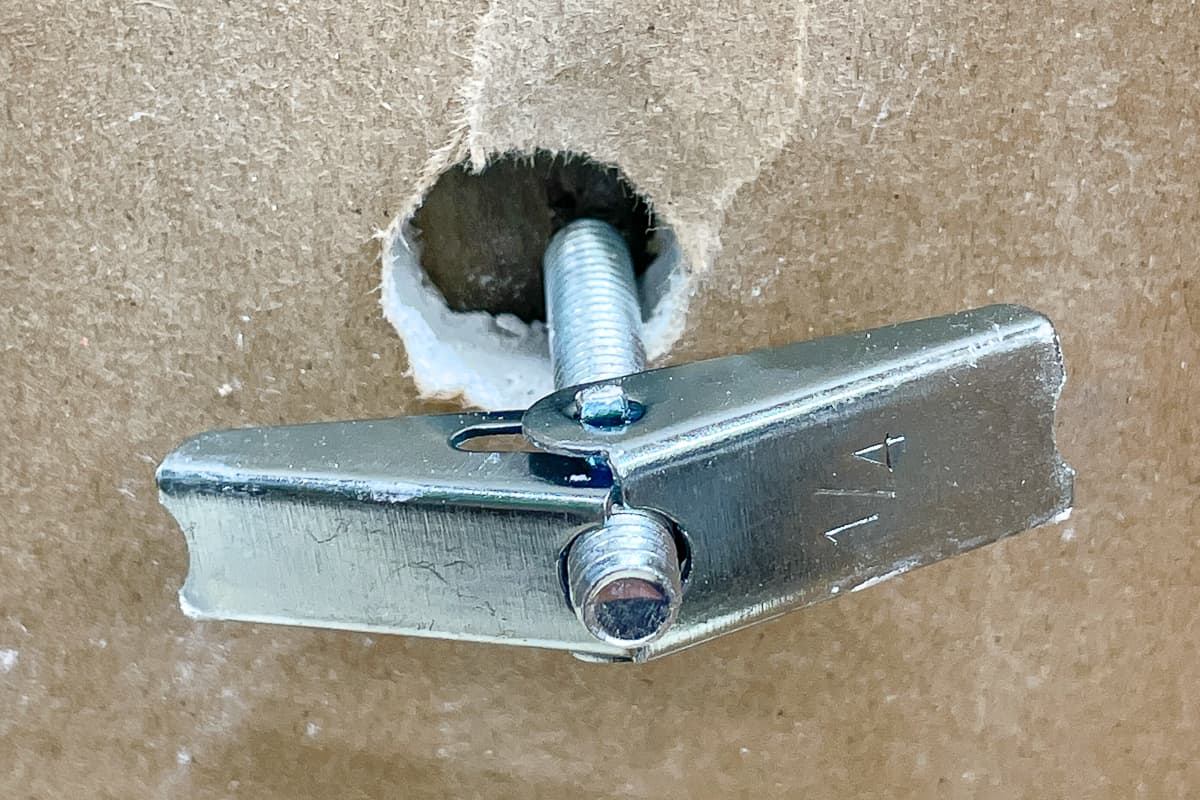
Anchor types, quickly: toggle bolts and snap toggles tend to be strong for hollow walls, but they require a larger hole. Molly bolts can work well in drywall and some plaster situations, but ratings vary widely. Whatever you pick, read the packaging for wall type and pay attention to whether the rating is for shear or pull-out.
Strength and safety
There is the headboard’s weight, and then there is real-life force: you sitting up and leaning back, pillows shoved, the bed shifting slightly when you change sheets. I like a big safety cushion.
- Studs: studs are the gold standard. A properly sized set of screws into studs is often enough, especially with a cleat that spreads the load. When I can, I try to catch at least two studs with a longer cleat, or at minimum get one solid stud connection and supplement with rated anchors.
- Anchors: build in margin. If your headboard weighs 30 lb, do not choose anchors rated for 30 lb total. Choose a system rated well above that, and distribute across multiple fasteners when possible.
Quick safety note: avoid drilling near outlets, switches, sconces, or any wall plates. If your stud finder has AC detection, use it. Bed walls are usually low drama, but I do not tempt fate.
Placement and height
Height is what makes a headboard look custom instead of accidental. Here is the guideline I use most often:
- Leave 1 to 3 in. between the top of the mattress and the bottom edge of the headboard.
- Aim for 24 to 32 in. of headboard showing above the mattress for that plush, layered look.
Two details people forget:
- Account for mattress toppers. If you just added a 3 in. topper, your headboard suddenly looks shorter.
- Think about pillow stack height. If you sleep with three pillows and a Euro sham, you want the headboard tall enough that fabric still peeks out behind your pillows.
Also, check your wall details. Thick baseboards, picture rail molding, and radiator covers can make a headboard sit slightly proud. Bumpers help, but sometimes you need to position the cleat so the headboard clears the trim cleanly instead of rocking against it.
French cleat steps
This is my favorite method for rentals because it is stable, removable, and forgiving if you need to take it down later.
1) Mark the centerline
Find the center of the bed and lightly mark the wall with pencil. Do the same on the headboard. This makes it much easier to line everything up.
2) Set the finished height
With the bed in its final spot, hold the headboard up (or prop it on sturdy boxes) and mark where you want the bottom edge to sit. Add painter’s tape where you will mark, especially on plaster.
3) Locate studs
Use a stud finder, then confirm with a magnet. Mark stud centers with pencil.
4) Mount the wall cleat
Hold the wall cleat level and mark your holes. Pre-drill pilot holes, especially when going into studs or plaster. Then screw the wall cleat into studs when possible. If studs are not available where you need them, use anchors rated for your wall type and the total load.
Orientation check: before you drill, do a quick dry-fit to confirm which cleat half goes on the wall and which goes on the headboard so they lock together correctly.
5) Mount the matching cleat to the headboard
Attach the second cleat to the headboard frame, making sure it is level and oriented so it drops onto the wall cleat. If the headboard has a thin frame, use the manufacturer’s recommended screw length so you do not poke through the front.
6) Add bumpers
Stick felt pads or rubber bumpers near the lower corners on the back of the headboard. This protects paint and helps prevent wobble.
7) Hang and test
Lift the headboard onto the cleat. Gently apply pressure where your back would go when sitting up. If there is any shifting, take it down and adjust now. This is the moment to be picky.
If you live in an earthquake-prone area, or you have kids who think everything is a climbing wall, consider extra fastening points or choose a frame-mounted option. A headboard is not the place for “probably fine.”
D-ring steps
D-rings can be perfectly fine, especially for lighter upholstered panels. The key is getting the wall fasteners right and keeping the headboard from drifting.
1) Measure D-ring spacing
Measure from the center of one D-ring to the other. Also measure from the top edge of the headboard down to the D-rings so you can calculate where screws must go on the wall.
2) Transfer measurements to the wall
Mark a level line at the correct height, then mark the two screw points. Double-check the distance between marks.
3) Use studs when you can
If a mark lands on a stud, use a wood screw into the stud. If not, use an anchor that matches the wall type and load.
4) Leave screw heads slightly proud
This is the tiny detail that saves so much frustration. Do not drive the screws flush to the wall. Leave the head out a little so the D-ring can seat fully and slide down into place.
5) Hang and add bumpers
Hang the D-rings on the screws. Add felt pads or bumpers behind the bottom corners to protect the wall and reduce shifting.
Tip: If the headboard wants to slide side-to-side, two small rubber bumpers can help create friction. You can also snug the bed frame closer so the mattress helps stabilize it.
Removal and patching
The most renter-friendly installs are the ones you can undo without panic. A few habits help:
- Save hardware notes. Write down what anchors you used and where. Future-you will appreciate it.
- Do not overtighten anchors. Over-tightening can crush drywall and create a bigger repair.
- Patch promptly. When you eventually remove it, fill holes with lightweight spackle, sand smooth, and touch up paint if required by your lease.
If your building is strict about paint matching, ask if they have the paint color on file or if they prefer to do touch-ups themselves.
Common mistakes
- Hanging it too high. If there is a big gap above the mattress, it can look like the headboard is floating.
- Using picture hooks for a heavy headboard. A headboard is not static art. It takes pressure.
- Skipping the stud check. Even one stud connection can dramatically increase stability.
- No bumpers. Fabric headboards still rub walls. Bumpers prevent scuffs and the tiny squeaks that drive you nuts at 2 a.m.
- Mounting before the rug is down. A thick rug can slightly change bed height and the way the bed sits against the wall.
- Ignoring trim and baseboards. If the headboard rocks against a thick baseboard, it will never feel solid.
Quick FAQ
Can I hang a fabric headboard without drilling?
Safely, it depends on the headboard. If it is designed to attach to a bed frame, yes, that is your best no-drill option. For a wall-mounted upholstered panel that will be leaned on, I do not recommend relying on adhesive strips.
How far should the headboard be from the mattress?
Usually 1 to 3 in. above the top of the mattress looks intentional and keeps pillows from getting trapped behind it.
What if my headboard is wider than the studs line up?
This is common. A French cleat helps because you can often catch at least one stud and then use rated anchors for the other fasteners, spreading the load across the cleat. When possible, use a longer cleat that can span multiple studs.
Is plaster harder to mount into than drywall?
Yes, especially lath-and-plaster, which can chip and crack if rushed. Use painter’s tape, drill slowly, and consider frame mounting if the wall feels fragile. If you suspect plaster over masonry, get the right bit and approach before you drill.