Curtain Rod Bracket Pulled Out of Drywall

Clara Townsend
The sound is unmistakable: that soft pop, then a slightly dramatic slide, and suddenly your “high and wide” curtain moment is… hanging on by vibes. I have been there. In my first tiny apartment, I mounted a rod into drywall with the little plastic anchors that came in the package, then hung thick linen panels like they weighed nothing. They did not forgive me.
The good news is this is fixable, and you can absolutely rehang the rod higher and wider without living in fear of the next tug. The trick is to diagnose the failure correctly, patch what needs patching, and remount with the right support.
Quick definition: “high and wide” usually means mounting the brackets about 4 to 8 inches above the window trim and 3 to 6 inches wider on each side (adjust for ceiling height, crown molding, and how much wall space you have).
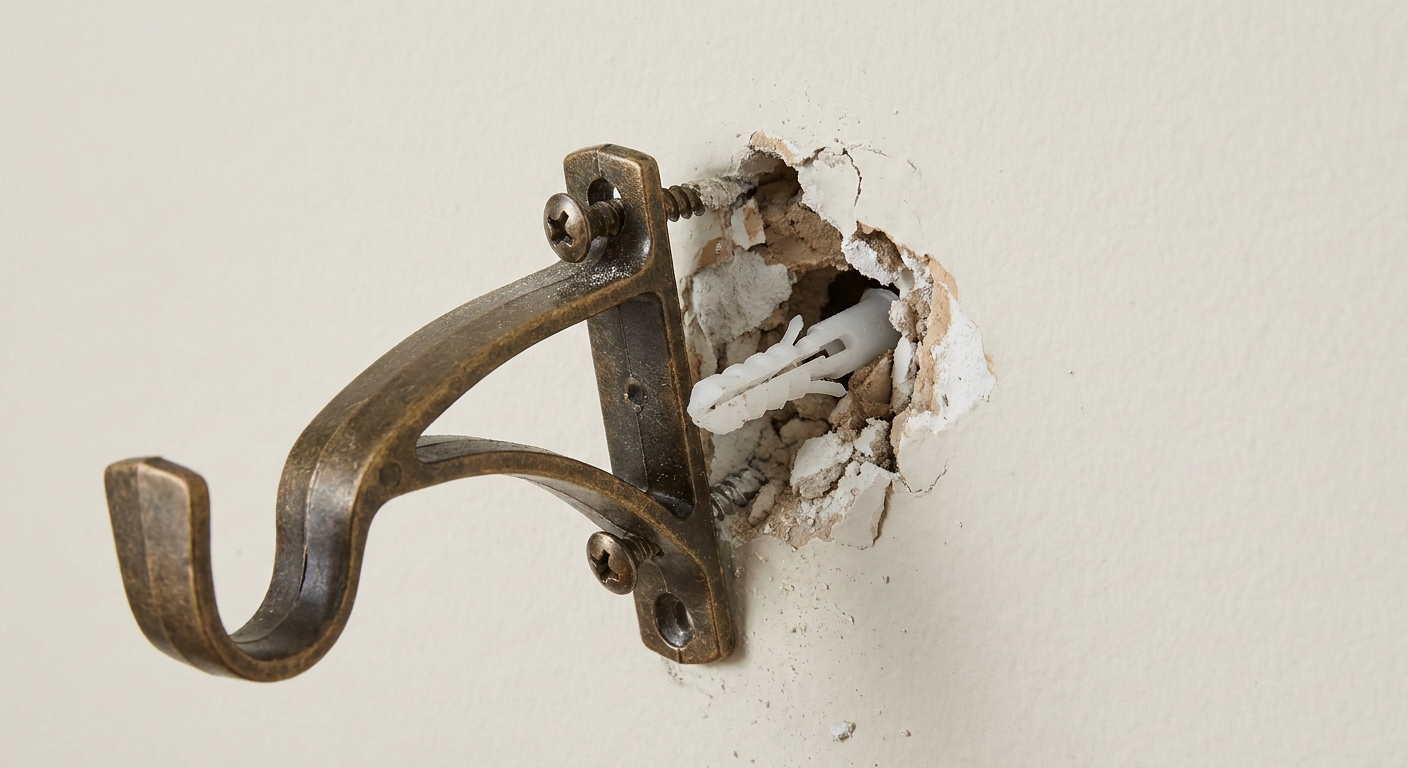
First: what actually failed?
Before you patch anything, take a breath and figure out what actually failed. A bracket can look “pulled out” for a few different reasons, and the fix depends on which one you have.
Signs the drywall anchor tore out
- The bracket is loose at one end and you can wiggle it with your fingers.
- You see a cratered or ragged hole around the screw location.
- The anchor came out with the screw, or the screw spins without tightening.
- The bracket sits off the wall because the drywall paper is torn and raised.
Signs the rod is bowing
- Both brackets feel solid and tight, but the rod dips in the center.
- The center support is missing, too far from center, or the rod is too thin for the span.
- The problem improves when you take the curtains off, then returns when you rehang them.
If it is bowing, do this
This article is mainly about fixing drywall failures, but do not ignore a long span. If your rod is dipping, add a center support (or two for very wide windows), or upgrade to a thicker rod rated for the width and fabric weight. Otherwise even perfectly mounted brackets will keep getting stressed.
A quick check that saves time
Take the curtains and rod down completely. Then hold the bracket against the wall and pull straight out and down lightly. Stop if the drywall starts crumbling. If the wall flexes or the screw hole breaks apart, you have a drywall failure. If the bracket is rock solid but things looked droopy only with fabric on the rod, that is a span-and-weight issue.
What you will need
You do not need a workshop, just a few basics. Pick what matches the size of the damage.
- Screwdriver or drill/driver
- Putty knife (a small one is perfect)
- Utility knife
- Sandpaper or sanding sponge (around 120 to 220 grit)
- Spackle (best for small nail and screw holes)
- Lightweight joint compound (best for feathering over mesh patches and smoothing larger areas)
- If the hole is larger: a drywall patch kit (mesh patch) or a small piece of drywall
- Primer and matching wall paint
- Stud finder (helpful) or a strong magnet to find drywall screws in studs
- Better anchors: toggle bolts, snap toggles, or metal self-drilling drywall anchors
- Proper screws (often #8 or #10), long enough to bite a stud if you hit one
Stylist tip: if you are upgrading hardware anyway, this is a great time to switch to a sturdier bracket with a wider wall plate. More surface area on the wall is generally more forgiving.
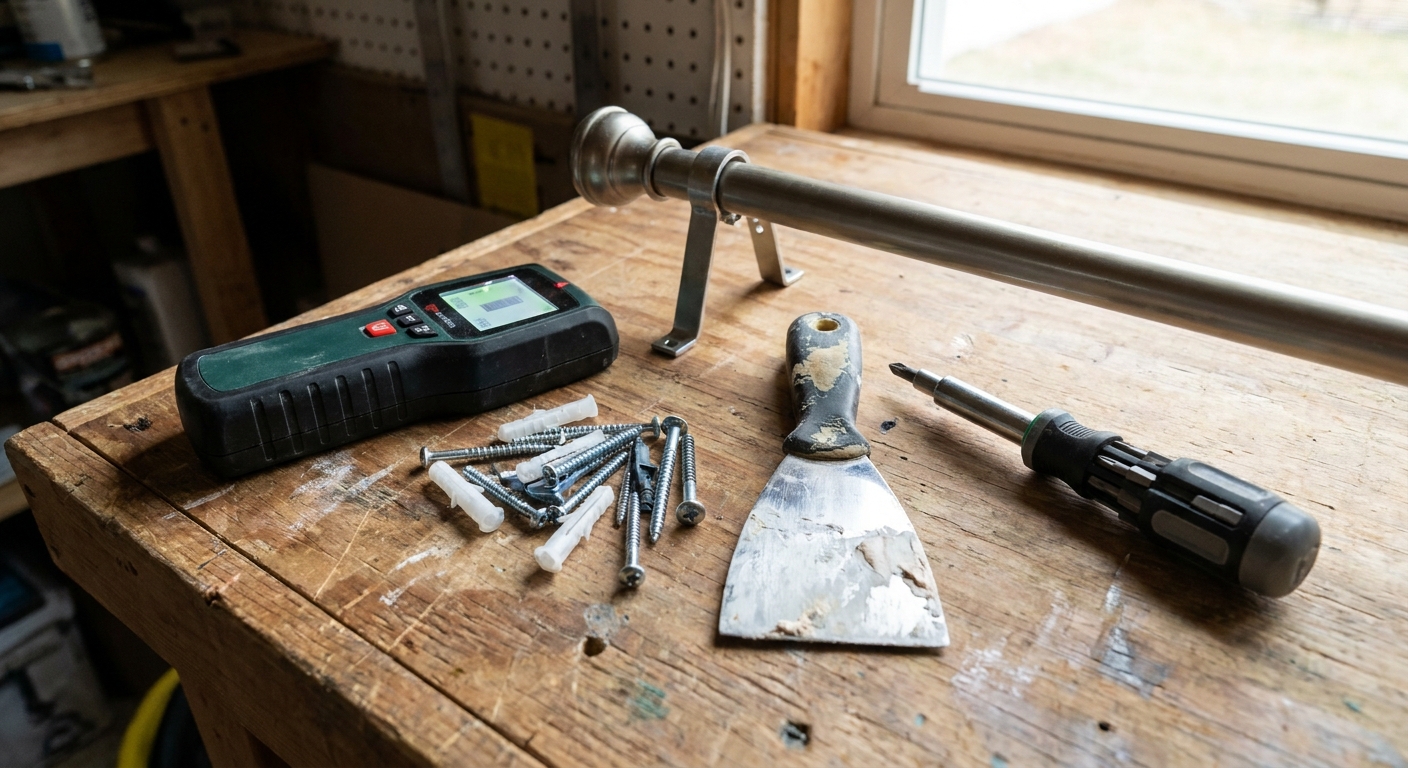
Step 1: remove the bracket
Unscrew the bracket and remove any remaining anchor pieces. If the drywall paper is torn and curling, use a utility knife to trim away loose bits. You are aiming for a clean edge, not a fuzzy crater.
Do not skip this tiny step
If the brown paper face of the drywall is exposed, seal it before you spackle or mud. A problem-surface sealer made for damaged drywall paper works best. An oil-based or shellac-based primer is also a reliable choice. Some water-based primers can raise fuzz or bubbles on torn paper. Let it dry, then move on.
Step 2: patch the hole
The size of the hole tells you which patch method will look smooth and hold up. Whatever product you use, let it dry fully according to the label. Thick coats take longer than you think.
If the hole is small (screw-size to dime-size)
- Press spackle into the hole with your putty knife.
- Feather the edges out a few inches so you do not create a bump.
- Let it dry completely, then sand smooth.
- Repeat with a second thin coat if the hole shrinks in as it dries.
If the hole is medium (quarter-size and crumbly)
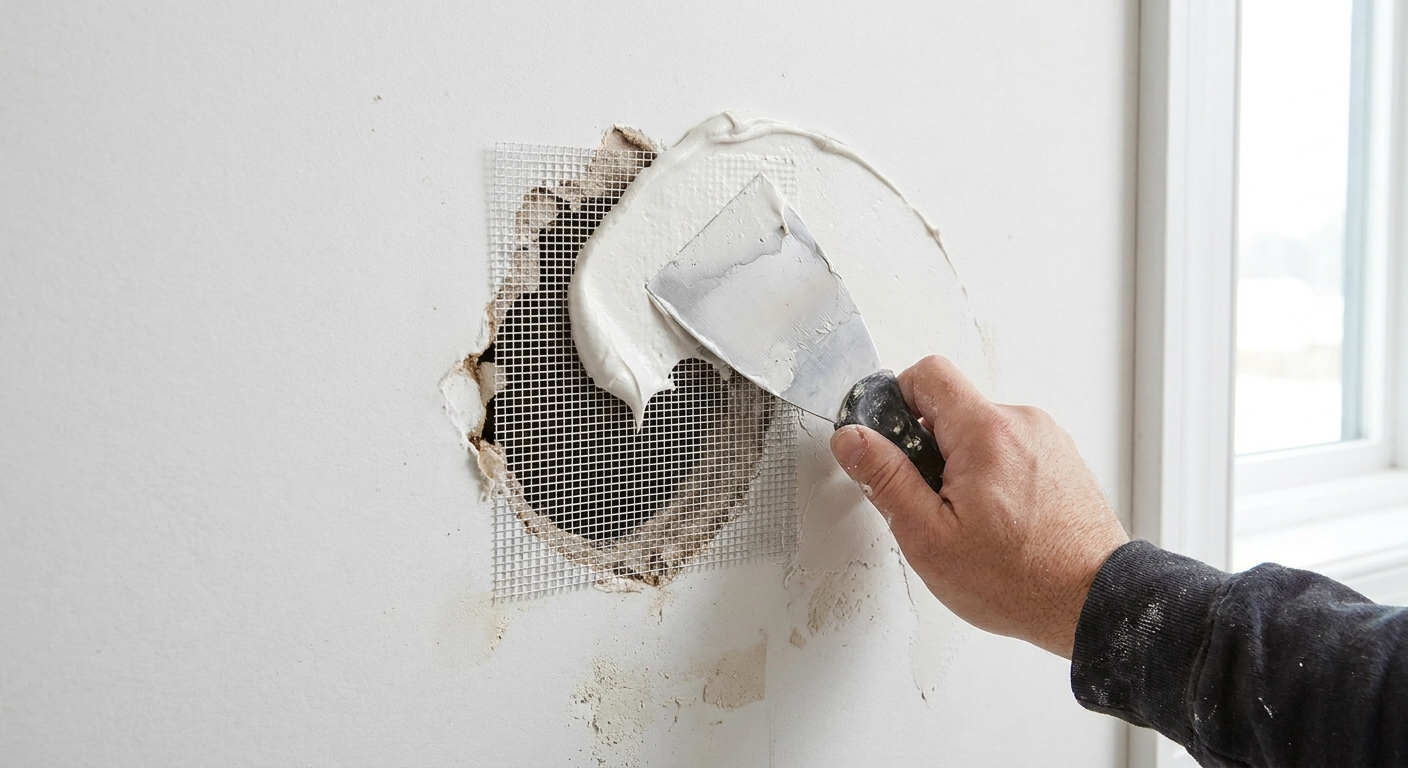
Use a mesh drywall patch kit. These are great for typical curtain mishaps because they bridge the opening and give the compound something to hold onto.
One caveat: if the gypsum core around the hole is pulverized and keeps breaking away when you touch it, do not fight it. Cut back to solid drywall and do a small drywall plug patch instead. You will get a stronger repair with less frustration.
- Center the mesh patch over the hole and press it down firmly.
- Apply joint compound over the patch in thin layers, feathering wider each time.
- Let it dry, sand, then apply another thin coat if needed.
- Prime and paint.
If the hole is large or the drywall feels shattered
If a chunk broke out, a small drywall “plug” patch is stronger than piling on compound. Cut the damaged area into a neat square, add a backing strip behind the opening, screw the patch piece to the backing, then mud, sand, prime, paint. It is more steps, but it restores the wall properly.
Step 3: choose a remount plan
This is the part that keeps you from doing this again in six months.
Best option: mount into a stud
If you can, shift the bracket so at least one screw lands in a stud. Ideally, both brackets have at least one stud screw each, but even one stud screw per bracket is a huge upgrade from drywall anchors alone.
- Use a stud finder, or slide a strong magnet along the wall to locate drywall screws, which are usually driven into studs.
- Mark the stud centerline lightly with pencil.
- Pre-drill a small pilot hole so the screw goes in cleanly.
- Use wood screws long enough to grab the stud. For typical 1/2 inch drywall plus the bracket, 1 5/8 to 2 inches is common, but use the shortest length that still gives solid bite.
Quick safety note: be thoughtful about screw length, especially near windows where there can be electrical wiring for nearby outlets, switches, or sconces. If anything feels off, stop and reassess.
When studs are not where you need them: upgrade the anchor
If your “high and wide” placement lands between studs, do not reuse the same plastic anchors. Choose one of these instead:
- Toggle bolts: very strong for drywall because the load is spread behind the wall. Great for heavier curtains.
- Snap toggles: a modern toggle style that is strong and easier to work with repeatedly.
- Metal self-drilling anchors: can be fine for lighter setups, but ratings vary wildly. Follow the package rating and be honest about real life. For kids, pets, blackout lining, or anything that gets tugged, I prefer toggles.
My rule of thumb: if your curtains are lined, velvet, blackout, or you have kids or pets who treat drapes like a stage curtain, go straight to toggles.
Quick anchor guidance
- Sheers and lightweight panels: stud screw if possible, or a quality metal self-drilling anchor rated for the load.
- Lined, textured, or heavier panels: toggles or a stud screw.
- Blackout panels or wide spans: toggles plus a center support, or studs plus a center support.
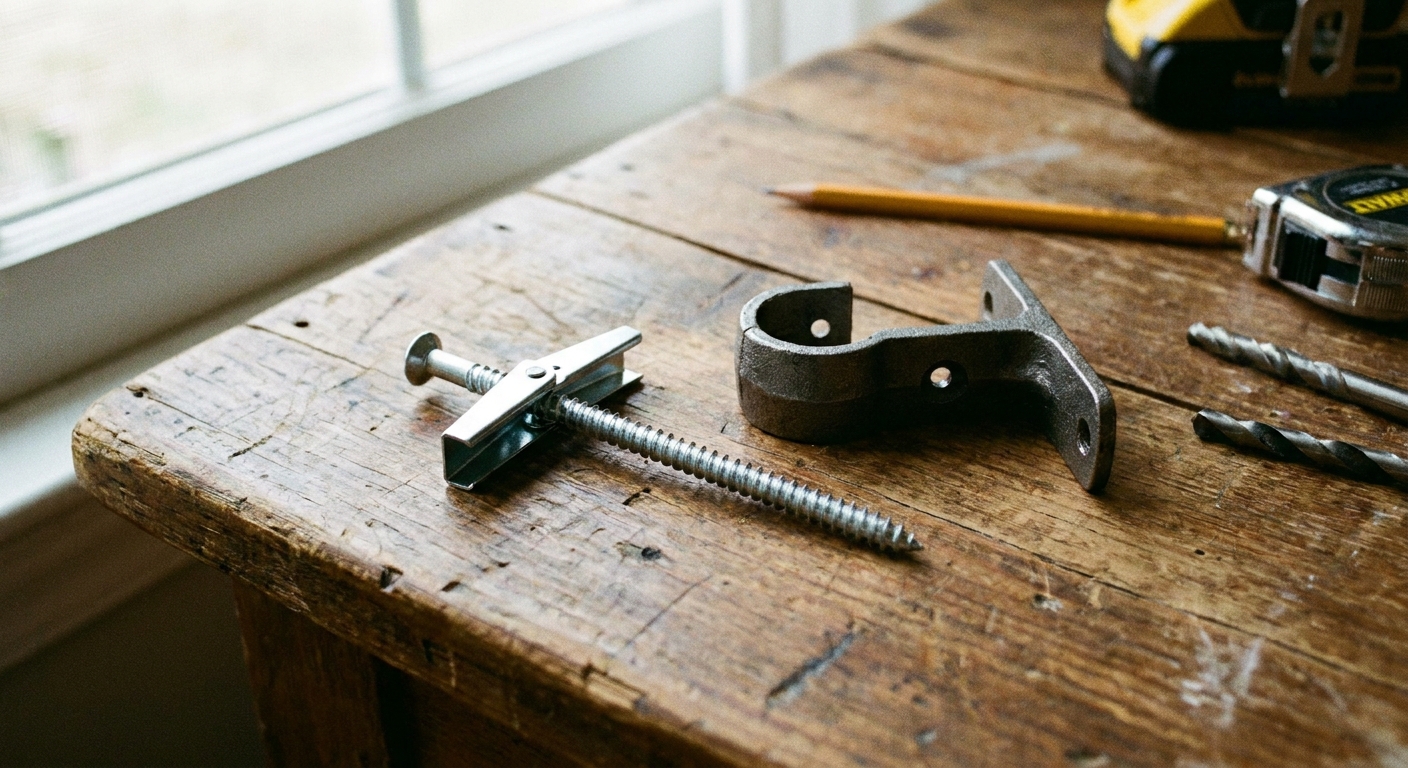
Step 4: remount the bracket
Once the wall is patched and painted, you can remount. Measure carefully so both brackets sit level and the rod clears the window trim.
Remount checklist
- Mark your bracket holes with a pencil while holding the bracket in place.
- Use a level. Even a small one is fine.
- Drill clean pilot holes for studs, or the correct size hole for your chosen anchors.
- Tighten until snug, not until the drywall starts to crush. Over-tightening is how anchors fail early.
- Test before rehanging fabric: give the bracket a firm tug downward and outward. It should feel like part of the wall.
If the bracket holes no longer line up
Do not try to force the screw back into a blown-out hole. Move the bracket slightly, or commit to a bigger anchor type. This is one of those moments where “close enough” becomes “on the floor at 2 a.m.”
High and wide without chaos
The temptation, after a bracket failure, is to hang everything lower and smaller out of fear. You do not have to. Just plan the support with the finished look in mind.
- Go wider thoughtfully: when you extend the rod beyond the window trim, you increase leverage on the brackets. Choose stronger anchors or studs.
- Choose hardware that matches the job: dainty brackets can be charming, but they need strong mounting. If your rod is thick or your panels are heavy, pick brackets that look and feel substantial.
- Use the right screws: many curtain sets include short, soft screws. Upgrading to sturdier screws can make a noticeable difference.
- Mind the wall material: older plaster walls, drywall over plaster, and drywall in newer builds all behave differently. When in doubt, toggles or studs win.
Quick troubleshooting
The screw spins and never tightens
The anchor is stripped or the hole is too large for that anchor. Remove it, patch if needed, then switch to a toggle or move to a stud.
The bracket is tight, but the wall looks dented
That is drywall being crushed. Back the screw out slightly, then consider a bracket with a larger wall plate or a toggle that spreads the load.
The patch looks bumpy under paint
Sand more than you think you need to, then prime. Primer is what makes the wall read as one continuous surface, especially in side light.
When to call in help
If the bracket pulled out and took a large section of drywall with it, or the wall feels soft and crumbly beyond the immediate hole, it may be moisture damage or a bigger drywall issue. That is when I would rather you get a handyman for an hour than keep re-anchoring into a wall that cannot hold anything.
FAQ
Can I reuse the same hole with a bigger anchor?
Sometimes, but it depends on how torn the drywall is. If the hole edges are crumbly or the paper face is ripped, patch first. Anchors need solid material to grab.
What is the strongest anchor for curtain rods in drywall?
Toggle-style anchors are typically the most reliable in standard drywall because they brace behind the wall and spread the load.
Do I have to patch the hole if I am moving the bracket?
If you care about the wall looking finished, yes. Even if it is hidden behind a curtain, an unpatched hole can continue to crumble over time.
Will spackle alone hold a new screw?
No. Spackle is for surface repair, not structural holding power. Mount into a stud or use a proper anchor.