Tweed & Houndstooth Sofa Fabric Care
Clara Townsend
Clara Townsend is an interior stylist, vintage furniture enthusiast, and the creative voice behind Velvet Abode. With over a decade of experience transforming both cramped city apartments and sprawling fixer-uppers, she believes that a beautiful home is built on personal stories rather than massive budgets. When she isn't hunting for the perfect brass sconce at a local flea market, she can usually be found rearranging her living room for the third time this month.
Tweed, houndstooth, and other tight-weave upholstery fabrics are the quietly hardworking classics of the sofa world. Many structured weaves can disguise pet hair better than some pile fabrics, look crisp next to modern lines, and bring that tailored, “pulled together” vibe even on a Tuesday night with takeout. (Small caveat: very nubby tweeds can also catch hair, so the right brush and vacuum setup matters.)
But structured wovens have their own care rules. The fibers can trap dry grit deep in the weave, and the texture can “bloom” or fuzz if you scrub like you would on a flat cotton slipcover. This page walks you through the care basics I use in real homes: how to spot directional shading (yes, even when the fabric looks flat), which brush actually helps, which vacuum attachment is least likely to snag, and how to handle spots without turning a small spill into a permanent halo.
One more real-world warning: a zipper does not mean a cushion cover is machine-washable. Many structured wovens and wool blends can shrink, warp, or unravel at the seams in the wash, and even “successful” washing can leave covers that never fit the same again.
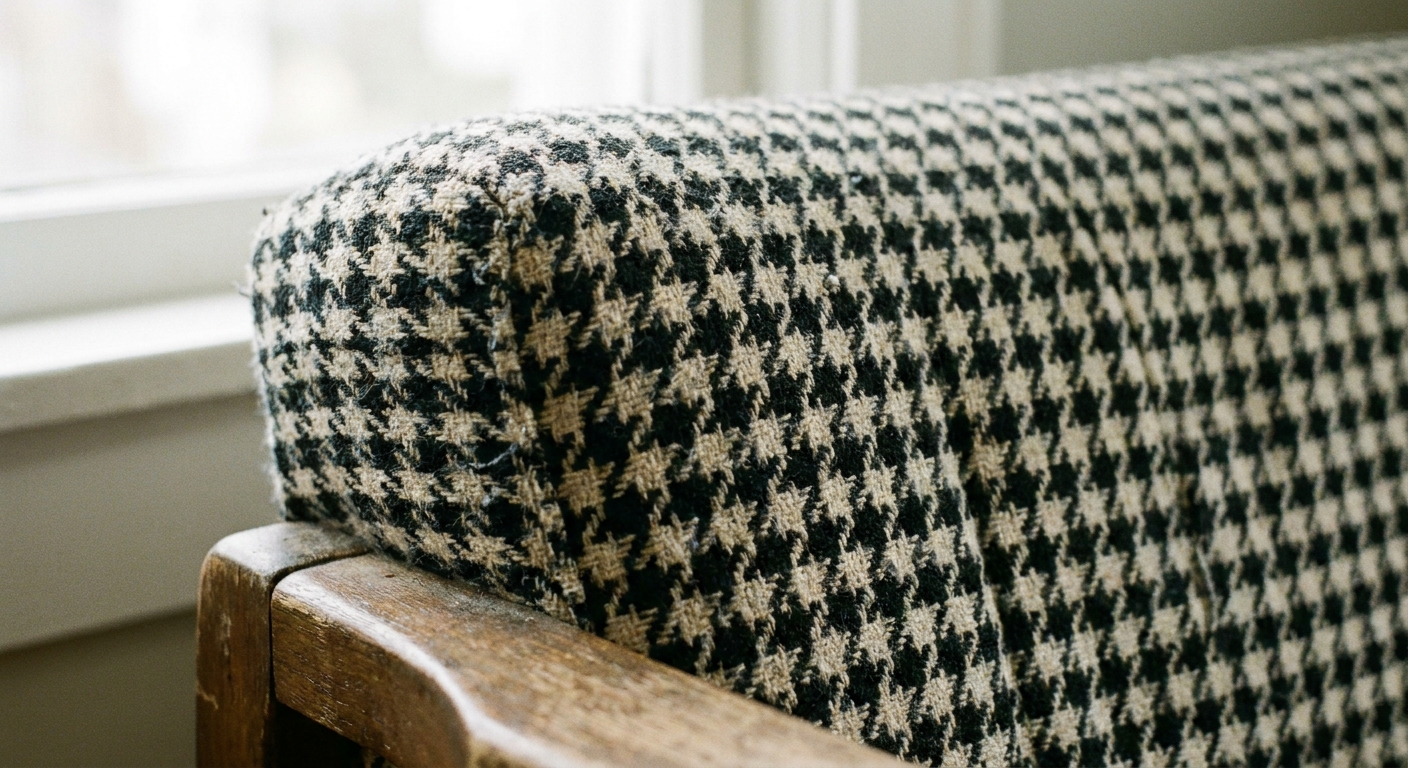
What counts as structured wovens
When I say structured woven upholstery, I mean fabrics where the pattern and durability come from the weave itself, not from a fuzzy pile on top. Common examples:
- Tweed (often a mix of fibers, sometimes wool blends)
- Houndstooth (a woven pattern, frequently in wool blends or poly blends)
- Basketweave, micro-herringbone, pinstripe, and other tight, tailored upholstery textiles
These fabrics tend to be resilient, but they can also hold onto fine dust in the “valleys” of the weave. That is why gentle, regular maintenance matters more than aggressive spot scrubbing.
Check the care code first
Before you choose a cleaner (or even decide how wet to go), find the manufacturer care tag. The most common codes are W, S, WS (sometimes written as SW), and X. Codes can vary by brand, so defer to your specific tag and any brand care guide.
- W: water-based cleaners are generally allowed
- S: solvent-based cleaners only (no water)
- WS/SW: either water-based or solvent-based, with a spot test
- X: vacuum only, no liquids
If your code is S: solvent products need good ventilation and careful handling. Keep them away from heat, sparks, and open flames, and follow the product label to the letter. When in doubt, call a pro.
Directional shading
People say “nap,” but on tweed and many flat woven upholsteries, what you are usually seeing is directional shading from how the yarns lay after brushing, pressure, or cleaning. It can be subtle, but it affects how the surface looks when it dries.
How to find the direction
- Hand test: Run your palm lightly across the fabric in two directions. One direction often feels smoother, the other slightly more resistant.
- Light test: Stand to the side of a lamp or window and look across the cushion. One direction may look a touch darker or more matte.
- Lint test (optional): If you want, place a couple short threads on the surface and lightly brush. How debris moves can hint at direction, but static and yarn type can change the results, so treat this as a clue, not a law.
Why it matters: Always finish brushing or drying strokes in one consistent direction so the fabric looks even. Going every which way can leave patchy shading, especially on houndstooth where contrast makes texture changes more obvious.
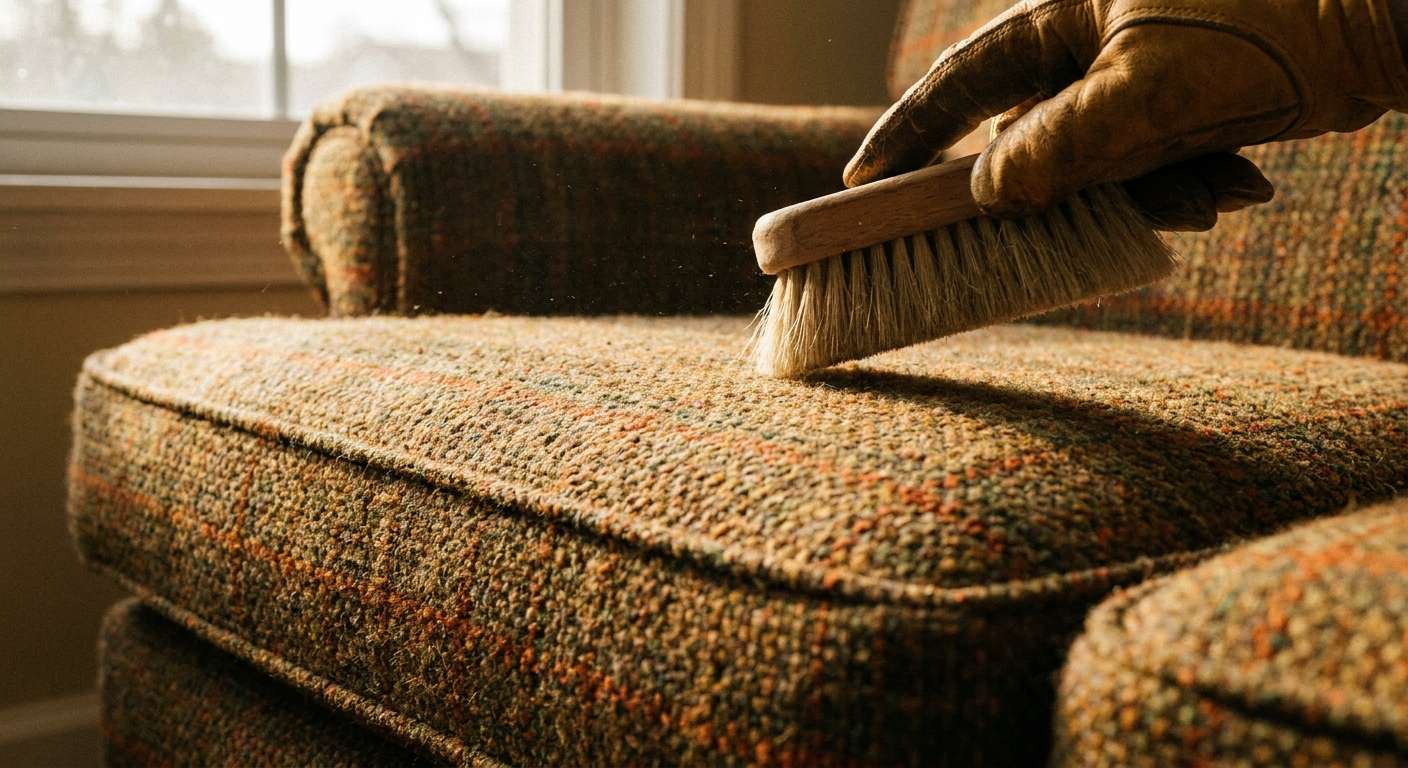
Brushes: what helps
Brushing is about lifting surface dust and loosening debris so it can be vacuumed away. With structured wovens, you want a brush that is firm enough to move grit, but soft enough not to rough up the yarns.
Best brush choices
- Soft upholstery brush (nylon or horsehair): ideal for weekly upkeep and pre-vacuum loosening.
- Clothing brush (soft bristles): great for arms and cushion tops where dust settles.
- Rubber upholstery brush (gentle, flexible nubs): can help with pet hair on some weaves, but test first because rubber can grab and pull at looser yarns.
Avoid
- Stiff scrub brushes that can break fibers and create a fuzzy, worn look.
- Hard wire pet tools that can snag loops or lift yarn ends.
- Aggressive lint shavers on upholstery, especially on wool blends. They can thin the weave and leave bald spots.
My rule: Brush like you are dusting a vintage frame, not scrubbing a kitchen tile.
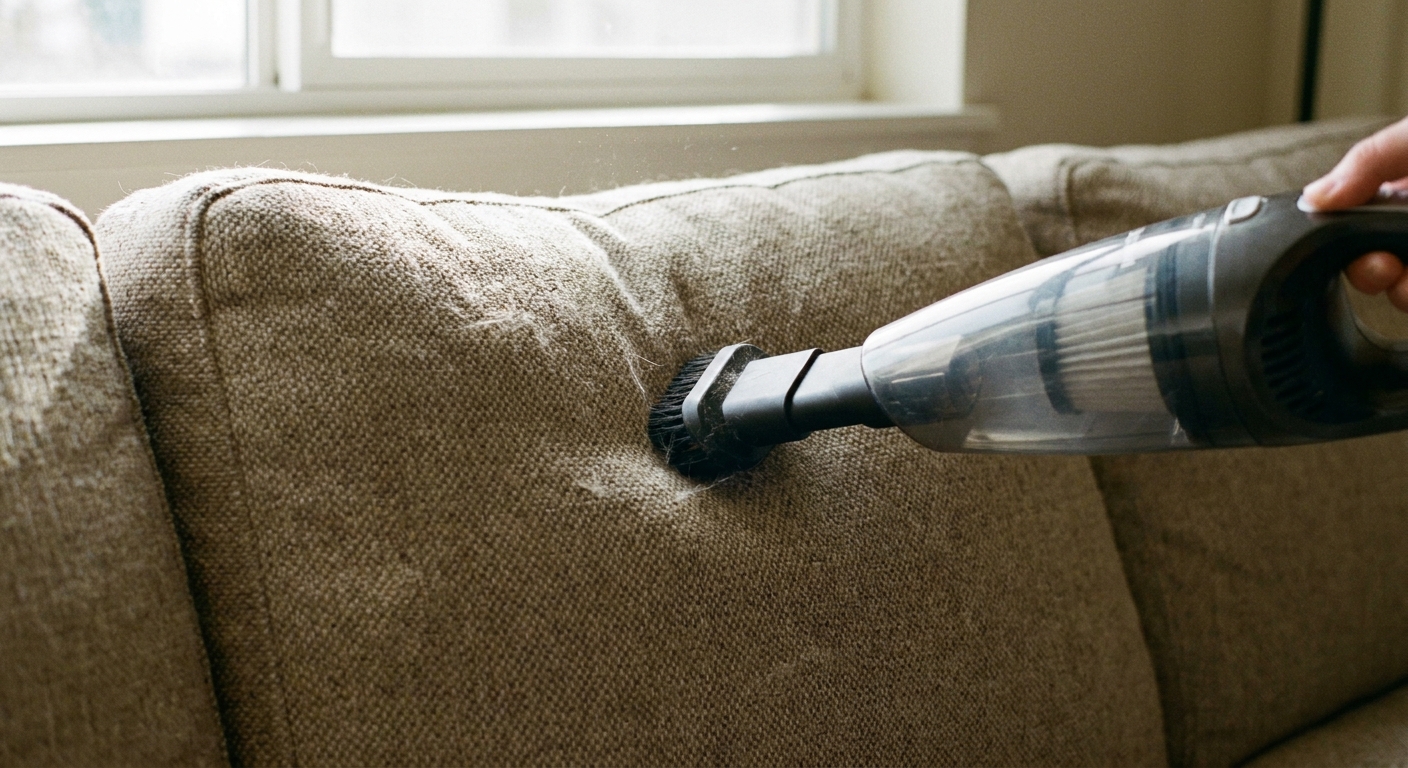
Vacuum attachments
Vacuuming is your best friend with tight weaves because it removes the gritty stuff that acts like sandpaper over time. The goal is steady suction, gentle contact, and tools that do not snag. If your vacuum has adjustable suction, start lower and work up as needed.
The safest setup
- Upholstery tool (wide mouth, smooth edges): best all-around for cushions and arms.
- Soft dusting brush attachment: great for delicate wool blends and textured tweeds.
- Crevice tool: for seams, welting, and the “crumb canyon” where cushions meet the frame.
Quick safety note: test any attachment on a hidden area first, and avoid sharp-edged tools or aggressive suction on delicate yarns.
Rotating brushes: use care
Motorized brush rolls can be too aggressive for some tweeds and houndstooths, especially if the fabric has nubby texture. If you use one, keep it on the lowest setting, do not press down, and stop immediately if you see fuzzing or pulling.
Vacuum rhythm that works
- Remove cushions and vacuum all sides, including undersides.
- Vacuum seams first with the crevice tool.
- Vacuum broad surfaces in slow, overlapping passes, finishing in one consistent direction.
- If the fabric still looks dusty, do a quick, gentle brush and vacuum again.
Spot test: do not skip
Before you put any cleaner on your sofa, do a spot test. Tight weaves can hide a lot, but they also love to show a water ring if cleaning changes the way light reflects off the yarns. Wool blends and dark dyes can be especially prone to bleeding or color shift.
Where and how to test
- Choose a hidden spot: under a cushion, back hem, or inside skirt area.
- Test the exact method you plan to use: your cleaner, your cloth, your amount of moisture, your drying method.
- Let it dry fully. For some fabrics, that means waiting until the next day.
What you are checking for
- Color transfer onto the cloth
- Lightening or dulling of the fabric
- Texture change, fuzzing, or stiffness
- Water marks or rings once dry
If you are trying to minimize mineral rings, especially on light fabrics, using distilled water (instead of tap) for water-based spot cleaning can help.
Dry soil vs oily stains
This is the part that saves most people from over-wetting their cushions. Not every “stain” is the same. On structured wovens, the wrong approach can push mess deeper into the weave.
Dry soil (dust, crumbs, dried mud)
Best approach: remove it as dry as possible first.
- Let mud dry completely, then gently break it up with a spoon edge or soft brush.
- Vacuum thoroughly using an upholstery tool, then crevice tool along seams.
- If a faint mark remains, dab with a cloth that is wrung nearly dry (think: barely damp, not wet) and immediately blot dry.
Oily stains (butter, body oils, salad dressing, lotion)
Best approach: blot, then absorb oil before you add liquid.
- Blot gently with a clean, dry cloth. Do not rub.
- Apply a small amount of an absorbent (baking soda or cornstarch) and let it sit 30 to 60 minutes. For heavier oil, longer dwell time (a few hours or overnight) can work better.
- Vacuum the powder slowly using the upholstery tool.
- Note: powders can cling in tight weaves. If you see residue, stop and reassess rather than grinding it in with more brushing.
- If needed, follow with an appropriate cleaner based on your care code and spot test results.
Oily stains are where many people reach for soap and water too quickly. That can spread the oil and create a larger shadow area. Slow and absorbent usually wins.
How to blot
With tweed and houndstooth, friction is the enemy. Here is the blotting method I use on textured upholstery:
- Start from the outside in to prevent spreading.
- Use a white cotton cloth or plain paper towel so you can see transfer.
- Press and lift. No circles, no scrubbing.
- Work in small sections, and switch to a clean area of cloth often.
- Finish by lightly brushing in one consistent direction once dry to restore the even look.
Water rings and halos
Tight weaves can show rings when moisture spreads beyond the spot you cleaned, then dries unevenly. It is not always a “stain” so much as a change in how the yarns reflect light, plus minerals left behind by water.
How to prevent rings
- Use the least amount of moisture possible.
- If you must use water-based cleaning, feather outward slightly so the transition is soft, not a hard edge.
- Blot dry, then let the cushion dry with good airflow. A fan helps.
- Once dry, gently brush in one consistent direction to blend the texture.
If your sofa is marketed as a performance fabric, it may be more forgiving, but “performance” is not one universal recipe. Many are polyester with stain treatments, but cleaning tolerance still varies by brand and finish. Treat it as more forgiving, not indestructible.
Drying basics
Good drying prevents the two big enemies: rings and that musty smell that never quite leaves.
- Avoid heat: skip hair dryers, heaters, and hot steam on unknown fabrics. Heat can set stains, shrink wool blends, or distort texture.
- Do not soak the insert: if liquid reaches foam or batting, you need more airflow and time. Press with dry towels to pull out moisture, then use a fan.
- Keep air moving: stand cushions on edge if you can, and give both sides airflow.
- If it smells after drying: that is a sign moisture is still inside. This is a good moment to call a pro for proper extraction.
Removable covers
Yes, some cushions have zippers. No, that does not automatically mean “toss it in the wash.” Structured wovens can shrink, distort, or fray in a machine, and linings can shrink at a different rate than the face fabric, which is a special kind of misery.
What I recommend
- Only remove covers if the manufacturer explicitly says they are washable, and you are willing to accept some risk.
- If you do wash (again, only when recommended), follow the label, use cool water, gentle cycle, and mild detergent, then air dry. Avoid high heat.
- If your goal is spot cleaning, it is often safer to clean the cover on the cushion using a controlled, lightly damp method than to create a fit problem you cannot undo.
Weekly and seasonal routine
Weekly (5 to 10 minutes)
- Quick vacuum of seat cushions and arms using the upholstery tool.
- Crevice tool pass along seams where grit collects.
- Light brush in one consistent direction if the fabric looks dulled.
Seasonal (every 3 to 4 months)
- Remove cushions and vacuum the platform and inside corners.
- Rotate or flip cushions if your sofa allows it to even out wear and sun exposure.
- Check high-touch zones (arm tops, head-rest areas) for early oil buildup and address gently.
Quick do and don’t list
- Do treat dry messes dry first. Brush and vacuum before you reach for cleaner.
- Do check the manufacturer care code before using any product, water, or solvent.
- Do spot test every cleaner and method in a hidden area.
- Do blot and lift, then finish in one consistent direction for an even look.
- Don’t scrub tightly woven yarns like you are trying to erase a pencil mark.
- Don’t over-wet cushions, especially wool blends or vintage upholstery.
- Don’t assume a zipper equals machine-washable.
- Don’t use harsh tools that snag, pull, or rough up nubby tweeds.
When to call a pro
Bring in an upholstery cleaner if:
- The fabric is wool-rich, vintage, or heirloom and you are seeing color shift or bleeding in spot tests.
- A stain is large, soaked through to the insert, or smells after drying.
- You have repeated water marks or rings that will not blend with gentle re-brushing.
- Your care tag is X (vacuum only) and the spot is beyond dry removal.
- Your care tag is S and you are not confident using solvents safely and evenly.
A good pro can flush and extract evenly across a panel, which is often what ringy spots actually need.