Turn a Thrifted Dresser Into a Bathroom Vanity
Clara Townsend
Clara Townsend is an interior stylist, vintage furniture enthusiast, and the creative voice behind Velvet Abode. With over a decade of experience transforming both cramped city apartments and sprawling fixer-uppers, she believes that a beautiful home is built on personal stories rather than massive budgets. When she isn't hunting for the perfect brass sconce at a local flea market, she can usually be found rearranging her living room for the third time this month.
There is something deeply satisfying about giving a second life to a solid old dresser, especially when it gets promoted to bathroom vanity. The bathroom is small, hardworking, and full of moisture, which means this is not the place for flimsy flat pack furniture or wishful thinking. But if you pick the right piece and prep it properly, you can end up with a vanity that looks custom, feels personal, and costs a fraction of the big box options.
Below is my step-by-step process, with the little details that keep the finish pretty and the plumbing headache-free.
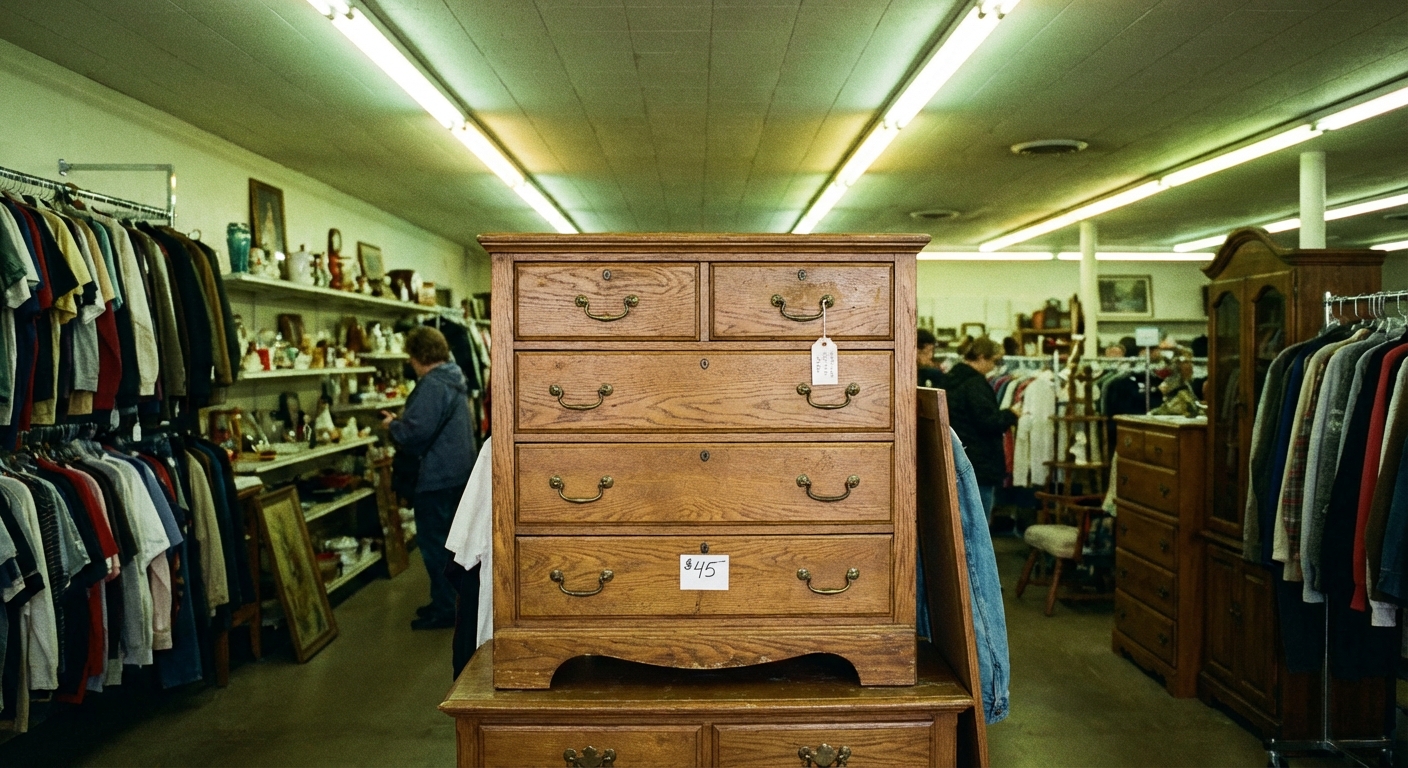
Before You Buy: Choose the Right Dresser
Not every thrift store dresser wants to live in a bathroom. The best candidates have strong bones, stable joints, and enough depth to handle a sink and plumbing without feeling like a balancing act.
Quick sizing guidelines
- Height: A typical finished vanity lands around 34 to 36 inches. Aim for roughly 32 to 36 inches after the top and counter are added, then adjust for comfort and sink style. Vessel sinks can push the total height too tall fast.
- Depth: 18 to 22 inches works well for many bathrooms. Shallower can be tricky with sink bowls and faucet clearance.
- Width: Match your space, but also consider door swing and drawer access.
What to look for in the build
- Solid wood or sturdy veneer: Veneer is okay if it is intact. Avoid swollen particleboard or anything that feels spongy around the bottom.
- Strong frame: Wiggle it. If it twists, the bathroom will only make that worse.
- Drawer layout that can be modified: Top drawers are often sacrificed for plumbing, so a dresser with multiple drawers gives you more flexibility.
Clara tip: Open every drawer and smell inside. If it smells like mildew now, it will smell like mildew later, only with toothpaste involved.
Plan the Vanity Like a Puzzle
This is the unglamorous part that makes the glamorous part possible. Before you sand a single inch, decide what sink and top combo you are using and where the drain and supply lines will land.
Countertop and sink pairing
- Drop-in sink: The most forgiving. It works with lots of countertop materials, including wood, because the rim covers the cut edge.
- Undermount sink: Beautiful, but most commonly paired with stone, solid surface, or other non-porous tops. Some people do undermount with wood or composite, but only if it is built and sealed meticulously, because the cut edge and underside live in the splash zone.
- Vessel sink: Very doable on a dresser, but pay attention to faucet height and overall vanity height so the sink does not sit up like a hat.
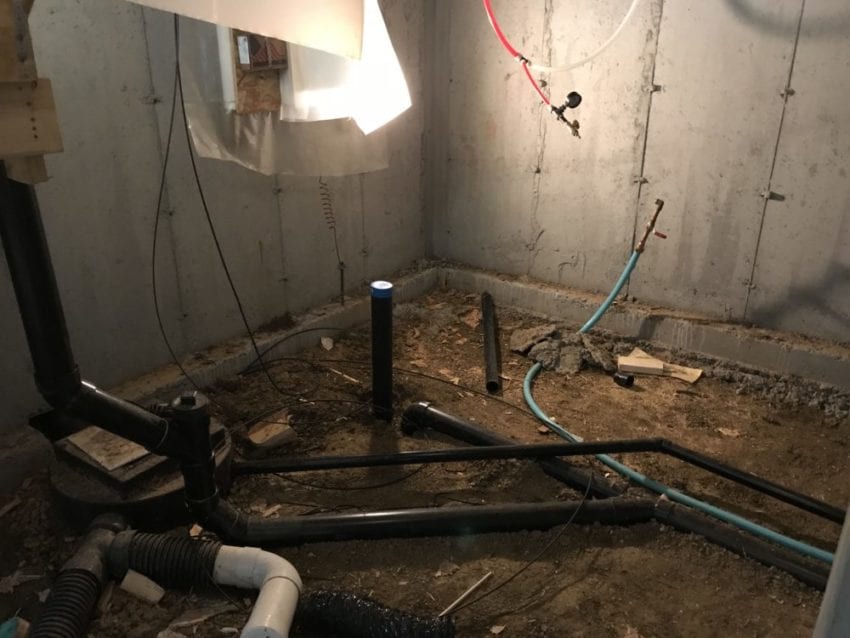
Confirm plumbing location
- Measure from the side walls to the center of the drain and water supply lines.
- Measure the height of the drain stub-out from the floor.
- Check if you have room for a P-trap inside the cabinet area once drawers are modified.
If you are moving plumbing, this quickly becomes a bigger project. If your goal is a weekend win, choose a dresser width that lets you center the sink on the existing plumbing.
Also plan for access. Make sure shutoff valves and supply connections stay reachable. Do not permanently box them in with a fixed panel you cannot remove later.
Tools and Materials
You do not need a fully stocked woodshop, but you do need the right basics. Here is what I actually reach for when turning a dresser into a bathroom-ready piece.
Tools
- Measuring tape, pencil, and painter's tape
- Drill and drill bits
- Jigsaw or oscillating multi-tool (for cutouts)
- Hole saw (for drain and faucet holes if needed)
- Random orbital sander or sanding block
- Clamps (helpful, not mandatory)
- Stud finder (if you will add wall anchoring)
- Caulk gun
Materials
- Sandpaper: 80, 120, 180, and 220 grit
- Wood filler and putty knife
- Degreaser or TSP substitute
- Bonding primer (especially for glossy finishes)
- Bathroom-rated paint or cabinet enamel
- Topcoat: water-based polyurethane or a durable clear coat compatible with your paint
- Silicone caulk (kitchen and bath)
- New hardware (optional but transformative)
- Plywood or 1x lumber for drawer modifications and support rails
- Countertop material (wood top, butcher block, stone, solid surface, or a pre-made vanity top)
Step 1: Disassemble and Deep Clean
Bathrooms magnify grime. Start fresh.
- Remove all drawers.
- Take off hardware and label it if you plan to reuse it.
- Clean every surface with a degreaser, especially around drawer pulls where hands have left years of invisible history.
- Let the dresser dry fully before sanding.
Step 2: Repair and Stabilize
This is the moment to make the piece feel solid and trustworthy.
- Tighten joints: Add wood glue to loose corners and clamp if needed.
- Fill damage: Use wood filler for dents and chipped edges. Let it dry, then sand smooth.
- Fix veneer: If veneer is lifting, glue it down and clamp with a scrap board to spread pressure.
If the bottom edge is swollen from past water exposure, consider trimming and adding a base or feet. Sometimes that little design pivot makes the whole vanity feel intentional.
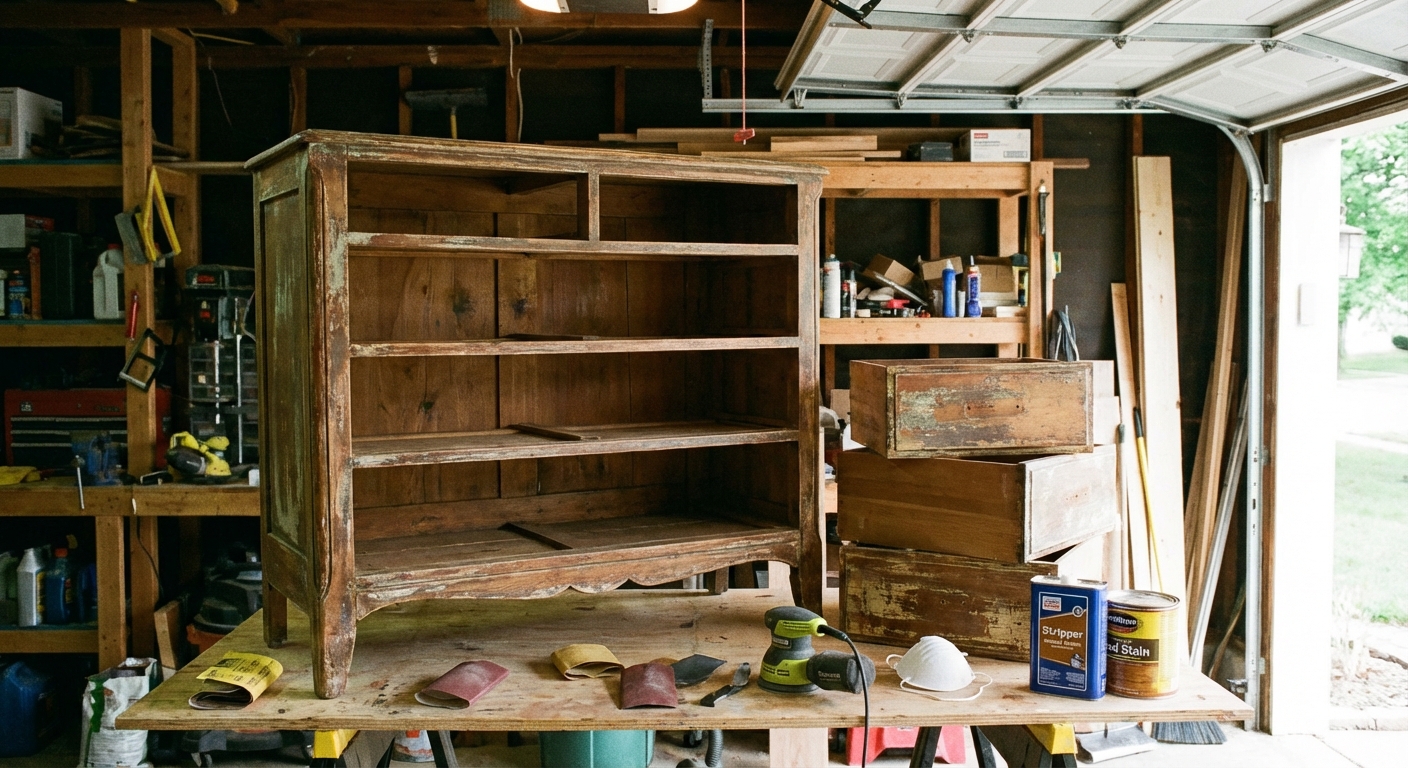
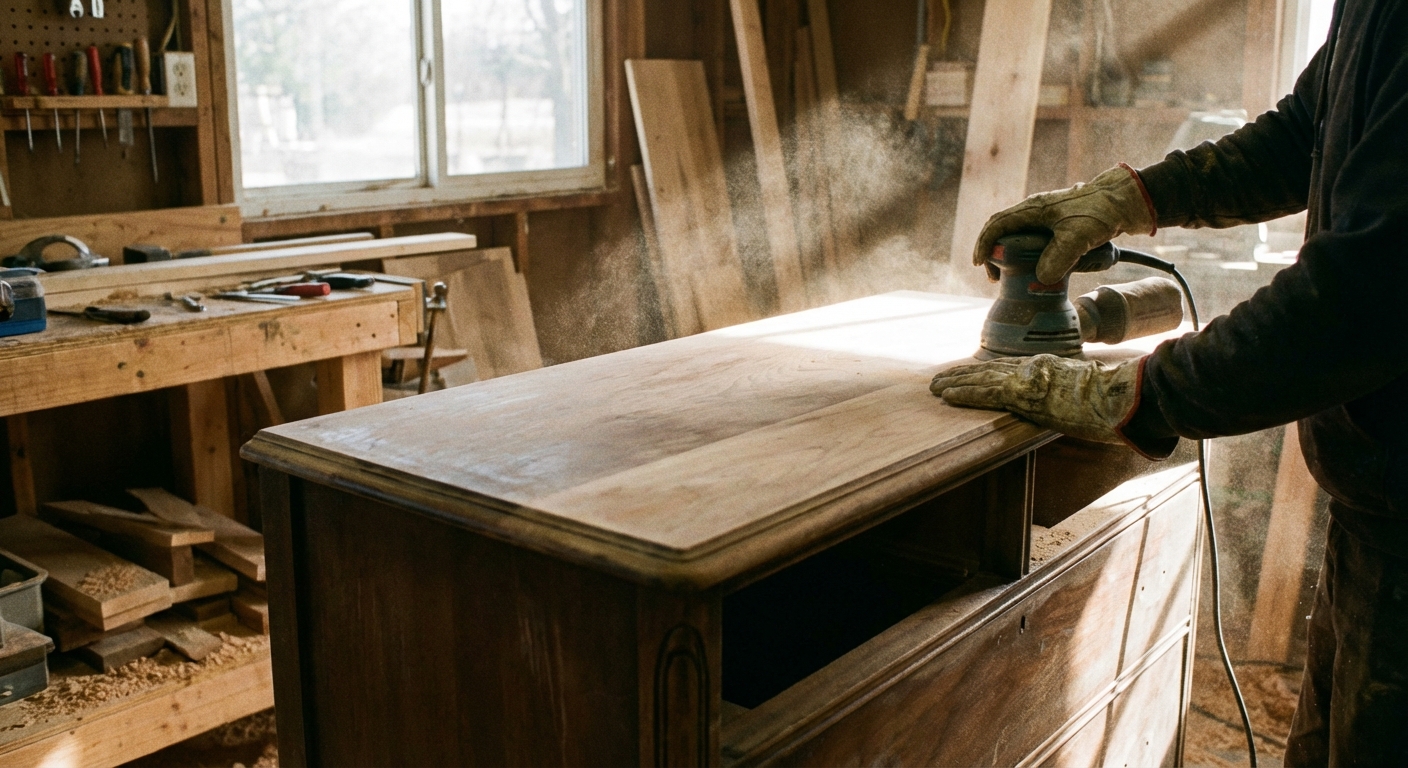
Step 3: Sanding
Sanding is how you get that smooth, modern finish that does not peel the first time someone splashes water while washing their face.
How to sand for paint
- Start with 120 grit to scuff the existing finish. If there is heavy damage or thick old varnish, start with 80 grit and move up.
- Move to 180 grit to refine scratches.
- Finish with 220 grit for a silky surface.
Clean after sanding
- Vacuum dust from corners and drawer runners.
- Wipe with a damp microfiber cloth or tack cloth.
- Let it dry before priming.
Step 4: Prime for Moisture
Primer is your insurance policy. It helps paint grip, blocks stains, and keeps tannins from bleeding through if you are working with older wood.
- Use a bonding primer if the dresser has a slick factory finish.
- Use a stain-blocking primer if the wood is knotty or you see yellowing coming through.
- Apply with a foam roller for flat areas and a quality brush for corners.
- Let it dry, then lightly sand with 220 grit to knock down texture.
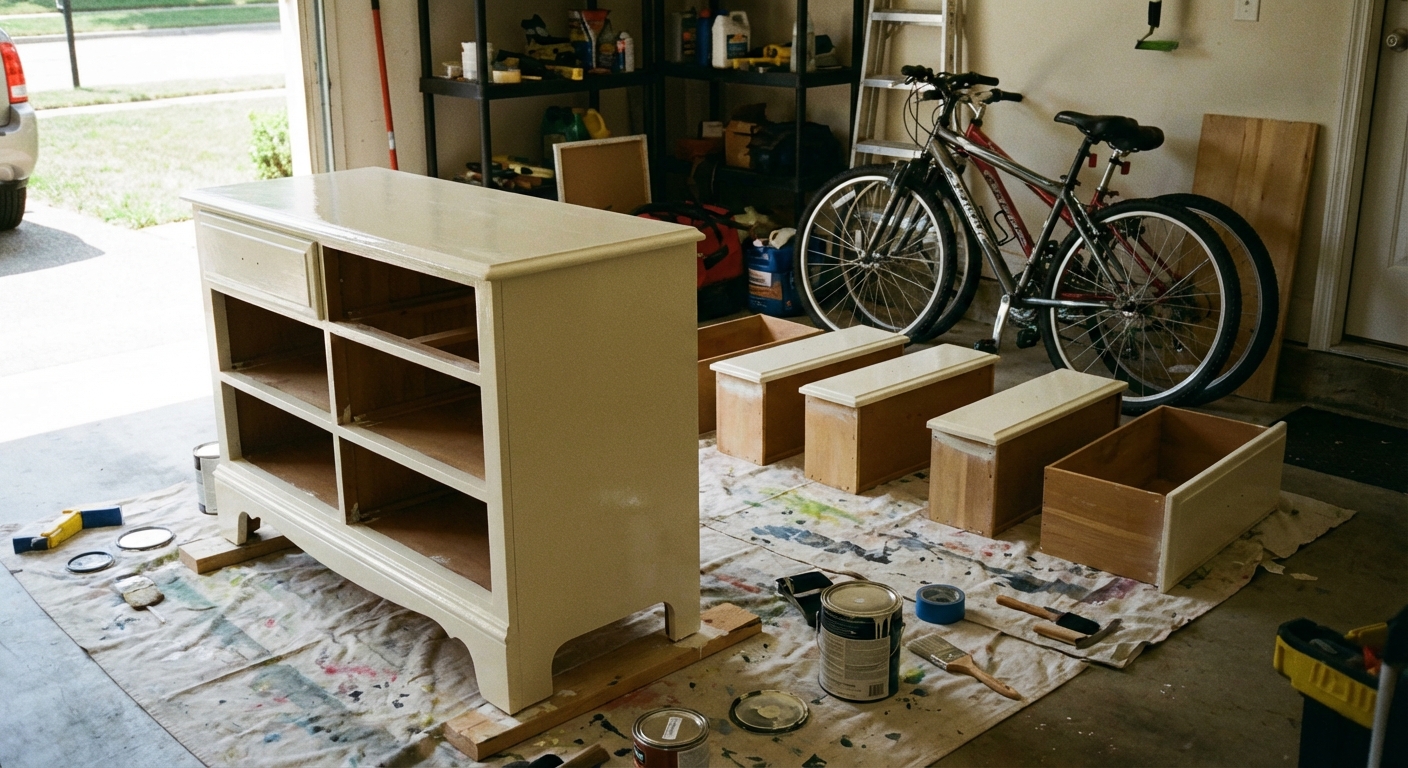
Step 5: Paint or Stain
For a modern vanity look, I love a soft, quiet color with a low sheen. Warm white, clay, smoky green, inky blue, or a moody charcoal that makes brass hardware glow.
Paint tips that matter
- Choose the right paint: Cabinet enamel or furniture paint with a hard cure is best. Bathroom walls get away with more than bathroom vanities.
- Thin coats win: Two to three thin coats beat one thick coat every time.
- Respect cure time: Dry is not cured. If the can says 7 to 14 days to cure, believe it.
Seal it
Even if your paint claims it is durable, I still like a protective topcoat for a bathroom vanity, especially around the sink area. Make sure the topcoat is compatible with your paint and test on the back first.
Step 6: Seal the Interior
This step is easy to skip, and it is also the step that makes the vanity feel truly bathroom-ready. Splashes happen. Leaks happen. The goal is to make those moments less dramatic.
- Paint or clear coat the interior surfaces, especially the bottom panel.
- Seal any raw wood you create during cutouts.
- Consider a removable drip tray or mat under the P-trap and supply lines.
- Add a small bead of silicone caulk around interior plumbing cutouts if you want extra insurance.
Clara tip: Put a white paper towel under the trap for the first week. If there is even a tiny drip, you will see it immediately.
Step 7: Modify for Plumbing
This is where upcycling gets clever. In most dresser-vanity conversions, the top drawer becomes a shallow U-shape or a false front.
Option A: False drawer front
- Remove the top drawer box entirely.
- Attach the drawer front to the face frame with screws from inside, or with brackets.
- You get open space for plumbing and a clean look from the outside.
Option B: U-shaped drawer
- Mark where the drain and trap will sit.
- Cut a U-shape out of the drawer box back and bottom so it can slide in around the plumbing.
- Rebuild the drawer box edges with plywood strips for strength.
Option C: Tip-out tray
If you are doing a drop-in sink, a tip-out tray can be a lovely little upgrade for toothbrushes and floss. It also keeps the top of the dresser looking like a dresser, which I find charming.
Centering and symmetry
If you can, center the sink on the dresser and the plumbing. If the plumbing is off-center and moving it is not in the cards, consider shifting the drawer layout so it looks intentional, not accidental. A slightly off sink reads much more “I had no choice” when the drawers are perfectly symmetrical.
Step 8: Add Counter Support
Even sturdy dressers were not designed to hold a sink full of water. Add support so the weight is carried confidently.
- Add cleats (wood rails) along the inside top edges to support a new countertop.
- If the dresser top is weak or you are removing a large section, add a center support rail.
- For undermount sinks, follow the sink manufacturer's support requirements. Many need brackets or a cradle.
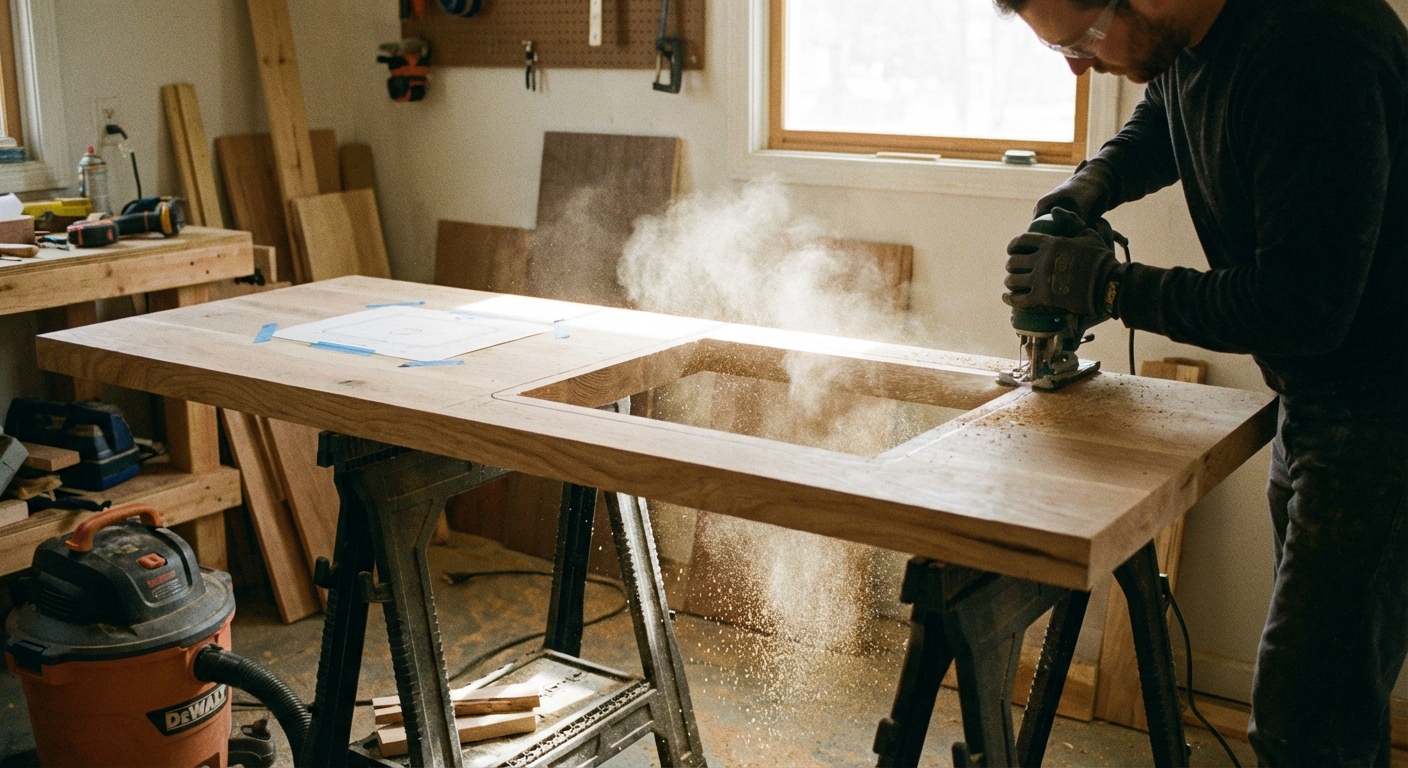
Step 9: Cut Sink and Faucet Openings
Measure like you are being graded. Then measure again after a cup of coffee.
How to mark your cut lines
- Use the sink template if it comes with one.
- If not, trace the sink rim carefully and follow the manufacturer's cutout dimensions.
- Use painter's tape over the cut line to reduce chipping, especially on wood tops.
Cut safely
- Drill a starter hole, then use a jigsaw for the main cut.
- Test-fit the sink before sealing any edges.
Clara tip: If you are using a wooden top, seal the raw cut edges thoroughly. That exposed grain is where water sneaks in first.
Step 10: Fit to Wall and Floor
This is the real-world part no one tells you about until you are standing there, vanity in hand, wondering why it will not slide back.
- Baseboards: Baseboards often keep the dresser from sitting flush. Options include removing the baseboard behind the vanity, scribing a notch into the back of the dresser, or adding spacers so it sits forward (then seal the gap well).
- Toe-kick: If you want toe space, plan it now. Some people add a recessed base to the dresser so you can actually stand close to the sink without doing the awkward lean.
- Back access: If the dresser has a finished back, cut a neat access opening for the drain and supply lines, and leave clearance for hoses so nothing gets kinked.
Step 11: Seal the Top
A bathroom vanity lives in a humid world. Your goal is to create a finish that can handle splashes, toothpaste, and the occasional puddle that someone forgets to wipe.
If you are using a wood top
- Apply multiple coats of water-resistant finish (polyurethane or a hardwax oil that is specifically rated for bathroom or wet-area exposure). Check the product guidance, and expect some finishes to need maintenance over time.
- Pay extra attention to the sink cutout, faucet holes, and the back edge near the wall.
If you are using stone or a pre-made vanity top
- Follow the manufacturer instructions for sealing, if required.
- Dry-fit first, then set in place with appropriate adhesive.
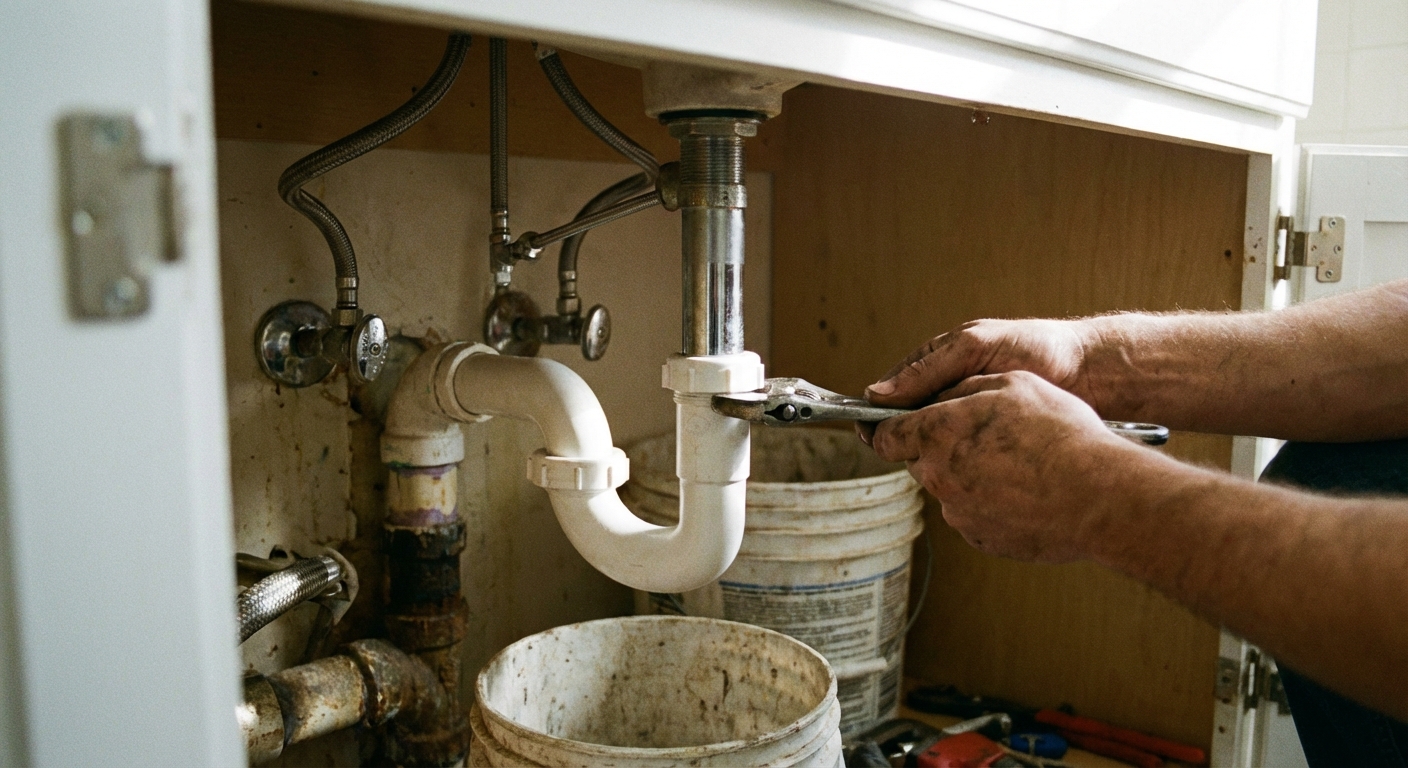
Step 12: Install Sink and Plumbing
If plumbing makes you nervous, you are not alone. You can absolutely DIY simple swaps, but do not hesitate to hire a plumber for peace of mind, especially if you are changing drain heights or adding shutoff valves.
Basic order of operations
- Install the faucet on the sink or top (often easier before the sink is mounted).
- Set the sink in place with silicone as directed.
- Connect the drain assembly.
- Connect supply lines to shutoff valves.
- Install the P-trap and check alignment.
- Turn on water and check for leaks with a dry paper towel around each connection.
Plumbing details like trap arm slope and venting are local-code sensitive. If you are changing configurations, follow local code and consult a plumber.
Use silicone caulk where the countertop meets the wall and where the sink meets the counter (if required for your sink type). This is one of those small steps that prevents big, soggy problems.
Step 13: Make It Look Modern
This is my favorite part. The styling choices are what pull the piece out of “repurposed” and into “that looks like it was always meant to be there.”
- Hardware: Swap to simple pulls in brass, matte black, or polished nickel. Keep the scale slightly oversized for a modern feel.
- Faucet finish: Match or thoughtfully mix with your hardware. I love brass pulls with a black faucet, especially against a warm white vanity.
- Add feet or a base: A recessed toe-kick or clean legs can make the silhouette feel more contemporary.
- Backsplash: A short stone or tile backsplash protects the wall and looks finished.
Clara tip: If you add a backsplash, run a clean bead of silicone where it meets the countertop and the wall. It is the tiny line between “fresh” and “mystery moisture.”
Common Mistakes
- Not sealing raw wood edges: Especially around cutouts and the back edge against the wall.
- Using wall paint: It will scuff and get gummy near water.
- Skipping primer on glossy finishes: Paint peels when it cannot grip.
- Blocking access: Do not trap shutoff valves or supply connections behind permanent panels.
- Forgetting drawer clearance: Make sure drawers still open after the sink and plumbing are installed.
Safety Notes
- Lead paint: If your dresser is very old and has chippy paint, consider a lead test kit and use proper precautions.
- GFCI outlets: Bathrooms typically require GFCI protection per local code. If you are adding outlets near the vanity, follow code and consider an electrician.
- Secure it: If the vanity feels tippy or you have kids climbing age in the house, anchor it to studs.
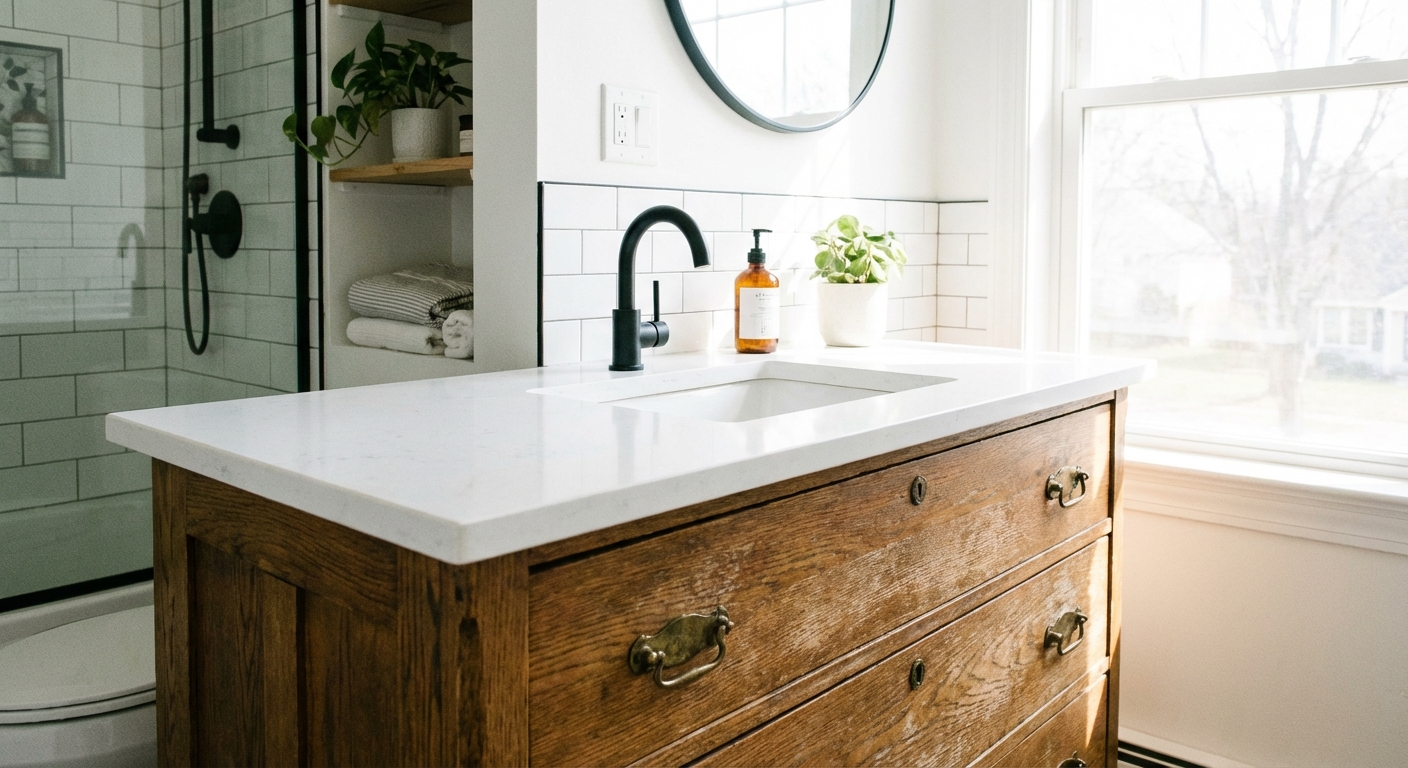
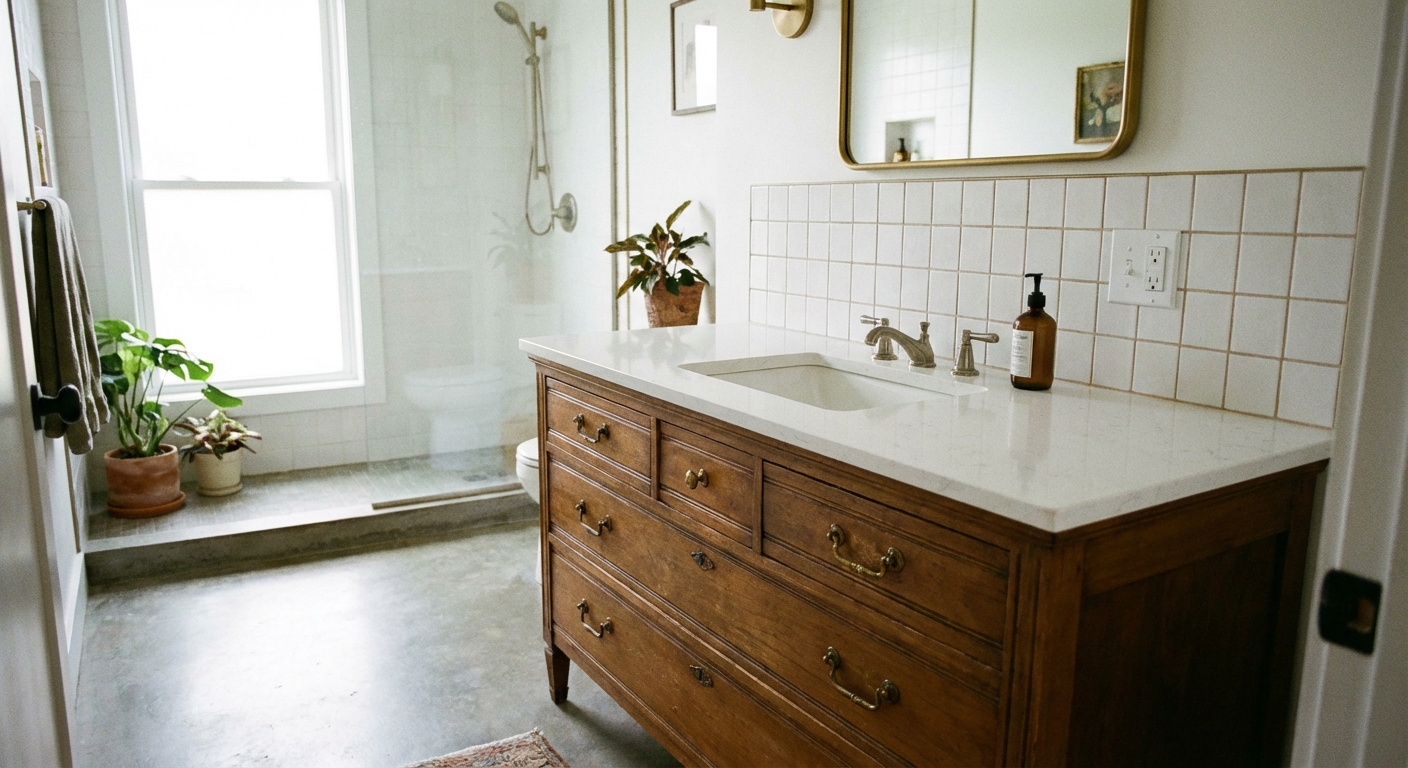
Final Touches
Once everything is installed and cured, style it like a small vignette. Hand soap in an amber bottle, a little tray for rings, a linen hand towel that feels good on your hands. This is where the “personal stories” part of home really shows up.
If you try this project, take a photo before you load it up with products. That first clean shot of your finished vanity, with the paint still perfect and the hardware still gleaming, is pure joy.