Temporary Window Privacy Ideas for Renters (Lights On, Neighbors Out)
Clara Townsend
Clara Townsend is an interior stylist, vintage furniture enthusiast, and the creative voice behind Velvet Abode. With over a decade of experience transforming both cramped city apartments and sprawling fixer-uppers, she believes that a beautiful home is built on personal stories rather than massive budgets. When she isn't hunting for the perfect brass sconce at a local flea market, she can usually be found rearranging her living room for the third time this month.
If you have ever turned on a lamp at night and suddenly felt like your living room became a stage, welcome. Renter life can be cozy and charming, but windows in the wrong place (hello, ground floor and close neighbors) can make you feel a little too visible.
The good news: you can get real privacy without drilling holes, without angering your lease, and without turning your apartment into a cave. Below are my favorite temporary window privacy ideas, sorted by what they do best. I will cover daytime privacy (soft light, blurred view) versus blackout-only solutions (great for sleep, not always for daytime).

First, pick your privacy goal
Before you buy anything, decide what you want your window to do. This saves money and avoids the classic mistake of buying blackout curtains for a problem that is really about daytime visibility.
- Daytime privacy: You want to block sightlines while still letting in natural light. Think frosted film, woven shades, café curtains.
- Nighttime privacy: You need to stop people seeing silhouettes when lights are on. Most sheer options will not be enough on their own.
- Full blackout: Best for bedrooms, shift workers, nurseries, or streetlights. This is about darkness more than privacy, though it helps with both.
My rule: if your window faces a sidewalk, a neighboring building, or a shared courtyard, aim for daytime privacy plus nighttime coverage. Layering is the renter’s best friend.
Quick reality check: Privacy solutions help with visibility, not sound. And film does not add meaningful security. It is about comfort, not fortification.
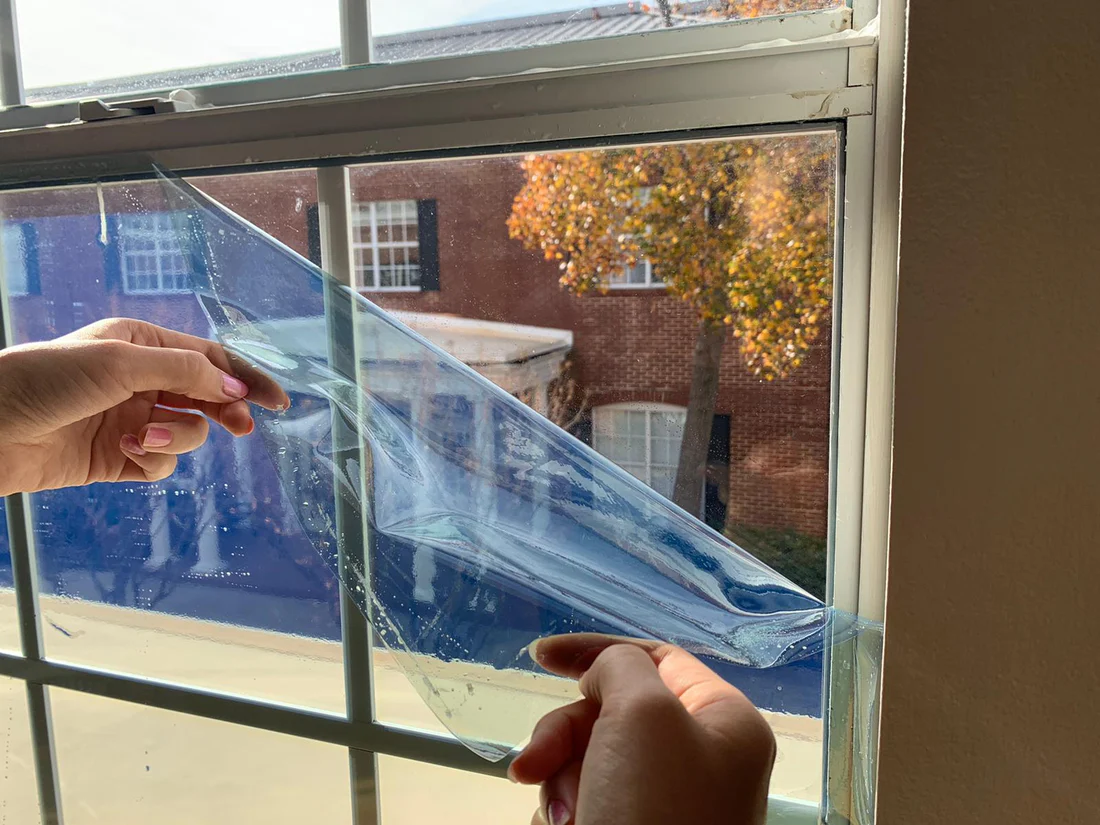
Static cling film: the easiest daytime privacy upgrade
Static cling window film is my number one recommendation for renters because it is designed to be removable. The key is buying the right kind: look for static-cling (non-adhesive) film, not adhesive-backed film.
Why it works
- Great for daytime: Frosted and textured options blur views while keeping rooms bright.
- Lease-friendly: No drilling, and cling styles usually peel off cleanly.
- Perfect for awkward windows: Bathrooms, sidelights, street-facing lower panes, and transoms.
What to buy
- Frosted or matte: Best all-purpose. Soft, calm, and looks like it belongs.
- Reeded or fluted texture: Gorgeous with vintage vibes. Reads like architectural glass.
- Prismatic: Throws little rainbows in sun. Very joyful, but can feel busy if you are sensitive to visual clutter.
- One-way mirror: Use with caution. It only “works” when it is brighter outside than inside. At night with lights on, you can often see in. It can also noticeably darken the room, and some buildings restrict reflective looks. Check your lease or building rules if you are unsure.
Compatibility note: Some window films are not recommended for certain insulated, double-pane, or low-E glass because of heat buildup and potential thermal stress. This varies by product and window type, so check the manufacturer guidance on the exact film you buy.
How to apply (the clean, bubble-free way)
- Clean the glass thoroughly (any lint will show).
- Spray the window with water mixed with a tiny drop of dish soap.
- Apply film and slide it into position.
- Squeegee from the center outward.
- Trim edges with a sharp utility knife.
Clara tip: Film on the lower half of a window is often enough for privacy while keeping the upper portion clear for sky and trees. It feels lighter than covering the whole pane.
Tension rods: curtains with zero commitment
If you can do one thing today that instantly makes your space feel more private and more finished, it is this: add a tension rod. No tools, no holes, and you can take it down in 30 seconds for cleaning or move-out.
Best tension-rod setups for privacy
- Café curtains: Cover the bottom half only. You get privacy where it matters, light where you want it.
- Panels inside the frame: Mount a tension rod inside the window recess (the “inside mount” area) and hang curtains there. This is a great workaround if your landlord forbids hardware on trim or walls.
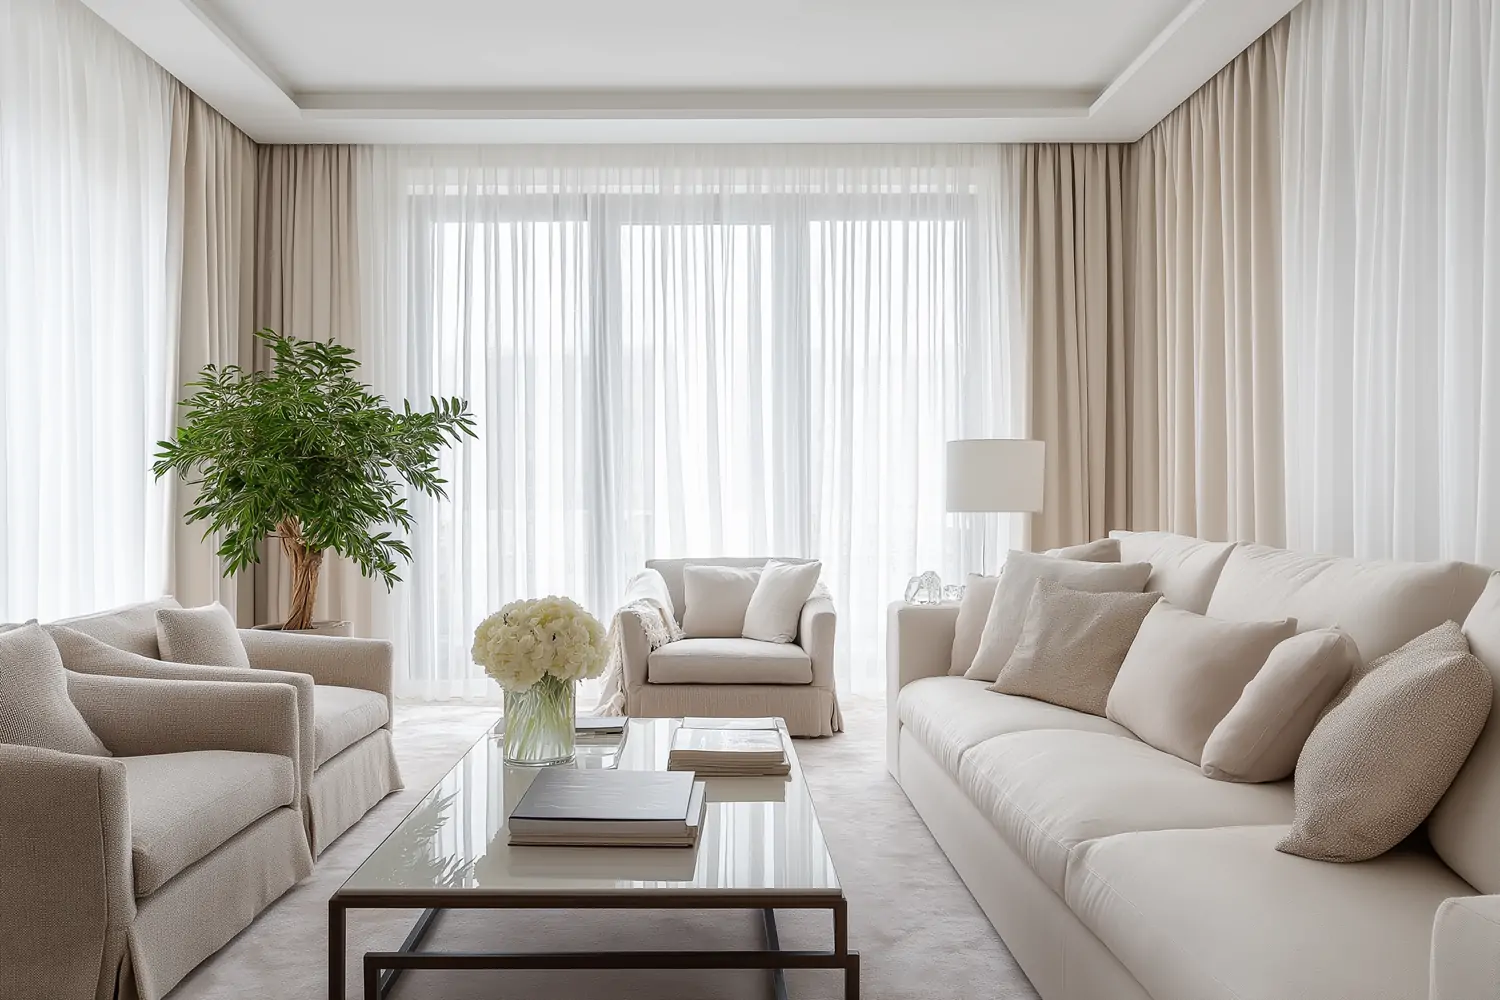
- Double rod layering: One rod near the glass for sheers, one rod closer to the room for thicker curtains. This is the “lights on, neighbors out” combo. Note: you need a fairly deep window recess to fit two rods securely without crowding.
Fabric choices that actually help
- Linen-look sheers: Pretty and airy, but usually not enough at night alone.
- Voile plus a lined panel: The best of both worlds. Sheer for day, lined for night.
- Velvet or twill: Cozy and insulating, but can feel heavy in tiny rooms unless balanced with a light wall color.
Clara tip: Check the weight limit on your tension rod packaging, especially if you are tempted by velvet. When in doubt, go wider-diameter, higher-tension rods, and choose lighter panels for tension setups.
No-drill curtain hardware: my favorite renter hack
If you want the look of a standard curtain rod (and you want to use heavier panels), this is the move: Command-style hooks plus a lightweight curtain rod. It is one of the most renter-friendly ways to get curtains above the frame without drilling.
- Use hooks rated for the full weight: Add up the panels plus the rod. Blackout curtains get heavy fast.
- Mind the paint: Adhesive can pull paint on removal, especially on older or matte walls. Follow removal directions exactly, and consider a small test spot in an inconspicuous corner first.
- Choose the right rod: A thin, lightweight rod is usually safer than a chunky decorative one for adhesive setups.
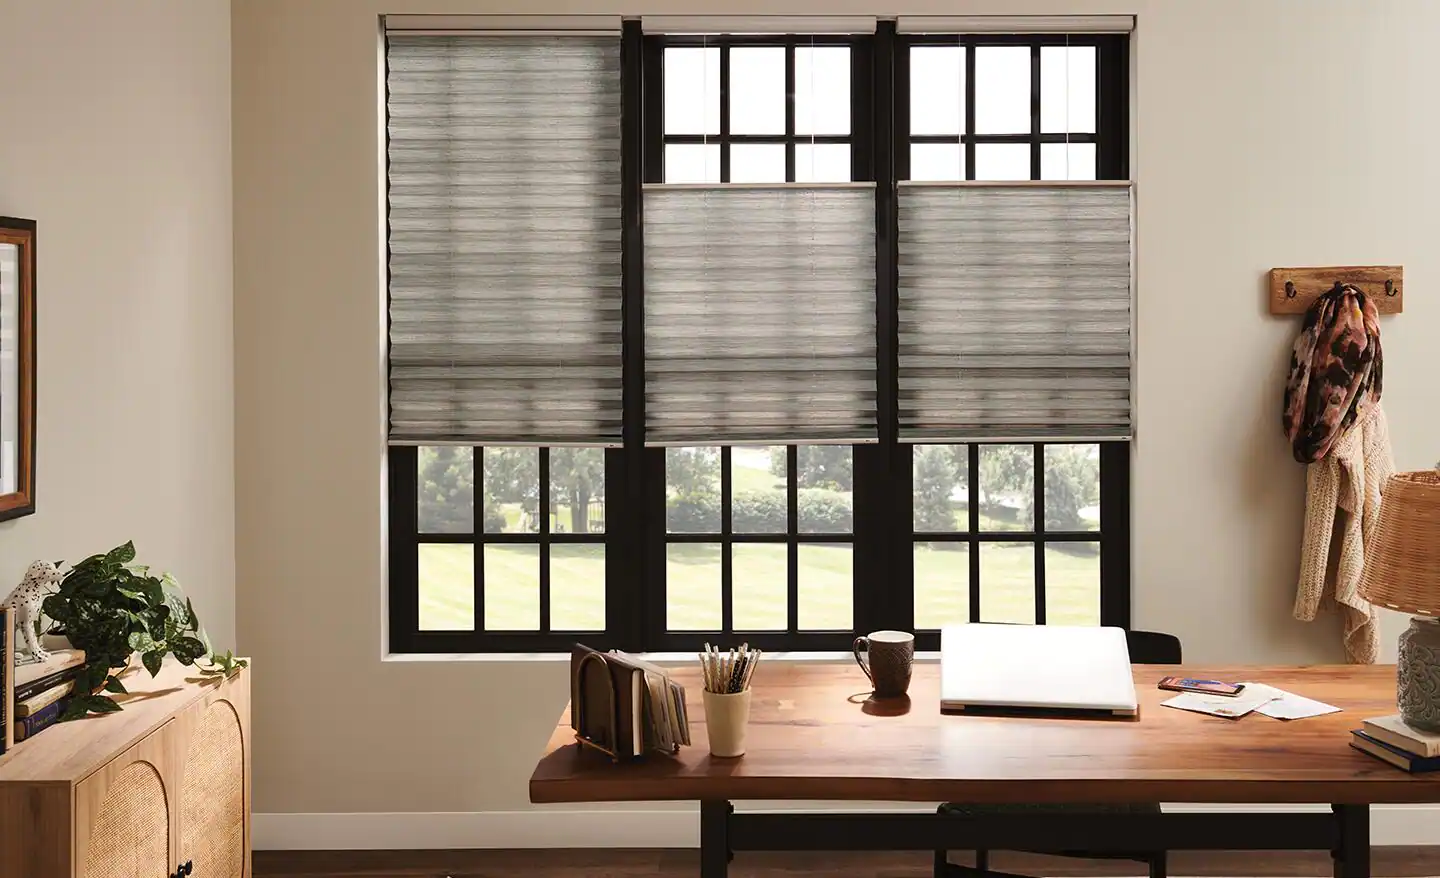
No-drill shades: adjustable privacy without the landlord email
Shades are wonderful when you want a cleaner look than curtains or you need privacy that adjusts throughout the day. Many renter-friendly styles install without drilling into walls, but designs vary, so confirm the exact mounting method before you buy (pressure, clip-on, or adhesive).
Top renter-friendly options
- Twist-and-fit cellular shades: Some models mount inside the window frame with pressure brackets. Great for bedrooms because they can dim light without feeling bulky.
- Clip-on or no-drill roller shades: Some designs hook onto the window frame. They are sleek and modern. Double-check whether the model uses any adhesive.
- Top-down, bottom-up shades: My favorite for street-facing windows. You can let light in at the top while keeping the lower portion private.
Measure twice: No-drill options are picky about window depth and trim shape. Measure the inside width and the inside depth of your window recess. If your frame is shallow, you may need an outside-mount solution like curtains or film.
Blackout-only solutions: great for sleep
Blackout curtains and blackout shades are excellent, but they solve a different problem. If you work nights or have harsh streetlights, yes. If you just want to stop the neighbor across the way from seeing you cook dinner, blackout can feel like overkill in daylight.
If you do need blackout, keep it renter-friendly
- Use Command-style hooks and a rod: This is often sturdier than trying to hang a heavy panel directly from adhesive clips.
- Use a tension rod for lighter blackout panels: Works best on smaller windows and lighter fabrics.
- Try a blackout liner: Clip-on liners let you keep prettier curtains while adding nighttime privacy.
Nighttime reality check: If your curtain is sheer, people can often see silhouettes when lights are on. If that makes you uneasy, add a second layer for evenings.
Frosted spray and peel-and-stick: proceed with caution
There are two common “quick fixes” that can be renter-safe in some situations and deposit-risky in others.
Frosted glass spray
Frosted spray paint can look convincing and give great privacy, but it is still paint. Some formulas claim removability, but removal can be time-consuming and messy depending on the product, how long it sat, and the glass texture. Read the manufacturer’s removal instructions before you commit.
- Only consider it if: you have written landlord permission, or you are applying it to a removable pane (rare), or you are willing to put in serious removal work.
- Avoid on: plastic windows, textured glass, or anything with coatings you do not understand.
Peel-and-stick adhesive film
Adhesive privacy film can be beautiful, but adhesives vary. Some peel off clean, some leave residue that requires scraping and solvent.
- Safer bet: static cling film whenever possible.
- If you do use adhesive film: test a small corner for removability and residue after a few days before committing to the whole window.
My favorite layering recipes
Here are a few combinations I use in real homes, especially rentals where the goal is privacy that still feels soft and welcoming.
Ground-floor living room
- Frosted static cling film on the lower half
- Sheer curtains for daytime glow
- Lined curtains for evenings
Bathroom window
- Full frosted or reeded static cling film
- If you want extra softness: a simple café curtain on a tension rod
Bedroom with streetlights
- Cellular shade (no-drill if possible)
- Blackout curtain panels for full darkness
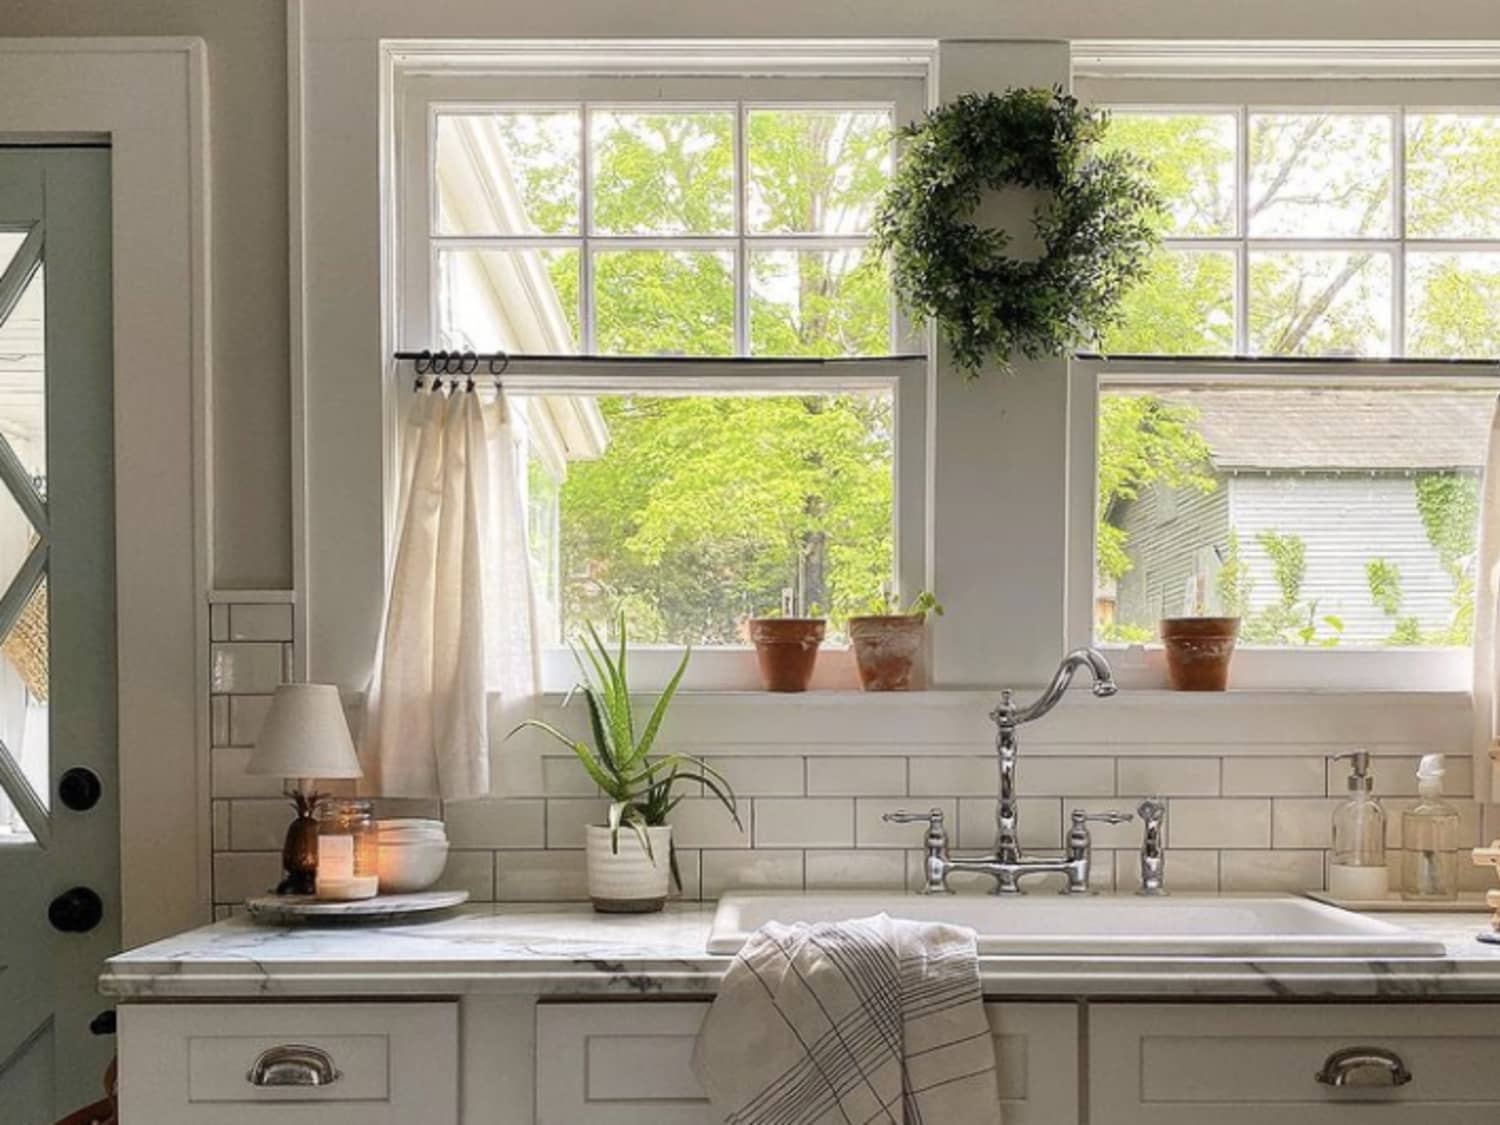
Kitchen window facing neighbors
- Café curtains on a tension rod
- Optional: film on the bottom pane if you want more privacy without sacrificing light
Lease-safe removal and move-out tips
Temporary window privacy is only as good as your ability to remove it cleanly. Here is how to keep your deposit out of the danger zone.
Before you install anything
- Check your lease: Some leases restrict changes to window coverings, especially if the exterior appearance matters.
- Do a tiny test: Try your chosen solution in one corner or one window first.
- Keep packaging: It helps if you need to reference instructions for removal later.
Removing static cling film
- Peel from a corner slowly.
- Use warm soapy water to loosen if needed.
- Clean glass with a non-scratch cloth to remove mineral spots.
Removing adhesive residue (if you used peel-and-stick)
- Start with warm soapy water.
- If residue remains, try a small amount of rubbing alcohol on a cloth.
- Use a plastic scraper for stubborn spots, not metal.
Important: Always spot-test any solvent on an inconspicuous area. Avoid getting chemicals on painted trim or window seals.
Quick shopping checklist
If you want a simple plan, this is the little list I would take to a hardware store or add to cart:
- Frosted static cling film (or reeded texture if you love vintage charm)
- Spray bottle and a small squeegee
- Tension rod (measure your window width first)
- Sheer café curtain or full panel set depending on your window
- Optional: lined curtain panels or blackout liner for nighttime privacy
- Optional: Command-style hooks and a lightweight rod for above-frame curtains
Design should make you feel safe and at ease in your own home. Privacy is not a luxury. It is a baseline.
Common renter questions
Will static cling film damage my windows?
Cling film is generally low-risk on standard glass because it does not use glue. The biggest issues tend to be trapped dust, bubbles from rushed application, or mineral spots if you use hard water. Apply on very clean glass and you are usually golden. For insulated or low-E windows, follow the film manufacturer’s compatibility guidance to avoid heat stress issues.
Does “one-way” mirror film work at night?
Usually not the way people hope. The brighter side becomes the reflective side, so if your interior is brighter than outdoors, the effect can reverse and you can see in. For nighttime privacy, pair it with curtains or a shade.
What is the most natural-light-friendly option?
Frosted or reeded static cling film, especially placed only on the bottom portion of the window, gives the best privacy-to-light ratio.