Steam Cleaning Upholstery at Home
Clara Townsend
Clara Townsend is an interior stylist, vintage furniture enthusiast, and the creative voice behind Velvet Abode. With over a decade of experience transforming both cramped city apartments and sprawling fixer-uppers, she believes that a beautiful home is built on personal stories rather than massive budgets. When she isn't hunting for the perfect brass sconce at a local flea market, she can usually be found rearranging her living room for the third time this month.
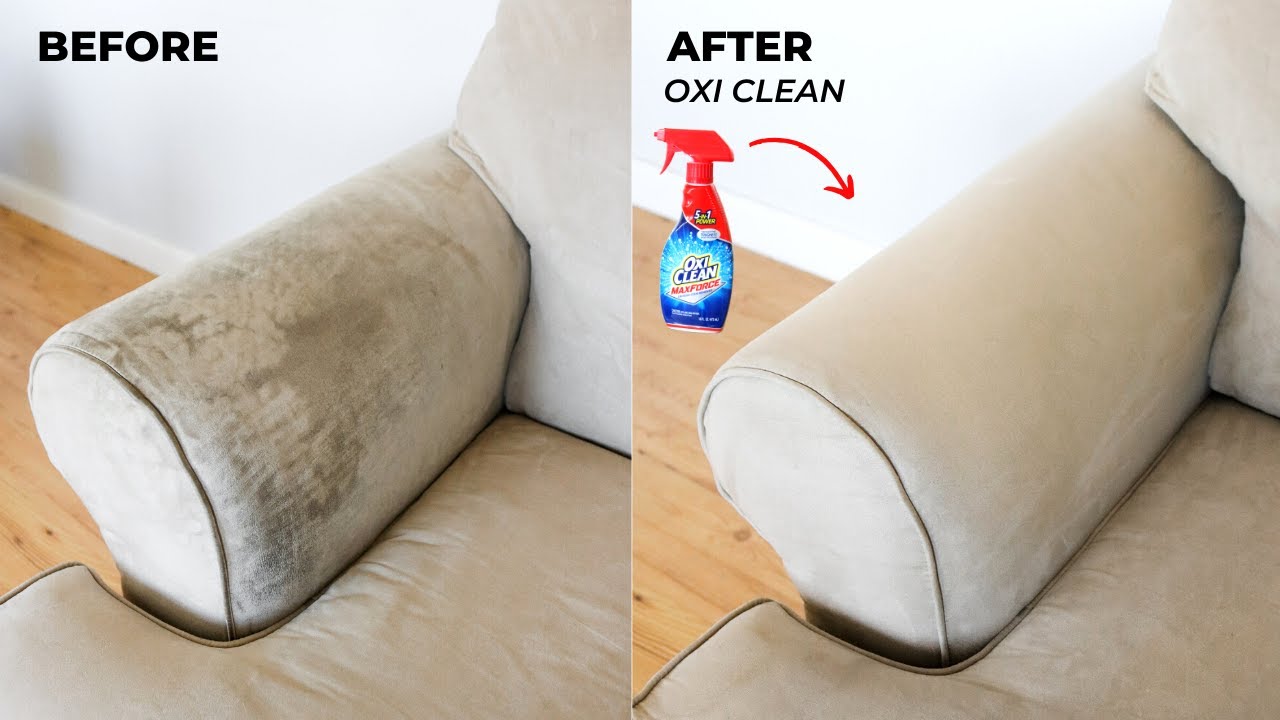
Steam cleaning your couch sounds like the dream: one afternoon, one machine, and suddenly your upholstery looks like it has its life together. Sometimes that’s true. Other times, steam plus the wrong fabric equals shrunken covers, crunchy texture, or those pale “halo” water rings that appear the moment you sit down and notice them forever.
This is your no-panic guide. We are going to figure out when steam cleaning is actually safe, what those mysterious fabric codes mean, and how to clean cushions at home without accidentally turning them into a science project.
First, know what “steam cleaning” really means
At-home “steam cleaning” gets used as a catch-all phrase, but there are two different approaches that matter:
- True steam: very hot vapor with minimal water. Great for sanitizing hard surfaces, risky for many fabrics.
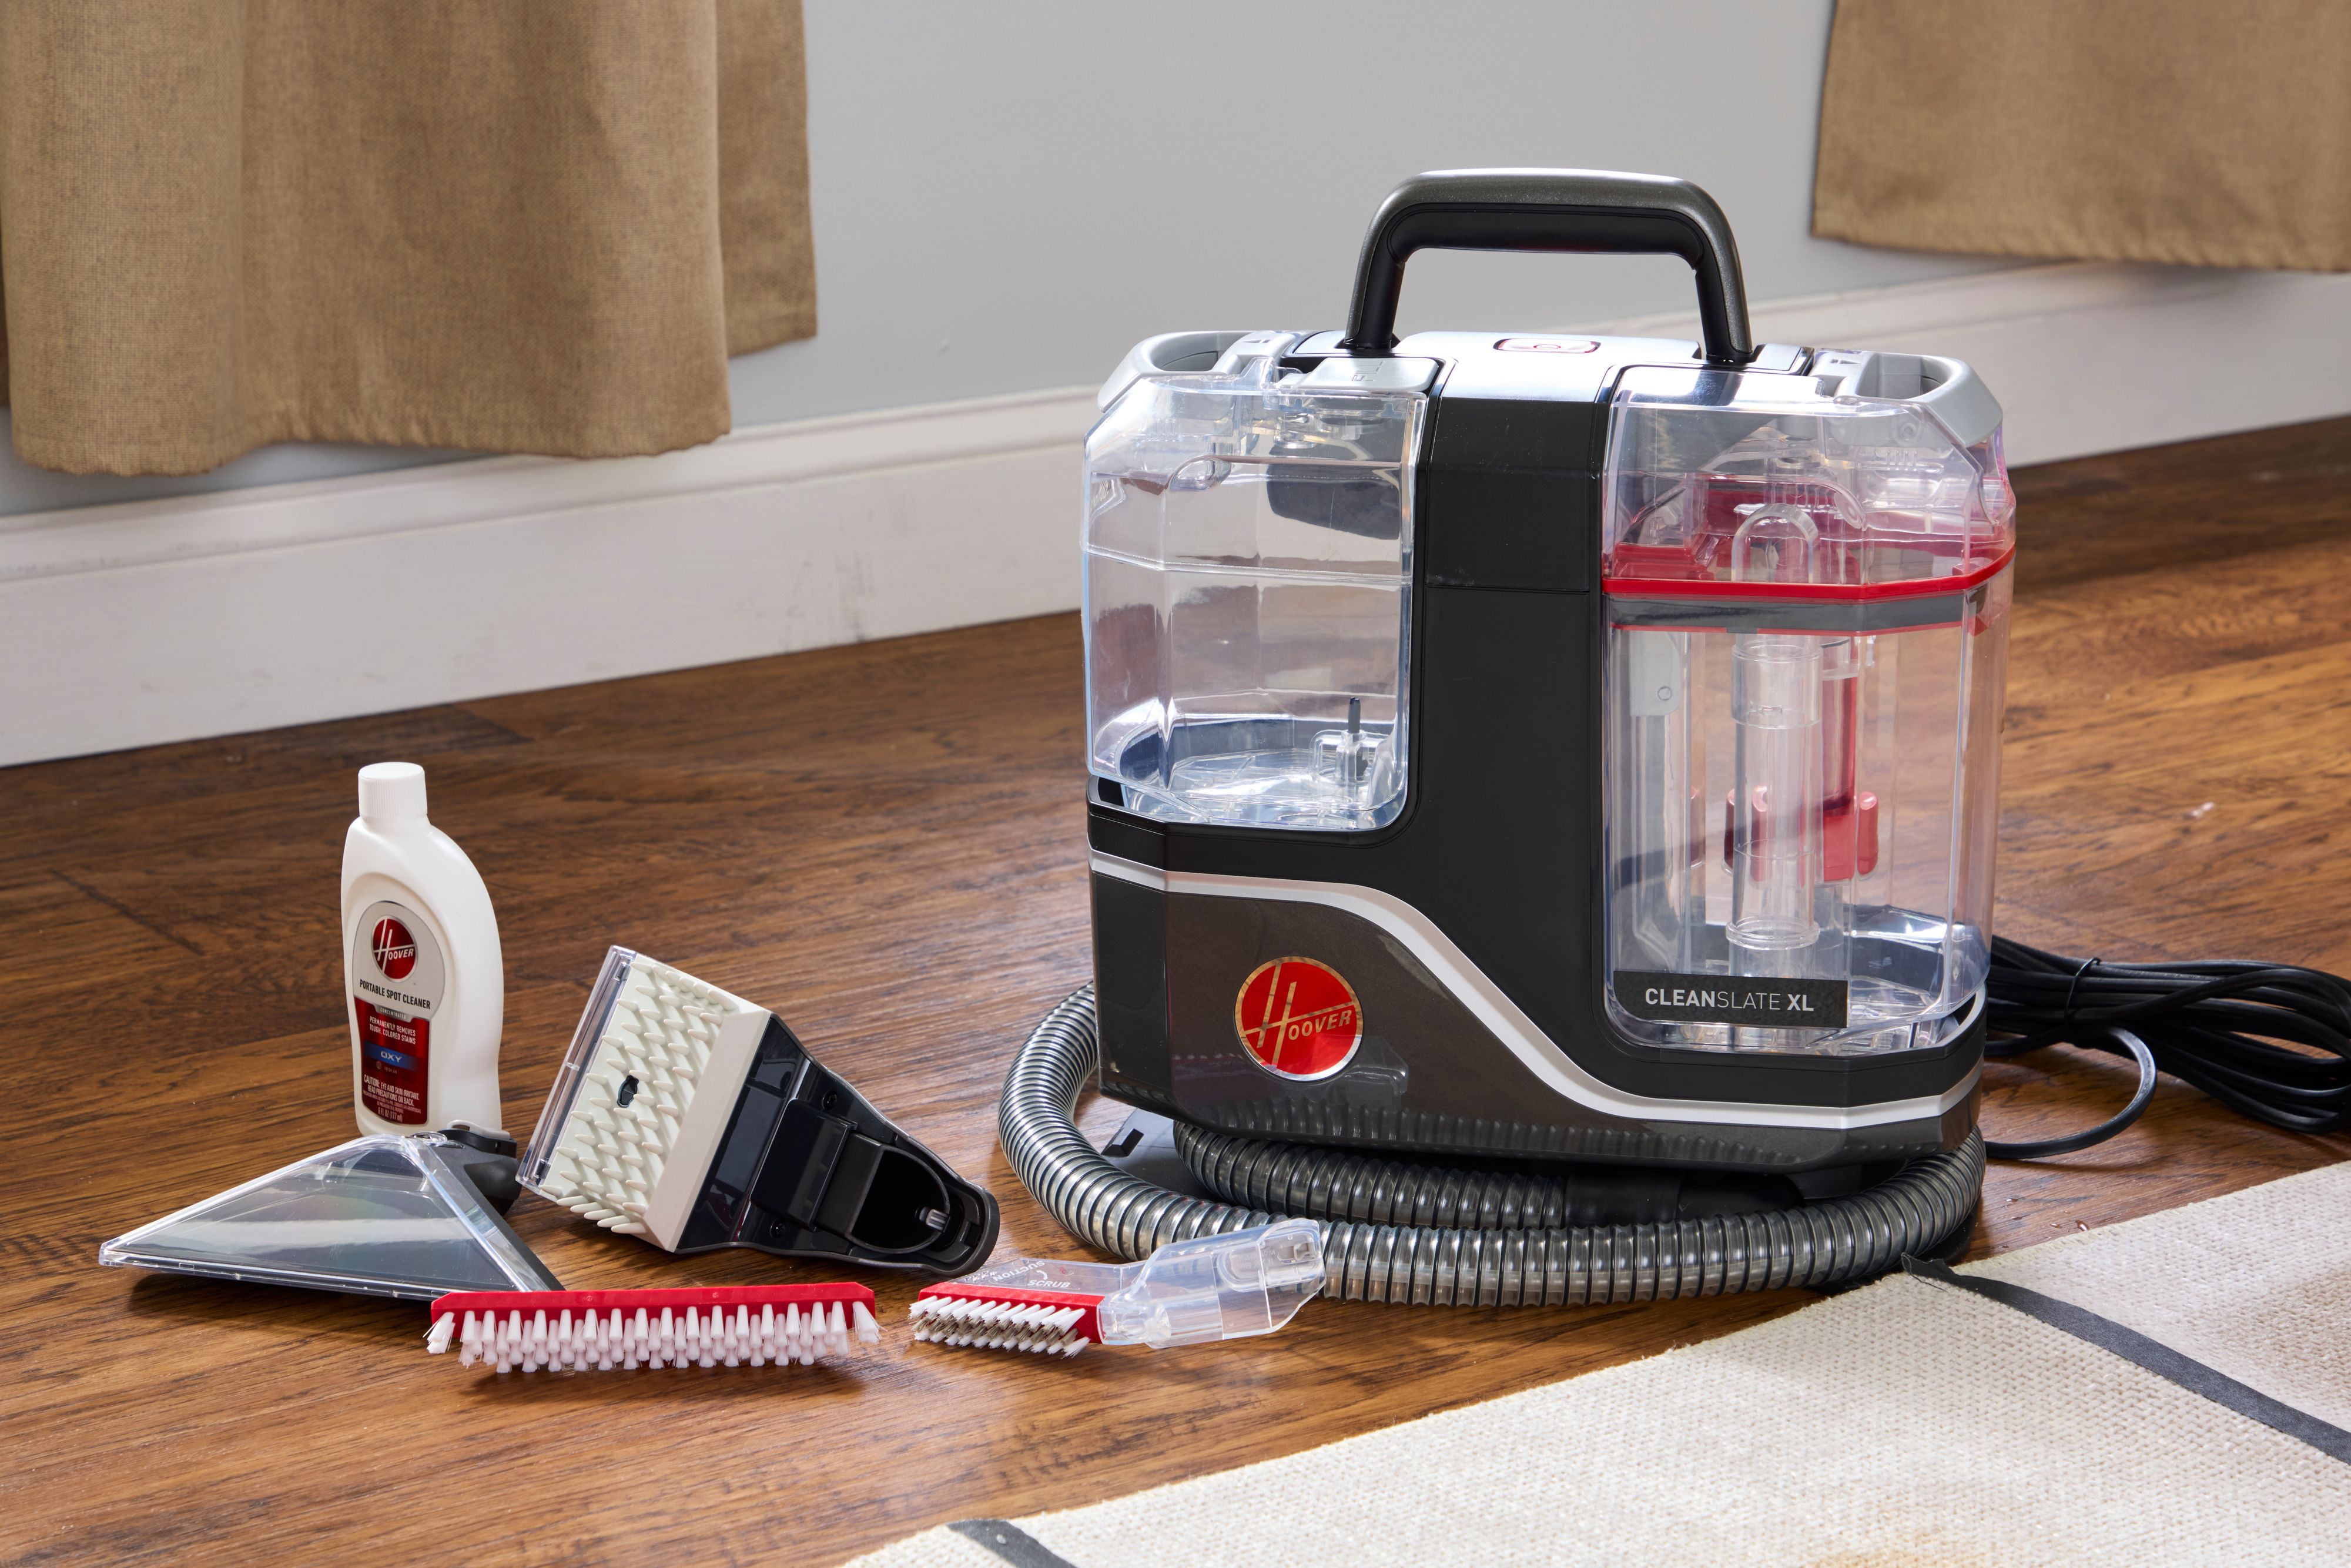
- Hot water extraction (most upholstery machines): sprays warm water plus cleaner, then vacuums it back out. This is usually what renters mean when they say steam clean.
Most upholstery-friendly machines are extractors. They clean well because they remove dirty moisture instead of just soaking the fabric.
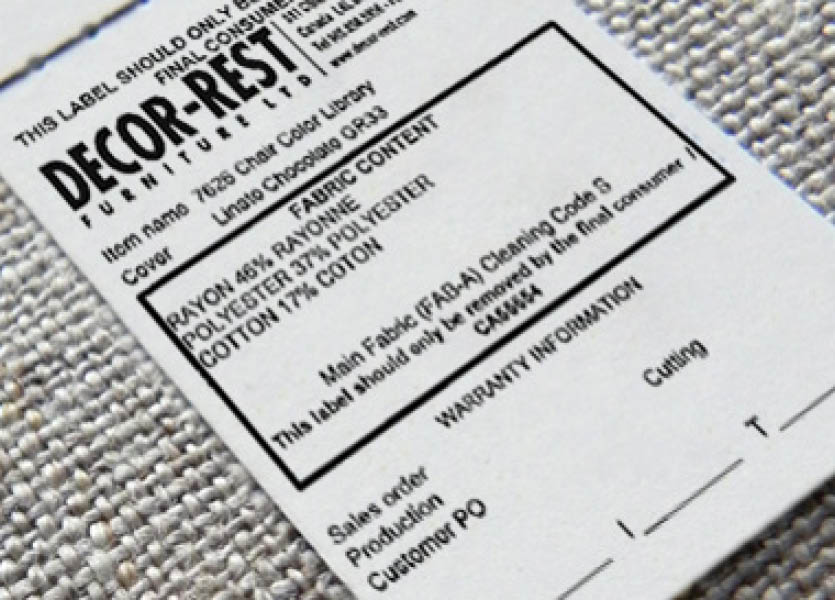
Read the fabric code before you do anything
Flip your cushion or look under the sofa for a care tag. You are hunting for one of these codes:
- W: Water-based cleaners are safe. Extraction is usually fine.
- S: Solvent-only. Do not steam clean or use water. Water can cause rings, dye bleed, or texture changes.
- WS or SW: Water-based or solvent cleaners are acceptable. Extraction can be okay with a careful, low-moisture approach.
- X: Vacuum only. No water, no solvent. (Yes, it is rude.)
No tag? Treat it like a “maybe” and do a hidden spot test. If you rent, this is the moment to be conservative. Replacing a cushion cover is rarely as easy as it should be.
When steam cleaning is safe (and when it is not)
Usually safe
- Code W synthetics like polyester, microfiber, and many performance fabrics
- Code WS fabrics, if you keep moisture low and extract thoroughly
- Removable cushion covers that are explicitly water-safe (still test for dye bleed)
High risk or skip it
- Code S or X upholstery
- Velvet (especially cotton or rayon velvet): pile can crush and show water marks
- Linen, viscose, rayon: prone to water rings, distortion, and texture change
- Antique or unknown-dye fabrics: risk of bleeding and browning
- Feather or down cushions: can trap moisture and smell musty for ages
If your sofa falls into the “skip” category but needs help, your safer DIY lane is: vacuum, gentle solvent-appropriate spot cleaning, and calling a pro for deep cleaning.
Tools and supplies (keep it simple)
- Upholstery extractor or steam-capable upholstery machine with a hand tool
- Vacuum with upholstery attachment and crevice tool
- White microfiber cloths (white so dye transfer is obvious)
- Soft upholstery brush
- Enzyme cleaner for organic stains (food, sweat, pet accidents), if fabric code allows
- Gentle upholstery shampoo or a small amount of clear, low-residue detergent
- A fan and, ideally, a dehumidifier
A note from someone who loves a shortcut: avoid heavily fragranced “all-purpose miracle cleaners” on upholstery. They often leave residue that attracts dirt, so the couch looks clean for a week and then gets dingy again.
Do a spot test like you mean it
Pick a hidden area: the back hem, underside of a cushion, or inside edge near a zipper.
- Step 1: Apply a tiny amount of your chosen solution.
- Step 2: Blot, do not rub.
- Step 3: Let it dry fully (at least a few hours).
- Step 4: Check for dye transfer, stiffness, distortion, or a ring.
If the test area dries darker, crunchy, or blotchy, do not proceed with extraction. Your fabric is telling you what it can handle.
Pretreating stains without making them worse
Pretreatment is where most people accidentally create water rings. The goal is to use the least product possible and avoid soaking a tight little circle.
General pretreat steps
- Vacuum first. Dry soil turns into muddy streaks when you add moisture.
- Blot fresh spills immediately. Press a cloth down firmly, lift, repeat.
- Treat the whole panel, not a dot. If you must wet the fabric, feather the moisture outward so it dries evenly.
Quick stain notes
- Grease: Skip water first. Use a small amount of solvent-safe degreaser only if your code allows. Otherwise, call a pro.
- Protein stains (milk, blood, pet mess): Cold or lukewarm only. Heat can set them.
- Wine, coffee, juice: Blot, then use a gentle water-safe pretreat. Do not scrub in circles.
How to steam clean upholstery step by step
1) Prep the room
- Open windows if weather allows.
- Turn on a fan, and set up a second fan if you have one.
- Plan a “no sitting” window. Upholstery needs time to dry properly.
2) Vacuum slowly and thoroughly
Use the crevice tool along seams, under cushions, and where crumbs go to retire.
3) Mix your solution lightly
Follow the machine’s directions. If you are allowed to choose concentration, go weaker than you think. Too much soap leaves residue that attracts dirt and can cause stiff, crunchy fabric.
4) Choose the right settings
- Heat: Warm is safer than very hot, especially for blended fabrics.
- Water flow: Use the lowest setting that still lets you clean.
- Suction: High suction is your best friend.
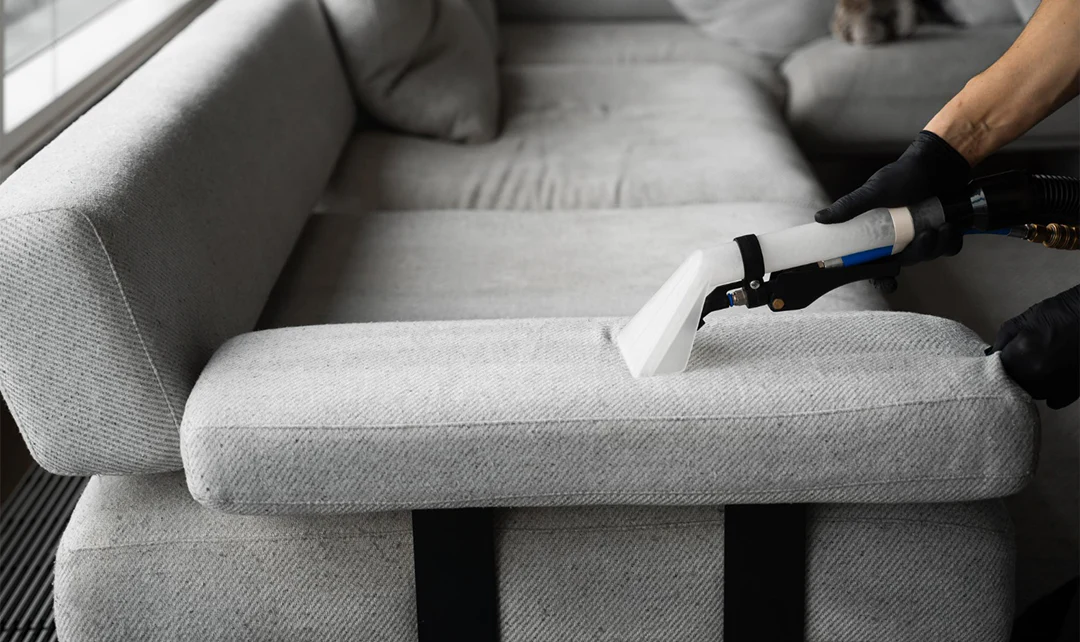
5) Work in sections, not chaos
Pick one cushion or one seat panel at a time.
- Do one slow wet pass (spray plus gentle pull).
- Then do two to four dry passes (no spray, suction only) to pull moisture back out.
- Overlap passes slightly to avoid striping.
6) Do not over-brush
A soft brush can help lift grime, but aggressive scrubbing can rough up the nap, fuzz the fabric, or create a lighter patch that never blends back in.
7) Finish with a final extraction pass
Once the whole area is cleaned, do another round of suction-only passes across seams and edges. Those spots hold water and love to produce rings.
Drying: the part that makes or breaks the result
Most upholstery disasters are drying disasters. If moisture sits too long, you can get odor, mildew, or browning.
Dry faster with this setup
- Fans aimed across the surface, not directly down into it
- Dehumidifier if your home is humid
- Cushions stood on edge (if removable) so air hits more surface area
- No blankets or throws until fully dry
Typical dry time is 4 to 12 hours, depending on fabric, cushion fill, suction strength, and humidity. If it still feels cool or slightly damp, it is not dry yet.
How to avoid water rings and “halo” stains
Water rings happen when a small area gets wetter than the surrounding fabric, then dries with a visible boundary. They are especially common on natural fibers and blends.
Ring-prevention rules
- Never spot-soak. Feather moisture outward and clean the whole panel when possible.
- Extract more than you spray. Dry passes matter.
- Keep edges and seams from staying wet. They dry slower and show rings faster.
- Use less soap. Residue can dry into a visible outline.
- Dry evenly. Fans across the surface help prevent tide lines.
If you already have a ring, the fix is usually to evenly dampen the entire panel (lightly, not drenched) and extract it uniformly, then dry quickly. If the fabric is S-coded or delicate, stop and consider a professional cleaner.
Mistakes that ruin cushions (ask me how I know)
- Skipping the vacuum step and turning dust into mud
- Using too much detergent and leaving a sticky film
- Over-wetting foam so it stays damp deep inside and starts to smell
- Using high heat on mystery fabric and causing shrinkage or texture change
- Cleaning only the stain dot instead of the full cushion face
- Putting cushions back immediately and trapping moisture between layers
Special cases: microfiber, velvet, and removable covers
Microfiber
Many microfiber sofas are code W or WS and respond well to extraction, but they can dry with a slightly stiff feel. Once fully dry, gently brush with a clean, soft brush to restore the nap.
Velvet
If it is performance velvet and explicitly water-safe, you can proceed with extreme caution and low moisture. For cotton or rayon velvet, I would not DIY steam clean. The pile can crush and water can leave permanent shading.
Removable cushion covers
Even if the cover unzips, do not assume it is washable. If you choose to remove it, clean and dry it completely before putting it back. Reinstalling a damp cover over a cushion is a recipe for mildew and that unmistakable basement smell.
When to call a pro
- Your tag says S or X
- The couch is vintage, heirloom, or irreplaceable to you
- You see dye transfer during a spot test
- The stain is large, old, or unknown
- You smell mustiness inside the cushion (moisture may already be trapped)
A reputable upholstery cleaner will identify fiber type, choose the right chemistry, and control moisture better than most rental machines.
Quick checklist before you start
- Find the fabric code and respect it
- Spot test and let it dry fully
- Vacuum thoroughly
- Pretreat lightly and feather outward
- Use low moisture, high suction
- Do multiple dry passes
- Dry fast with airflow and low humidity
If you take nothing else from this: extraction is not about how much water you can spray. It is about how much you can remove. Your cushions will thank you, and you will not be haunted by mystery halos every time the sunlight hits the sofa at 4 p.m.