Squeaky Wood Floors and Stairs: Causes and Fixes
Clara Townsend
Clara Townsend is an interior stylist, vintage furniture enthusiast, and the creative voice behind Velvet Abode. With over a decade of experience transforming both cramped city apartments and sprawling fixer-uppers, she believes that a beautiful home is built on personal stories rather than massive budgets. When she isn't hunting for the perfect brass sconce at a local flea market, she can usually be found rearranging her living room for the third time this month.
There are few sounds that can turn a cozy evening into a tiny horror movie faster than a single stair that shrieks every time someone goes for water. The good news is that most squeaks are not a sign your house is falling apart. They are usually a simple case of wood moving, rubbing, or loosening over time.
Before you call a pro, you can do a surprisingly effective round of detective work and a couple of DIY fixes, from renter-friendly options through moderately handy DIY fixes. I will walk you through what causes squeaky wood floors and stairs, how to pinpoint the exact spot, and the best fixes depending on whether you can access the underside.
Quick note on floor type: The advice below fits most nailed or screwed-down wood floors and traditional stair framing. If you have a floating floor (some laminates and engineered systems), do not pin it into joists. The squeak may be in the underlayment or perimeter clearance instead, and the fix is different.
Why wood floors and stairs squeak
Squeaks happen when two materials move against each other. The movement can be tiny, but it is enough to create friction and noise. Here are the most common culprits.
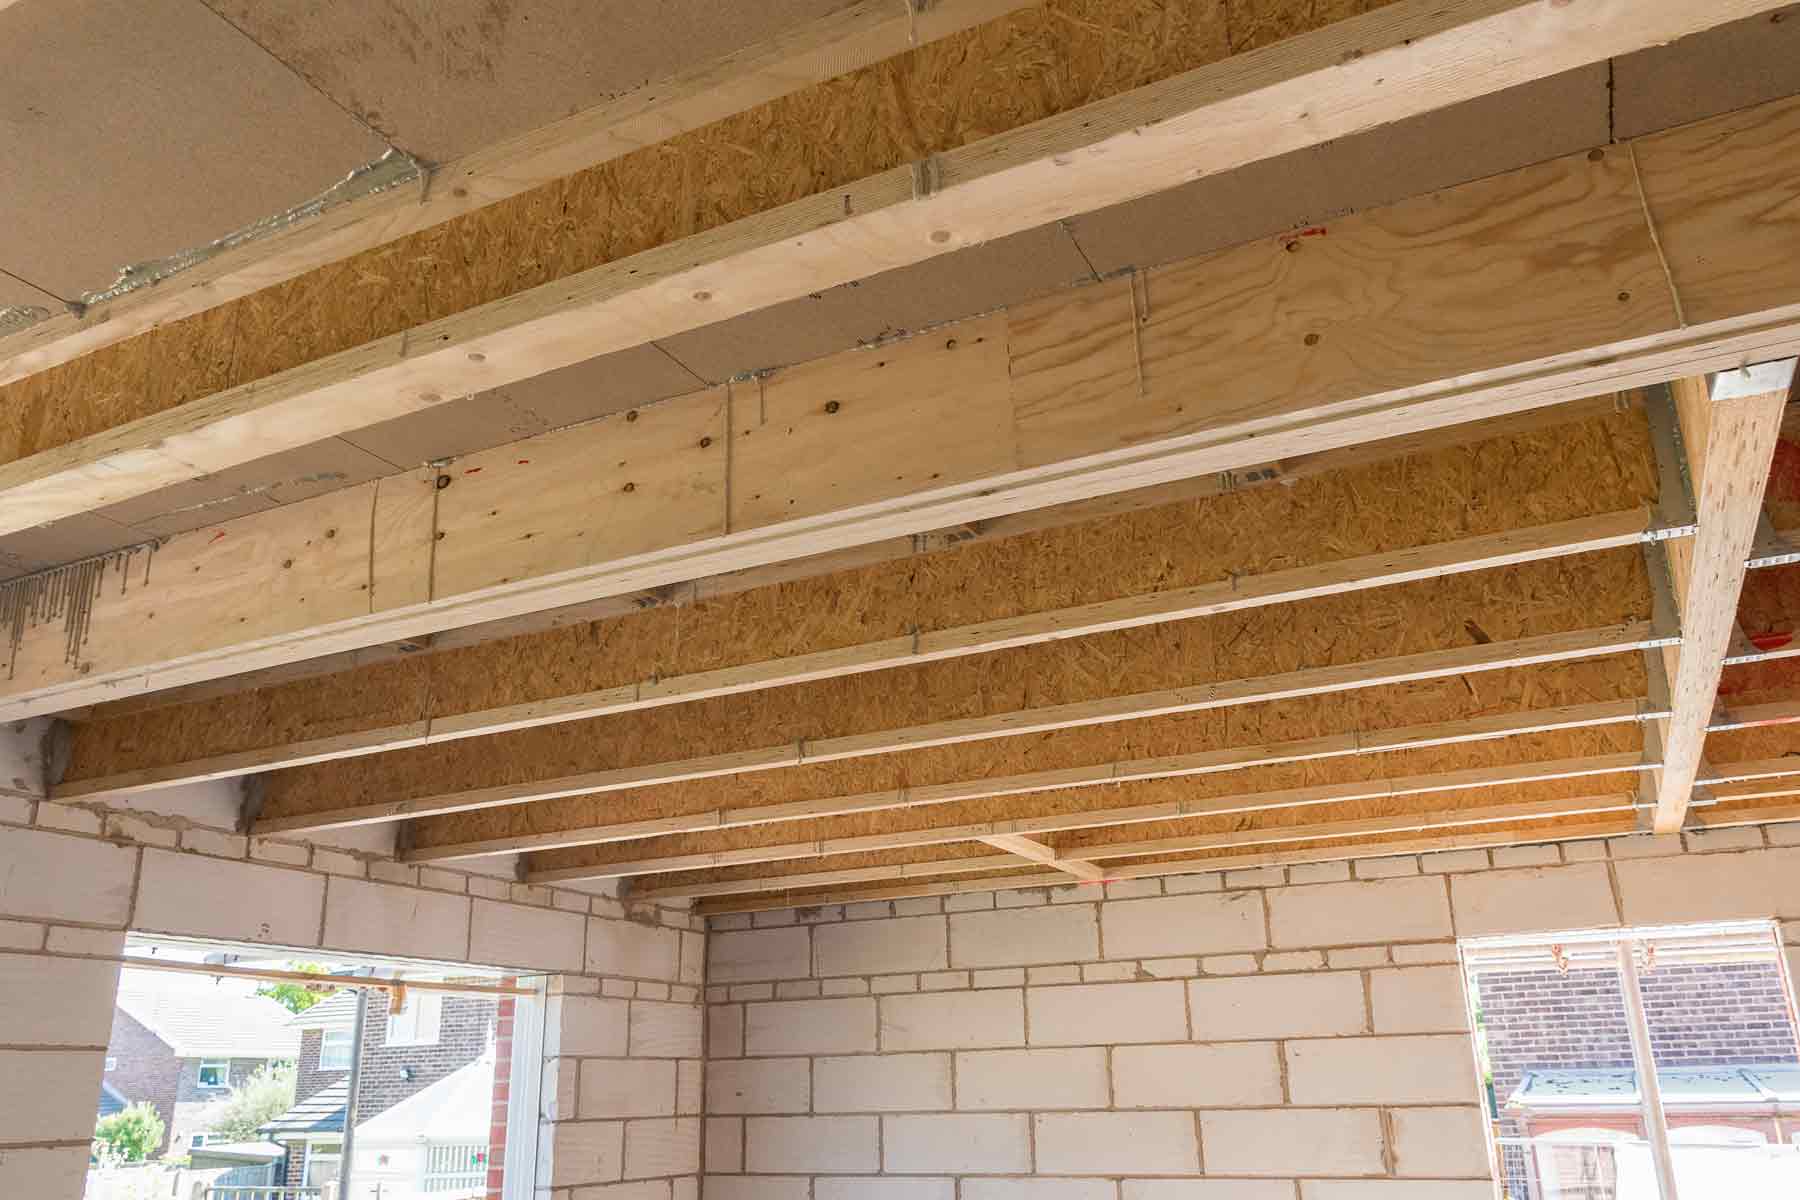
1) Subfloor movement on the joists
Your finished floor (hardwood or engineered wood) sits on top of a subfloor (often plywood or OSB), which is supported by joists. If the subfloor is not firmly fastened, it can flex up and down as you walk. That movement makes the subfloor rub on nails or rub on the joist itself.
2) Loose nails or fasteners
Older floors are often nailed. Over decades of tiny vibrations and seasonal expansion and contraction, nails can back out just enough to lose their grip. Then, instead of holding everything tight, the nail becomes a little metal violin string that squeaks as the wood shifts.
3) Seasonal shrinkage and swelling
Wood is hygroscopic, meaning it absorbs and releases moisture from the air. In dry seasons, boards and subfloors shrink slightly. In humid seasons, they swell. That movement can open up gaps, loosen fasteners, and create wood-on-wood friction in tongue-and-groove flooring or stair parts.
4) Stairs: the classic rub points
Stairs have more joints than a typical floor, so they have more opportunities to complain. Common squeak points include:
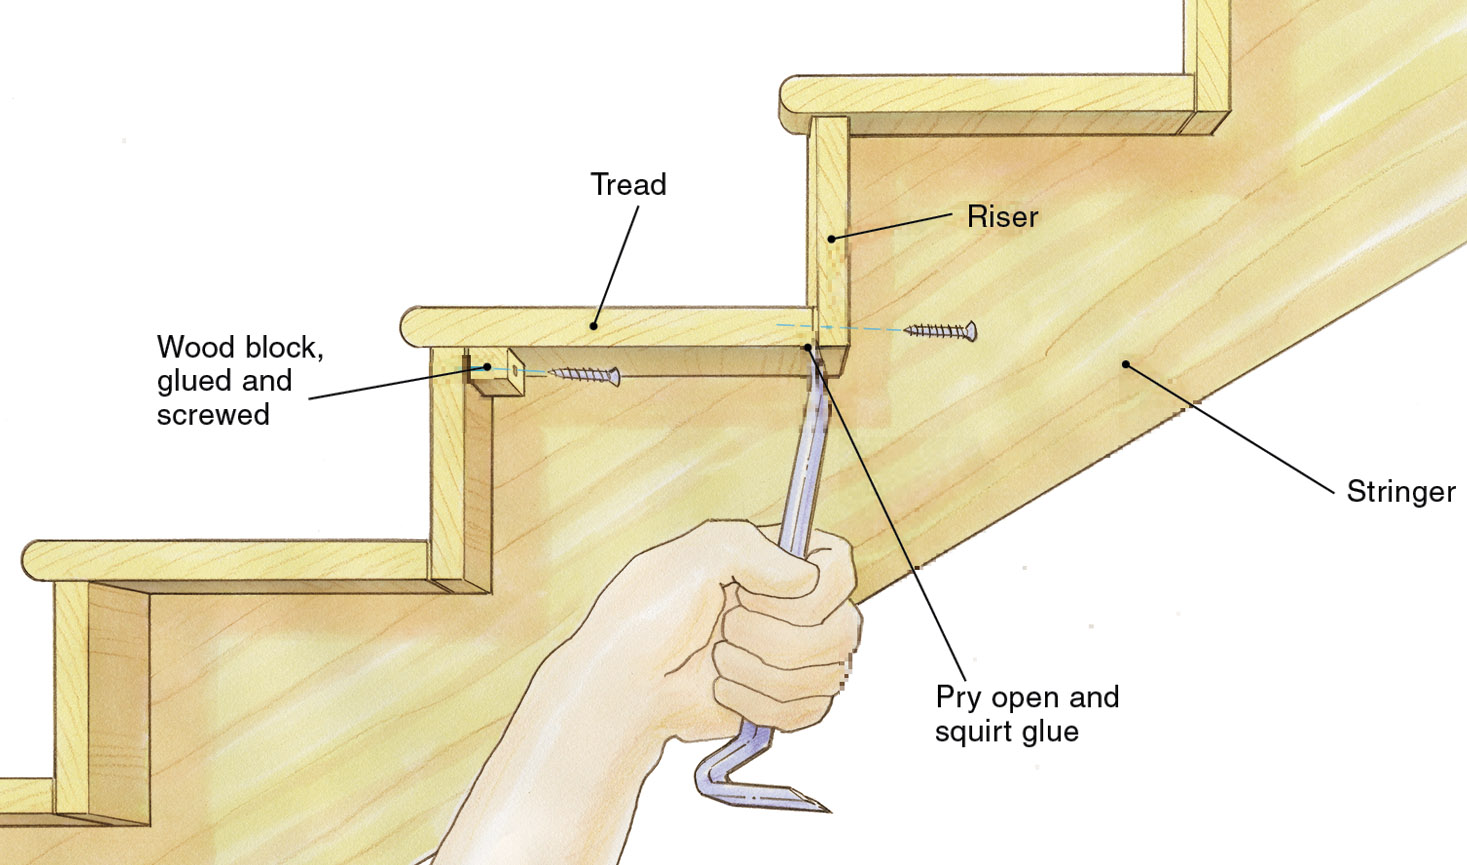
- Tread to stringer: the tread (the part you step on) shifting on the side supports.
- Riser to tread: the vertical board rubbing the underside of the tread.
- Nosing: the front lip of the tread flexing.
- Balusters or newel posts: sometimes the squeak is actually in the railing system, not the step.
Find the squeak before you fix it
If you only take one thing from this article, let it be this: don’t treat the whole floor. Squeaks are specific. The most satisfying fix is the one that targets the exact movement point.
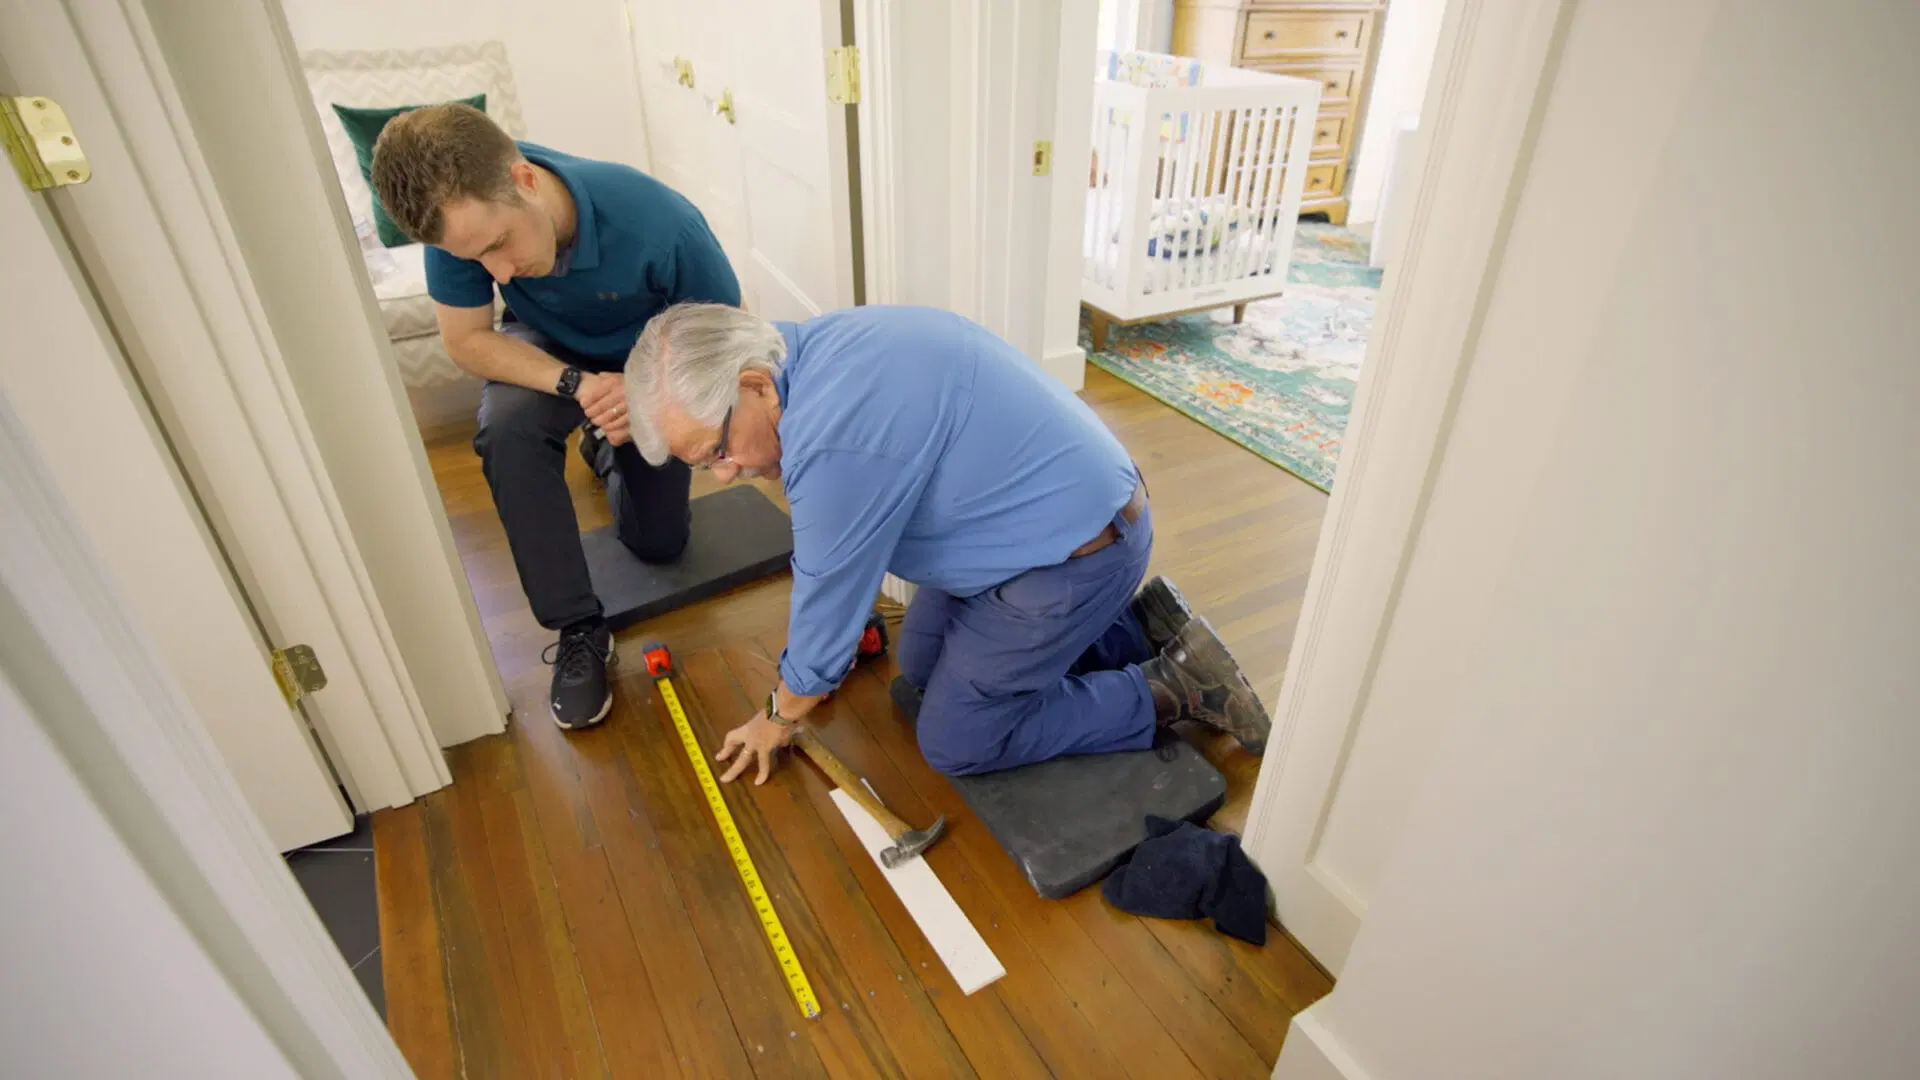
Step 1: Recruit a helper and listen up close
Have one person walk slowly and repeatedly on the squeaky area while the other kneels nearby with a hand on the floor. You are listening, but you are also feeling for movement. Mark the spot with painter’s tape.
Step 2: Map the squeak pattern
Step in these patterns:
- directly over the squeak
- 2 to 4 inches to either side
- along the length of the board
If the squeak appears in a straight line across multiple boards, it often points to a joist line or a subfloor seam. If it is localized to one seam between two boards, it can be tongue-and-groove friction.
Step 3: Identify joist direction (quick, practical methods)
You do not need X-ray vision. Try one of these:
- Look from below: If you have an unfinished basement or crawl space, you can see the joists and their direction immediately.
- Use floor vents or recessed openings: Sometimes you can peek beside a vent boot or plumbing cutout to see joist direction.
- Tap test: Tapping the floor with a knuckle can sometimes reveal slightly different sounds over a joist versus between joists.
- Stud finder with joist mode: This may help, especially on thinner floor assemblies, but performance is inconsistent. Nails, radiant heat, wiring, pipes, and thicker flooring can confuse it, so treat it as one clue, not the final answer.
Tools and materials (quick list)
- Painter’s tape and a pencil
- Flashlight or headlamp
- Drill/driver and bits
- Trim-head screws or flooring screws (and a few longer structural screws for blocking, if needed)
- Wood shims and construction adhesive
- Small wood block or metal angle bracket (optional for reinforcement)
- Soft brush, vacuum, and a barely damp cloth
- Wax stick or color-matched wood filler (for small holes)
DIY fixes to try first (in order)
Start with the least invasive option. If it works, stop there. Your floors will thank you.
Fix #1: Tighten what is already loose (best with underside access)
When it works: subfloor is lifting slightly off a joist, or stairs have gaps at joints, and you can reach the underside from a basement, crawl space, or under-stair access panel.
What you will do: eliminate movement by closing gaps and adding support, not by forcing pieces into alignment with brute strength.
- Find the exact squeak spot from below. Have your helper step on the squeaky area while you watch for movement and listen.
- Look for gaps. Common ones are between joist and subfloor, or between stair tread and stringer.
- Add a wood shim with construction adhesive. Spread a small amount of adhesive on the shim, then gently tap it into the gap until snug. Stop before you jack the floor up.
- Optional upgrade: add a small wood block or a metal angle bracket to reinforce the joint, screwed into framing members.
Tips from my own old-house life: Go slow. A shim that is too aggressive can create a visible hump above, and that is the kind of “fix” that haunts you every time the light hits it.
Fix #2: Add screws into the joists (best when you can locate joists)
When it works: the squeak is along a joist line and the subfloor is not tight to the joist. Screws clamp the layers together better than nails.
Before you begin: If your floor is a finished hardwood surface you care about, choose the least noticeable location, and consider whether a tiny filled hole is acceptable. If not, skip to lubrication or underside repairs.
Safety first: Before driving any screw, consider what might be below. Be extra cautious near bathrooms, kitchens, radiators, and around vents where plumbing or wiring may run. If you are unsure, stop and check from below or consult a pro.
How to do it:
- Locate the joist. Use measurements from below, consistent squeak alignment, or a stud finder as a supporting clue. Mark the joist line with painter’s tape.
- Pre-drill a small pilot hole to reduce splitting and keep the screw tracking straight into the joist.
- Drive a trim-head screw long enough to go through the flooring and subfloor and bite well into the joist.
- Stop when snug. Over-driving can dimple the wood.
- Fill if needed. Use a color-matched wood filler or wax stick for tiny holes, especially near edges.
Important: Do not guess at joists. If the screw does not bite the joist, it may not help and can sometimes create new noise by adding a fresh rubbing point.
Fix #3: Use breakaway squeak-repair screws (low-visibility option)
When it works: you need to secure a squeaky spot from above but want minimal visual impact.
Specialty squeak-repair kits use scored screws that snap off below the surface. They are designed to pull the flooring tight to the subfloor or joist, then leave a tiny, easier-to-hide divot.
- Follow the kit instructions precisely, especially depth control.
- Test in a closet or low-traffic corner if you are nervous about finish matching.
If you have carpet: Many kits are designed to work right through carpet. You drive the screw through the carpet and pad into the subfloor or joist, then snap it off below the surface so the carpet fibers spring back and hide the spot. You usually do not need to pull up the carpet to try this.
Note: These work best when the squeak is from vertical movement. If the issue is boards rubbing side-to-side, you will want lubrication instead.
Fix #4: Lubricate tongue-and-groove seams (when it is wood-on-wood)
When it works: the noise comes from two boards rubbing, especially during dry months, and you do not feel a lot of bounce underfoot.
Safe, gentle options:
- Baking soda swept into the seam
- Powdered graphite worked into the seam (effective, but it can darken light floors)
- Cornstarch-based baby powder as a talc-free alternative
- Paraffin wax rubbed lightly along a squeaky seam (test first)
Step-by-step:
- Vacuum the seam so the powder does not mix with grit.
- Sprinkle a small amount of powder over the seam.
- Work it in with a soft brush, then walk over the area to help it settle.
- Wipe excess with a barely damp cloth, then dry.
A quick caution: Avoid oily sprays on finished wood floors. They can discolor, attract dust, and create a slick spot that is not cute in socks. Also, any powder can leave a visible residue if you overdo it, so start small.
Stairs: targeted fixes that hold
Stairs are often where squeaks go from “mildly annoying” to “I can hear you sneaking to the kitchen.” The best stair fixes depend on access.
If you can access the underside
- Shim tread-to-stringer gaps: adhesive plus shim, tapped snug.
- Add glue blocks: small triangular wood blocks glued and screwed between tread and riser or tread and stringer to stiffen the joint.
- Secure risers: if a riser is loose, re-fastening it to framing can eliminate a surprising amount of noise.
- Check for loose wedges: On some stair styles, small wedges lock parts together. If they have backed out, re-securing them (often with wood glue) can be a quiet miracle.
If you cannot access the underside
- Fasten from above in discreet places: screws near the back of the tread (close to the riser) are sometimes easier to hide than at the nosing.
- Try careful adhesive at the joint: If you can spot a tiny gap where tread meets riser, a small bead of wood glue worked into the crack and clamped by body weight can reduce rubbing. Wipe squeeze-out immediately and do a test spot if finish is precious.
- Check railing parts: tighten balusters and newel post fasteners if the squeak seems to come from the side.
What not to do
- Do not drown the floor in oil-based sprays. They can stain, soften some finishes, and create slippery patches.
- Do not keep hammering nails down. Nails tend to loosen again. Screws hold better for squeak control.
- Do not force massive shims into tiny gaps. If you lift the floor, you can create a ridge or crack plaster nearby.
- Do not ignore moisture. If the squeak appeared suddenly alongside cupping, swelling, or a musty smell, stop and investigate.
When a squeak is a bigger warning
Most squeaks are harmless. But sometimes they are a little smoke alarm for a moisture or structural issue. Call a pro, or at least do a deeper inspection, if you notice:
- Soft or spongy spots that feel like the floor is giving way
- New squeaks after a leak (dishwasher, refrigerator line, roof, window, bathroom)
- Visible water staining on ceilings below or on baseboards nearby
- Persistent musty odor or signs of mold in a basement or crawl space
- Wide, growing gaps between boards or at stair joints beyond normal seasonal change
- Cracks that are spreading in plaster or drywall near stairs or along a sagging floor line
- Widespread bounce or deflection across a room, or squeaks that suddenly multiply across multiple areas
If any of these are present, the fix is not just silence. It is protecting the structure of your home.
A calm plan for a quieter home
If you want the simplest path: start by pinpointing the squeak, then choose the least invasive fix that matches the cause. Lubricate seams when it is wood-on-wood. Shim and reinforce from below when you can access it. Screw into joists when movement is vertical and you can locate framing confidently.
And if your floor still squeaks after a couple of smart attempts, do not take it personally. Some homes are like old friends. A little creaky, a little dramatic, and worth caring for the right way.