Spray Paint Brass Hardware Like It Came From a Showroom
Clara Townsend
Clara Townsend is an interior stylist, vintage furniture enthusiast, and the creative voice behind Velvet Abode. With over a decade of experience transforming both cramped city apartments and sprawling fixer-uppers, she believes that a beautiful home is built on personal stories rather than massive budgets. When she isn't hunting for the perfect brass sconce at a local flea market, she can usually be found rearranging her living room for the third time this month.
There is a certain kind of “tired brass” that shows up in older kitchens and bathrooms. Not the gorgeous, aged, European kind. I mean the orangey lacquered knobs with mystery smudges that never fully clean up, plus hinges that squeak like they are auditioning for a haunted house.
The good news is you do not have to replace every knob and hinge to get a fresh, modern look. With the right prep and a few small pro moves, spray paint can make inexpensive, outdated hardware look like you ordered it from a boutique fixture shop.
What makes brass hardware tricky
Brass and brass plated hardware are often coated in clear lacquer, hand oils, and cleaning residue. Spray paint hates all three. The “pro” finish is not magic paint. It is mostly cleaning, scuffing, and priming so the color coat can grab on and cure hard.
- Lacquer can make paint bead or peel.
- Finger oils cause fisheyes, those little craters that show up as the paint dries.
- Smooth metal needs tooth, meaning a lightly sanded surface, or a primer that bites.
Supplies that actually matter
You do not need a workshop, but you do need the right products. These are the ones that make the biggest difference in durability and smoothness.
Shopping list
- Dish soap and hot water
- Degreaser or isopropyl alcohol (70 to 91 percent)
- Scuff pad or 320 to 400 grit sandpaper
- Adhesion primer made for glossy surfaces or metal (spray)
- Spray paint in your finish of choice (matte, satin, etc.)
- Optional: spray clear coat (especially helpful for high-touch knobs)
- Nitrile gloves
- Painter’s tape and a marker for labeling
- Cardboard or a drop cloth
- Wood screws or bamboo skewers to “lift” pieces for 360-degree coverage
Clara note: If your hardware is in a kitchen that gets a lot of love, I strongly prefer an adhesion primer plus a durable topcoat. The paint job will feel less precious and more like real hardware.
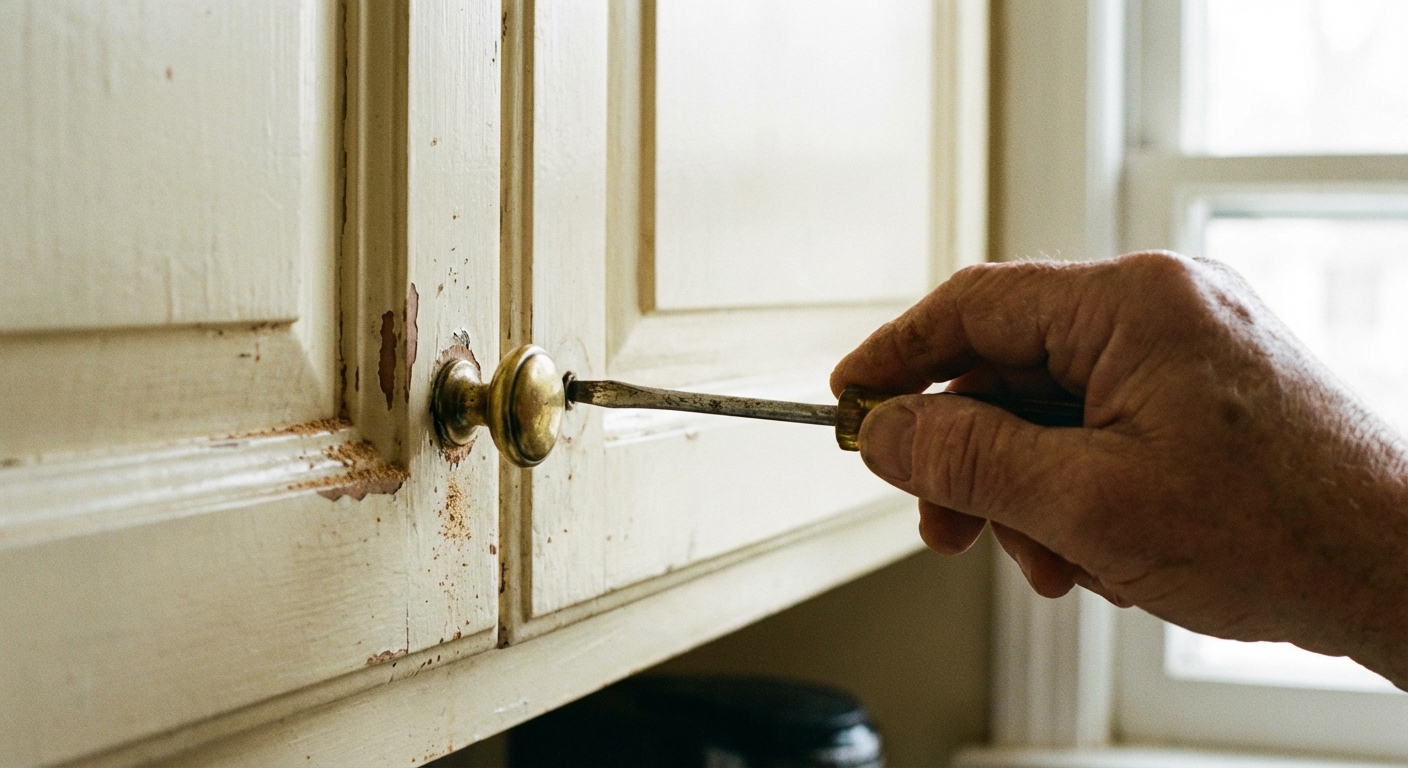
Step 1: Remove and label like a calm person
Take everything off, even if it feels tempting to “just paint them on the doors.” Overspray has no respect for your plans.
- Put screws in labeled baggies (Top Left Drawer, Sink Base, etc.).
- If hinges are involved, keep each hinge with its door. Small variations add up.
- Snap a quick photo of any weird hinge situation before you remove it.
Step 2: Deep clean until the water test passes
This is the unglamorous step that makes the glamorous step work.
How to clean
- Wash hardware in hot, soapy water. Use an old toothbrush for crevices.
- Rinse well and dry completely.
- Wipe down with isopropyl alcohol or a degreaser using a lint-free cloth.
The water test
Drip a little water on the metal. If it sheets evenly, you are clean. If it beads up in little circles, there is still oil or residue. Clean again.
Step 3: Scuff sand for a silky finish
You are not trying to remove the finish down to bare metal. You are giving the surface a gentle grit so primer can hang on like it means it.
- Use 320 to 400 grit sandpaper or a fine scuff pad.
- Sand lightly, especially around edges and high-touch areas.
- Wipe away dust with alcohol or a tack cloth. Let dry.
If you see peeling lacquer or flaky plating, sand those areas until they are smooth. Any raised edge will telegraph through the paint like a wrinkle under satin sheets.
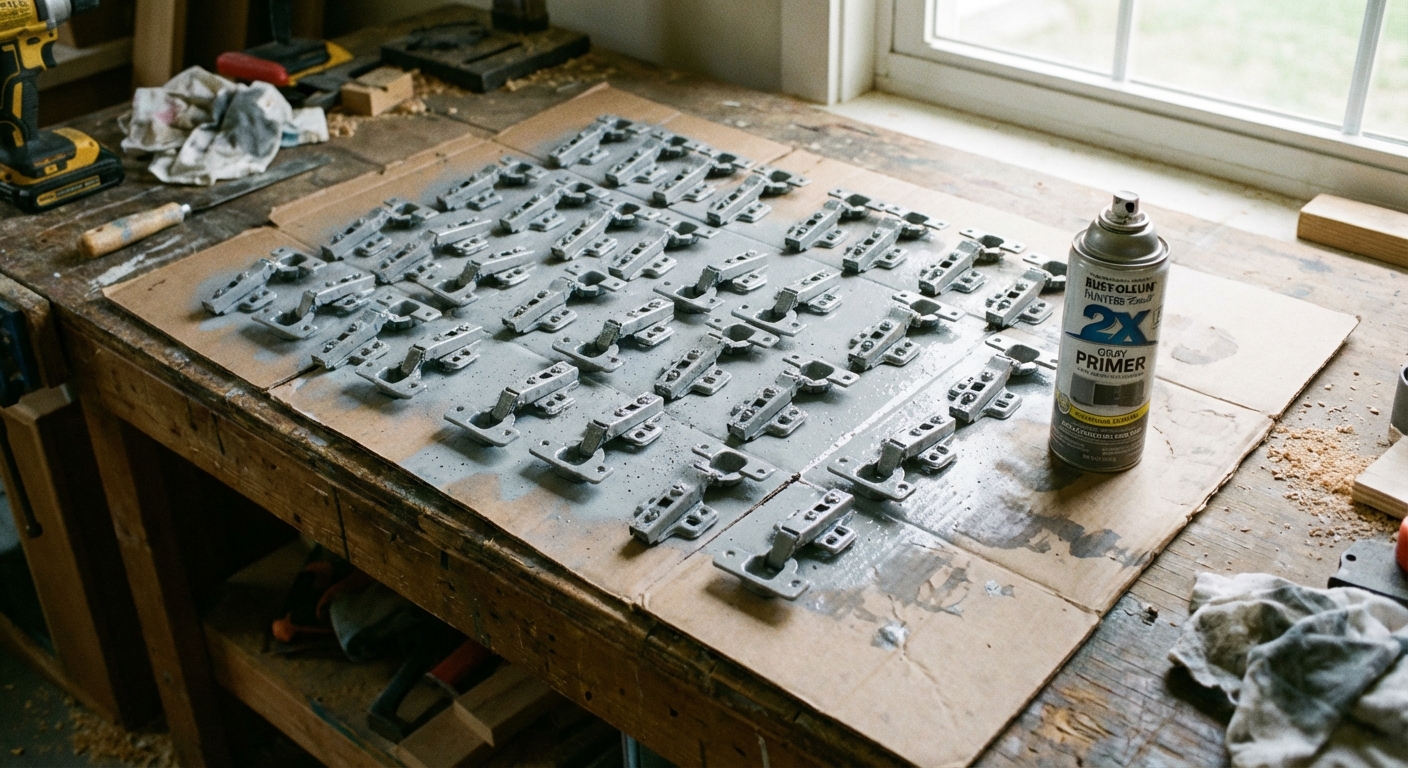
Step 4: Prime like you want it to last
An adhesion primer is the secret handshake for painting shiny hardware. It helps the paint bond and reduces chips later.
Set up a spray station
- Work in a well-ventilated area, ideally 60 to 80°F with low humidity.
- Lay hardware on screws stuck through cardboard, or on skewers, so you can coat edges.
- Wear gloves so you do not re-oil the pieces.
How to spray primer
- Shake the can for the full time listed, usually 1 to 2 minutes.
- Hold 8 to 12 inches away.
- Spray thin coats, moving past the piece before you start and after you stop.
- Do 1 to 2 coats, following recoat times on the can.
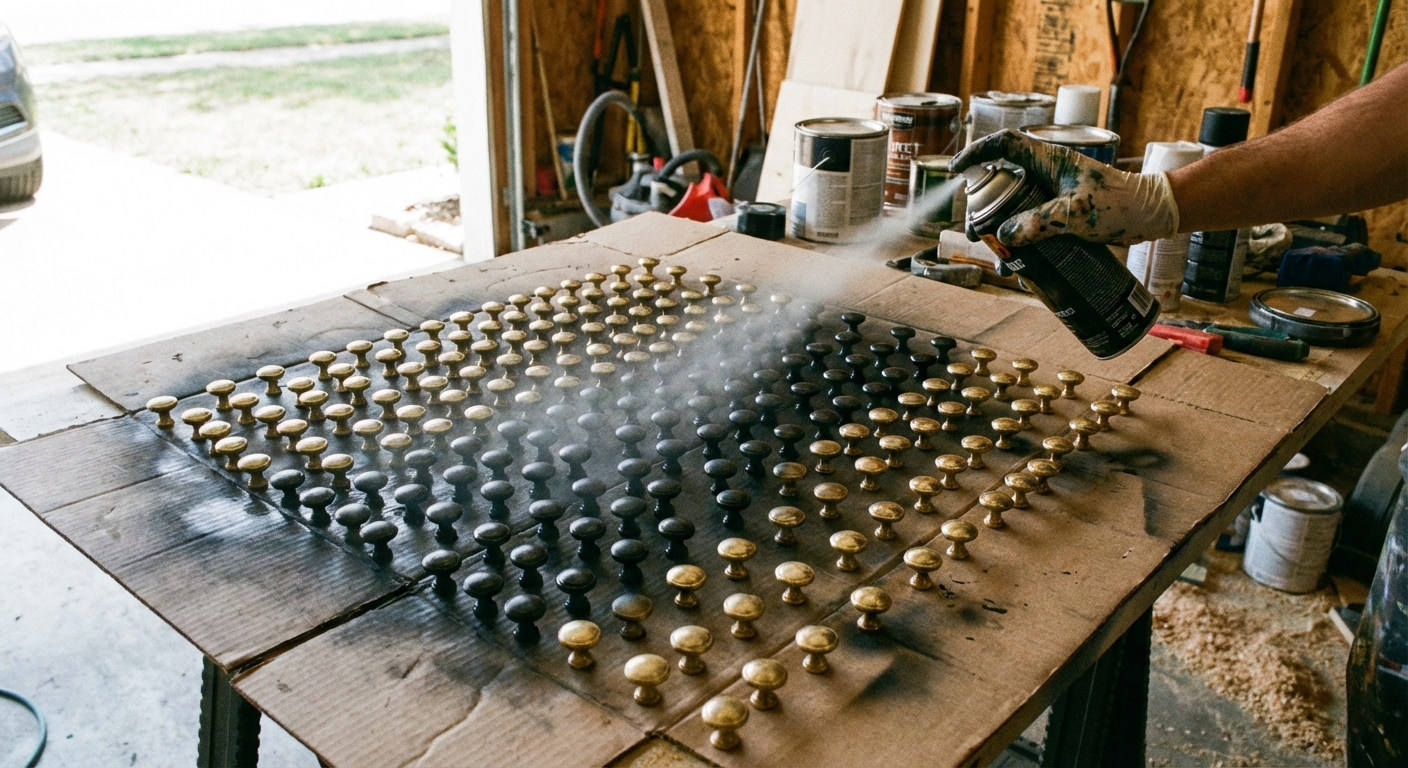
Step 5: Spray paint with the “mist coat” method
If you want that expensive, powder-coated look, the goal is multiple whisper-thin layers, not one thick coat that looks good for five minutes and then runs.
The method
- First coat: a light mist coat. It will look a little speckled. That is good.
- Wait the recommended time, often 5 to 10 minutes.
- Second coat: a slightly wetter coat, still thin.
- Third coat (optional): another thin coat for full coverage and depth.
Pro spraying tips
- Keep the can moving at a steady pace.
- Rotate the hardware between coats to get edges and undersides.
- If you see a run forming, do not chase it with more paint. Let it dry, then sand that spot smooth and respray lightly.
Finish choice: Satin tends to look the most like real hardware in real life. Matte is gorgeous but can show oils sooner. Gloss highlights every tiny bump, so it is less forgiving unless your prep is immaculate.
Optional but worth it: Clear coat for kitchens and kids
Clear coat is not mandatory for every project, but it is a lifesaver for high-touch knobs and pulls. Think of it like a topcoat for your nails, but less dramatic and far more practical.
- Make sure your color coat is fully dry within the recoat window.
- Use a compatible clear, often from the same brand system.
- Spray 1 to 2 thin coats.
If you are doing a darker finish like matte black, clear coat can also make the surface feel smoother and easier to wipe down.
Dry time, cure time, and when to reinstall
This is where most “looks great, then chips” stories begin. Paint can feel dry to the touch quickly, but curing takes longer.
- Dry to touch: often 30 to 60 minutes (varies by product and conditions)
- Handle gently: after a few hours, if the can says it is safe
- Reinstall: I like to wait 24 hours if possible
- Fully cured: commonly 5 to 7 days
For the first week, treat your newly painted hardware kindly. Avoid harsh cleaners and wipe with a soft, damp cloth only.
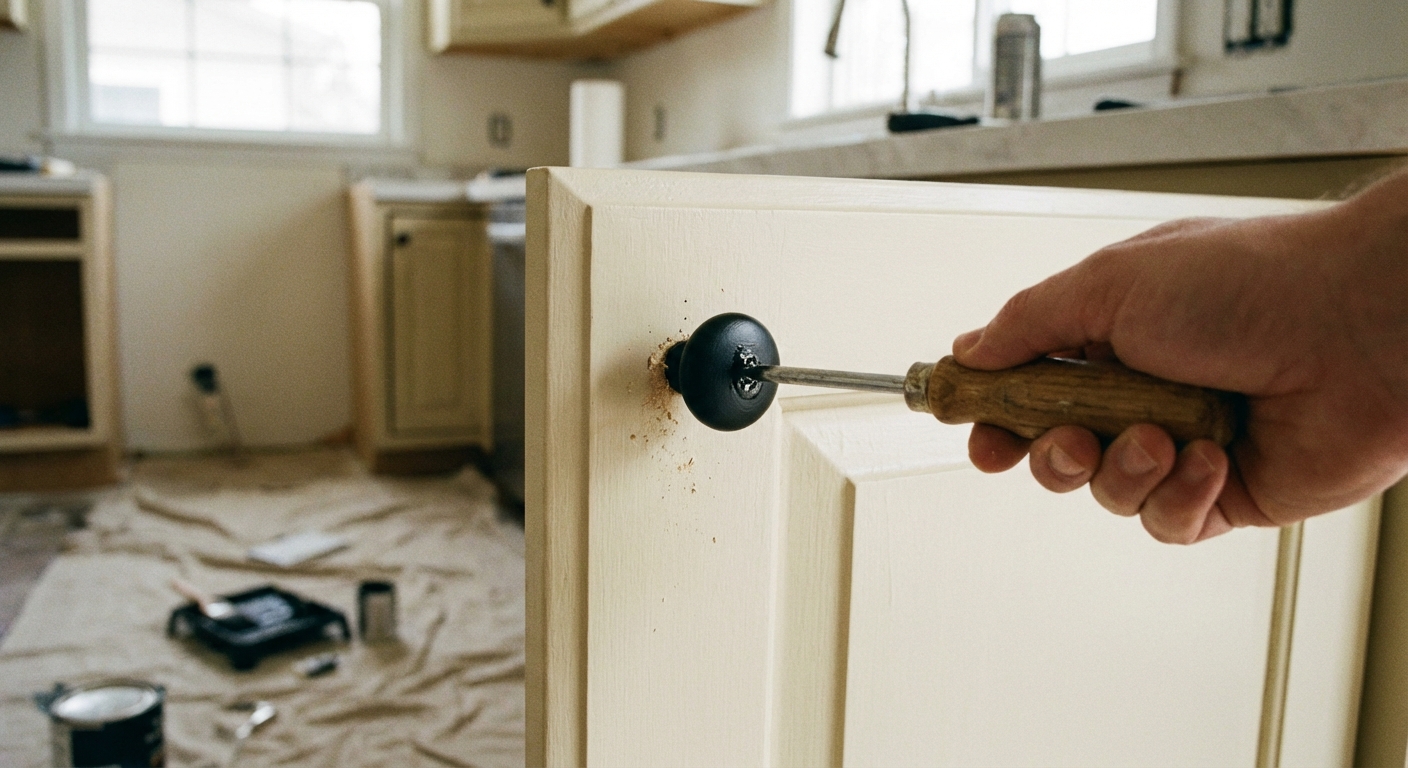
Reinstall without wrecking your new finish
Freshly painted knobs can chip if you attack them with a screwdriver like you are building a deck.
- Use a manual screwdriver, not a drill, for better control.
- Place a piece of painter’s tape over the hardware while tightening, then peel it off.
- Tighten until snug, not “I am angry at this cabinet” tight.
Troubleshooting: what went wrong and how to fix it
Fisheyes or craters in the paint
Cause: oil or residue. Fix: let it dry, sand smooth, wipe with alcohol, then respray thin coats.
Peeling or scratching easily
Cause: skipped primer or poor scuff sanding. Fix: strip or sand back to stable finish, then adhesion primer plus color coats.
Orange peel texture
Cause: spraying too far away, too cold, or too heavy. Fix: sand lightly with 400 grit once dry, then respray closer with lighter passes.
Runs and drips
Cause: too much paint in one spot. Fix: do not touch it while wet. Let dry fully, sand the drip flat, then repaint.
Choosing a “modern” hardware color that still feels timeless
If your goal is “expensive modern hardware,” pick a finish that plays well with your cabinet color and your lighting.
- Soft black (matte or satin): crisp, graphic, and forgiving with mixed metals.
- Warm bronze: a cozy alternative to black, especially with creamy cabinets.
- Brushed nickel look: cleaner than shiny chrome, great for cooler palettes.
- Muted brass (painted): if you love warmth but hate the orange tone, choose a softer, antique-leaning brass color.
My best friend rule: repeat the finish at least twice in the room. Maybe on a faucet, a light fixture, or even a mirror frame. That little echo makes it feel intentional, not like a one-off experiment.
When you should replace instead of paint
Spray paint is wonderful, but it is not a miracle for every situation.
- If hinges are bent, stripped, or sagging, replace them.
- If knobs are pitted or deeply corroded, paint can highlight the texture.
- If the shape is the real issue, like very ornate knobs and you want sleek, use paint as a temporary fix while you shop.
A home is allowed to evolve. Sometimes paint is the “right now” solution that buys you time, and honestly, that is still a win.
Quick checklist for a pro finish
- Remove and label everything
- Wash, degrease, and pass the water test
- Scuff sand and wipe clean
- Adhesion primer in thin coats
- Mist coat, then build color slowly
- Optional clear coat for durability
- Let it cure before heavy use
If you try this, you will be shocked at how much lighter a kitchen feels when the hardware stops reading as “builder basic from 1998.” Your cabinets did not change, but the whole room suddenly looks more intentional. Like you meant it. Like it has a point of view.