Spot-Cleaning Performance Fabrics Without Water Rings
Clara Townsend
Clara Townsend is an interior stylist, vintage furniture enthusiast, and the creative voice behind Velvet Abode. With over a decade of experience transforming both cramped city apartments and sprawling fixer-uppers, she believes that a beautiful home is built on personal stories rather than massive budgets. When she isn't hunting for the perfect brass sconce at a local flea market, she can usually be found rearranging her living room for the third time this month.
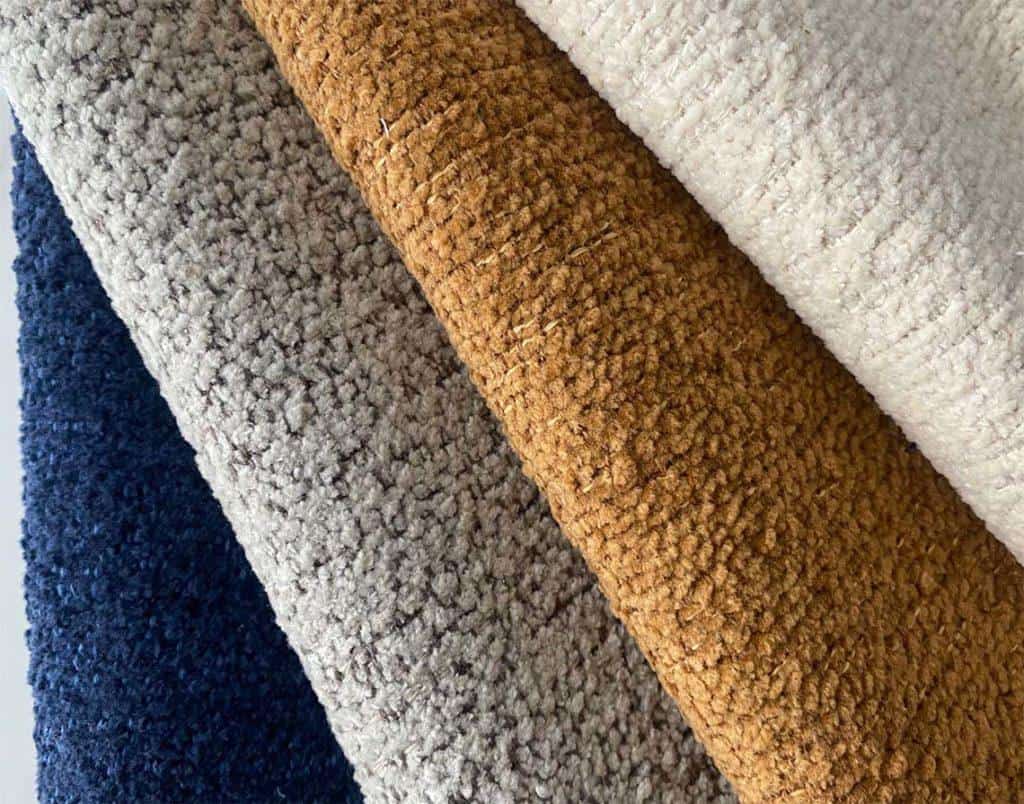
Performance fabrics like Crypton, InsideOut, Revolution, and other “family-friendly” upholstery textiles are wonderfully forgiving, but they are not magically immune to water rings. The irony is that many rings are created by the cleaning attempt, not the original spill.
If you have ever watched a small spot turn into a faint halo that only shows up when the light hits it sideways, this is for you. I am going to walk you through the rules I use in real homes with real pets, real kids, and yes, real beige sofas. No gatekeeping, no fancy jargon. Just the steps that keep the fabric looking even and calm.
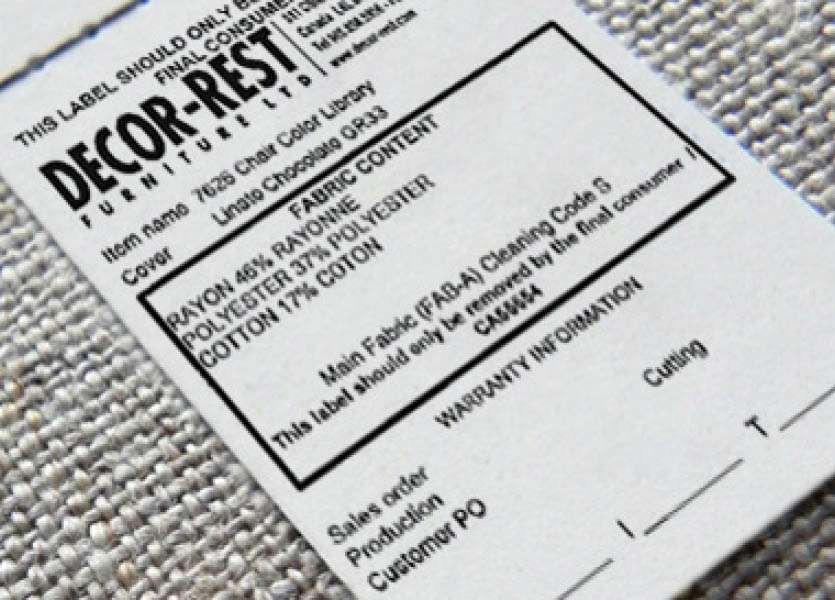
Read the label first
Most water-ring problems start with a well-meaning assumption: “It is performance fabric, so water is fine,” or “It is a couch, so I will use an upholstery shampoo.” Before you touch anything, find the care information and treat it like a tiny instruction manual.
One important caveat: care codes and tag systems are common, but not universal. Always follow your specific manufacturer’s directions (and any fabric brand guidance) even if the code looks familiar.
Where to look
- Manufacturer care tag under a seat cushion or along the deck.
- Brand brochure that came with the sofa or fabric card.
- Retailer product page for the exact upholstery name and colorway.
Common code assumptions
- “W” does not mean “scrub with water.” It usually means water-based cleaners are allowed, but you still need controlled moisture and even drying.
- “S” does not mean “no liquid ever touches this.” It means solvent-based cleaning methods are typically recommended, and water can leave marks.
- “WS” is not a free-for-all. You can use either approach, but the gentle approach still matters.
- “X” means vacuum only. If you spot-clean anyway, you are taking on the risk.
With branded performance fabrics, there is an additional layer: the finish system. Many are engineered to resist stains, but the face fiber, backing, and any moisture barrier can respond differently to overwetting. That is why two “performance” sofas can behave totally differently during cleaning.
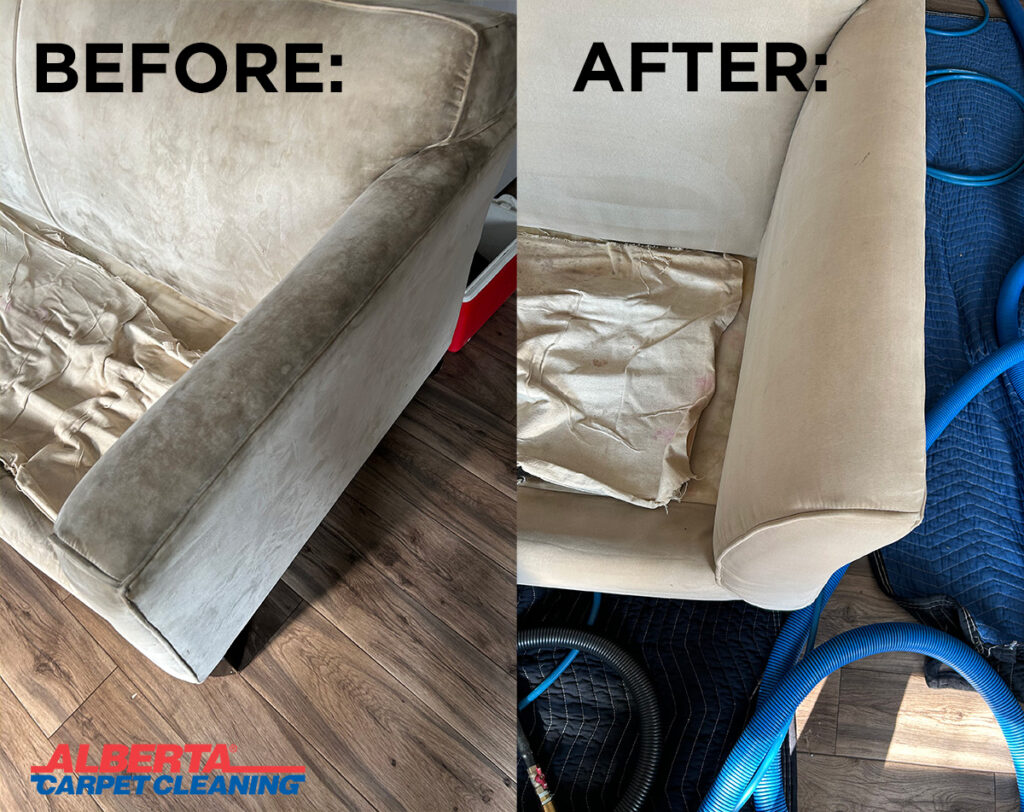
Why rings happen
Let us demystify the halo. A water ring is usually one of these situations, or a combo:
- Uneven wetting: the center gets wet, the edges stay dry, and the boundary dries as a line.
- Soil migration: moisture pulls tiny particles outward as it dries, depositing them at the edge.
- Cleaner residue: soap that is not fully rinsed attracts dirt later and shows as a dull ring.
- Nap or pile disturbance: on textured weaves or sueded performance fabrics, scrubbing changes how light reflects.
The good news is that the fix is mostly about geometry and restraint, not brute force.
Blotting geometry
If you remember one thing, make it this: you are not cleaning a dot, you are cleaning a zone. The goal is an evenly dampened area that dries evenly.
Rule 1: Blot, do not rub
Rubbing drives the spill deeper, frays fibers, and can polish the surface so it reflects light differently. Blotting lifts.
Rule 2: Outside in
Start blotting at the outer edge of the stain and move inward. This keeps you from pushing the spill outward and enlarging the ring zone.
Rule 3: Feather past the edge
This is the part people skip. If the stain area is 2 inches wide, your controlled damp zone might be 4 to 6 inches wide. You are creating a soft gradient of moisture rather than a sharp border.
Rule 4: Use clean cloth faces
Use white microfiber or white cotton. Fold it into quarters. Each blot uses a fresh, clean section. If you keep pressing with a dirty section, you re-deposit what you just lifted.

Water vs. detergent
I know it is tempting to go straight to soap. But on many performance fabrics, detergent is what creates the second problem, especially if it is not fully rinsed out.
Start with distilled water when:
- The stain is fresh and water-based (coffee, juice, soda).
- You see a faint ring from a previous cleaning attempt.
- The fabric looks slightly dull or “tide-marked” after a spill.
- You do not know what cleaner was used before.
Why distilled? Tap water minerals can dry into faint outlines, especially with hard water, light colors, and certain textures. Distilled water removes the variables.
Use a mild detergent solution when:
- The spot is oily or sticky (salad dressing, body oils, greasy fingerprints).
- The stain has dried and water alone does nothing.
- The manufacturer explicitly recommends a water-based upholstery cleaner.
Mix gently: a few drops of a plain, clear, dye-free, no-lotion, no-bleach dish soap in a cup of distilled water is usually plenty for a small spot. If you have a purpose-made upholstery detergent approved for your fabric, that is often the safer choice. More soap means more residue and more rinsing, which means more water, which means more chance of a ring.
Always rinse after detergent
This is the unglamorous step that saves you later. Blot with your detergent mix, then blot with distilled water to lift the soap back out, then blot dry. If you skip the rinse, you can get a “clean looking” spot that turns into a grayish outline a week later.
Repeat-cycle method
Performance fabrics respond best to short, repeated cycles. Think of it like hair care: gentle shampooing twice beats one aggressive scrub.
What to do
- Dry blot first: Press a dry cloth to lift as much as possible.
- Lightly dampen the cloth, not the fabric: Put distilled water (or your solution) onto the cloth. Avoid pouring onto the upholstery.
- Blot a controlled zone: Outside-in, feathering past the edge.
- Rinse blot: Use a fresh cloth with distilled water to remove cleaner residue (needed any time you used soap or a cleaner).
- Dry blot: Press firmly with a dry towel to pull out moisture.
- Airflow dry: Use a fan aimed across the surface, not a heat blast.
How to tell you overwet
- The cushion feels wet through, not just slightly damp on the surface.
- You can press and see water transfer easily to your hand.
- The damp zone keeps spreading on its own.
- The fabric looks darker for more than an hour in normal airflow.
If you crossed into “too wet,” do not panic. Keep blotting with dry towels and get airflow on it immediately. The faster you bring the moisture level down evenly, the less likely a ring becomes.
Drying matters
Some cushion interiors hate slow drying. Foam, down blends, and certain natural fibers can hold moisture longer than you think, and that can lead to odor, mildew, or a stubborn shadow that keeps coming back.
- If you can, stand the cushion on its edge so air can reach more than one side.
- If there is a zipper and the manufacturer allows it, you can open the cover slightly to help moisture escape. Do not force anything, and do not remove covers that are not meant to be removed.
- Get airflow under the cushion too, not just across the top.
Stain tweaks
Coffee, tea, red wine
- Blot dry immediately.
- Distilled water blot, then repeat.
- If color remains, move to a tiny amount of mild detergent solution, then rinse.
Grease and makeup
- Do not add a lot of water first.
- Use a small amount of detergent solution on the cloth, blot repeatedly.
- Rinse with distilled water blotting, then dry blot.
Pet accidents
- Blot dry thoroughly first.
- Use a manufacturer-approved enzyme cleaner if permitted for your fabric system.
- Follow the product directions for dwell time, and do not let it dry on the fabric.
- Rinse with distilled water to prevent residue rings (if your fabric system allows water).
- Dry with heavy towels and airflow.
For any bodily-fluid situation, test cleaner compatibility first. Some performance finishes handle enzymes beautifully, others can dull if left too long or if residue remains.
Test safely
Patch testing does not have to be dramatic. Choose a hidden area like the back lower edge or under a cushion overhang.
- Use the exact cloth, exact solution, and exact blotting method you plan to use.
- Let it fully dry before judging. Some fabrics look perfect damp and weird when dry, or the reverse.
- Check for texture change by viewing from multiple angles in daylight.
If the test area dries with a dark edge, sheen shift, stiffness, or color loss, stop and contact the manufacturer or retailer for guidance before you do the visible area.
Fix an existing ring
Most rings are an “edge” problem. The fix is usually to even out the moisture gradient and dry evenly.
What I do at home
- Lightly dampen a clean cloth with distilled water.
- Blot the entire ring zone, feathering beyond the visible edge.
- Use a second cloth to dry blot thoroughly.
- Set a fan to move air across the area until fully dry.
This feels wrong the first time because you are re-wetting an area you are mad at. But done lightly and evenly, it is often the simplest way to erase that hard line.
Tools and products
Helpful
- White microfiber cloths or white cotton towels
- Distilled water in a small spray bottle (spray the cloth, not the sofa)
- A soft-bristle upholstery brush for restoring texture after drying, used gently
- A fan for faster, even drying
I avoid most of the time
- Colored towels: dye transfer is a real heartbreak.
- Heat tools: hair dryers can create fast edge drying and set a ring line.
- Heavy foam cleaners: too much residue unless you rinse well.
- Overzealous machines: spot extractors can be amazing, but only if you know how to avoid soaking the cushion core and leaving detergent behind.
Common DIY liquids to be careful with
These show up in a lot of internet advice, and sometimes they work. Sometimes they permanently change color or finish. Unless your manufacturer explicitly approves them for your specific fabric, I treat these as “not my first choice” products:
- Bleach
- Hydrogen peroxide or oxygen cleaners
- Vinegar
- Rubbing alcohol
If your tag says “S”
If your fabric is coded “S,” skip the water experiments. Water can create rings and can push some soils deeper.
What to do instead
- Vacuum first (dry soil removal makes everything easier).
- Blot gently if there is liquid, but keep moisture to an absolute minimum.
- Use only a manufacturer-approved solvent cleaner if you have one and the directions are clear.
- Call a pro for anything larger than a small spot, especially on light fabric.
Solvent safety: If you use any solvent product, ventilate well, keep it away from flames and heat sources, and follow the label exactly. When in doubt, this is the moment to outsource.
Warranty notes
Branded performance fabrics often come with strong warranties, but they also come with specific documentation expectations. If something feels “off” like premature pilling, delamination, discoloration, or a finish that seems to fail too easily, start a simple paper trail.
What to document
- Photos in consistent light: Take one wide shot of the whole piece and one close-up. Morning indirect daylight is best.
- A timeline: Note purchase date, delivery date, and when you first noticed the issue.
- Cleaning details: Write down what you used (distilled water, mild dish soap, brand cleaner), how much, and whether you rinsed.
- Room conditions: If the sofa sits in direct sun or near a vent, note it. UV and airflow matter.
- Fabric name and lot info: Save the tag, receipt, and any fabric card information.
Keep it calm and factual. Warranty teams respond best to clear, consistent info and photos that show scale and context.
Quick checklist
- Find the care tag and brand guidance for your specific fabric.
- Dry blot first.
- Use distilled water as your default starting point.
- Feather the damp zone beyond the stain edge.
- If you use detergent, rinse with distilled water afterward.
- Repeat short cycles rather than soaking once.
- Dry thoroughly with towels and airflow, including under the cushion when possible.
If you want a cozy rule of thumb: your sofa should never feel like it took a bath. It should feel like it got a careful, polite dab and then a brisk breeze.
When to call a pro
If the stain is large, the cushion core is soaked, the fabric is coded “S” or “X,” or the piece is under a high-value warranty you do not want to jeopardize, it is worth calling an upholstery cleaning professional who has experience with your brand system.
Ask what products they plan to use, how they avoid overwetting, and whether they will do a discreet test patch first. A confident pro will not be offended by those questions.