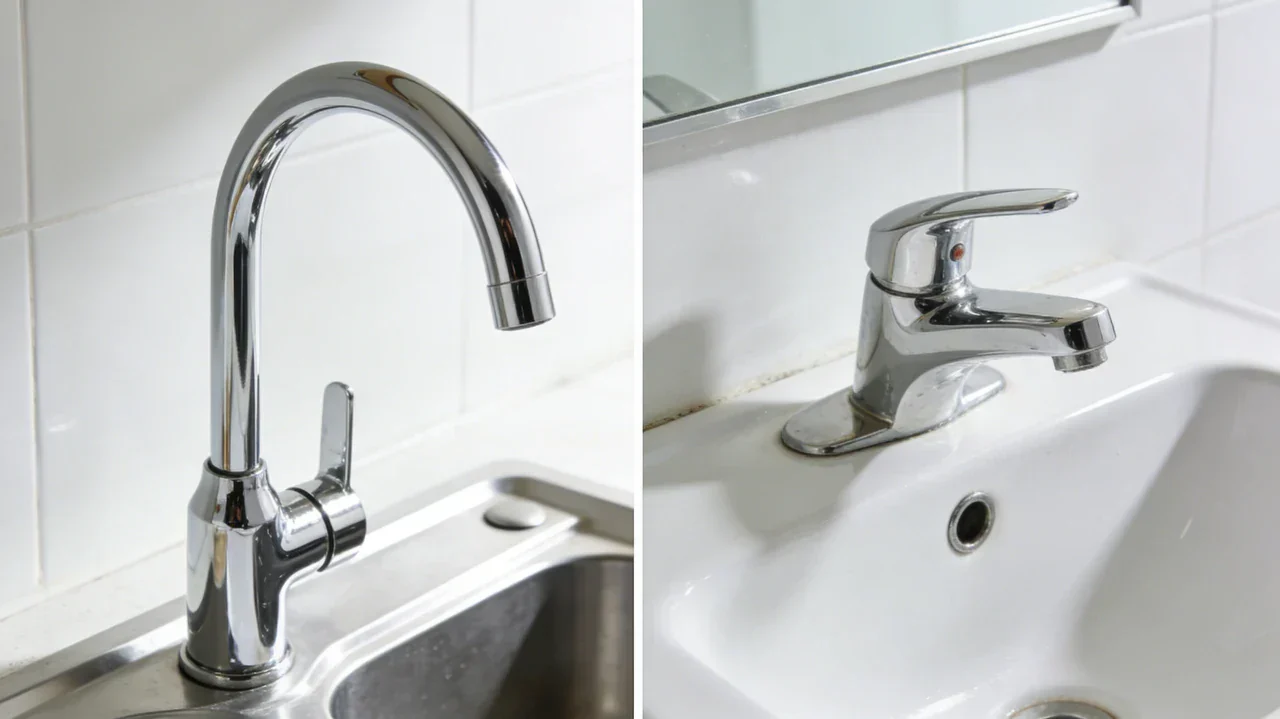
Slow Bathroom Sink Drain? Renter-Safe Fixes That Work
Clara Townsend
Clara Townsend is an interior stylist, vintage furniture enthusiast, and the creative voice behind Velvet Abode. With over a decade of experience transforming both cramped city apartments and sprawling fixer-uppers, she believes that a beautiful home is built on personal stories rather than massive budgets. When she isn't hunting for the perfect brass sconce at a local flea market, she can usually be found rearranging her living room for the third time this month.
A slow bathroom sink drain has a way of turning the calmest morning routine into a tiny rage spiral. One minute you are washing your face under a cozy amber bulb, the next you are staring at a bowl of cloudy water that refuses to go down. The good news: most bathroom sink clogs are very fixable with renter-safe tools and a little patience.
This is a bathroom sink only plan. No whole-house plumbing adventures. No taking apart pipes unless your lease explicitly allows it. Just the smartest order of operations for hair, soap scum, and gunk that love to collect right where you cannot see them.
Before you start: what a slow drain means
In most apartments, a slow bathroom sink is caused by a buildup in the drain stopper area or the first stretch of pipe beneath it. Think: toothpaste residue, face oil, shaving cream, hair, and soap that slowly turns into a waxy film.
A few clues can help you choose the right method:
- Slow but steady draining: buildup is likely close to the top, often around the stopper or just below it.
- Gurgling sounds: partial blockage, sometimes with trapped air.
- Standing water that barely moves: more substantial clog, usually best addressed with plunging and then a plastic snake.
- Bad odor: trapped gunk near the drain opening. Cleaning the stopper area often helps a lot.
Gather renter-safe supplies
You do not need a toolbox the size of a carry-on. Here is the short list that keeps your sink and chrome looking nice:
- Sink plunger (the small cup style, not a toilet plunger)
- Plastic drain snake (a barbed zip tool made for hair and soap scum)
- Dish soap
- Baking soda and white vinegar (optional, with realistic expectations)
- Kettle or pot for hot water
- Microfiber cloth and an old towel
- Nitrile gloves if you are squeamish, which is completely fair
Safety note: If someone has already used a chemical drain opener in this sink, do not plunge or snake until it has been thoroughly flushed and you are sure there is no caustic liquid sitting in the basin. Also, never mix drain chemicals. If you are unsure, call maintenance. Eye protection is a smart idea for anything splashy.
Avoid: metal augers on delicate finishes, harsh chemical drain openers, and anything that requires disassembling plumbing without permission. In many rentals, chemical openers can damage certain pipe materials, create heat and fumes, and increase splashback risk for you or maintenance. They can also make some clogs harder to deal with mechanically later, depending on what the clog is made of and how the product reacts.
Step 1: Clear the stopper area
In a bathroom sink, the stopper is often the main villain. If you can remove it easily, do so and clean what you can reach.
If you have a pop-up stopper
- Look behind the faucet for a small lift rod. Raise it and see if the stopper lifts out.
- Some pop-up designs will not lift out from above without loosening a pivot rod under the sink. If it does not lift out easily, do not force it. Move on to plunging and snaking instead of yanking.
If you have a push-and-click stopper
- Many unscrew by turning the top counterclockwise. If it resists, stop and do not scratch the finish.
Wipe away any visible hair and buildup, then rinse with warm water for about 30 seconds. Even this simple step can turn a painfully slow drain into a normal one.

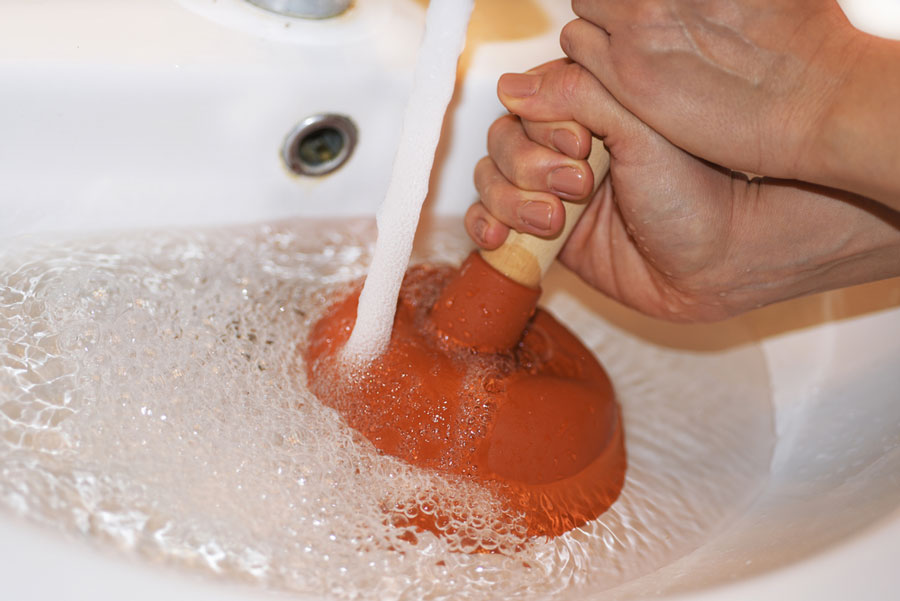
Step 2: Plunge the renter-safe way
Plunging sounds dramatic, but it is often the gentlest mechanical method you can use because you are not scraping anything. The trick is to create a good seal and direct the pressure where it matters.
Use a sink plunger, not a toilet plunger
A sink plunger is a simple cup. Toilet plungers often have an extra flange and are harder to seal on a flat sink basin.
How to plunge a bathroom sink
- Cover the overflow hole with a damp washcloth. The overflow is the little opening near the top of the basin. If you do not cover it, the pressure escapes and plunging becomes ineffective.
- Add enough water to cover the plunger cup lip (usually about 1 inch, depending on your plunger).
- Press down gently to seal, then plunge with short, firm strokes for 15 to 20 seconds.
- Lift and listen. If you hear a satisfying release and the water starts moving, run warm water for 60 seconds to flush.
Quick cleanup tip: Water can burp out of the overflow while you plunge. Wipe the area dry afterward so it does not drip down the cabinet face.
Tip for protecting chrome: If the plunger rim is stiff, wet it first. A wet rim seals better and reduces friction against the sink surface.
If plunging improves things but does not fully fix them, that is a great sign. It usually means you loosened the clog and a plastic snake can finish the job.
Step 3: Snake gently with plastic
For bathroom sinks, a plastic barbed snake is the sweet spot: strong enough to grab hair and sludge, but unlikely to scratch chrome or damage fragile piping when used carefully.
How to snake without scratching chrome
- Protect the finish: lay a microfiber cloth around the drain opening so the tool does not rub the metal edges.
- Insert slowly: feed the snake straight down. Do not stab or force it.
- Twist lightly: a gentle rotation helps the barbs catch buildup.
- Pull out slowly: brace yourself. This is the gross part. Wipe the tool with a paper towel and repeat until it comes out mostly clean.
- Flush with warm water for 1 to 2 minutes.
Where you will feel resistance: often right under the drain stopper area. If it stops hard and will not pass, do not force it. You can withdraw, clean, and try again. Forcing tools is how renters end up with scratched finishes or dislodged parts.
Step 4: Gentle methods (real talk)
I love a gentle, low-toxin routine as much as anyone, but natural drain fixes have limits. Think of them as degreasers and deodorizers, not a miracle for a packed hair clog.
Dish soap + hot water
This is best for soap and oily buildup, especially if the sink is slow rather than fully blocked.
- Squeeze about 1 tablespoon of dish soap into the drain.
- Follow with hot water in stages, like 2 to 3 short pours, pausing a few seconds between pours.
- Finish by running hot tap water for 60 seconds.
Baking soda + vinegar
Good for maintenance, not for heavy clogs.
- If the basin is holding water, scoop most of it out first so this does not get instantly diluted.
- Pour 1/2 cup baking soda into the drain.
- Add 1/2 cup white vinegar.
- Cover the drain with a stopper or a damp cloth for 10 minutes.
- Flush with hot tap water for 1 to 2 minutes.
Reality check: the fizz is satisfying, but it does not physically pull out hair. Use it after snaking or plunging to freshen and break down leftover residue, not as the only strategy when water is standing.
A note on boiling water
Heat can help soften and flush residue, but renters should be cautious. Pouring boiling water into PVC (common in many buildings) can soften or warp it, especially if repeated. If you are unsure what your plumbing is, stick with hot tap water instead of a rolling boil.
What not to do (deposit-saving)
- Do not pour chemical drain openers into a slow bathroom sink unless your building explicitly approves it. They can damage pipes, create heat and fumes, and cause hazardous splashback. They can also make later plunging or snaking riskier if any chemical remains in the line.
- Do not use a metal plumber’s snake unless you are experienced and your lease allows DIY plumbing work. It can scratch the drain, chip finishes, and get aggressively stuck.
- Do not take apart the P-trap unless you have permission. Even when it is simple, one slipped gasket can equal a leak you discover at 2 a.m.
- Do not keep running the faucet “to see if it will go down.” A slow drain can turn into an overflow faster than you think.
When to call maintenance
Some situations are beyond the cozy DIY zone, and that is okay. Call maintenance if:
- Multiple fixtures are slow (sink plus tub, or sink plus toilet). That suggests a larger line issue.
- The sink backs up quickly even after snaking and plunging.
- You smell sewage or see dirty water backing up from the drain.
- There is a leak under the sink, moisture in the cabinet, or warped particleboard.
- The clog returns within a day or two despite a thorough clean-out. That can mean buildup deeper in the horizontal branch line or around the trap area, which is a maintenance job in most rentals.
If you are submitting a ticket, a helpful note is: “Bathroom sink draining slowly. I removed visible hair at the stopper and tried a sink plunger. Still slow.” That signals you did safe basics and helps them triage faster.
Keep it flowing: simple prevention
A few small habits keep you from repeating this whole storyline next month:
- Weekly: run hot water for 30 seconds after brushing teeth and washing your face at night.
- Monthly: remove and wipe the stopper area, then flush with dish soap and hot water.
- If you shave at the sink: wipe hair into the trash before rinsing the basin.
- Add a small sink strainer if your drain style allows it. It is not glamorous, but it is effective.
Your bathroom should feel like a soft landing, not a tiny plumbing mystery. Start with the stopper, move to a proper plunge, then snake gently. If it is still not improving, let maintenance take it from there. That is what they are for.