Sleeper Sofa and Pull-Out Bed Care
Clara Townsend
Clara Townsend is an interior stylist, vintage furniture enthusiast, and the creative voice behind Velvet Abode. With over a decade of experience transforming both cramped city apartments and sprawling fixer-uppers, she believes that a beautiful home is built on personal stories rather than massive budgets. When she isn't hunting for the perfect brass sconce at a local flea market, she can usually be found rearranging her living room for the third time this month.
A sleeper sofa is basically two pieces of furniture sharing one body: a cozy couch on the outside, and a hardworking little machine on the inside. If yours has started squeaking , snagging, or smelling a bit like “college basement,” you do not need a whole new sofa. You need targeted care in three areas: the mechanism, the bars and mattress, and the hidden cavity where air (and humidity) likes to get trapped.
Let’s keep it smooth, quiet, supportive, and guest-ready.
Before You Start: A 3-Minute Safety Reset
- Clear the area. Move coffee tables, floor lamps, and anything breakable out of the swing zone.
- If your sofa has power features, unplug. Some sleeper sofas include USB ports, recliners, or power headrests. If yours does, disconnect power before you reach into the frame.
- Protect fingers and floors. Wear thin work gloves and slide a towel or cardboard under the front edge to prevent scuffs.
- Open it fully, then close it fully. Do one slow cycle first and listen. The sound usually tells you where to focus.
- Find the label if you can. Many frames have a manufacturer tag under the seat deck (the platform under the seat cushions). If it mentions “no oil” or “dry lube only,” follow that.
- Check rug clearance. Thick pile rugs can cause dragging or crooked closing. Roll the rug edge back during maintenance and when guests use the bed.
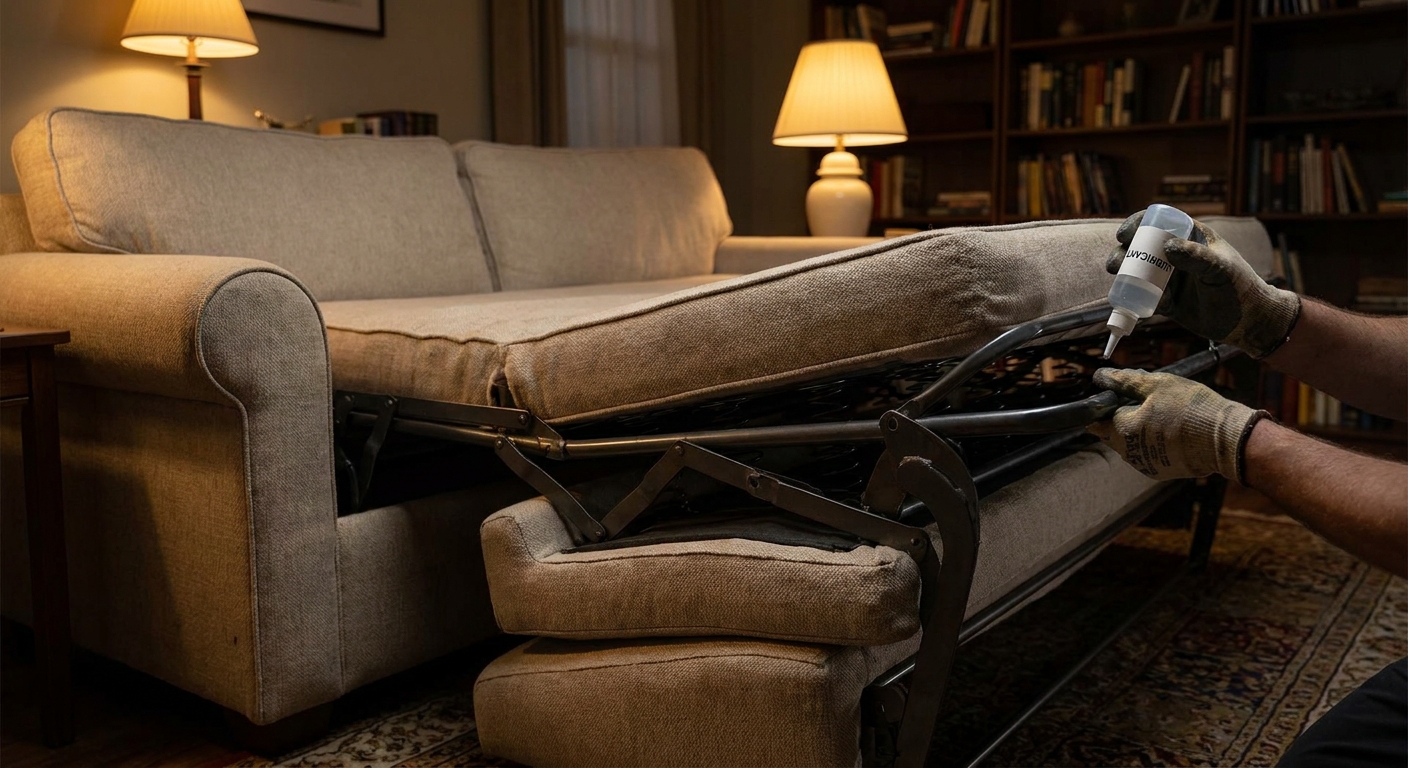
Lubrication Dos and Don’ts
Most sleeper sofa problems that feel “heavy” or “stuck” come down to friction at pivot points, or grime on the glide tracks. Lubrication helps, but the wrong product can turn dust into sticky paste. Also, some mechanisms specifically warn against oil or grease on nylon rollers, painted rails, or spring assemblies, so check the manufacturer tag first and treat it as the final word.
Do: Protect fabric, clean first, then lubricate lightly
- Drape a towel to catch drips. Lay an old towel or sheet over nearby upholstery and the floor under the joint you are working on.
- Vacuum the frame. Use a crevice tool along tracks, hinges, and the mattress platform. Dust is the enemy of smooth motion.
- Wipe metal contact areas. A slightly damp microfiber cloth is usually enough. For greasy residue, use a tiny bit of dish soap in water, then dry well.
- Use a controlled applicator. A straw nozzle or a cotton swab prevents overspray on fabric and wood.
Do: Choose the right lubricant for the right spot
In most homes, you will have the best results with one of these options:
- Dry lubricant (PTFE or silicone dry spray) for tracks and sliding rails. It dries down and is less likely to attract lint.
- Silicone lubricant for stubborn squeaks at hinges and pivot points where metal rubs metal.
- White lithium grease for heavy-duty joints on older mechanisms, used very lightly and only if your frame does not warn against grease. It is effective, but it can collect dust if you overdo it.
Don’t: Use household oils that stay wet
Avoid products that remain oily and grab dust:
- Cooking oils (they go rancid and smell)
- Vaseline or thick petroleum jelly (too sticky for dusty cavities)
- “All-purpose” sprays used as a long-term lubricant (some are fine as a cleaner, not as a lasting lube)
Don’t: Spray blindly into the couch
Overspray can stain upholstery and soften some finishes. Instead, open the bed, identify the squeak point, and apply a single short burst to the hinge or rail. Then cycle the bed open and closed 3 to 5 times to distribute.
Quieting Noisy Frames
If lubrication helped but did not solve it, you are probably dealing with loosened hardware, spring noise, or metal flex.
Step 1: Tighten what you can reach
- With the bed open, check visible bolts and screws along the frame sides and front crossbar.
- Tighten gently but firmly. If you strip the head, you will regret it later.
- If a bolt keeps loosening, add a small drop of threadlocker (blue, removable) and retighten.
Step 2: Check the perimeter springs
A very common squeak source is the perimeter springs around the mattress deck. Look for a spring hook rubbing a metal edge, a spring that shifted, or a dry contact point where the spring meets its clip. Vacuum first, then apply a tiny amount of manufacturer-approved lubricant to the contact point (often a dry spray), and cycle the mechanism to listen for improvement.
Step 3: Add felt where metal taps metal
When you hear a clack rather than a squeak, look for a spot where the frame lands against a stop. Stick-on felt pads or thin rubber bumpers can soften the impact.
Step 4: Check for a bent guard bar or misalignment
If one side drags or the bed closes crooked, stop forcing it. Misalignment can bend rails and make everything worse. In that case, remove the mattress, vacuum the tracks, and look for:
- Loose or missing screws on one side
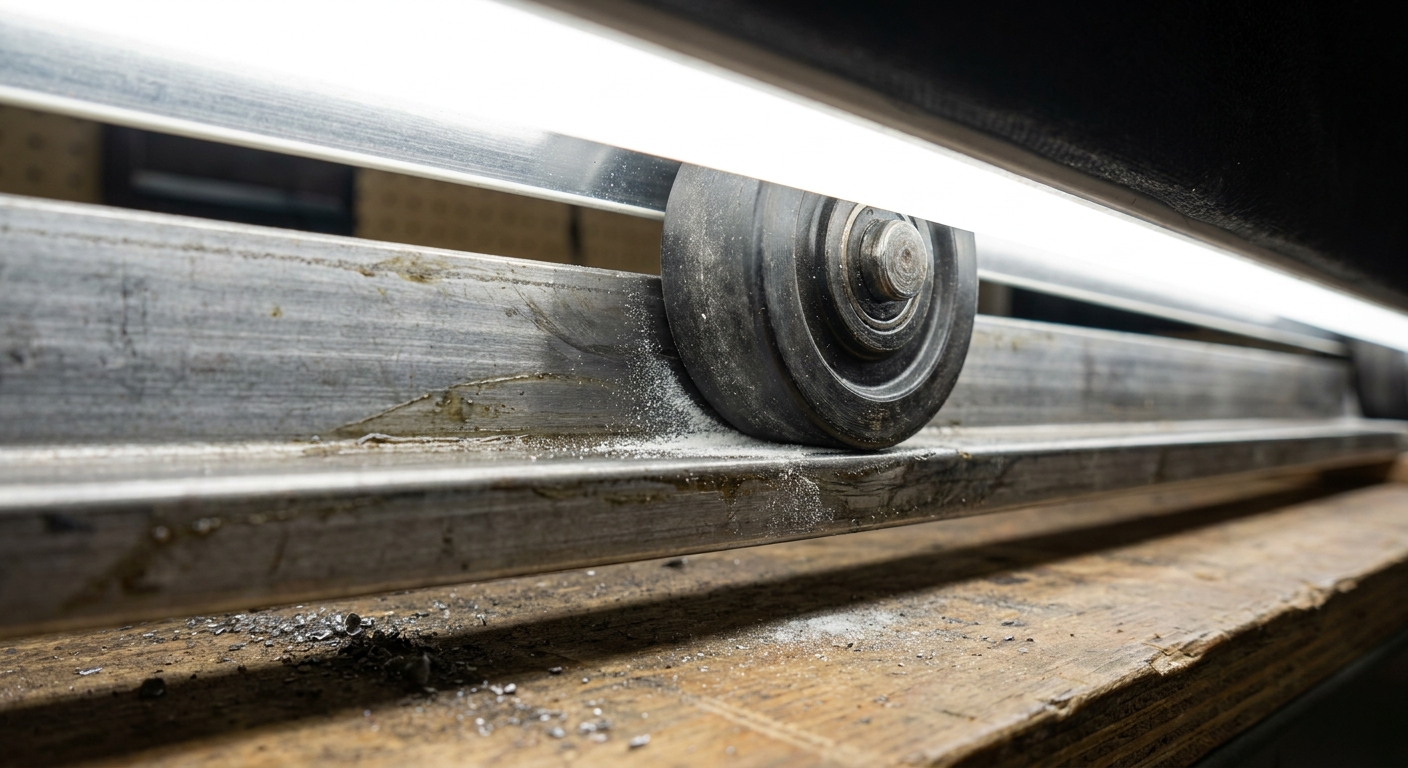
- A roller that popped out of its track
- A bent cross brace from someone sitting on the edge while half-open
If you see obvious bending, it is usually worth calling the manufacturer for a replacement part or having a local furniture repair tech correct the frame. Mechanisms are modular more often than people realize.
Fixing Snags and Dragging
“Snagging” is often not the mechanism itself, but something around it: a torn dust cover, loose staples, a shifted mattress retainer, or a rug that is grabbing the legs.
What to check
- Dust cover fabric underneath. If it is sagging or torn, it can catch on the frame. Trim loose threads and re-staple or replace the fabric (a common upholstery repair).
- Loose upholstery staples. Run your hand (gloved) along the underside edges and remove or tap down any staples that are sticking out.
- Mattress retainers and straps. Some frames have a bar, clip, or strap that keeps the mattress aligned when folding. If it shifted, it can create a snag point when closing.
- Track obstructions. Coins, hair ties, and small toys love tracks. Vacuum, then do a slow open and close to confirm it moves cleanly.
- Floor and rug interference. If it drags only in one spot, suspect a rug edge, thick pad, or uneven floor. Roll rugs back or add a thin furniture slider under the legs during use.
Bar-Padding Fixes
Let’s talk about the classic sleeper sofa complaint: the “bar in the back” feeling. That is usually a crossbar telegraphing through a thin mattress, or a sagging support layer that is no longer doing its job.
Quick fix: Add a barrier layer
- Folded wool blanket laid across the bar zone under the fitted sheet. Wool adds cushion and breathes well.
- Dense felt pad (like rug underlayment felt) cut to size and placed between the mattress and the platform.
- Closed-cell foam strip (thin camping pad material) placed directly over the crossbar area.
These work best when the bar is one clear “hot spot” rather than a whole mattress that feels thin.
Better fix: Use a bar shield or support panel
Look for products described as a “sleeper sofa bar shield” or “sleeper sofa support board.” They create a smoother surface so your body weight does not sink between frame elements.
Make sure padding does not interfere with folding
Anything you add has to fold with the bed. Keep padding low-profile and flexible, and do a test close before guests arrive. If it resists closing, remove bulk until the mechanism moves freely.

Upgrading Thin Mattresses
Most sleeper mattresses are thin by design so they can fold into the sofa. The trick is upgrading comfort without creating a wrestling match every time you close it.
Option 1: Add a low-profile topper
- Low profile thickness: 1.5 to 3 inches is the sweet spot for many pull-out frames.
- Flexible material: Memory foam can work if it is not too dense and can bend at the fold points. Latex is springy but can resist folding if thick.
- Breathability basics: Look for ventilated foam, a washable cover, or wool. For mustiness, airflow and humidity control matter more than any “cooling” claim.
- Anchor method: Elastic corner straps help keep a topper from migrating when guests sit up and scoot around.
Two smart topper setups
- The “foldable comfort” setup: A 2-inch foam topper that folds with the mattress, plus a thin mattress protector. Test closing. If it closes easily, you can store it inside.
- The “store separately” setup: A plush 3-inch topper stored in a breathable bag in a closet. It takes 30 seconds longer to set up, but it avoids stressing the mechanism.
Stylist tip: Keep a dedicated set of guest bedding in a lidded basket nearby. When setup is easy and un-rushed, you use the bed more gently, and it stays in better condition.
Option 2: Replace the sleeper mattress
If the mattress is deeply sagging, smells permanently funky, or feels like a collection of hinges no matter what topper you add, it is time to replace the sleeper mattress itself. Look for a purpose-made replacement sleeper sofa mattress in the correct size (twin, full, queen) and thickness your frame allows. Measure your current mattress thickness and confirm your frame’s maximum thickness so it still folds and latches properly.
Odor Control
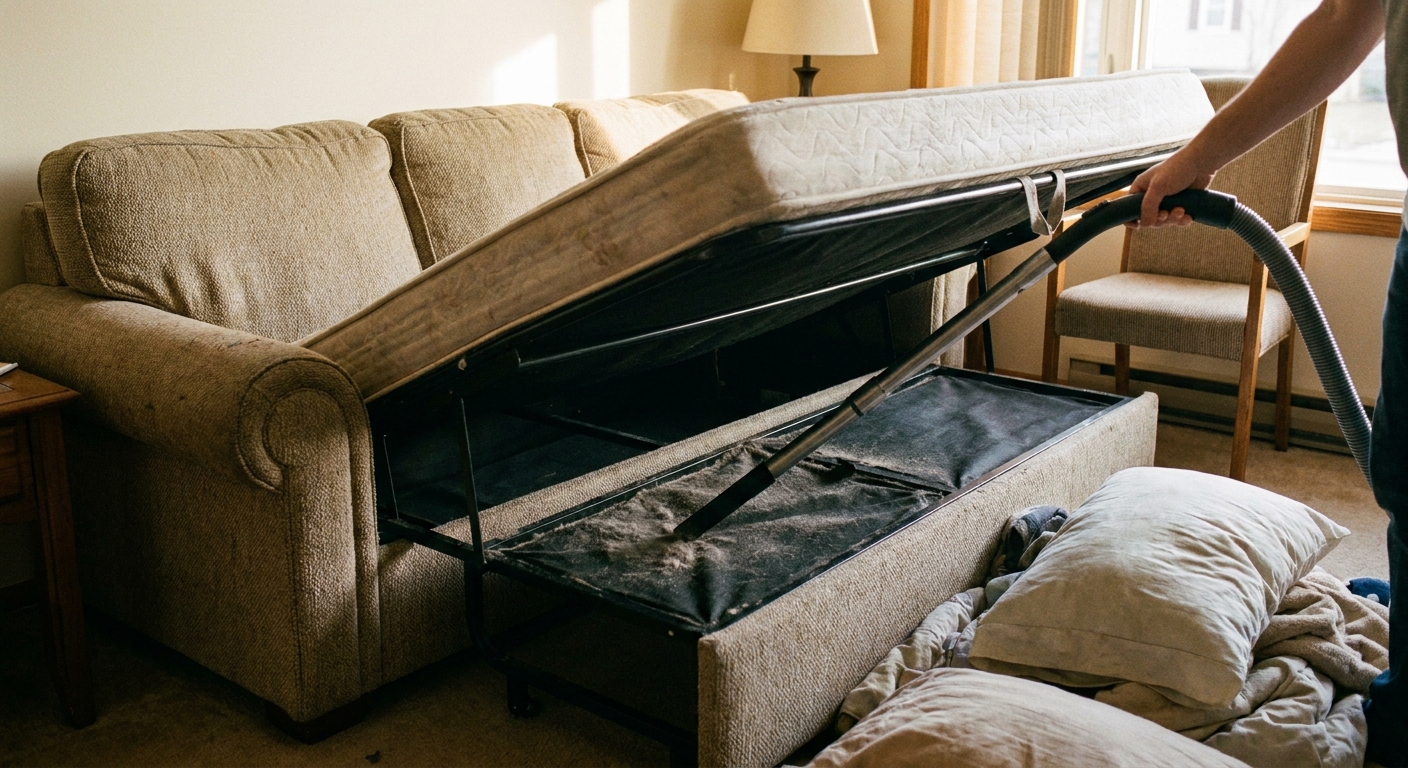
If your sleeper sofa smells fine as a couch but funky as a bed, it is usually the storage cavity. It is a dark pocket that collects lint, skin flakes, humidity, and the occasional mystery sock.
Monthly refresh routine (15 minutes)
- Open the bed fully. Remove all bedding and the mattress if it is manageable.
- Vacuum every corner. Hit the wood deck, frame rails, and the dust shelf behind the back cushions.
- Wipe hard surfaces carefully. A light 1:1 mix of white vinegar and water can work on bare, non-porous metal, but vinegar is acidic. Test a small hidden spot first, avoid painted or coated finishes, and do not leave it sitting on the surface. Wipe, then dry immediately. For finished wood, use a barely damp cloth and dry right away.
- Deodorize gently. Sprinkle baking soda lightly on the mattress surface, let sit 30 to 60 minutes, then vacuum with an upholstery attachment.
What to avoid for odor control
- Heavy fragrance sprays inside the cavity. They mask odors but can leave a sticky film that traps more dust.
- Ozone generators in a living space. They can be harmful to breathe and can degrade rubber and some fabrics.
- Soaking the mattress with liquid cleaners. Moisture is what creates the musty loop.
Airing It Out
Airflow is the unsung hero of sleeper sofa hygiene. After guests leave, the mattress and cavity are often holding onto moisture from body heat and breath. If you fold it up immediately, you trap that humidity in the darkest place possible.
The post-guest routine (same day if you can)
- Strip the bed right away. Put linens straight into the wash.
- Leave the bed open for 4 to 8 hours. Even better if you can open a window.
- Add gentle air movement. A fan pointed across the mattress, not directly blasting it, helps moisture evaporate evenly.
- Stand the mattress on its side for 30 minutes if it is light enough. This exposes the underside, which is where odors love to hide.
Dry deodorizer options
- Activated charcoal sachets tucked in the cavity when the bed is stored (replace every 1 to 3 months).
- Cedar blocks in a breathable pouch (skip if anyone is scent-sensitive).
- Desiccant packs in humid climates, kept away from kids and pets.
Mold Prevention
Mold is not inevitable, but sleeper sofas are more vulnerable than regular beds because they spend so much time closed up. Prevention is mostly about humidity control and not storing damp bedding inside.
Red flags
- A persistent musty smell that returns within a day or two
- Small black or green specks on the underside of the mattress or platform
- Guests waking up congested only when they sleep on the pull-out
What to do if you spot mildew
- Take it outside if possible. Sunlight and fresh air help, and you keep spores out of your living room.
- Wear basic PPE. Gloves and a well-fitting mask help reduce exposure, especially if you are sensitive.
- Be cautious vacuuming porous materials. Vacuuming visible mold on a mattress can aerosolize spores. If you vacuum, do it outdoors with a HEPA vacuum if you have one, and avoid aggressive brushing that kicks dust into the air.
- Spot-clean lightly. Use a small amount of 70% isopropyl alcohol on a cloth for non-porous metal parts. For mattress fabric, follow manufacturer guidance and use minimal liquid.
- Dry completely before folding the bed back in. “Feels dry” is not always dry. Give it extra time.
If mold is widespread, if anyone in your home has asthma, or if the smell is deeply embedded, professional remediation or replacing the sleeper mattress is often the healthiest choice. You can keep the frame and upgrade comfort at the same time.
Guest-Ready Checklist
- Open and close the mechanism once to confirm it is smooth and quiet
- Wipe the frame rails with a dry cloth (no lint surprises)
- Add your bar padding or support layer if needed
- Put on a mattress protector, then fresh sheets
- Keep a small fan nearby if your space runs warm
A sleeper sofa feels like hospitality with good bones when it opens easily, smells like nothing, and does not punish anyone’s shoulder blades with a hidden bar.
When to Repair vs. Replace
A little maintenance goes a long way, but some issues are worth escalating.
- Repair (usually): squeaks, light grinding, minor dragging, loose bolts, worn felt bumpers, thin mattress discomfort.
- Replace parts: broken springs, snapped crossbars, rollers that will not stay seated, rails that visibly twist.
- Replace the sleeper mattress: persistent odor, visible mold, deep sagging, or painful pressure points even after adding a topper.
If you are in a rental or you host often, keeping a simple maintenance kit nearby can save you from last-minute stress: a small vacuum attachment, dry lubricant (per your frame label), felt pads, a wrench set, and two charcoal sachets.