Shower Door Sweeps and Seals That Fail
Clara Townsend
Clara Townsend is an interior stylist, vintage furniture enthusiast, and the creative voice behind Velvet Abode. With over a decade of experience transforming both cramped city apartments and sprawling fixer-uppers, she believes that a beautiful home is built on personal stories rather than massive budgets. When she isn't hunting for the perfect brass sconce at a local flea market, she can usually be found rearranging her living room for the third time this month.
If your shower is “mysteriously” leaving a little lake on the bath mat every morning, odds are it’s not your tile grout suddenly developing a personality. Often, the culprit is much less dramatic: a tired, cracked, or shrunken shower door sweep or seal that’s no longer guiding water back into the shower where it belongs. (Other common offenders: a showerhead that’s aimed right at the door, a misaligned bottom guide, a clogged track on framed doors, or old caulk .)
I love a vintage brass sconce as much as the next person, but bathroom water damage isn’t charming patina. The good news is that replacing a sweep or drip rail is one of the quickest, renter-friendly fixes you can do, and it can make the whole shower feel cleaner and quieter, too.
Sweep, seal, drip rail: what’s failing?
Shower door parts get lumped together, so let’s sort them in plain language. (You don’t need a full door replacement to fix most leaks.)
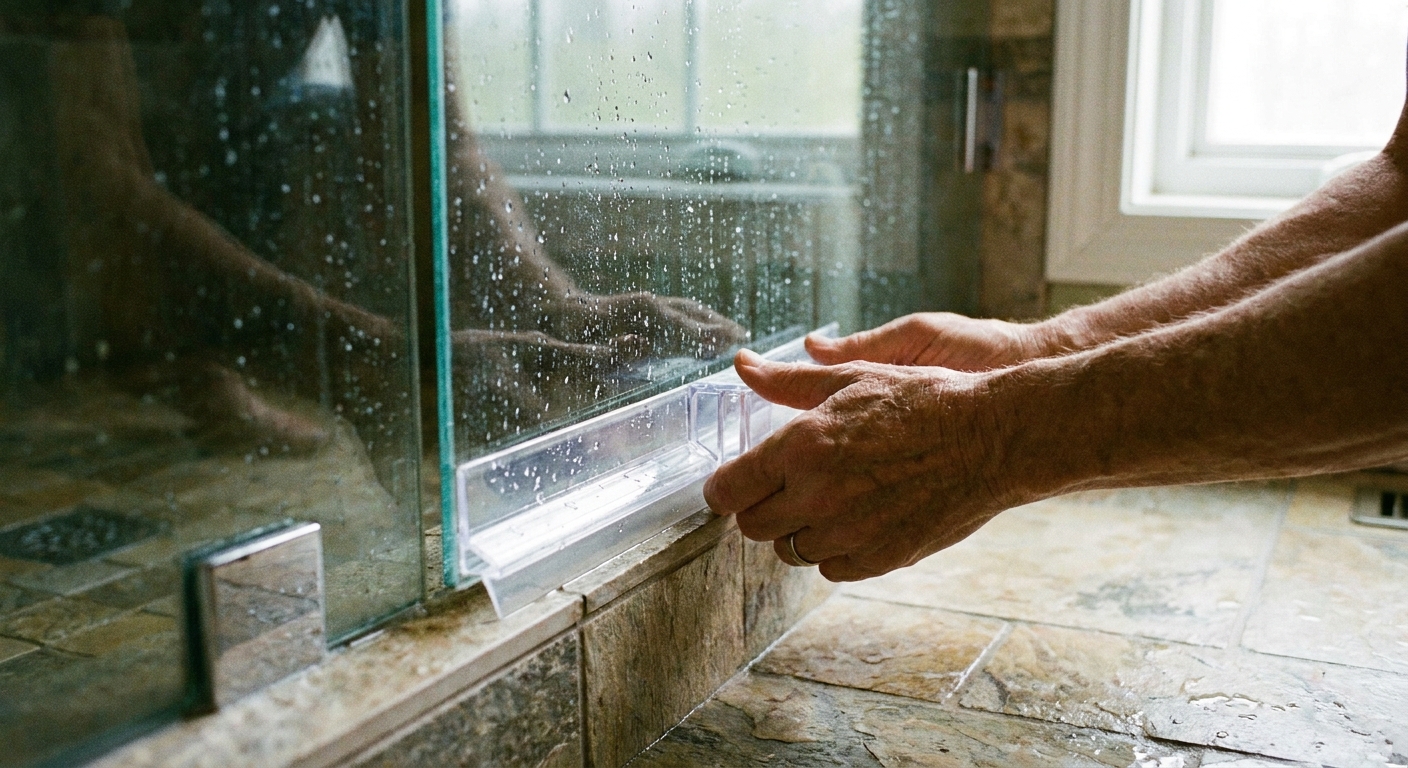
Bottom sweep
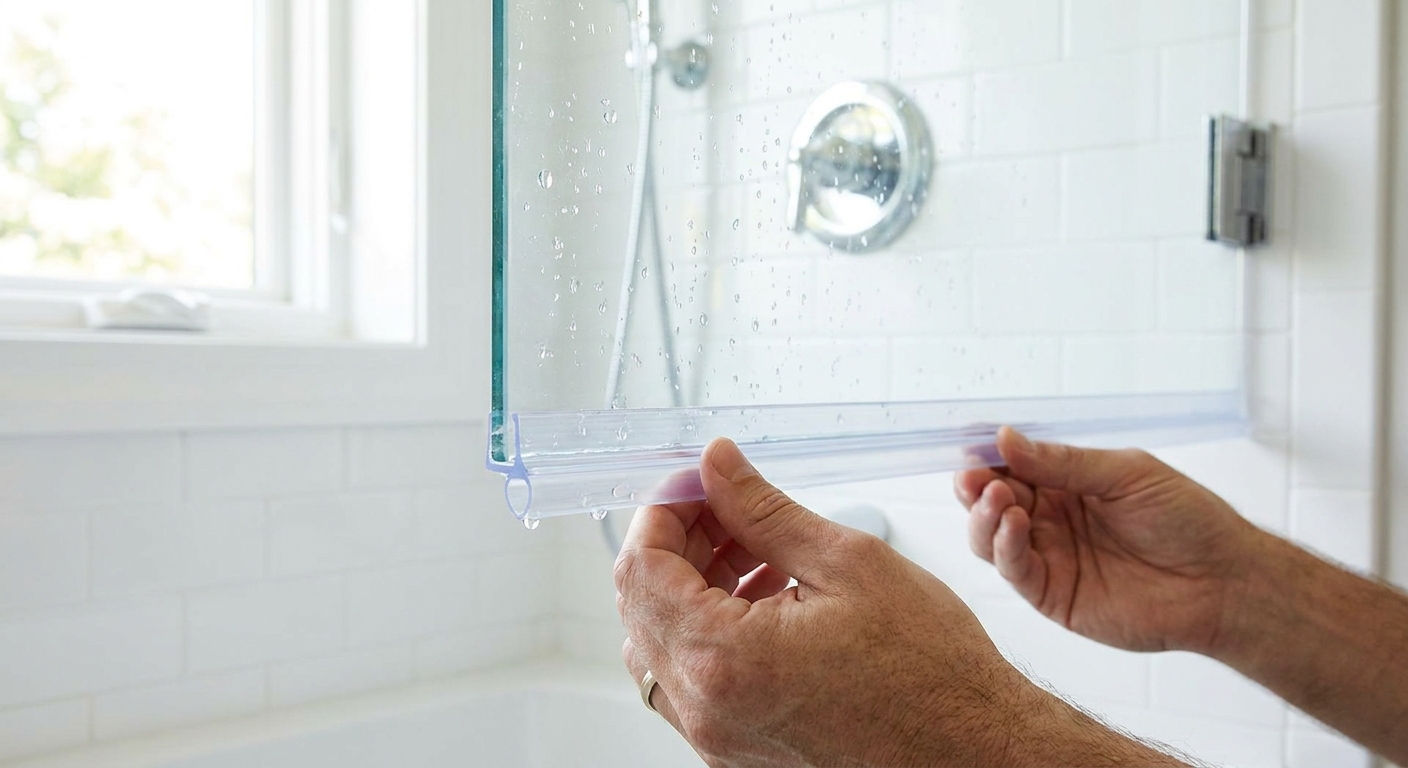
The bottom sweep is the vinyl or silicone strip that attaches to the bottom edge of the shower door. It usually has one or two fins that lightly brush the threshold. Its job is to block splash-out and nudge water back in.
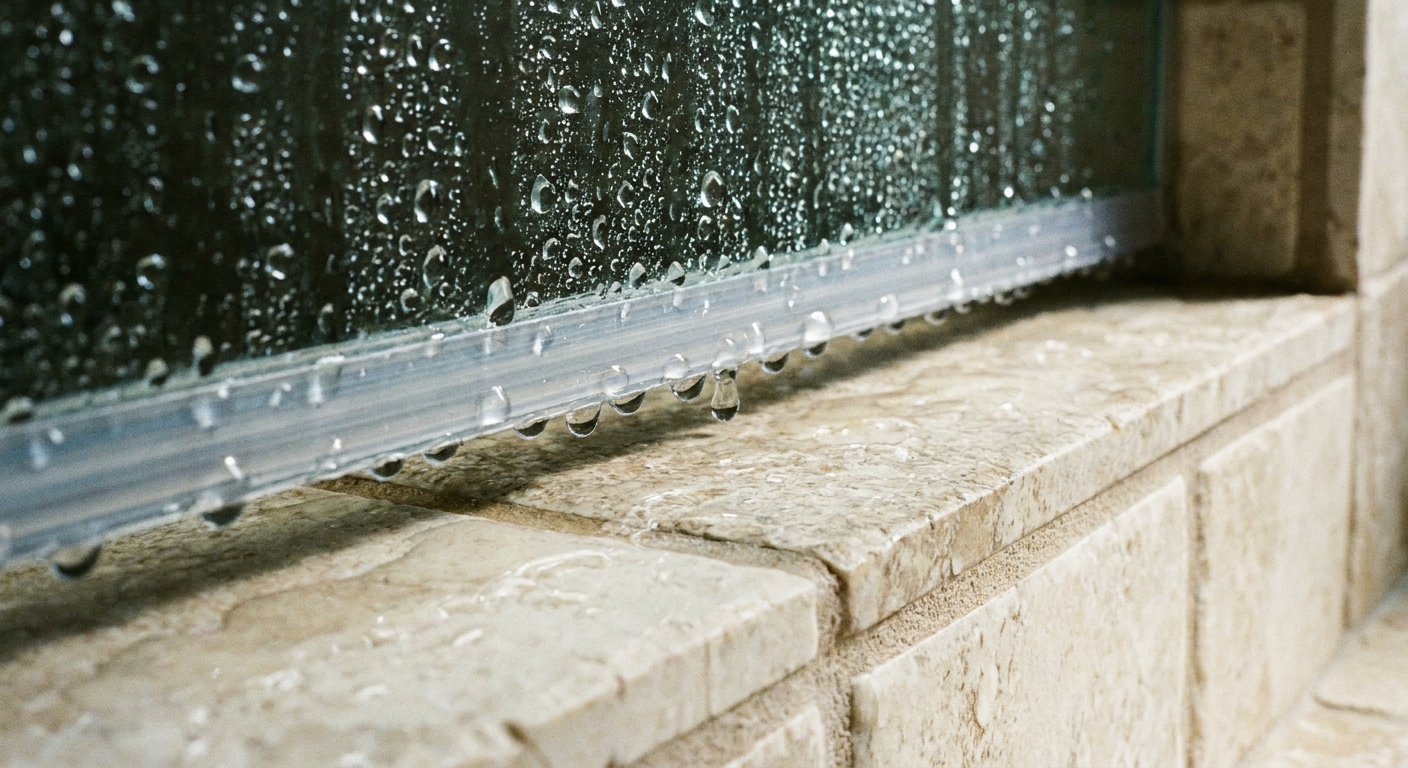
Drip rail (sometimes sold as a drip sweep)
A drip rail is also mounted on the bottom edge, but it’s designed more like a tiny gutter. It catches water running down the glass and directs it inward, often with a little lip that hangs over the inside of the shower.
Some products combine both concepts: a sweep with a rigid rail profile plus flexible fins.
Side seals and strike seals
Vertical seals run up the hinge side or handle side of the door (or along the fixed panel). These stop water that sprays toward the door jamb or escapes through the gap where the door meets the glass panel.
Threshold seal and bulb seal
On framed or semi-frameless doors you might see a bulb seal, a rounded tube of vinyl that compresses when the door closes. On some setups, the threshold has its own gasket-like seal that works with the door sweep.
How to tell what’s leaking
- Puddle centered under the door: bottom sweep or drip rail is worn, too short, or hardened.
- Water near the handle-side edge: vertical strike seal is missing or not contacting.
- Water near the hinge side: hinge-side seal, alignment issue, or door sag.
- Leak only when spray hits the door: likely a side seal gap or spray pattern issue, not caulk.
- Persistent dampness at the baseboard outside the shower: could be sweep plus a threshold that’s flat or pitched the wrong way, or a door that isn’t closing square.
Quick checks before you buy
This is the save-yourself-three-returns-to-the-hardware-store section.
1) Clean the bottom edge first
Soap scum can hold water and make it look like the sweep is failing. Clean the lower edge of the glass and threshold with a non-scratch pad and a gentle bathroom cleaner. Dry it and test again.
2) Do the paper test
Close the door on a strip of paper (near the bottom and near the handle side). If the paper slides out with zero resistance, you’ve got a gap that a seal may not be bridging.
3) Check for door sag
If the bottom corner on the handle side is closer to the threshold than the hinge side, the door may be slightly out of alignment. Some hinges have small adjustment screws, but adjustment varies by brand and model. If your door is dragging or visibly crooked, fix alignment first or your new sweep will wear unevenly.
4) Check the threshold direction
Best practice is a threshold that slopes slightly toward the shower, so water sheds inward. Plenty of installations are basically flat, and a few are pitched the wrong way, which means water will fight you no matter how perfect the sweep is. A better drip rail can help, but correcting pitch is a bigger job and may require a pro.
5) If you have a framed door, check the track and weep holes
On framed enclosures, water is meant to collect in the bottom track and drain back through weep holes. If those holes are clogged, the track can overflow and mimic a failing sweep. Clear gunk carefully (a zip tie works well), then retest.
6) Check the bottom door guide (especially sliders)
Sliding doors usually have a small bottom guide or bumper that keeps the panel aligned. If it’s loose, broken, or shifted, it can create a gap that looks like a seal problem.
Know your door type
Seal selection gets easier if you identify your setup first.
- Frameless hinged or pivot door: clamp-on sweeps and clamp-on vertical seals are common, sized by glass thickness.
- Semi-frameless: may use a mix of clamp-on and slide-in parts depending on the bottom edge.
- Framed slider: track + weep holes are part of the system; sweeps often slide into a metal channel, and bottom guides matter.
Measure like you mean it
Shower door seals are picky. A few millimeters can be the difference between crisp and dry and why is the bath rug soaked again. Here’s how to measure without guesswork.
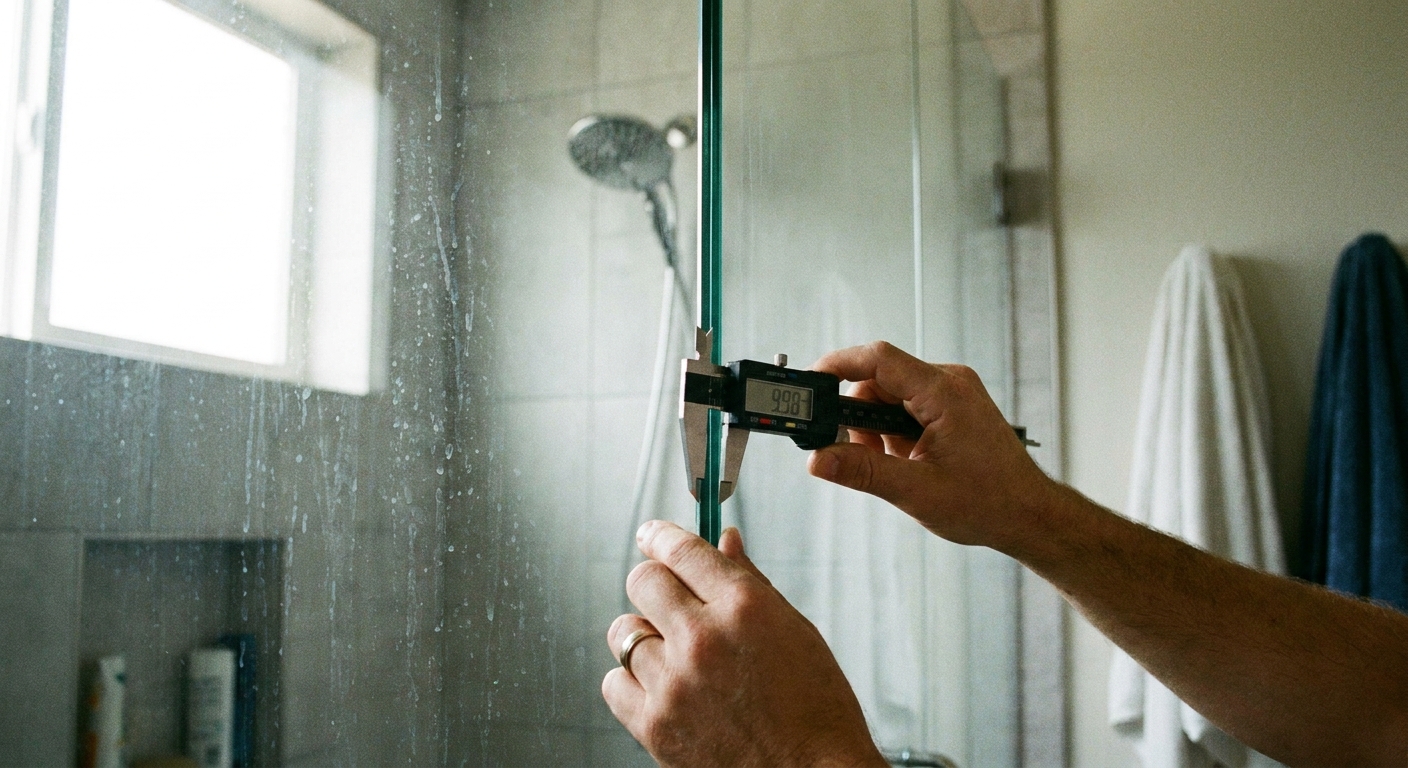
Measure the glass thickness
This is the big one. Most sweeps are sized by glass thickness, like 1/4 inch (6 mm), 5/16 inch (8 mm), 3/8 inch (10 mm), or 1/2 inch (12 mm).
- Best method: measure the exposed edge of the glass with calipers.
- Good method: use a tape measure and read carefully. Measure the glass edge, not the sweep.
- Don’t rely on the old sweep size: old vinyl can stretch or shrink.
Measure the door width (for cut-to-length sweeps)
Bottom sweeps commonly come in 36-inch or 48-inch lengths (and other sizes, too), and you cut them down. Measure the bottom edge of the door from corner to corner.
Measure the gap between glass and threshold
With the door closed, measure the distance from the bottom of the glass to the top of the threshold at both corners. If one side is much larger, go back to alignment before you buy a fin that drags on one end and floats on the other.
Pick a fin length that will lightly contact the threshold. Too short leaks. Too long drags, folds, and wears out faster.
Curved glass: what changes?
If you’ve got a rounded, neo-angle, or curved enclosure, you can’t force a rigid sweep to behave. You need a sweep designed to flex.
- Confirm curvature: hold a straight edge (or even a metal ruler) to the bottom edge. If you see daylight, it’s curved.
- Look for flexible or curved in product descriptions: these are often softer PVC or silicone.
- Measure thickness the same way: curvature changes the sweep style, not the glass thickness.
Framed doors: measure the channel, not the glass
On framed shower doors, the sweep may slide into an aluminum channel. In that case, you’re matching the channel shape (T-slot, barbed insert, etc.), not just glass thickness.
Snap-on vs adhesive
There are two main ways sweeps and seals attach. The best choice depends on your door style and whether you’re dealing with glass or metal.
Snap-on (clamp-style) sweeps for frameless glass
These slide onto the glass edge and grip by friction. They’re common on frameless doors because they’re tidy, removable, and don’t require glue.
- Pros: clean look, easy to replace, no curing time.
- Cons: must match glass thickness closely; can creep if soap scum builds up.
Slide-in sweeps for framed doors
These have a shaped spine that slides into the frame channel along the bottom of the door.
- Pros: secure fit, very common in rentals.
- Cons: you must match the spine profile; removal can be fiddly if the channel is gunked up.
Adhesive-backed seals
These stick onto glass or metal. They’re often used for vertical seals, small gaps, or as a quick fix when a clamp-style sweep isn’t compatible.
- Pros: versatile, helpful for odd gaps.
- Cons: adhesive fails if the surface isn’t perfectly clean and dry; removal can leave residue.
What I recommend in most homes
Frameless door leaking at the bottom: start with a clamp-style bottom sweep sized to your glass thickness, ideally with a drip rail lip and a flexible fin.
Framed door: match the exact slide-in profile. Bring the old piece to the store if you can.
Small side gap: add or replace the vertical seal, often adhesive or clamp-on depending on the panel.
Remove the old sweep safely
This part is easier than it looks, and it feels strangely satisfying.
Safety notes (quick but important)
- Wear gloves (and eye protection if you’re cutting rigid plastic). Tempered glass is strong, but edges can chip if you knock or lever against them.
- Don’t force a too-tight clamp: if it won’t slide on with reasonable pressure, it may be the wrong thickness.
- Avoid hard tools against glass: use plastic, not metal.
Tools you might want
- Rubber gloves
- Non-scratch scrub pad
- Rubbing alcohol or a glass-safe degreaser
- Plastic putty knife (for adhesive types)
- Scissors or a fine-tooth hacksaw (to cut a new sweep to length)
- Hair dryer (to soften stubborn adhesive)
Removal steps (clamp-style)
- Open the door so you can grip the sweep evenly.
- Pull from one end, sliding it along the glass edge. If it’s stuck, wiggle gently rather than yanking straight down.
- Clean the glass edge thoroughly. Any residue makes the new sweep fit poorly.
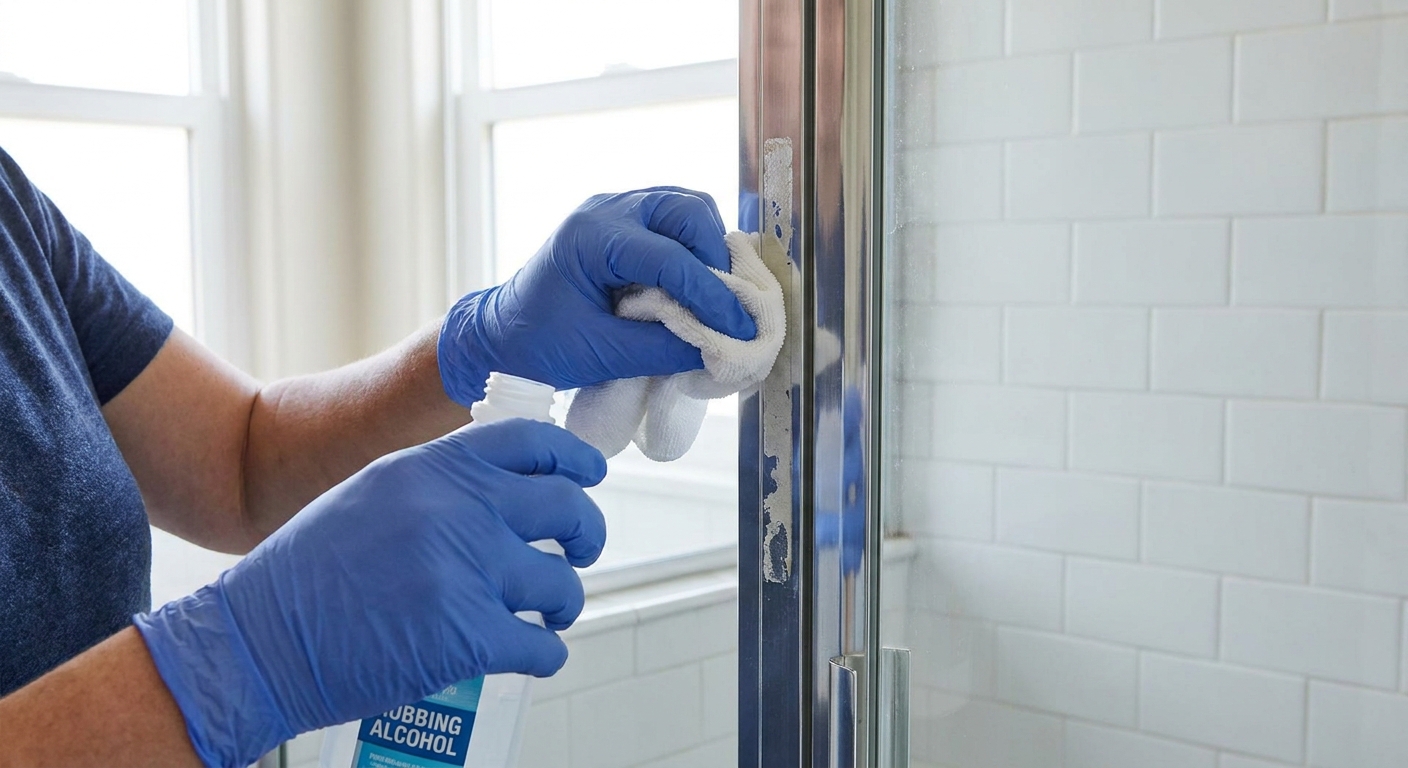
Removal steps (adhesive)
- Warm the seal with a hair dryer on low to soften the adhesive.
- Lift slowly with a plastic putty knife.
- Remove residue with rubbing alcohol or a plastic-safe adhesive remover. Spot-test first, especially on acrylic doors, painted metal, or specialty finishes. Avoid harsh solvents that can haze plastic.
Install the new sweep
Take your time here. A careful install is the difference between fixed for two years and why is it falling off already.
Step 1: Dry-fit first
Before cutting anything, slide or place the new sweep on the door to confirm it seats properly and the fin points the correct direction. (Most fins should angle inward, toward the shower.)
Step 2: Cut to length cleanly
Mark the length with a pencil or painter’s tape. Cut with sharp scissors for softer vinyl, or use a fine-tooth hacksaw for rigid drip rails. Aim for a square cut so the corners meet neatly.
Step 3: Clean and dry the contact surface
For clamp-on sweeps, clean the glass edge. For adhesive seals, clean and dry the face where it’ll stick. If there’s any dampness, the adhesive will fail early.
Step 4: Install
- Clamp-on: start at one end and slide on evenly. Don’t twist. If it’s very tight, a tiny bit of soapy water can help, then wipe dry.
- Slide-in framed: feed the spine into the channel and push along the length. If the channel is tight, clean it again, then try.
- Adhesive: peel a little backing at a time, press firmly, and work in small sections to avoid crooked placement.
Step 5: Check for drag and gaps
Close the door gently. The fin should touch the threshold lightly. If the door feels like it’s plowing through rubber, you may need a shorter fin or an alignment tweak.
Step 6: Water test (realistic, not aggressive)
Run the shower and test under your typical spray conditions. If you want to stress-test, briefly aim the spray toward the door for a few seconds, then watch where water travels. A proper drip rail will guide water inward instead of letting it crawl under the door.
Help your new seals last
Seals fail faster when they sit in moisture, soap, and mineral buildup all day. You don’t need a complicated routine, just a few small habits.
- Squeegee the glass after showers: especially the bottom 12 inches where water pools and drips.
- Run the exhaust fan for 20 minutes after bathing to reduce humidity.
- Wipe the threshold with a small towel if your shower tends to hold puddles.
- Clean the sweep monthly: a quick wipe with gentle soap and water prevents gritty buildup that abrades the fin.
- Avoid harsh chemicals: strong solvents can harden vinyl and shorten its life.
My tiny home habit is keeping a small, neutral hand towel tucked under the sink just for the shower threshold. A quick swipe takes five seconds and saves you from that damp-sock feeling later.
If it still leaks
If you replaced the sweep and water still escapes, don’t assume you bought the wrong thing immediately. Run through these common issues first.
The fin is facing the wrong direction
It happens. Many sweeps can be installed flipped, but only one orientation sends water back inside.
The door isn’t square
If the bottom gap is larger on one side, water will find that weak spot. Adjust hinges if your model allows, or add a compatible vertical seal to the problem edge.
The threshold is flat or pitched wrong
A sweep can only do so much if water is being encouraged to run outward. In these cases, a drip rail style often performs better than a simple fin sweep.
It’s escaping from the side
Stand outside the shower and watch during a test run. If droplets are spraying through a vertical gap, you need a strike seal or magnetic seal, not a bottom sweep.
Framed door track is overflowing
If water is pooling in the bottom track, recheck those weep holes and make sure the track is clean and seated properly.
Curved glass needs a flexible sweep
If you see tiny gaps where the sweep doesn’t follow the curve, switch to a flexible curved-glass sweep.
You’ve actually got an acrylic door
Some older enclosures use acrylic or plastic rather than tempered glass. Adhesives and clamp fits can behave differently. Use products rated for acrylic, and spot-test cleaners and removers before going all in.
Renter notes
If you’re renting, replacing a slide-in sweep is often considered routine maintenance, but rules vary. A few suggestions:
- Take photos of the leak and the worn sweep before replacing.
- Save the receipt and the packaging with the size.
- Avoid permanent adhesives on glass unless approved, especially on higher-end frameless doors.
- Call maintenance if the threshold is pitched outward, the door is sagging heavily, the track is damaged, or you see swelling baseboards or soft flooring outside the shower.
Shopping checklist
- Door type (framed slider, frameless hinged, semi-frameless)
- Glass thickness (or frame channel profile)
- Door width (so you can cut to length)
- Gap height between glass and threshold
- Flat vs curved glass
- Clamp-on, slide-in, or adhesive style
- Clear vs frosted finish (purely aesthetic, but it changes the look)
Once you replace a failing sweep, the bathroom instantly feels calmer. No damp bath mat, no stealthy water trails, no creeping worry about what’s happening under the floor. Just the quiet little luxury of a shower that stays in its lane.