Shower Curtain Rod Keeps Falling? Causes and Fixes That Hold
Clara Townsend
Clara Townsend is an interior stylist, vintage furniture enthusiast, and the creative voice behind Velvet Abode. With over a decade of experience transforming both cramped city apartments and sprawling fixer-uppers, she believes that a beautiful home is built on personal stories rather than massive budgets. When she isn't hunting for the perfect brass sconce at a local flea market, she can usually be found rearranging her living room for the third time this month.
If your shower curtain rod keeps falling, you are not alone. Bathrooms are basically the Olympics of slippery surfaces: glossy tile, steamy air, and a curtain that gets yanked twice a day. The good news is most “mystery” falls come down to a few predictable issues, and you can fix them without turning your rental into a construction site.
Below is the exact order I use when I style bathrooms for real life. Start with the least fussy, least damaging fixes first, then level up only if you need to.
Why tension rods fail
1) The wall surface is too slick
Tension rods rely on friction. Smooth glazed tile, glass, high-gloss paint, and some acrylic surrounds do not offer much bite, especially once they are damp. If the rod end caps are hard plastic, they can behave like little ice skates.
2) Moisture (and sometimes heat) reduces grip
Moisture is the most reliable troublemaker here. A thin film of water plus soap residue lowers friction, and that is often enough for a rod to slowly “walk” downward. Heat and steam can also change how some rubber or plastic end caps behave, but it varies by material and rod quality.
3) Too much weight (or a curtain that acts like a sail)
A soaking-wet fabric curtain, extra-thick liner, heavy rings, or a curved rod that puts more leverage on the ends can overwhelm basic tension. Another sneaky culprit is a curtain that gets trapped and yanked when someone steps out.
4) Placement is working against you
If the rod is set too high, too wide, or too close to the outer edge of the tile, you may be pressing against grout lines, uneven corners, or a slightly bowed wall. Even a tiny angle can encourage slipping.
Big rule: do not place rod ends on grout. Grout is uneven, can be porous, and gives the end caps less stable contact.
5) The rod is the wrong size or type
Not all tension rods are created equal. Thin, lightweight rods and weak springs struggle in high-moisture bathrooms. Also, if your rod is near its maximum extension for your opening, it is more likely to flex and lose pressure over time.
Fixes to try first
Step 0: Check the basics
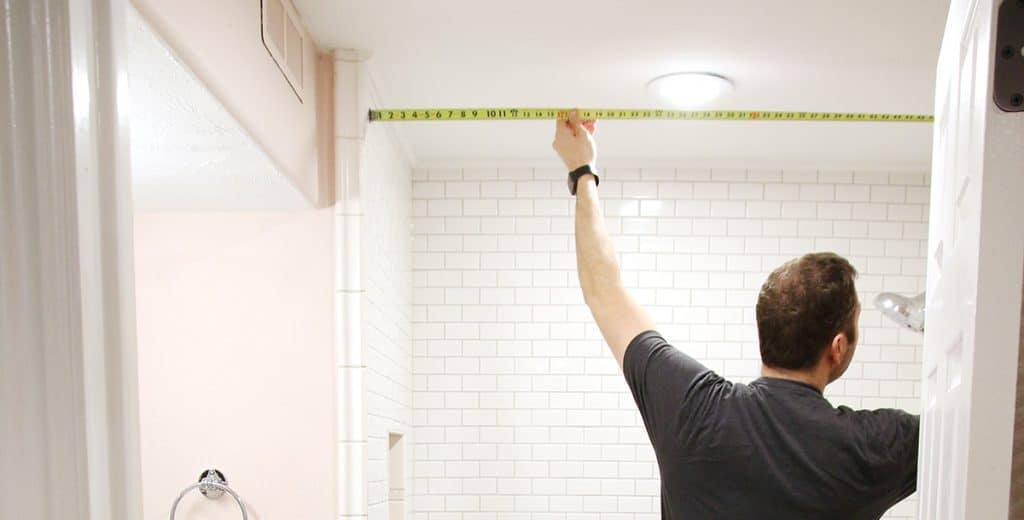
- Measure your opening. Confirm your rod’s stated size range covers it comfortably. If you are at the far end of the range, upgrading often fixes the problem faster than endless retensioning.
- Choose a flat landing spot. Aim for solid, smooth tile (or a smooth surround), not grout lines, textured tile, or decorative trim edges.
Step 1: Retension it properly
This sounds obvious, but it is the fix that actually works most often.
- Take the rod down and dry everything. Dry the tile and the end caps completely.
- Clean the contact spots. Soap residue and conditioner overspray are friction killers. Use rubbing alcohol on tile or glass where the ends sit, then dry again. If you have natural stone (marble, travertine), skip harsh cleaners and use a pH-neutral stone-safe cleaner instead. Always test first.
- Extend the rod firmly. You want solid pressure, not barely-there tension. Extend until it feels secure, but do not over-compress to the point of bowing the rod, stressing tile, or denting drywall.
- Lock it with intention. If your rod twists to lock, twist until it is firmly locked and does not rotate easily.
- Set it straight. Use tile lines as a guide so both ends sit at the same height.
Quick test: After installing, tug the curtain gently from the center. If it shifts, you need more grip or a different approach.
Step 2: Add non-damaging grip where the ends land
If your rod is slipping on tile or fiberglass, add a grippy barrier between the rod and the wall. This increases friction without drilling.
- Rubber tension rod pads: Clear or white rubber discs made for this exact problem. They are usually the cleanest-looking option.
- Silicone bumper pads: The kind used for cabinet doors can work in a pinch if they are large enough.
- Non-slip shelf liner circles: Cut two circles and sandwich them between the end cap and the wall. Not the prettiest, but very effective.
Renter note: Avoid aggressive glue on painted drywall. On smooth tile, some adhesives can be fine, but residue can still be stubborn. If you want the lowest-drama removal, look for removable, bathroom-rated adhesive systems and test in an inconspicuous spot first.

If it still falls
When tension alone is not enough, the best next step is adding support at the ends. The goal is to stop downward creep, not to rebuild your bathroom.
Option A: No-drill brackets
Look for adhesive-mounted shower rod brackets that are rated for humid environments and check the product’s stated load rating and surface compatibility.
- Best for: Smooth, non-porous tile, glass, acrylic, or fiberglass surrounds.
- Not great for: Grout, textured tile, porous stone, or surfaces with heavy texture. Adhesives usually fail faster there.
- Why it works: It prevents sliding because the rod is physically “caught” by the bracket.
- Make it last: Clean with rubbing alcohol (or a stone-safe alternative), let the surface dry fully, then press and hold firmly. Wait the full cure time before hanging the curtain.
Renter note: Some adhesive systems remove cleanly, some do not. If your lease is strict, choose brackets marketed as removable and assume there may still be residue to gently clean.
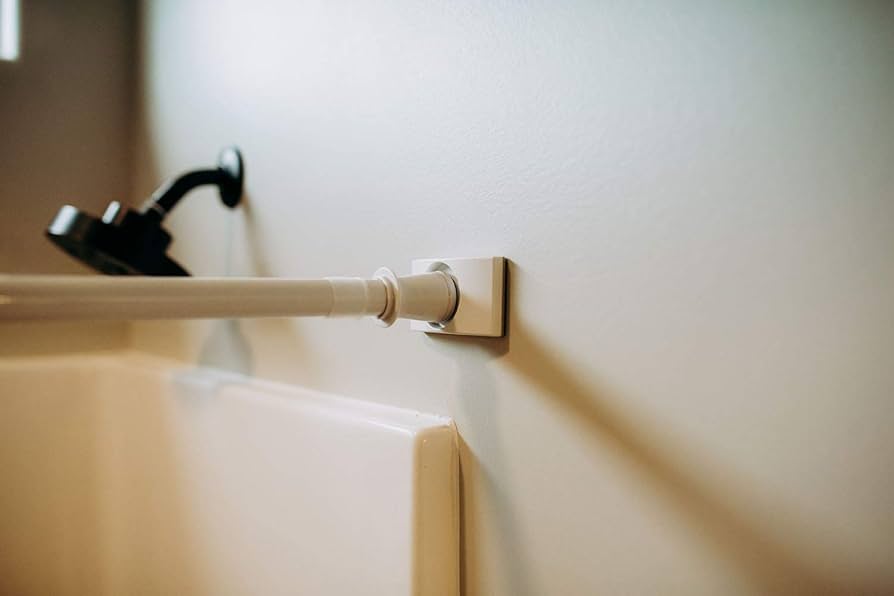
Option B: Screw-in brackets
If your shower opening is on painted drywall, tension rods are more likely to dent the wall and slowly sink. A basic wall-mounted rod with brackets is the most stable option.
- Best for: Drywall, plaster, and showers where one side is not tile.
- What matters: Use the proper anchors if you cannot hit a stud. Anchors rated for the rod and curtain weight will outperform a struggling tension spring every time.
- Design perk: Wall-mounted rods look more intentional, especially in a styled space.
Renter note: If you can patch small holes at move-out, this is often worth it for peace and quiet.
Troubleshooting by symptom
The rod falls overnight
- Moisture and residue are reducing friction. Clean and dry the contact points, then add grip pads.
- Check if it is placed on a grout line or uneven seam. Shift it slightly left or right onto flat tile.
It falls when you pull the curtain
- The curtain is snagging. Switch to smoother roller rings or ensure the liner is not catching on the tub edge.
- Lower the rod slightly so the curtain hangs straighter and pulls less at an angle.
It slips down slowly each day
- Retension and lock it firmly (without over-compressing).
- Add no-drill brackets or end-cap pads to stop creep.
The ends leave dents or marks on drywall
- This is drywall compressing. A wall-mounted rod with brackets is the real fix.
- In the meantime, add wider rubber pads to spread pressure.
When to upgrade the rod
If you have tried retensioning plus grip pads and it still drops, the problem is not you. It is the setup.
Upgrade if this sounds like you
- Your shower opening is wide and the rod visibly flexes (or you are near the rod’s max extension).
- You use a heavy fabric curtain plus a liner.
- The bathroom is used daily and gets very steamy.
- One side of the opening is drywall and keeps compressing.
Best upgrade paths
- Wall-mounted straight rod: Most secure, cleanest look, easiest long-term.
- Wall-mounted curved rod: Great if you want more elbow room, but it adds leverage, so solid brackets matter.
- Higher-quality tension rod: Works if you are committed to no-drill and your walls are ideal. Look for a thicker diameter, grippy rubber end caps, and a higher stated load rating.
Style note from my vintage-loving heart: a simple, solid rod in a warm metal tone can make even a basic liner look intentional. Add a linen-look curtain and suddenly the whole bathroom feels calmer.
Quick fix checklist
- Measure the opening and confirm the rod is not at max extension.
- Dry the wall and rod ends completely.
- Clean the contact spots (tile and glass: rubbing alcohol; stone: pH-neutral cleaner), then dry.
- Retension firmly and make sure the rod is level (do not over-compress).
- Make sure the ends sit on flat surface, not grout.
- Add rubber pads or grip discs at both ends.
- If still slipping, install no-drill adhesive brackets on smooth tile or a wall-mounted bracket rod on drywall.
- If the setup is wide or heavy, upgrade to a sturdier rod type.
Safety note
If your rod is falling into the tub regularly, pause and fix it before your next shower. A rod can chip tile or damage enamel or acrylic surfaces, and it can land on a toe at the worst possible moment. If you have kids or anyone with balance concerns in the home, skip straight to brackets or a wall-mounted rod.
One of these tiers will stick. Once the rod stops moving, the whole bathroom instantly feels calmer.