Sectional Connectors Loose? Re-clip and Stabilize Modular Pieces
Clara Townsend
Clara Townsend is an interior stylist, vintage furniture enthusiast, and the creative voice behind Velvet Abode. With over a decade of experience transforming both cramped city apartments and sprawling fixer-uppers, she believes that a beautiful home is built on personal stories rather than massive budgets. When she isn't hunting for the perfect brass sconce at a local flea market, she can usually be found rearranging her living room for the third time this month.
If your modular sectional keeps “unzipping” itself every time someone sits down, it is usually not a rug problem. It is a connector problem.
Sliding on hard floors is all about traction. Separating modular pieces is about joint play, meaning the connectors are not fully seated, are slightly bent, are missing hardware, or the frames have loosened just enough that the pieces no longer pull tight.
First, confirm it is a connector issue
Here are the quick tells I use when I walk into a client’s living room and the sectional looks innocent but behaves like it is on wheels.
- The gap opens at the seam even though the feet are not sliding across the floor.
- You can wiggle one piece side-to-side and feel a little clunk or looseness at the join.
- The pieces reconnect easily but separate again within a day or two.
- The rug grips fine and the feet are not drifting, yet the seam still spreads.
If, instead, the whole sectional drifts as one unit across tile or hardwood, you want our traction-focused guide (different fix, different tools). This page is for the seam that will not stay locked.
Why sectional connectors fail over time
Most modular sectionals use one of three connector styles. They are simple, effective, and not immune to years of scooting, vacuuming, moving, and real life.
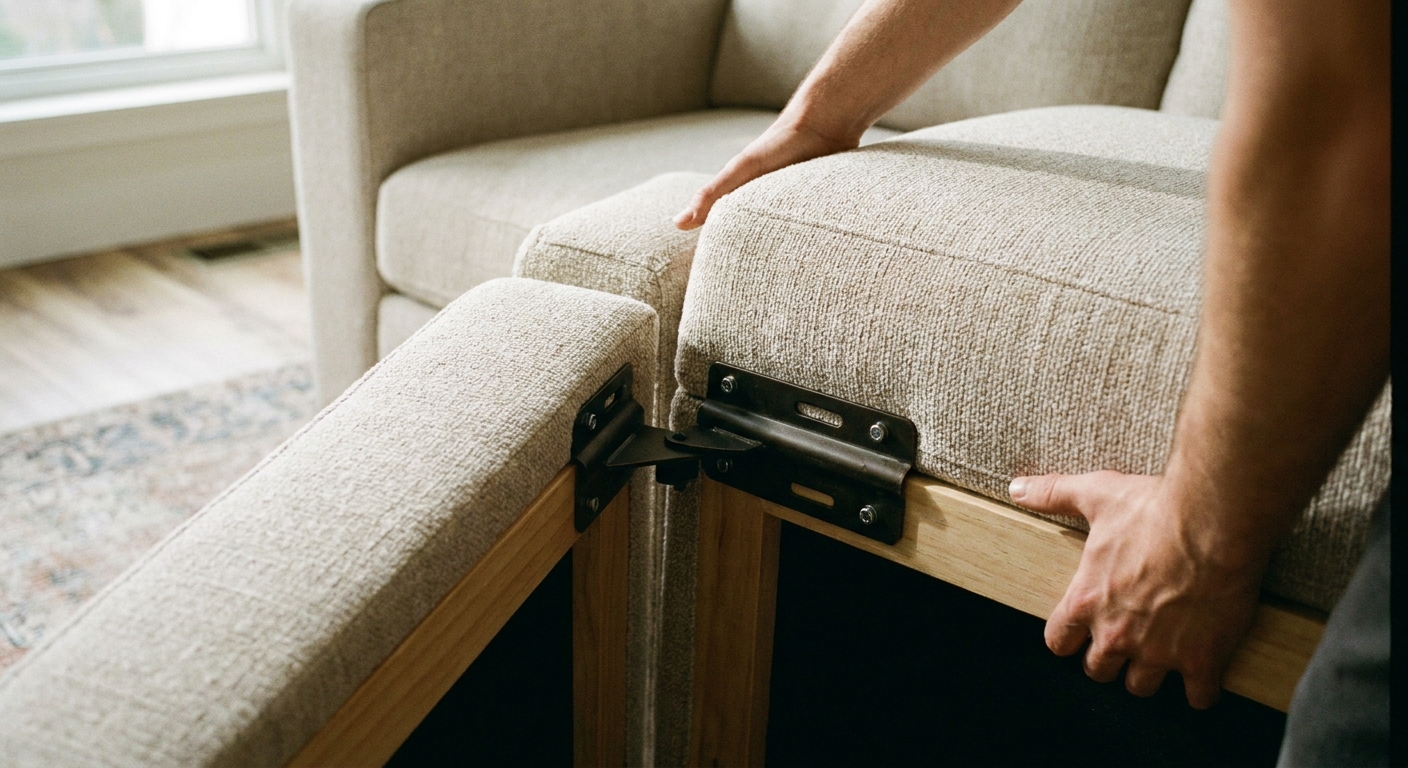
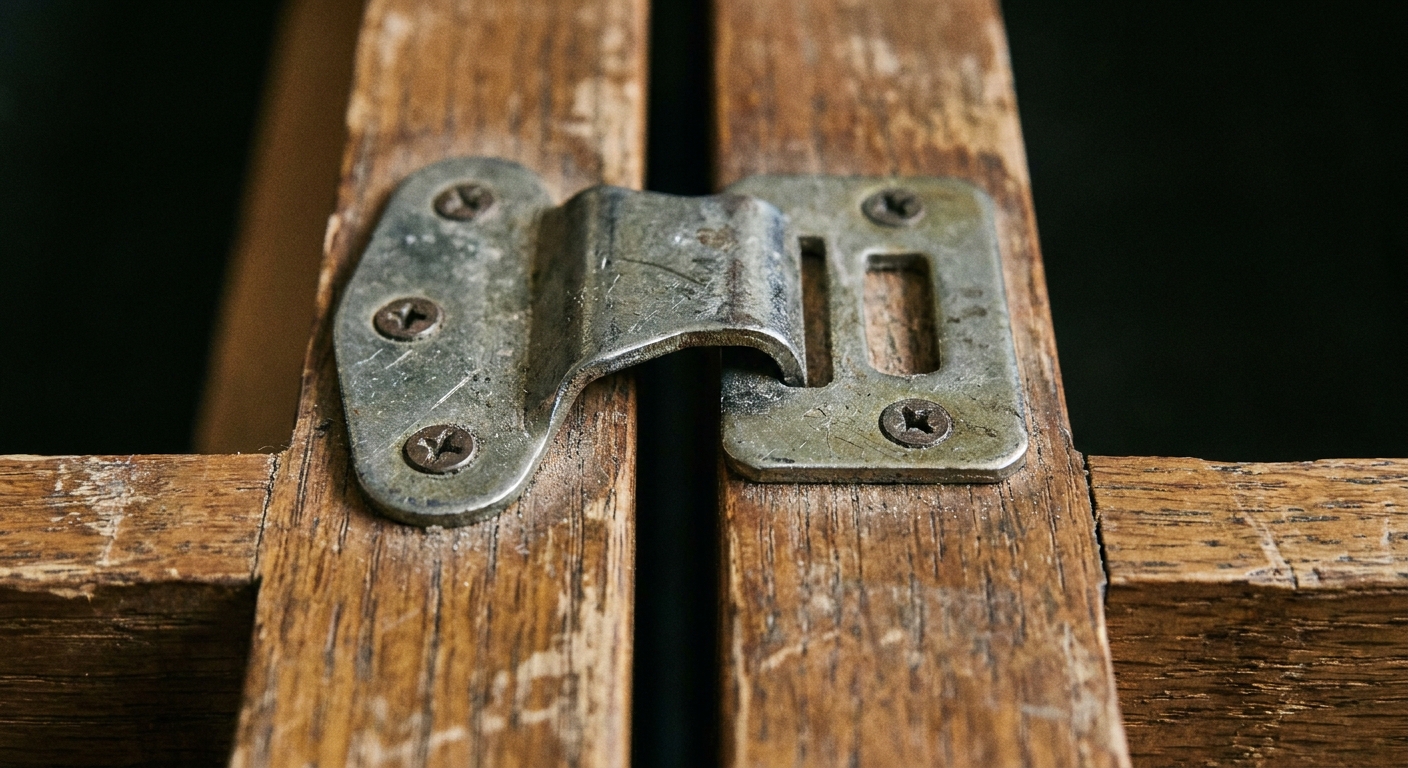
1) Brackets and “crocodile” clips
These are the metal hook-and-slot style connectors mounted to the frame. They fail when:
- They are not fully engaged because the pieces were pushed together at a slight angle.
- The clip is bent from dragging the sectional while it is still connected.
- Screws loosen and the connector shifts, so it cannot catch cleanly.
- Wood compresses around the screw holes, creating a tiny wobble that becomes a gap.
2) Alignment pins and sockets
These are the “pegs” that help one piece nest into another. They fail when:
- The pin is slightly bent, so it never seats all the way.
- The receiving hole is wallowed out from repeated stress.
- The pin is missing after a move, a repair, or an enthusiastic deep clean.
3) Cam locks and turn-lock connectors
More common on flat-pack or modular designs, these “twist to lock” fasteners fail when:
- They were never fully turned to the locked position after rearranging.
- The cam is stripped or the bolt is slightly loose, so it cannot pull the pieces tight.
- The two sections are misaligned, so the cam bites but does not clamp.
Tools and prep (keep it gentle)
You do not need a full workshop. You do need a calm five minutes and a little clearance.
- Flashlight or phone light
- Work gloves (optional but helpful)
- Phillips and flathead screwdriver
- Small adjustable wrench or pliers (for some cam bolts)
- Felt pads and thin rubber bumpers (more on this below)
- A friend, if the sections are heavy or awkward
Safety note: lift and shift pieces instead of dragging them while connected. Dragging is how clips bend and screw holes loosen. Also, keep fingers clear of the seam when you “drop” connectors into place. Those brackets love to pinch.
Step-by-step: re-seat and re-clip connectors
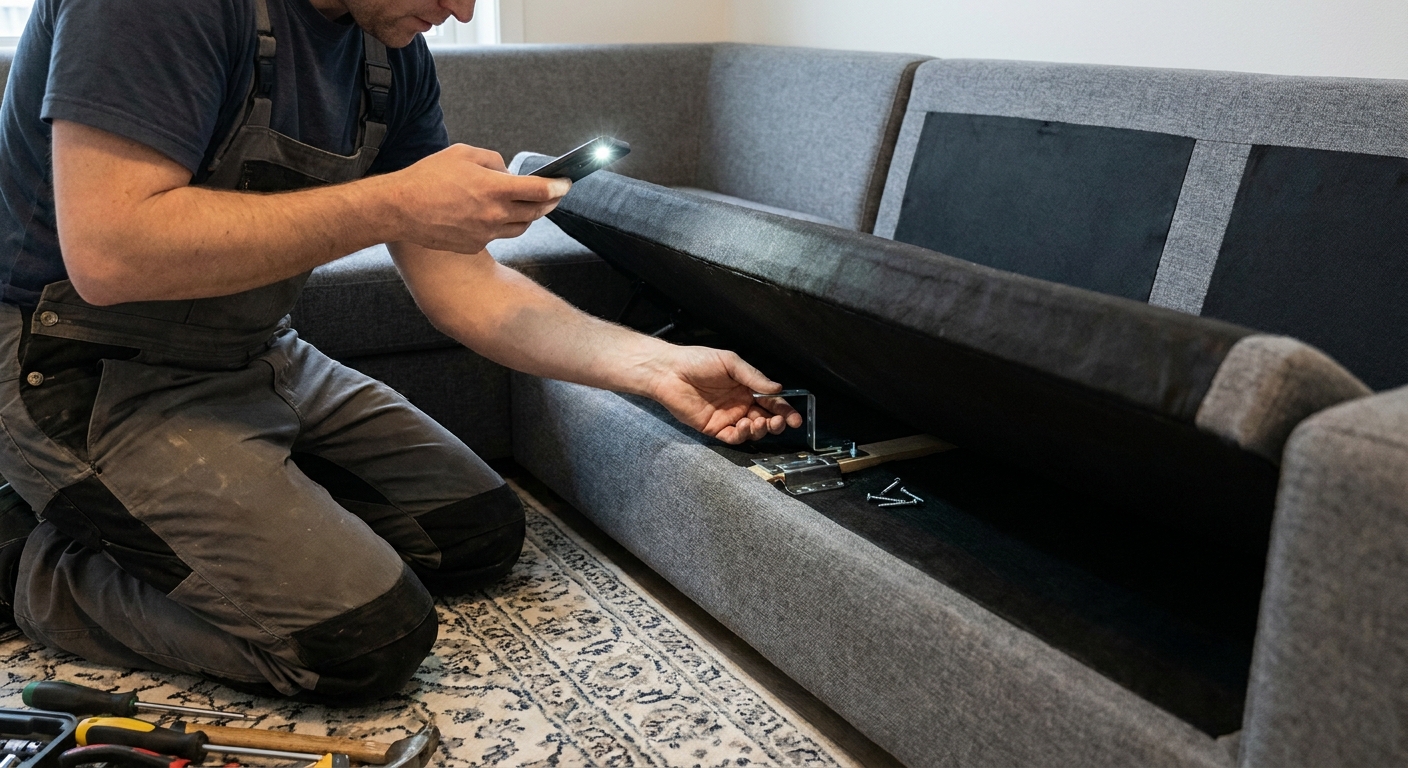
Step 1: Separate the sections and inspect both sides
Pull the pieces apart just enough to see the hardware. Look for:
- Missing screws
- Screws backed out even a little
- Connectors mounted crooked
- Bent hooks, crushed slots, or twisted plates
Step 2: Tighten what is loose (but do not over-tighten)
Snug up screws so the connector sits flat against the frame. Stop when you feel firm resistance. Over-tightening can strip the wood, which creates more play, not less.
Step 3: Realign the pieces before you reconnect
This is the part people skip. If the sectional is even slightly skewed, the connector will “half-catch” and pop loose later.
- Line up the fronts first so the seam is flush where you see it.
- Then line up the backs so you are not forcing the frames into a twist.
- If there are alignment pins, guide those in before you try to lock clips.
Step 4: Engage the connectors with a clean, confident motion
For bracket and clip styles, you typically want a slight lift, then a settle down into the catch. For cams, rotate to the lock position until it stops.
After connecting, do a gentle test: push one section sideways with your hip. If it shifts at the seam, you still have joint play.
Fixes for the most common “it still separates” scenarios
The clip hooks, but pops apart when someone sits
- Look for a bent hook. If it is visibly deformed, it may not hold tension. Many connectors are replaceable with a like-for-like part from the manufacturer or a furniture hardware supplier.
- Check screw tightness and wood bite. If the plate shifts under load, it will release.
- Verify full engagement. Some clips need the pieces to be pushed together, then pressed down to seat.
Alignment pins will not seat
- Look for debris in the socket, especially if the sectional sits near a kitchen or entry.
- Check for a slightly bent pin. Even a small bend can stop full seating.
- Confirm you are connecting the right modules. Some sectionals have “left” and “right” hardware that only matches one way.
Cam locks spin or never feel tight
- Make sure the bolt is captured. The cam can spin forever if the mating bolt is not in the cam channel.
- Snug the bolt first (if accessible), then lock the cam.
- If the cam is stripped, replacement is usually inexpensive and worth it.
Add discreet stabilization (no drilling into floors)
Once the connectors are correctly seated, modest stabilization can keep the seam feeling “quiet” during daily use. The goal is to reduce micro-movement at the joint, not to glue your sofa to the planet.
Option 1: Felt pads for tiny height corrections
If one module sits a hair higher or rocks slightly, the connector takes the stress. Add felt pads under the feet on the lighter side to level things out.
- Choose dense felt, not fluffy craft felt.
- Use the smallest thickness that stops rocking.
- Place pads under the feet, not at the seam, so you are supporting the frame.
Option 2: Rubber grippers under feet to reduce “walk” at the seam
Even when the whole sectional is not sliding across the room, a little foot movement can translate into seam separation. Thin rubber furniture grippers under the feet can calm that down without changing the look.
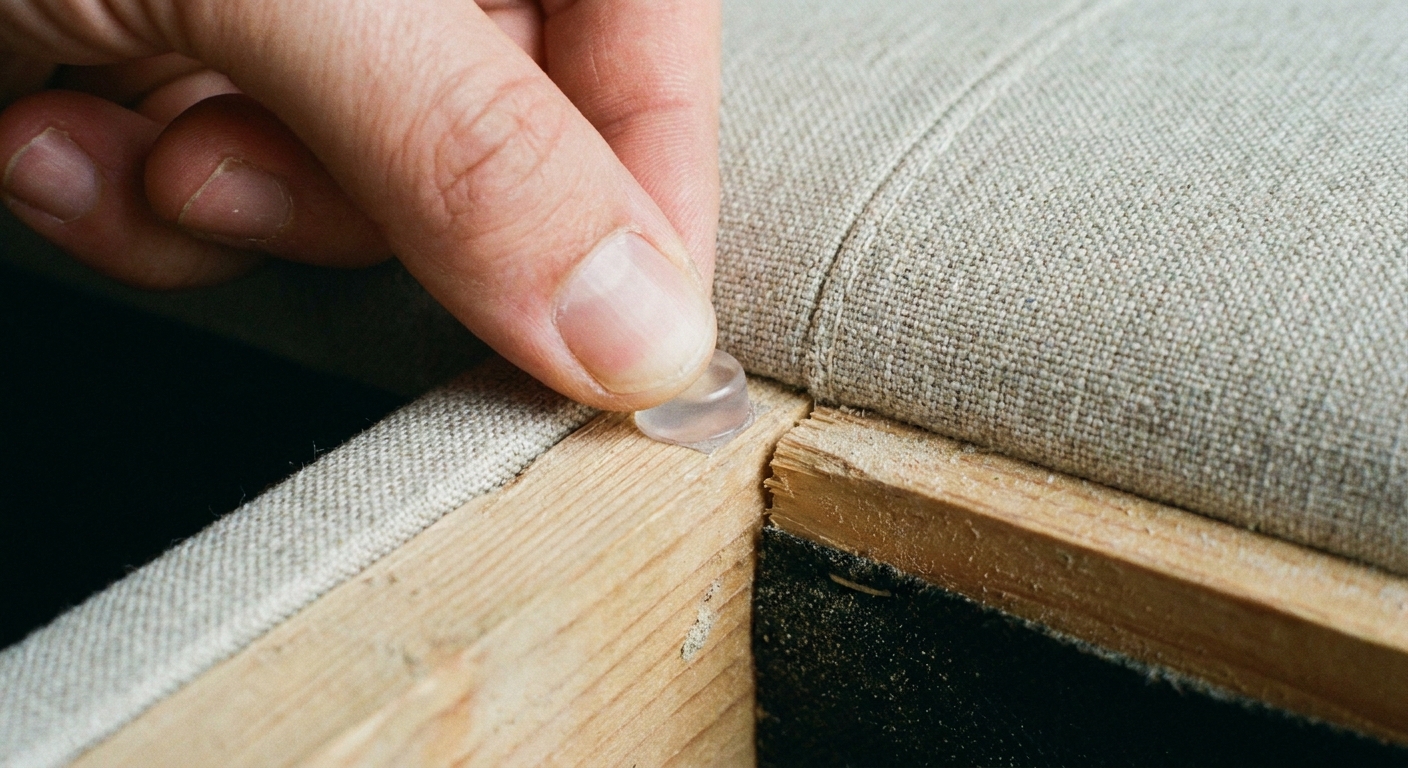
Option 3: Rubber bumpers between frames (only where they will not show)
If the frames knock against each other and create space over time, small clear rubber bumpers placed on an interior, hidden contact point can act like a tiny shock absorber.
Use bumpers sparingly. Too thick, and you will prevent the connector from fully engaging.
What not to do (the quick “please don’t” list)
- Do not blame the rug first. If the seam opens but the feet stay put, the issue is connection, not traction.
- Do not force misaligned modules together. You can bend hardware and twist frames.
- Do not over-tighten screws into soft wood. Stripped holes create repeat loosening.
- Do not add thick pads at the seam that keep connectors from fully seating.
- Do not drag connected sections while rearranging. Disconnect, lift, move, then reconnect.
When to replace hardware (and when to call the manufacturer)
If you have re-seated everything and the seam still releases, you may be dealing with worn or damaged parts. Consider replacement when:
- The clip or bracket is visibly bent or cracked
- The cam lock no longer grabs, even when aligned
- Multiple screws will not hold because the wood is damaged
- A pin is missing and the module will not align without it
If your sectional is under warranty, start with the manufacturer. They can often send the exact connector set for your model, which saves you from playing hardware matchmaker.
A simple “stay-together” routine after cleaning or rearranging
Modular sectionals love to be reinvented. I do it too. Just give the connectors a little respect when you are done.
- Reconnect with the modules square to each other, not at an angle.
- Do one gentle wiggle test at the seam.
- Every few months, check that the connector screws are snug.
When the joints are seated properly, the whole sectional feels quieter. The cushions look neater. And the room stops doing that awkward little “excuse me” shuffle every time someone sits down.