Rug Browning and Water Marks After Cleaning
Clara Townsend
Clara Townsend is an interior stylist, vintage furniture enthusiast, and the creative voice behind Velvet Abode. With over a decade of experience transforming both cramped city apartments and sprawling fixer-uppers, she believes that a beautiful home is built on personal stories rather than massive budgets. When she isn't hunting for the perfect brass sconce at a local flea market, she can usually be found rearranging her living room for the third time this month.
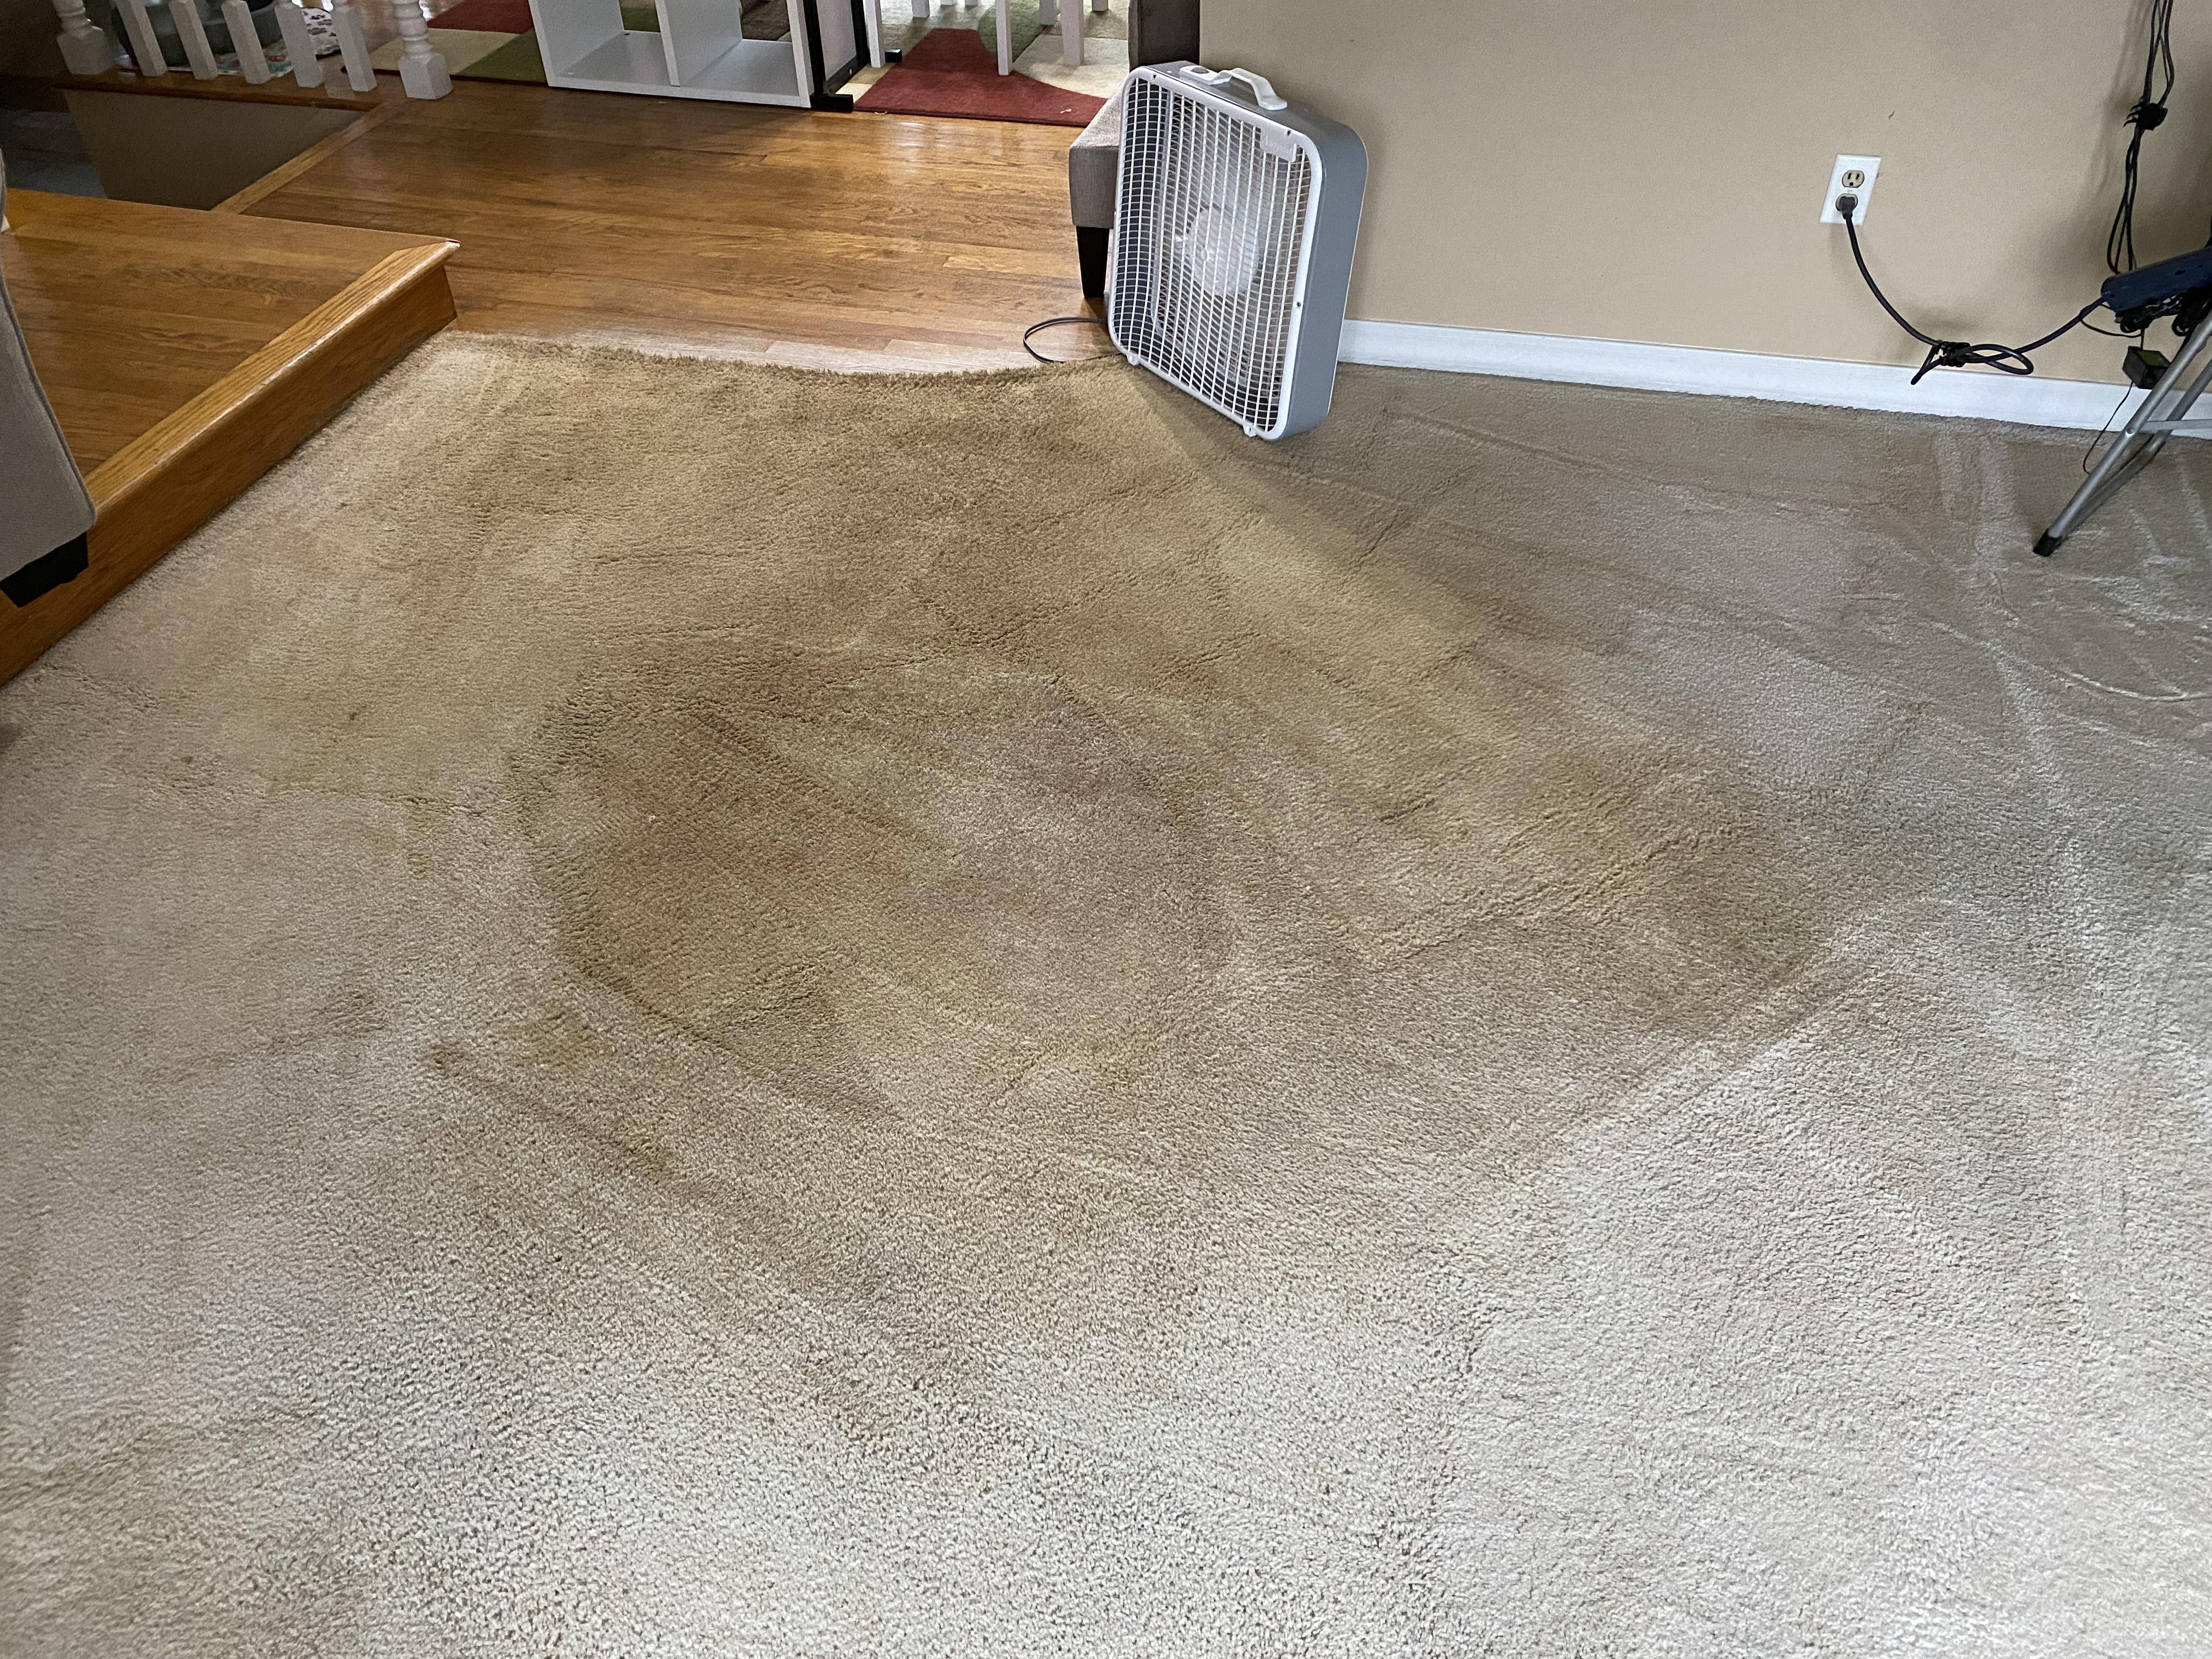
Nothing makes your stomach drop quite like cleaning a spill, stepping back, and realizing you have made it worse. Suddenly there is a brown halo. Or a crisp, pale “tide line” that looks like a coffee ring the size of a hula hoop. The good news is that most post-cleaning marks are not permanent stains. They are often a drying problem, a residue problem, or a backing and pad problem.
Let’s walk through what you are seeing, why it happened, and how to correct it without turning your rug into a damp science project.
First: what kind of mark is it?
Before you do anything else, identify the look of the discoloration. Different marks point to different fixes.
Brown spots or overall yellow-brown shading
- Most common cause: over-wetting, slow drying, and wicking from the backing or pad.
- Also possible: cellulosic browning (natural fibers), old spills reappearing, or rust from furniture legs.
Light, crisp “tide lines” or rings
- Most common cause: residue left behind by the cleaner, or soil being pulled to the edge as it dries.
- Also possible: uneven wetting and drying, especially if you spot-cleaned a small circle in a larger dirty area.
- Sometimes: optical brighteners or “spotter” products can leave lighter patches that look like pale rings.
Grayish or dull patches
- Most common cause: detergent residue holding onto dirt, or pile distortion from scrubbing.
Dark patches that feel stiff or crunchy
- Most common cause: too much product, not enough rinsing, or a backing that stayed wet and migrated up.
Quick safety note: If you smell mustiness, see any fuzzy growth, or the rug feels cool and damp a day later, treat it as an urgent drying issue. Mold risk climbs fast when a rug stays wet, often within 24 to 48 hours (and sooner in warm, humid rooms).
Why this happens (plain English)
1) Over-wetting and slow drying
Rugs are layered. Even if the top looks “barely damp,” the foundation may be wet. When moisture sits, it dissolves whatever is in the fibers or backing, then carries it upward as it dries. That upward migration is called wicking, and it is one of the most common reasons brown marks return after you think you fixed them.
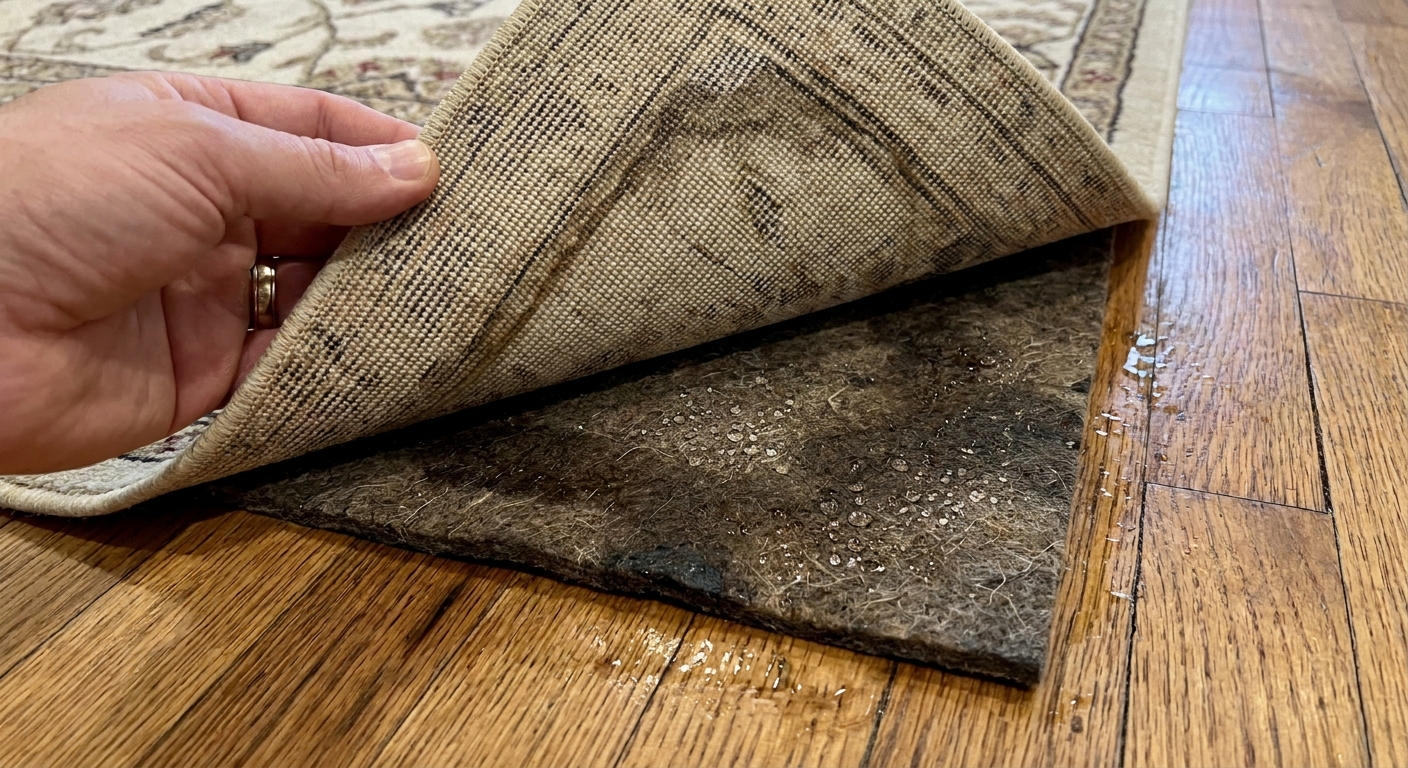
2) Pad wicking
If your rug has a pad under it, the pad can act like a sponge and a dye-transfer station. You clean the top, water soaks through, the pad gets wet, and then as everything dries the pad feeds moisture back into the rug from underneath. This can create repeated browning that feels like it is haunting you.
3) Residue from the wrong cleaner
Many DIY carpet shampoos and “miracle” sprays leave sticky surfactants behind. Residue attracts soil, and it can also dry into visible rings. Even some dish soaps can be too concentrated and difficult to fully rinse from a rug’s pile.
4) Fiber chemistry (especially natural fibers)
Jute, sisal, seagrass, and other plant fibers contain natural compounds that can darken when wet. This is often called cellulosic browning. Wool can also yellow or brown if it stays wet too long or if the cleaner was too alkaline.
The do-not-do list
- Do not keep adding water in rounds without improving drying. More moisture plus slow drying usually equals more wicking.
- Do not use bleach on rugs. It can weaken fibers, lighten unevenly, and react with previous cleaners.
- Do not mix cleaners (for example, ammonia products with bleach). When in doubt, rinse with plain water instead of stacking chemicals.
- Do not steam clean natural-fiber flatweaves (jute, sisal, many braided plant-fiber rugs) with DIY machines or heavy moisture. Some pros use controlled low-moisture methods, but at home it is easy to over-wet and lock in browning or warping.
- Do not scrub aggressively, especially on wool and looped constructions. You can fuzz, felt, or distort the pile.
- Do not leave the rug on a wet pad while it dries. That is like drying a towel on a wet towel.
Step-by-step: fix most browning and tide lines
This is the “reset” method I use when a rug has been over-wet or has visible rings from cleaning product.
Step 0: Do a quick color test
Before you re-wet anything, do a fast colorfastness check. Dampen a white cloth with cool water, press on an inconspicuous area for 10 to 15 seconds, and see if dye transfers. If you get color on the cloth, stop and consider a professional clean, especially for reds, navy, and richly dyed patterns.
Step 1: Get the rug off the pad
Move the rug to a hard floor if possible. If you cannot move it, at least pull back the rug and remove the pad from the wet area. Put towels under the wet zone to protect flooring.
Step 2: Blot, do not rub
Use clean white towels. Stand on them and press to pull moisture up. Keep rotating to dry sections of towel.
Step 3: Rinse lightly to remove residue (only if safe)
If the mark looks like a ring or feels sticky or crunchy, residue is likely. A light rinse can help, but only if your rug can handle moisture. Check the care label if you have one, and be cautious with plant-fiber rugs (jute, sisal, seagrass) and water-sensitive fibers (viscose, bamboo silk, art silk).
Mix a gentle rinse:
- Option A (simple): cool distilled water in a spray bottle.
- Option B (for soap or alkaline residue): 1 cup cool distilled water + 1 tablespoon white vinegar. This can help bring pH closer to neutral and improve rinsing and feel, but always spot-test first. Vinegar can affect some dyes or finishes.
Mist the area lightly, then blot immediately. Your goal is even dampness, not saturation.
Step 4: Feather the edge (only when appropriate)
One reason tide lines form is that you cleaned a small circle and the edge dried differently. On wool and most synthetics, you can feather your misting slightly beyond the visible ring so the transition is softer, then blot.
Important: Do not do this on jute, sisal, seagrass, or other plant-fiber rugs. With those, keep moisture as tight and minimal as possible, or you may enlarge the mark.
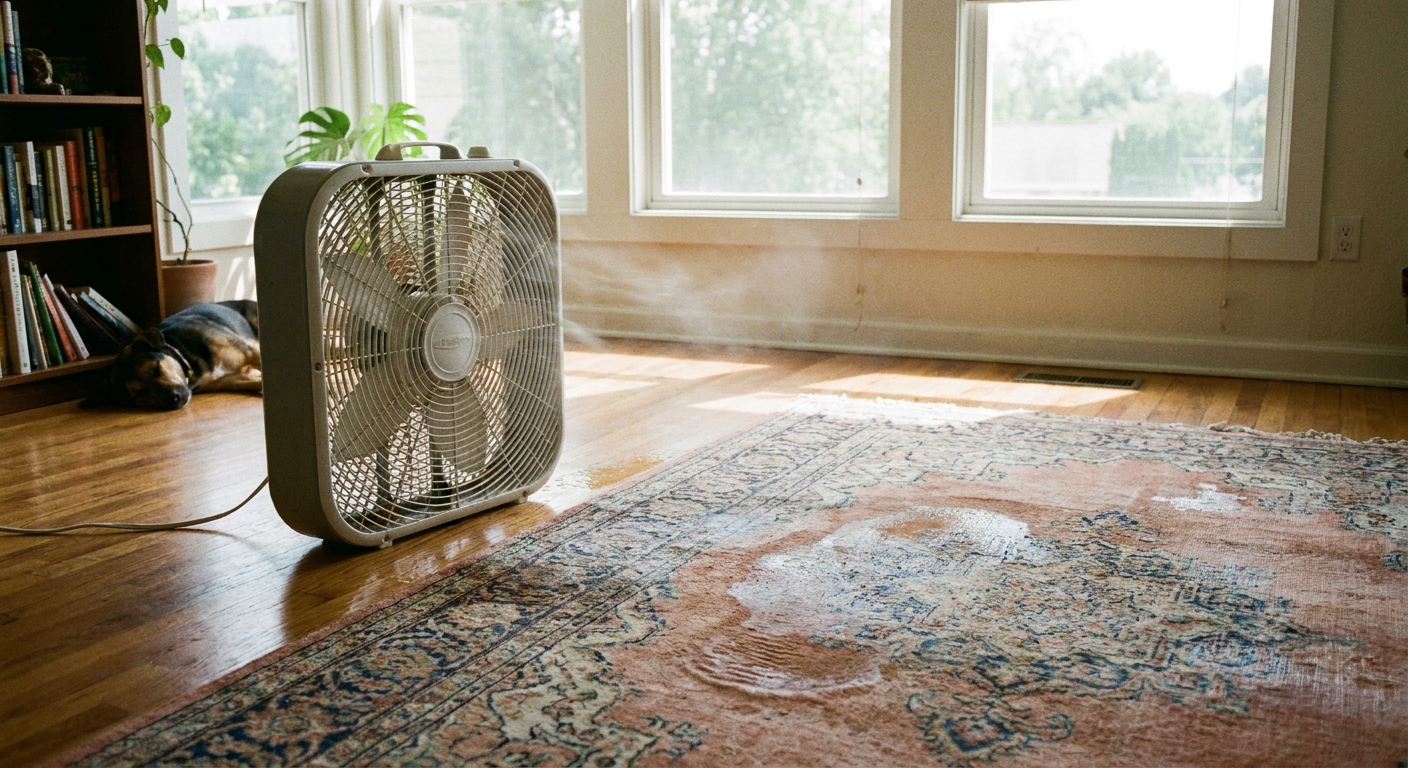
Step 5: Speed-dry hard
- Point a fan across the rug surface, not straight down.
- Add gentle heat to the room if you can, but avoid blasting the rug with high heat.
- If you have a dehumidifier, run it close by.
- Lift the pile with your fingers or a clean, soft brush so air can move through.
If you own a wet-dry vacuum: Use it to extract moisture after misting and blotting. Extraction is one of the best ways to beat wicking, but go easy on fringes and edges, and do not hold strong suction in one spot long enough to distort the pile. Make sure the vacuum is clean so you do not add odors back into damp fibers.
Fiber-specific tips
Wool rugs
Wool is resilient, but it hates being left damp. Browning in wool is often a mix of wicking plus residue that dried in place.
- Use cool water. Hot water can set some stains and can contribute to distortion.
- Avoid high-pH cleaners (many general carpet cleaners). Wool prefers mildly acidic to neutral.
- Rinse and extract to remove residue, then dry fast with airflow and low humidity.
- If the rug has a urine history (pets), browning can be old contamination reappearing. That often needs professional flushing and extraction.
Synthetic rugs (polypropylene, polyester, nylon)
Synthetics are the most forgiving for DIY fixes, but they can hold onto detergent residue like a magnet.
- Prioritize rinsing. Most tide lines on synthetics are soap that dried in place.
- Extraction helps. A wet-dry vac or carpet extractor (used lightly) can remove what blotting cannot.
- Go easy on fragrance cleaners. They often leave sticky components behind.
Cotton flatweaves and rag rugs
Cotton can brown when it dries slowly, and dyes can be less stable than you expect.
- Test colorfastness before you re-wet anything.
- Use distilled water to reduce mineral rings.
- Dry flat and fast. If possible, hang over a sturdy line with airflow so both sides dry evenly.
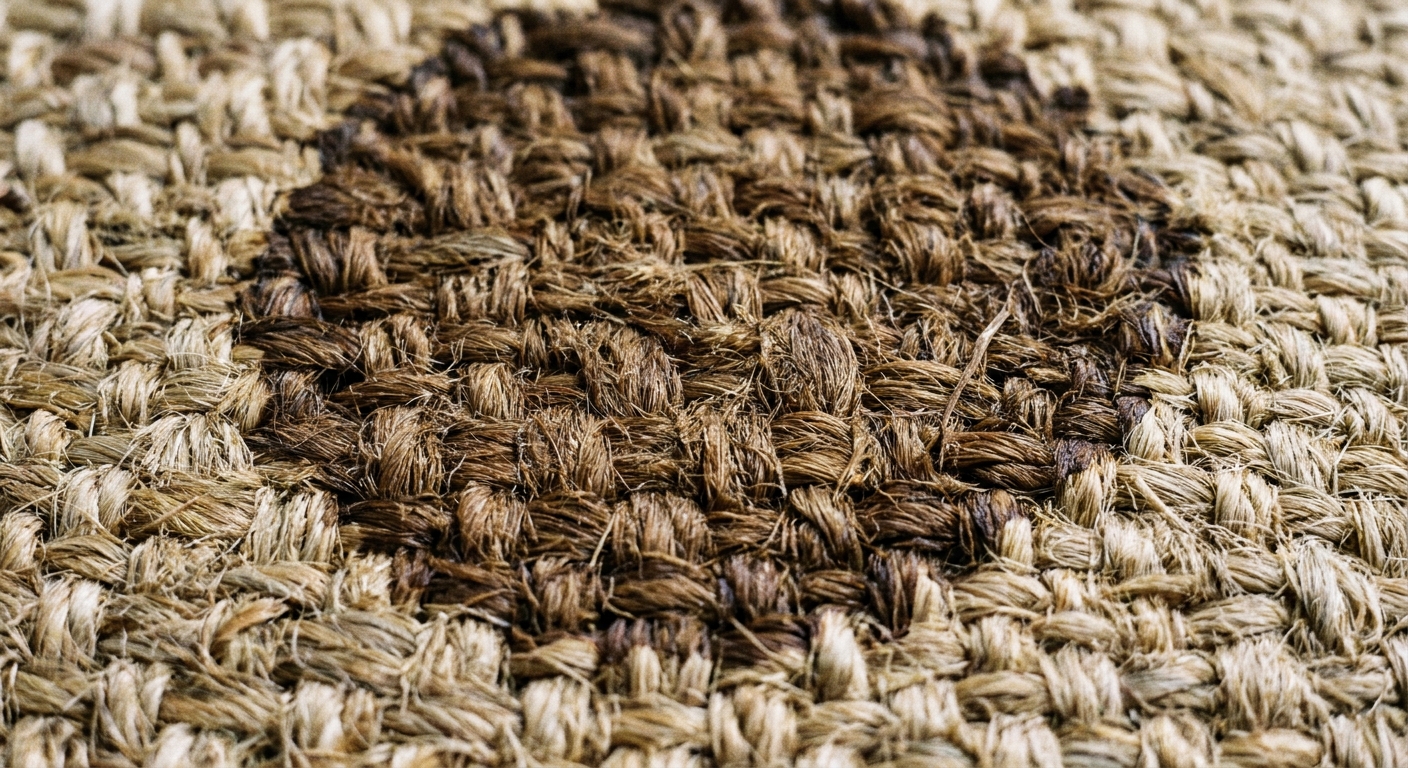
Jute, sisal, seagrass, and other plant-fiber rugs
These are the most likely to show water marks. In many cases, the “stain” is the fiber itself reacting to moisture.
- Keep water to an absolute minimum. Spot-clean with barely damp cloths, not soaking.
- Do not saturate. Deep wetting can cause permanent darkening, rippling, or shrinkage.
- Dry immediately with a fan and dehumidifier.
- If the mark is large or very dark, consider calling a pro experienced with natural fibers. Some water marks do not fully reverse once set.
Viscose, bamboo silk, and “art silk” rugs
These are famous for water sensitivity. They can watermark, gray, or lose sheen with even careful DIY spot cleaning.
- Skip the DIY rinse. Blot dry and get professional help if the mark is obvious.
- Avoid brushing. The pile can distort easily and show permanent shading.
Pad and floor checks
If the mark keeps coming back after you dry the top, assume the moisture is coming from underneath.
Check the rug pad
- Lift the rug corner and touch the pad with a dry paper towel.
- If it picks up moisture or discoloration, remove the pad and dry it separately.
- If the pad smells musty or feels slimy, replace it. Pads are cheaper than rugs.
Check the floor
- Hardwood: do not trap moisture. Dry the floor immediately to prevent cupping or finish damage.
- Concrete: it can hold moisture and slow drying. Elevate the rug slightly so air can circulate.
Prevent it next time
- Blot first, always. Get as much liquid up as possible before any cleaner touches the rug.
- Mist, do not pour. A spray bottle gives control and reduces saturation.
- Use less product than you think you need. Residue is a bigger problem than you expect.
- Rinse lightly. Even “no-rinse” products often benefit from a distilled-water blot.
- Dry fast. Fan + dehumidifier is the dream team.
- Clean beyond the edge (when fiber allows). Feather the damp area so you do not create a perfect ring.
When to call a professional
DIY is wonderful until it is not. Bring in a rug cleaner (ideally one who specializes in area rugs, not just wall-to-wall carpet) if:
- The rug is antique, hand-knotted, vegetable-dyed, or heirloom and you are seeing browning after cleaning.
- The rug is viscose, bamboo silk, or art silk and has water marks or shading.
- The rug is tufted (glue-backed) or has a latex backing and it has been soaked. Adhesives can loosen and dyes can migrate.
- The rug stayed wet for roughly a day or more, smells musty, or you suspect mold.
- The discoloration is spreading, deep, or keeps returning after drying.
- The rug is a natural plant fiber with large water marks.
- You suspect urine, flood water, or backing dye bleed.
Professionals have controlled rinsing and high-powered extraction that removes what DIY methods often leave behind, especially from the foundation layers.
Quick “save the rug” checklist
- Spot-test for dye transfer with a damp white cloth.
- Lift the rug and remove any damp pad.
- Blot with white towels, pressing with body weight.
- Mist with distilled water (add a small splash of vinegar only if appropriate and spot-tested), then blot again.
- Extract if you can, then dry fast with fan plus dehumidifier.
- Do not re-soak repeatedly. Improve drying between attempts.
If you tell me what fiber your rug is, what cleaner you used, and whether you have a pad underneath, you can usually pinpoint the cause quickly and choose the safest fix.