Restuff Sagging Couch Cushions
Clara Townsend
Clara Townsend is an interior stylist, vintage furniture enthusiast, and the creative voice behind Velvet Abode. With over a decade of experience transforming both cramped city apartments and sprawling fixer-uppers, she believes that a beautiful home is built on personal stories rather than massive budgets. When she isn't hunting for the perfect brass sconce at a local flea market, she can usually be found rearranging her living room for the third time this month.
A sagging sofa cushion has a very particular way of making the whole room feel tired. The good news is that most couch cushions are absolutely fixable, and you do not need an upholstery degree or a designer budget to get that “freshly fluffed” look back. You just need the right kind of filling, a little wrapping technique, and a realistic sense of when the foam is simply past its prime.
This guide focuses on comfort and structure, not surface cleaning. We will figure out whether you should add fiber, add batting, replace foam, or do a mix. Then I will walk you through a clean, repeatable method that makes cushions look fuller and sit better.
First: diagnose what is actually sagging
Before you buy anything, unzip a cushion and look inside. Most “flat cushion” problems come from one of three places:
- Compressed foam: the core has softened and no longer springs back.
- Flattened wrap: the foam is okay, but the outer layer that creates loft has collapsed or shifted.
- The cover got bigger: fabric relaxes over time, seams stretch, and the cushion looks baggy even if the insert is decent.
Pull the insert out and do two quick tests.
The squeeze test (foam health)
Squeeze the foam in your hands. Healthy foam rebounds quickly and feels resilient. If it stays dented, feels crumbly, or has the texture of a tired sponge, it is replacement time.
The “pancake” test (cover vs. insert)
Put the insert back in the cover and set it on a flat surface. If the cover wrinkles and puddles while the insert still feels supportive, you likely need more wrap or a slightly larger insert, not a whole new cushion.
Batting vs. fiberfill vs. new foam
These materials get lumped together, but they behave differently. Here is the simplest way to choose.
Add polyester batting when:
- Your foam still feels supportive, but the cushion looks a little deflated.
- You want crisper corners and a smoother, more tailored look.
- You need a little extra “fullness” to fill a relaxed cover.
Batting (often sold as Dacron or polyester wrap for upholstery) comes in sheets. Think of it like a cozy jacket around the foam. It adds loft and reduces wrinkling. If you are working with a tight zippered cover, layering two thinner wraps is often easier than wrestling one super lofty layer.
Add loose fiberfill when:
- Your cushion is fiber-filled already and just needs topping up.
- You have back pillows that collapse and need re-plumping.
- You want a softer, sinkier feel than batting gives.
Fiberfill is loose stuffing. It is wonderful for back cushions and throw pillows. For seat cushions, it tends to migrate and go lumpy unless it is contained in a tightly woven inner liner or inner pillow.
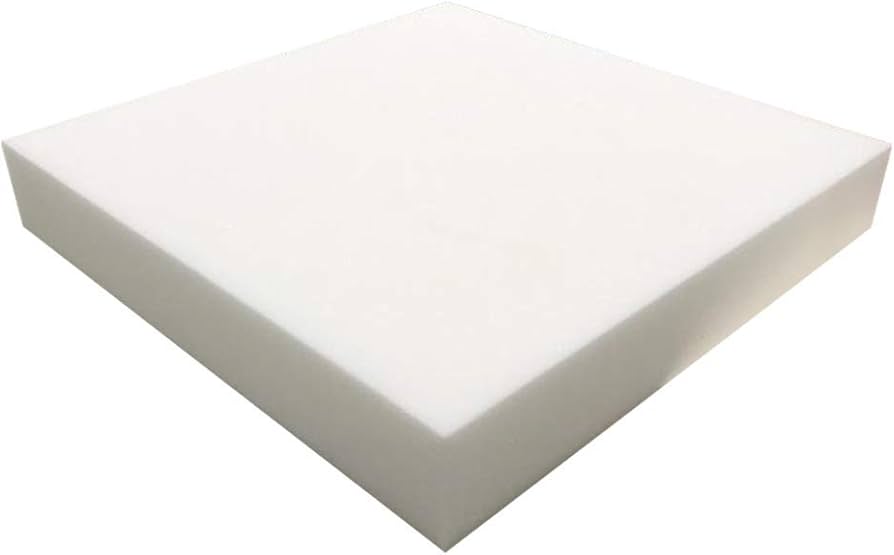
Replace the foam when:
- The foam fails the squeeze test or has permanent dents.
- You feel the frame or springs under the cushion.
- The cushion is lopsided even after rotating and flipping.
If you are replacing foam, you can still wrap it with batting for that plump, “new sofa” finish.
Foam cheat sheet (density vs. firmness)
Quick clarity that saves a lot of money: high-density and firm are not the same thing.
- Density is about durability and how long the foam holds up. For main seat cushions, many DIYers have good results in the 2.0 to 2.5 lb density range (or higher, if budget allows).
- ILD (sometimes called firmness rating) is how firm the foam feels. A common comfortable support range for seats is roughly 35 to 45 ILD, depending on your preference and body weight.
Foam naming is not always consistent across sellers, so use the specs when you can and read reviews. If you are between options, order a small sample piece if the supplier offers it.
Before you buy: match the cushion build
Most DIY restuffing is foam plus wrap, but some cushions are built differently, like pocket-coil, spring-down, layered foam stacks, or a sewn-in wrap. If your insert has multiple layers, coils, or a stitched inner casing, it is usually best to match the original construction or consider having an upholstery shop rebuild it. Your cover is cut for a specific shape and “give,” so major changes can get frustrating fast.
Shopping list
You can do this with basic supplies. Do not overcomplicate it.
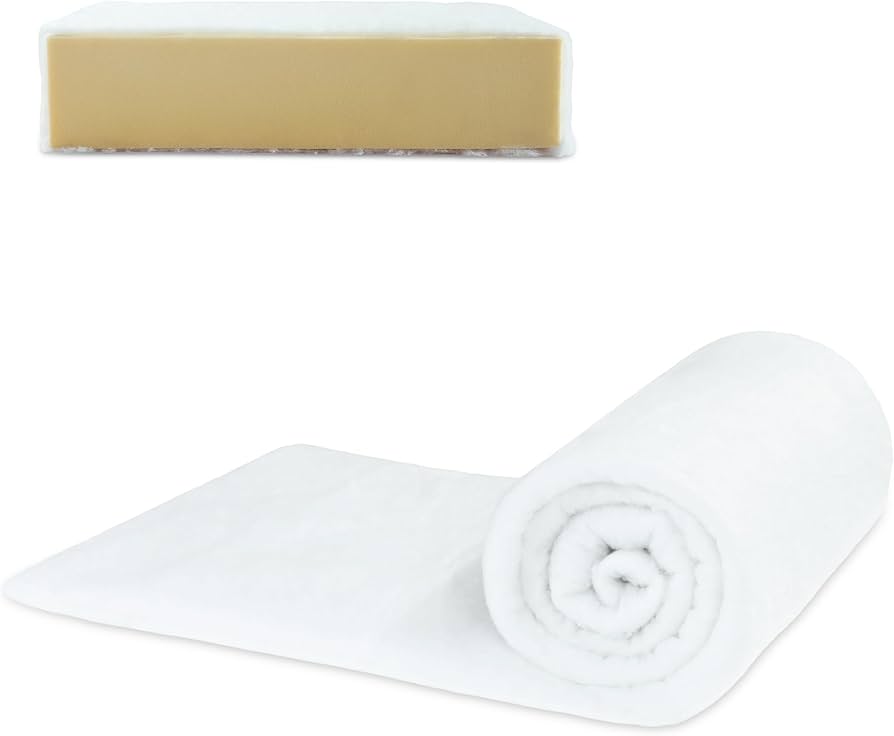
- Polyester batting (Dacron wrap): upholstery wrap, often sold by loft or weight. Layer as needed.
- High-density upholstery foam: if replacing. Look for seating-grade foam and check density and ILD when available.
- Foam-safe upholstery spray adhesive: optional, but helpful for keeping batting from shifting. Use with ventilation, keep it away from flames, and test a small spot first because some adhesives can damage certain foams.
- Cutting tool: an electric carving knife is the cleanest, easiest way to cut seat foam. A serrated bread knife works in a pinch. Scissors are best for thin batting and very soft or thin foam only.
- Marker and measuring tape: for clean cuts.
- Optional: a long upholstery needle and strong thread for quick zipper area repairs.
Tip from my styling floor: grab a cheap plastic tablecloth or an old sheet to work on. Batting sheds tiny fibers and clings to everything.
Measure like you mean it
Remove the old insert and measure the cover, not the foam. Measure seam to seam where the cushion is actually stitched, especially along the zipper and boxing.
- Width (side to side)
- Depth (front to back)
- Thickness (height)
For a fuller look, upholsterers often cut foam about 1/2 inch larger in width and depth than the cover, but it varies a lot by fabric stretch, zipper placement, and cushion style (boxed cushions and knife-edge cushions do not behave the same). If your fabric is structured with very little give, start at exact size.
If you are unsure, do a test-fit before you commit to wrapping. A tiny trim is easy. A too-big foam block inside a tight cover is a full-body workout.
If you are only adding batting, you can keep the foam size as-is and let the wrap do the plumping.
How to restuff a foam seat cushion
Step 1: Open and prep the cover
Unzip the cover fully. If the zipper is stubborn, do not force it yet. Jump down to the zipper section below first.
Turn the cover inside out to check seams and shake out any crumbs of old foam or loose fiber. Vacuum quickly if needed, then flip it back right-side out for re-stuffing.
Step 2: Replace foam if needed
If the foam is shot, use the old foam as a template. Trace it on your new foam, then cut with an electric carving knife for the straightest, cleanest cut. A serrated bread knife can work too. Save scissors for batting and small tweaks.
Step 3: Wrap with batting for loft and smooth corners
This is the secret sauce for that crisp, full cushion.
- Lay batting flat.
- Place foam on top.
- Wrap batting around the foam like a gift, keeping it snug but not compressed.
- Overlap seams on one broad face of the cushion, not on an edge where it will create a ridge.
For extra fullness, do a double wrap. If you do not want the cushion to feel firmer, use two lighter layers instead of one very thick layer.
Optional: a light mist of foam-safe upholstery spray adhesive can keep layers from sliding. Use it sparingly, let it get tacky before pressing, and ventilate the room.
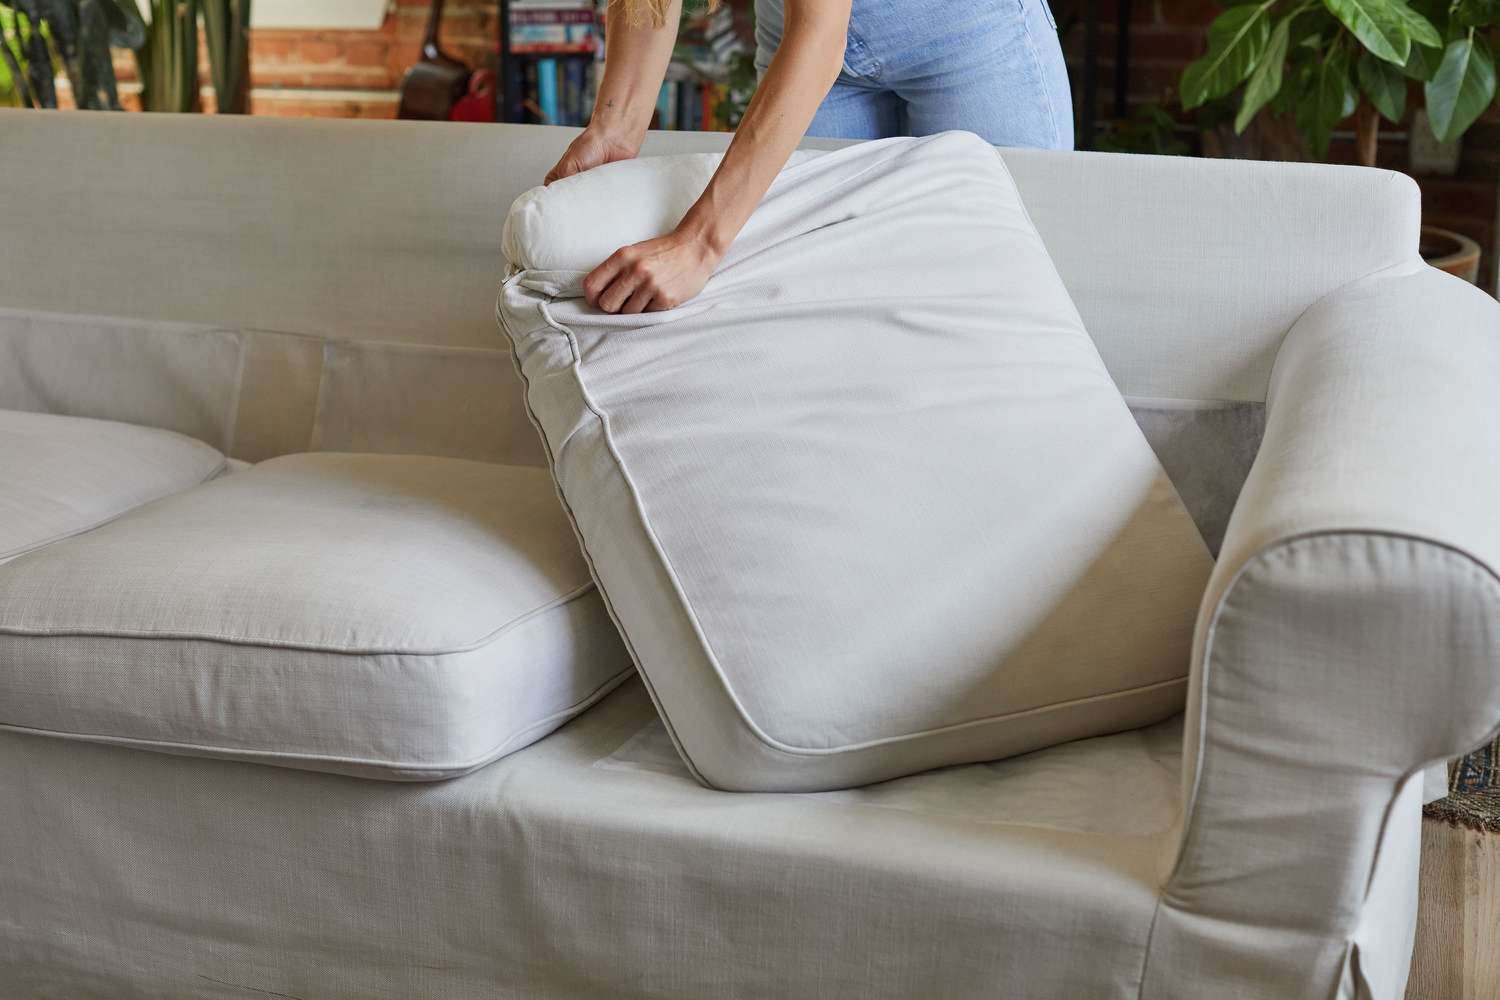
Get the insert back in the cover
This is the part that makes people give up, so here is the calm, tidy way.
The plastic bag slide
- Put the wrapped foam into a very thin plastic bag, like a dry cleaner bag or a cheap, thin trash bag. Avoid heavy-duty bags because they can be stubborn to pull out once the foam expands.
- Slide the bagged insert into the cover. The plastic reduces friction dramatically.
- Once it is in place, reach in and pull the plastic bag out through the zipper opening.
Then massage the corners from the outside like you are fluffing a duvet. Let it sit and rebound. Foam can take 15 to 30 minutes to fully expand if it was compressed.
If the cushion feels too tight to zip, do not panic. You likely need to trim batting at the overlap seam, or reduce the foam by a very small amount. Start with the batting first. Foam is harder to undo.
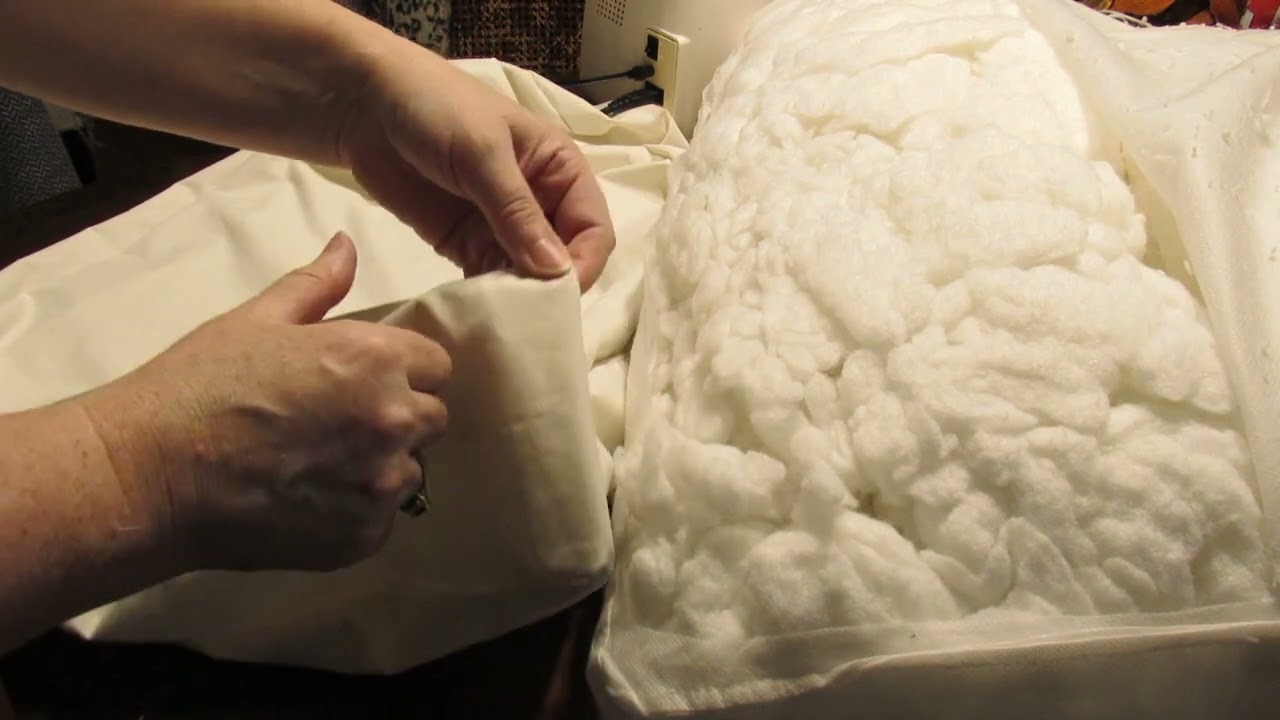
Back cushions: fiberfill refresh
Back cushions are often fiber-filled, and they flatten because the filling migrates downward and clumps. A refresh helps, but you want to avoid creating a lumpy “pillow with rocks” situation.
Step 1: Break up old fill
Pull the insert out and gently tease the fiber apart with your hands. Think of separating cotton candy, not kneading dough.
Step 2: Add fill in layers
Add handfuls of fiberfill a little at a time, distributing evenly across the whole insert, especially the top corners where sagging is most visible.
Step 3: Add structure with a batting wrap (optional)
If your back cushion cover looks floppy or wrinkly, wrap the fiber insert with a thin layer of batting before putting it back in. It smooths the outer surface and makes the cushion look more finished.
Zippers and cover issues
Stuck zipper
- Check for fabric caught in the teeth. Gently pull it free with tweezers.
- Lubricate lightly. A tiny rub of wax (candle or zipper wax) on the zipper teeth can help.
- Do not yank. If the slider bends, you are in a whole new project.
Zipper separating (it closes, then opens behind the slider)
This usually means the slider is worn. A quick fix is to gently tighten the slider with pliers, squeezing the top and bottom plates just a hair so it grips the teeth again. Go slowly. Tiny adjustments.
Zip is too tight for the new insert
If you upgraded fullness and now the zipper is working overtime, you have options:
- Remove a little batting thickness at the overlap seam.
- Add a zipper extension tab (a small key ring or a paperclip in a pinch) so you can pull more smoothly while pressing the insert down.
- Replace the zipper if it is damaged. If sewing is not your thing, a local alterations shop can often do this faster than an upholstery shop.
Baggy cover corners
If corners look empty even with a decent insert, you can add small corner puffs of fiberfill inside the cover at the corners before closing. It is a tiny trick, but it makes the cushion look expensive.
Safety and cleanup notes
- Foam cutting gets messy. Work on a sheet, vacuum after, and wear a mask if you are sensitive to dust or fibers.
- Use spray adhesive safely. Ventilate well, keep away from heat or flame, and choose a foam-safe upholstery adhesive.
- Plastic bags: keep them away from kids and pets during the bag-slide step.
Budget sources for supplies
You do not have to buy everything at a specialty upholstery showroom. Here are practical places to look, especially if you are redoing multiple cushions.
- Local foam shops: often the best value for quality foam, and they can cut to size.
- Fabric stores: frequent coupons for batting and basic notions.
- Upholstery suppliers online: great for higher-density seat foam and specific thicknesses.
- Marketplace finds: if you spot someone giving away a nearly new foam mattress topper, it can be a budget-friendly source for some projects. Better for back cushions or light-use seats, not a main sofa seat.
When choosing foam for a main sofa seat, prioritize durable upholstery foam and check density if it is listed. That is what helps the “new cushion” feeling last.
Make the fluff last
- Rotate and flip seat cushions weekly at first, then monthly once they settle.
- Give them a quick chop on the edges and corners to keep the shape.
- Support the sofa base: if the seat deck is sagging, even perfect cushions will feel sad. If you feel dips beneath the cushions, you may need new webbing, springs, or at least a temporary support board.
A freshly restuffed cushion should feel supportive, look smooth, and spring back when you stand up. That is the goal: a sofa that welcomes you in, not one that swallows you whole.
Quick troubleshooting
The cushion looks lumpy
Batting overlap is likely creating a ridge. Open it up and move the overlap to a flatter face, then smooth the wrap tighter.
The cushion is too firm now
Use less batting, or swap to a lower-loft wrap. If you replaced foam, you may need a slightly lower ILD (softer) foam grade for your comfort preference.
The cushion still sags in the middle
If the foam is new and wrapped properly, the sofa support system underneath is likely the issue. Check for broken springs, stretched webbing, or a bowed deck.