Remove Water Stains from Wood Furniture
Clara Townsend
Clara Townsend is an interior stylist, vintage furniture enthusiast, and the creative voice behind Velvet Abode. With over a decade of experience transforming both cramped city apartments and sprawling fixer-uppers, she believes that a beautiful home is built on personal stories rather than massive budgets. When she isn't hunting for the perfect brass sconce at a local flea market, she can usually be found rearranging her living room for the third time this month.
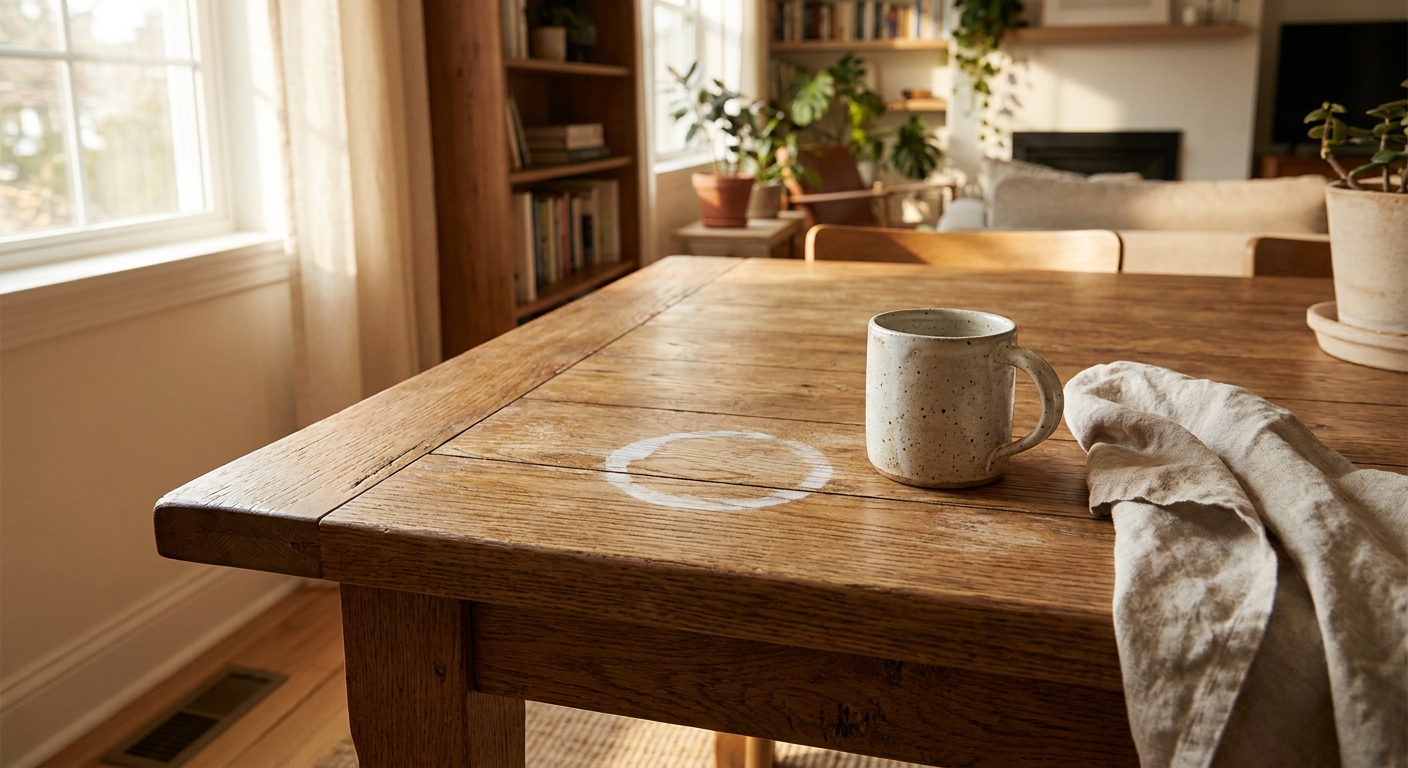
Water rings are the design equivalent of a surprise guest. They show up uninvited, sit right in the center of the table, and somehow look worse under every light in the room. The good news: most water marks are fixable at home, and you do not need a fancy workshop or a budget that belongs to someone else.
This guide covers the most effective methods for white water rings and dark water stains on wood tables, dressers, and nightstands, plus how to choose the right approach for your finish. We will go step by step, with a few sanity-saving notes along the way.
White rings vs dark stains
Before you grab the mayo or fire up the iron, take a close look at the color of the mark. It often tells you where the moisture is sitting, and how aggressive you need to be.
- White rings or cloudy spots: Typically moisture trapped in the finish (the clear top layer), not deep in the wood. These are usually the easiest to remove.
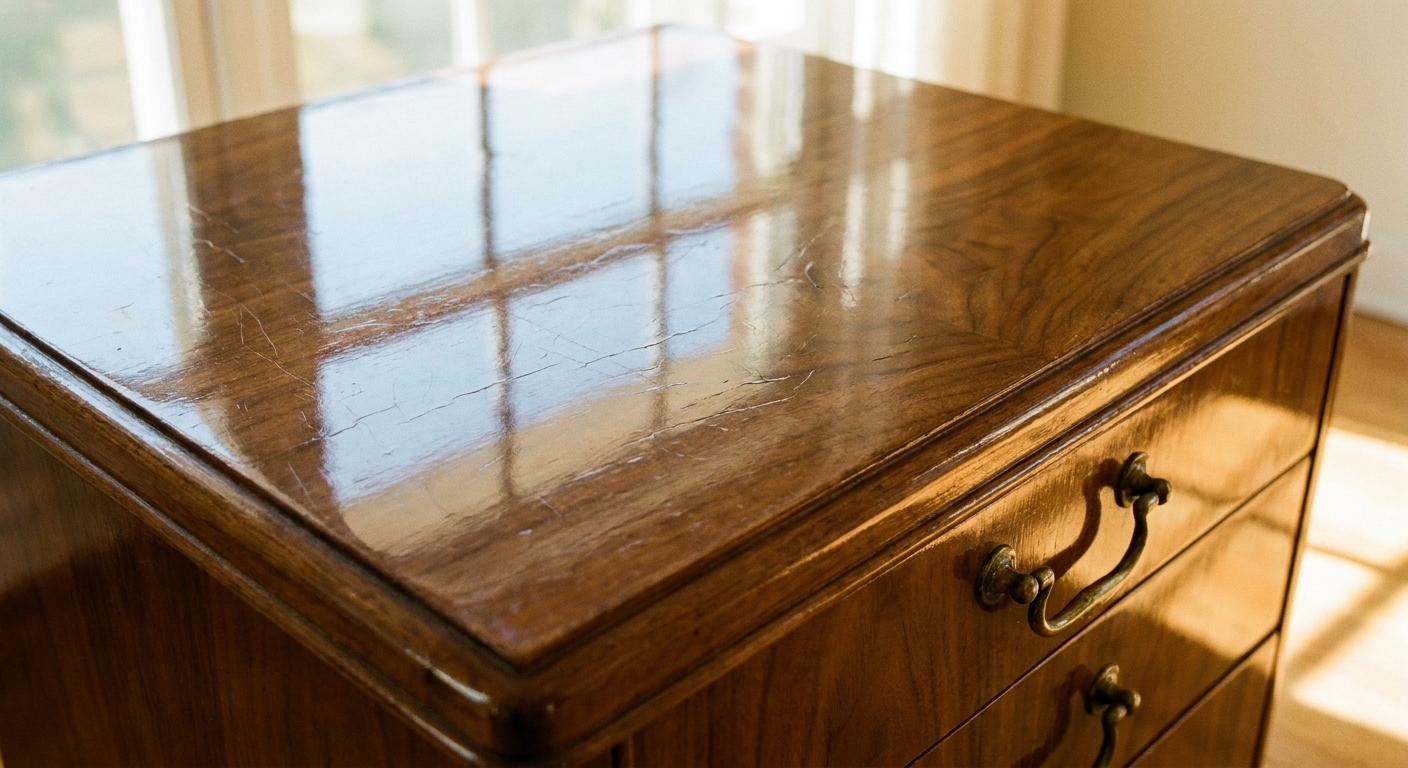
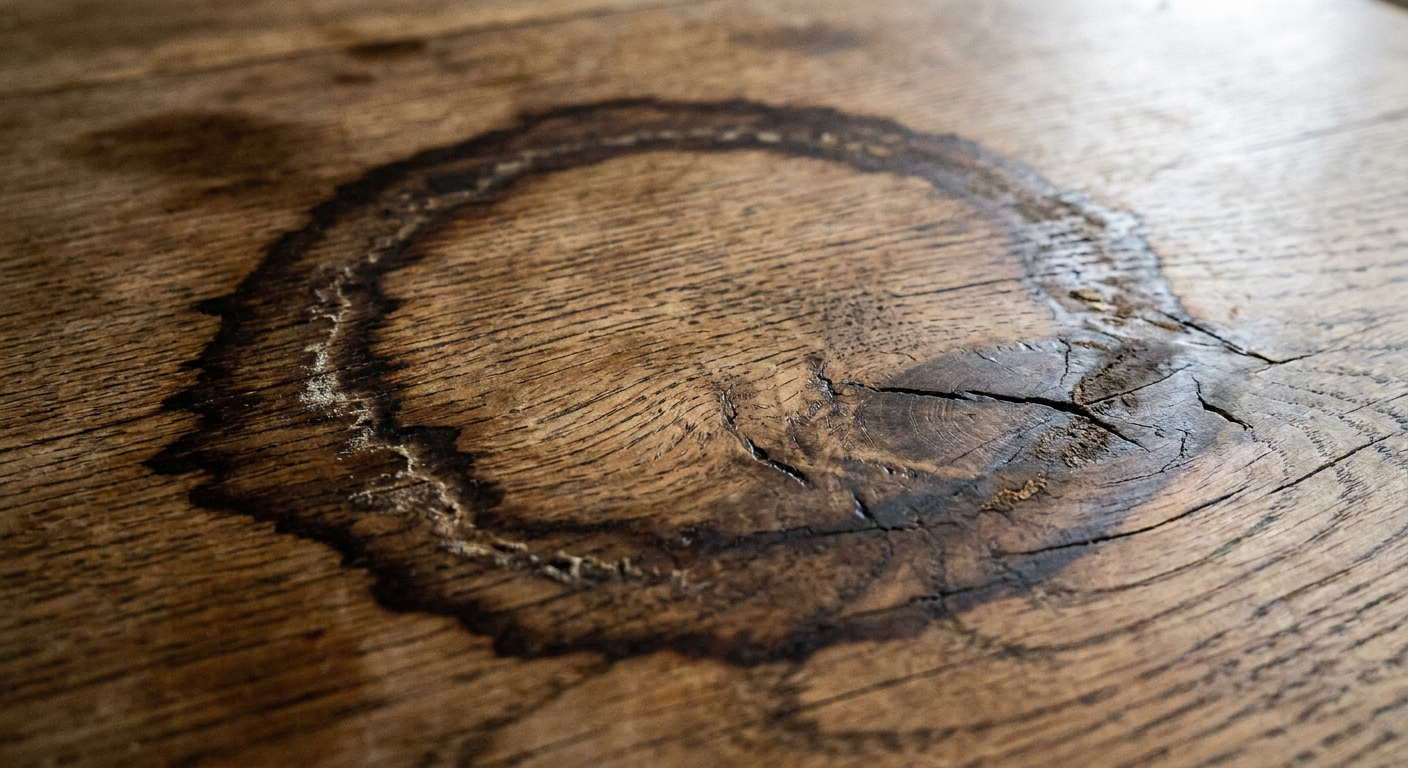
- Dark water stains (brown, gray, or black): Often water that made it past the finish and into the wood fibers, sometimes reacting with tannins (and occasionally metal or iron residue). These need more intensive treatment and sometimes refinishing.
If your stain feels raised, tacky, or slightly soft, it is often heat damage or a finish that has temporarily softened. That can also happen from certain cleaners, polishes, or plasticizers (hello, rubber feet and some placemats). The methods below can still help, but go gently.
Know your finish
Wood furniture finishes are like coats. Some are rain jackets. Some are wool. Some are basically a beautiful scarf. Knowing what you have helps you pick a method that fixes the ring without creating a new problem.
Polyurethane (common on newer furniture)
Clues: Durable, slightly plastic-feeling topcoat. Water tends to bead up. Often on dining tables and big box pieces.
Best methods: Iron-and-cloth, gentle warming, polishing compounds. Baking soda paste can work with a light touch.
Avoid: Aggressive solvents. Heavy abrasion that can turn the sheen patchy.
Lacquer (common on vintage pieces)
Clues: Smooth, hard finish. Can blush (turn cloudy) from moisture. Often on vintage dressers and nightstands.
Best methods: Iron-and-cloth done carefully, gentle warming, mayonnaise, and specialty blush remover products.
Avoid: Strong solvents and harsh cleaners. Lacquer thinner or acetone can strip or melt lacquer quickly. Some alcohol-based cleaners can also soften certain lacquer finishes, so test first and keep it gentle.
Shellac (older antiques, warm tone)
Clues: Classic amber glow. Can get water spots easily. If you rub a hidden area with a cotton swab and denatured alcohol and it gets tacky, it may be shellac.
Best methods: Mayonnaise method, gentle warming, very light polishing.
Avoid: Alcohol-based cleaners and heavy heat. Shellac is sensitive.
Wax or oil finish (matte, touchable)
Clues: Velvety, low sheen, you can feel the grain. Water marks can appear quickly. Often on antique pieces or furniture that has been “revived” with wax.
Best methods: Mayonnaise, re-waxing or re-oiling, very light abrasion with baking soda paste.
Avoid: High heat. Also avoid soaking the surface.
Quick reality check: Many pieces have been refinished over the years. If you are not sure what you have, start with the gentlest method and test in an inconspicuous spot first.
What to do first
- Dry it out: If the ring is fresh, leave the piece in a warm, dry room for 24 to 48 hours. Sometimes the cloudiness fades on its own as moisture escapes.
- Clean lightly: Wipe with a barely damp microfiber cloth, then dry. Skip all-purpose sprays that can leave residue.
- Test the sheen: Notice whether the surface is matte, satin, or glossy. Your goal is to fix the stain without creating a shinier or duller patch.
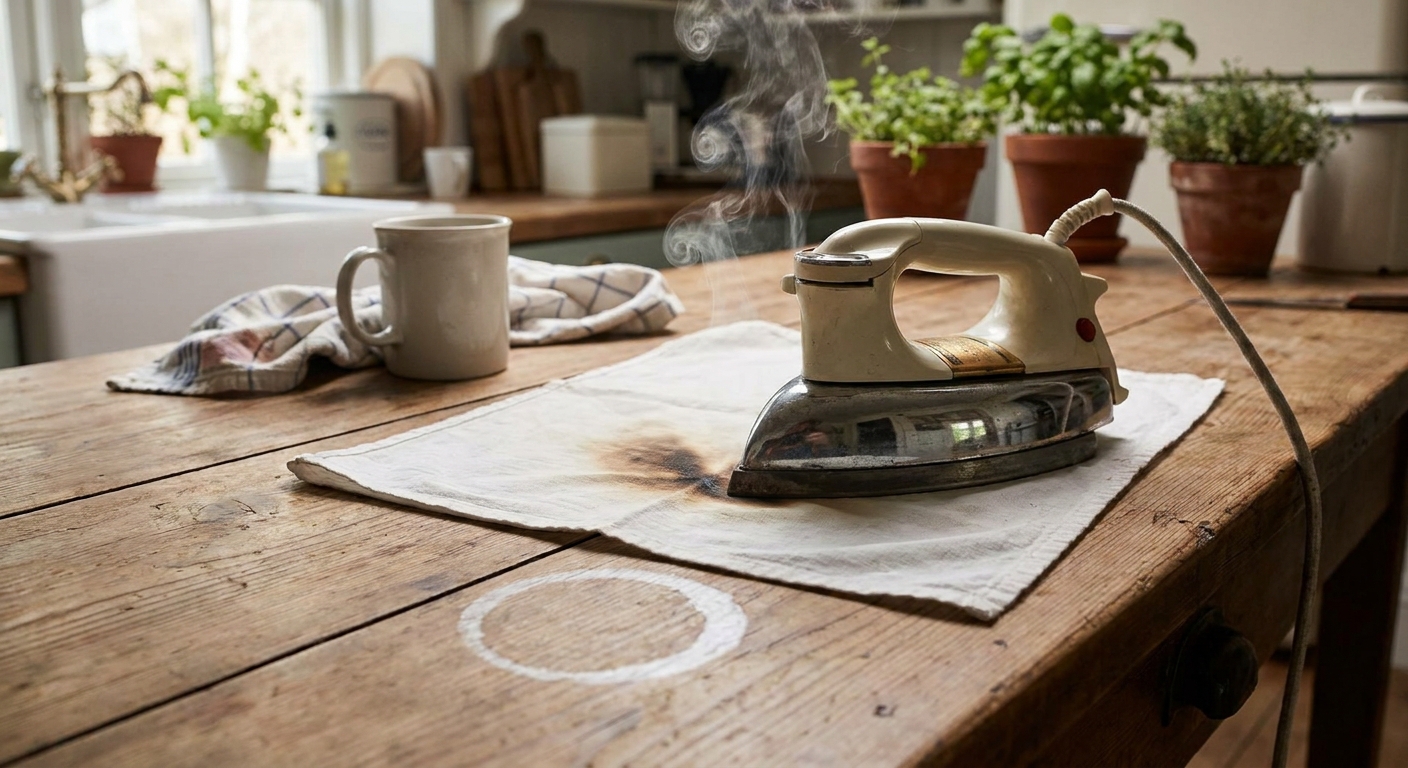
Method 1: Iron and cloth
This is the classic for a reason. White rings are often moisture trapped in the finish. Gentle heat helps it evaporate out.
Works best on
- Polyurethane
- Lacquer (with extra caution)
Use caution on
- Waxed and oiled finishes (heat can melt or smear the wax)
- Shellac (too much heat can print or dull it)
What you need
- A clean cotton cloth (old T-shirt or thin dish towel)
- An iron with steam turned off
Steps
- Set the iron to low (start with “synthetic” or low-cotton). No steam.
- Place the cloth over the ring.
- Tap, do not park: Press the iron onto the cloth for 3 to 6 seconds, then lift.
- Check the ring. Repeat in short bursts until it fades.
- Let the surface cool, then buff gently with a dry microfiber cloth.
Quick note: If you can smell anything “hot,” see the sheen changing, or feel the finish getting tacky, stop and let it cool. The goal is warm, not sizzling.
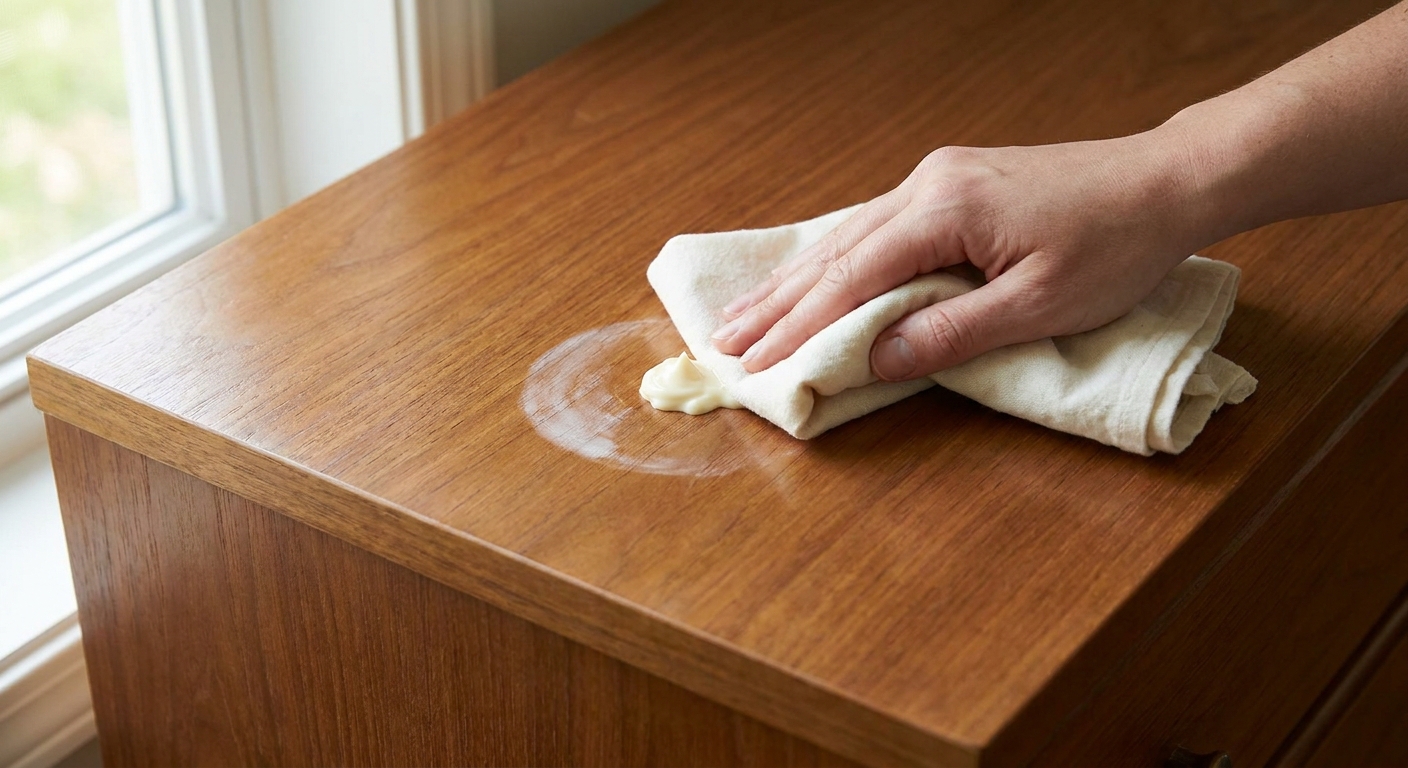
Method 2: Mayo or petroleum jelly
I know. It sounds like an old wives’ tale, and yet it is weirdly dependable on certain finishes. Mayo and petroleum jelly can sometimes reduce the appearance of cloudy spots by conditioning the finish and changing how light hits the affected area. It is not magic, but it can be surprisingly effective.
Works best on
- Waxed finishes
- Shellac
- Some lacquer pieces
How to do it
- Apply a small dab of mayonnaise (or petroleum jelly) directly to the ring.
- Rub lightly with a soft cloth, then leave a thin layer sitting on top.
- Wait 2 to 12 hours (overnight is fine).
- Wipe clean and buff with a dry cloth.
If the ring is improved but still faint, repeat once. After that, move on to a different method rather than building up residue.
Important: Avoid flavored or dyed mayo. Plain is best. Also, do not let it drip into veneer seams or joints.
Stop if: The surface turns sticky, smears, or looks duller in a growing patch. Clean it off and let the finish rest.
Method 3: Baking soda paste
Baking soda is a mild abrasive. It can polish away the cloudy layer in the finish, which is why it works. It is also why you need a feather-light touch.
Works best on
- Polyurethane and tougher finishes
- Some lacquer surfaces, very gently
Avoid on
- Very thin finishes
- High-gloss pieces where a dull spot would be obvious
Steps
- Mix two parts baking soda with one part water to create a thick paste. You want it spreadable, not runny.
- Using a soft cloth, rub the paste over the ring with light pressure, following the grain.
- Work for 10 to 20 seconds, then stop and wipe clean.
- Dry thoroughly and assess. Repeat only if needed.
Finish by buffing, then apply a small amount of furniture polish or paste wax if that matches your piece’s existing finish.
Stop if: The spot starts to look dull, hazy, or uneven in sheen. That is your sign to stop polishing and switch strategies.
Method 4: Dark stains
Dark stains usually mean the wood itself has been affected. Surface tricks rarely erase them completely, but you have options.
Step 1: Confirm what is damaged
If you can feel a dip, cracking, or flaking in the topcoat, the darkness may be trapped in damaged finish layers. In that case, refinishing the topcoat may solve it. If the wood grain itself looks darker, it is likely in the wood.
Step 2: Try gentle cleanup first
- Clean with a barely damp cloth and dry immediately.
- If the piece is waxed, re-waxing sometimes reduces contrast, even if it does not remove the stain.
Step 3: Oxalic acid (spot treatment)
For deep black or gray water stains, especially on oak, walnut, or other tannin-rich woods, oxalic acid is a common woodworking solution because it can lighten water and iron-tannin stains.
Important safety note: Oxalic acid is toxic and requires careful handling. Wear gloves and eye protection, provide ventilation, and follow the product directions exactly. Keep it away from kids and pets.
High-level process (always defer to your product label): Oxalic acid is typically applied to bare wood, which means you usually must remove the finish in the stained area first. After treatment, you will rinse and or neutralize as directed by the product, then allow the area to dry fully before refinishing.
Veneer and edges: Be extra cautious. Spot stripping and bleaching can create a lighter “halo,” and sanding veneer can go wrong fast. If the stain is near an edge, seam, or veneer joint, consider a pro.
Spot fix or refinish
I am all for saving the original finish when it is beautiful and stable. But sometimes the kindest thing you can do for a piece is to give it a clean slate.
Try at-home methods if
- The mark is white or cloudy.
- The finish is intact and smooth.
- The piece is sentimental and you want to keep its patina.
Consider refinishing (or a pro) if
- The stain is dark and has not budged.
- You see cracking, peeling, bubbling, or widespread cloudiness.
- The surface is a patchwork of sheen from previous attempts.
- The piece is veneer and you are unsure how thin it is. Veneer can be sanded through quickly.
Spot refinishing can be tricky because matching color and sheen is an art. If the damage is in a very visible area like the center of a dining table, a full refinish often looks more seamless.
Cheat sheet
| Finish | Best first choice | Next best | Skip or be careful |
|---|---|---|---|
| Polyurethane | Iron-and-cloth (low heat) | Baking soda paste (light) | Aggressive sanding, strong solvents |
| Lacquer | Iron-and-cloth (very cautious) | Mayonnaise, blush remover product | Acetone, lacquer thinner, harsh cleaners, test alcohol-based cleaners first |
| Wax or oil | Mayonnaise or petroleum jelly | Re-wax or re-oil, light baking soda | High heat, soaking water |
| Shellac | Mayonnaise or gentle warming | Light polishing | Alcohol, heavy heat |
Gentle warming
You will see “gentle warming” mentioned a few times because it is a nice middle step when you do not want an iron on the surface.
- Use a hair dryer on low, held 6 to 12 inches away.
- Keep it moving, following the grain, for 30 to 60 seconds.
- Let the surface rest and cool, then reassess.
Stop if: The finish looks wavy, feels soft, or starts to smell hot.
What not to do
A few popular internet fixes can do real damage, especially on veneer or glossy finishes.
- Toothpaste: Often too abrasive, especially whitening formulas. It can leave a dull spot.
- Magic Eraser: It is basically micro-sandpaper. Great for some jobs, risky for finishes.
- Ammonia or harsh all-purpose cleaners: Can cloud, strip, or soften some finishes.
- Acetone or lacquer thinner: Fast, effective, and also a great way to remove the finish you were trying to save.
- Heavy sanding on veneer: One small “oops” and you are through the top layer.
Middle-ground options
If DIY feels like a leap, there are a few in-between choices that can work well on white rings:
- Commercial ring remover cloths: Often treated with mild abrasives and polishing agents. Follow directions and test first.
- Furniture polishing compounds: Good for blending minor cloudiness and restoring sheen, especially on tougher finishes.
Common mistakes
- Using steam with the iron. Steam adds moisture, which is the exact problem.
- Scrubbing in circles on a visible surface. Follow the grain to keep the finish looking even.
- Over-polishing. A shiny patch can end up more noticeable than the original ring.
- Going straight to sanding on veneer. Veneer is thin and unforgiving.
- Mixing too many methods back to back. Give the surface time to cool and settle between attempts.
Prevent water stains
You do not need to live on coasters alone, but a few habits make life easier:
- Keep a small stack of coasters where you actually sit, not tucked in a drawer.
- Use a tray on nightstands for water glasses and skincare bottles.
- Refresh waxed pieces with paste wax occasionally, especially in dry winters or humid summers.
- If you love hot tea, add a heat-resistant coaster or cork pad. Heat can worsen ring formation even more than water.
If your table is a true workhorse, consider a tablecloth for big gatherings or a clear, cut-to-size protective mat for everyday use. Practical can still be pretty.
When in doubt
Most white rings can be handled with careful heat, gentle warming, or a conditioning method like mayonnaise. Dark stains are a different story, and there is no shame in calling in a refinisher if the piece is valuable or the veneer is delicate.
And if you are feeling annoyed at your furniture, I get it. But I also promise: the best homes are lived-in homes. A perfect surface is not the goal. A space that feels like you is.