Remove Water Stains from Wood Furniture
Clara Townsend
Clara Townsend is an interior stylist, vintage furniture enthusiast, and the creative voice behind Velvet Abode. With over a decade of experience transforming both cramped city apartments and sprawling fixer-uppers, she believes that a beautiful home is built on personal stories rather than massive budgets. When she isn't hunting for the perfect brass sconce at a local flea market, she can usually be found rearranging her living room for the third time this month.
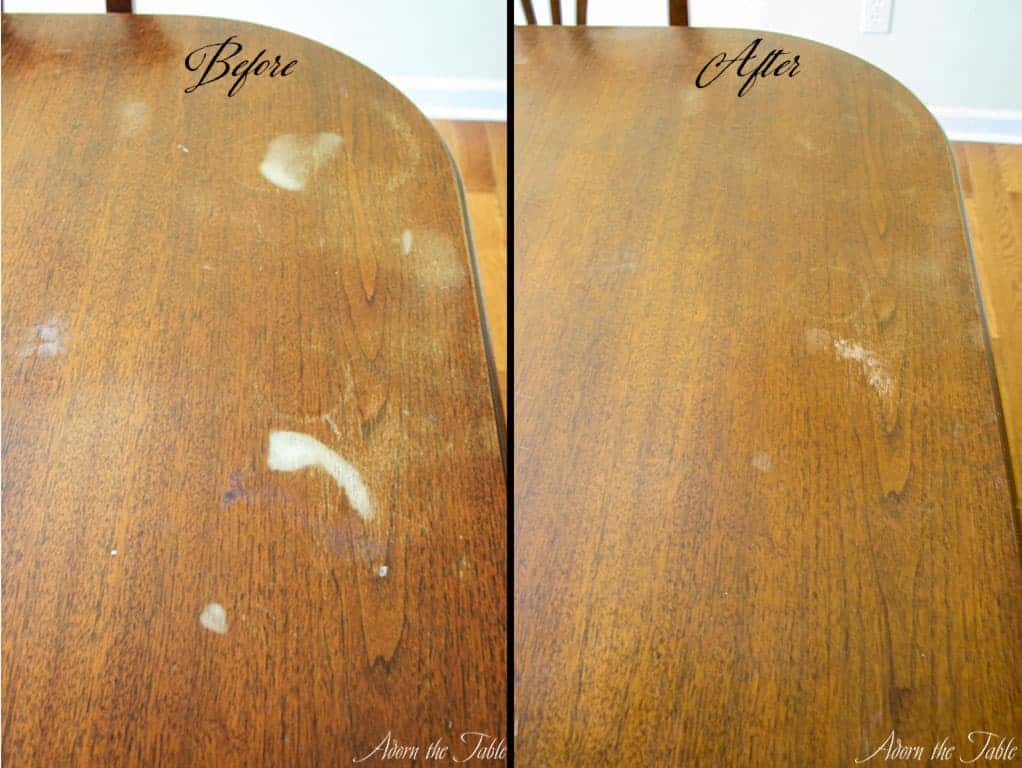
There are few things more annoying than setting down a cold glass for two seconds and discovering a pale little halo on your favorite table. The good news is that most water stains are fixable at home, and you do not need to panic-sand your whole dresser at midnight.
Water marks usually fall into two camps:
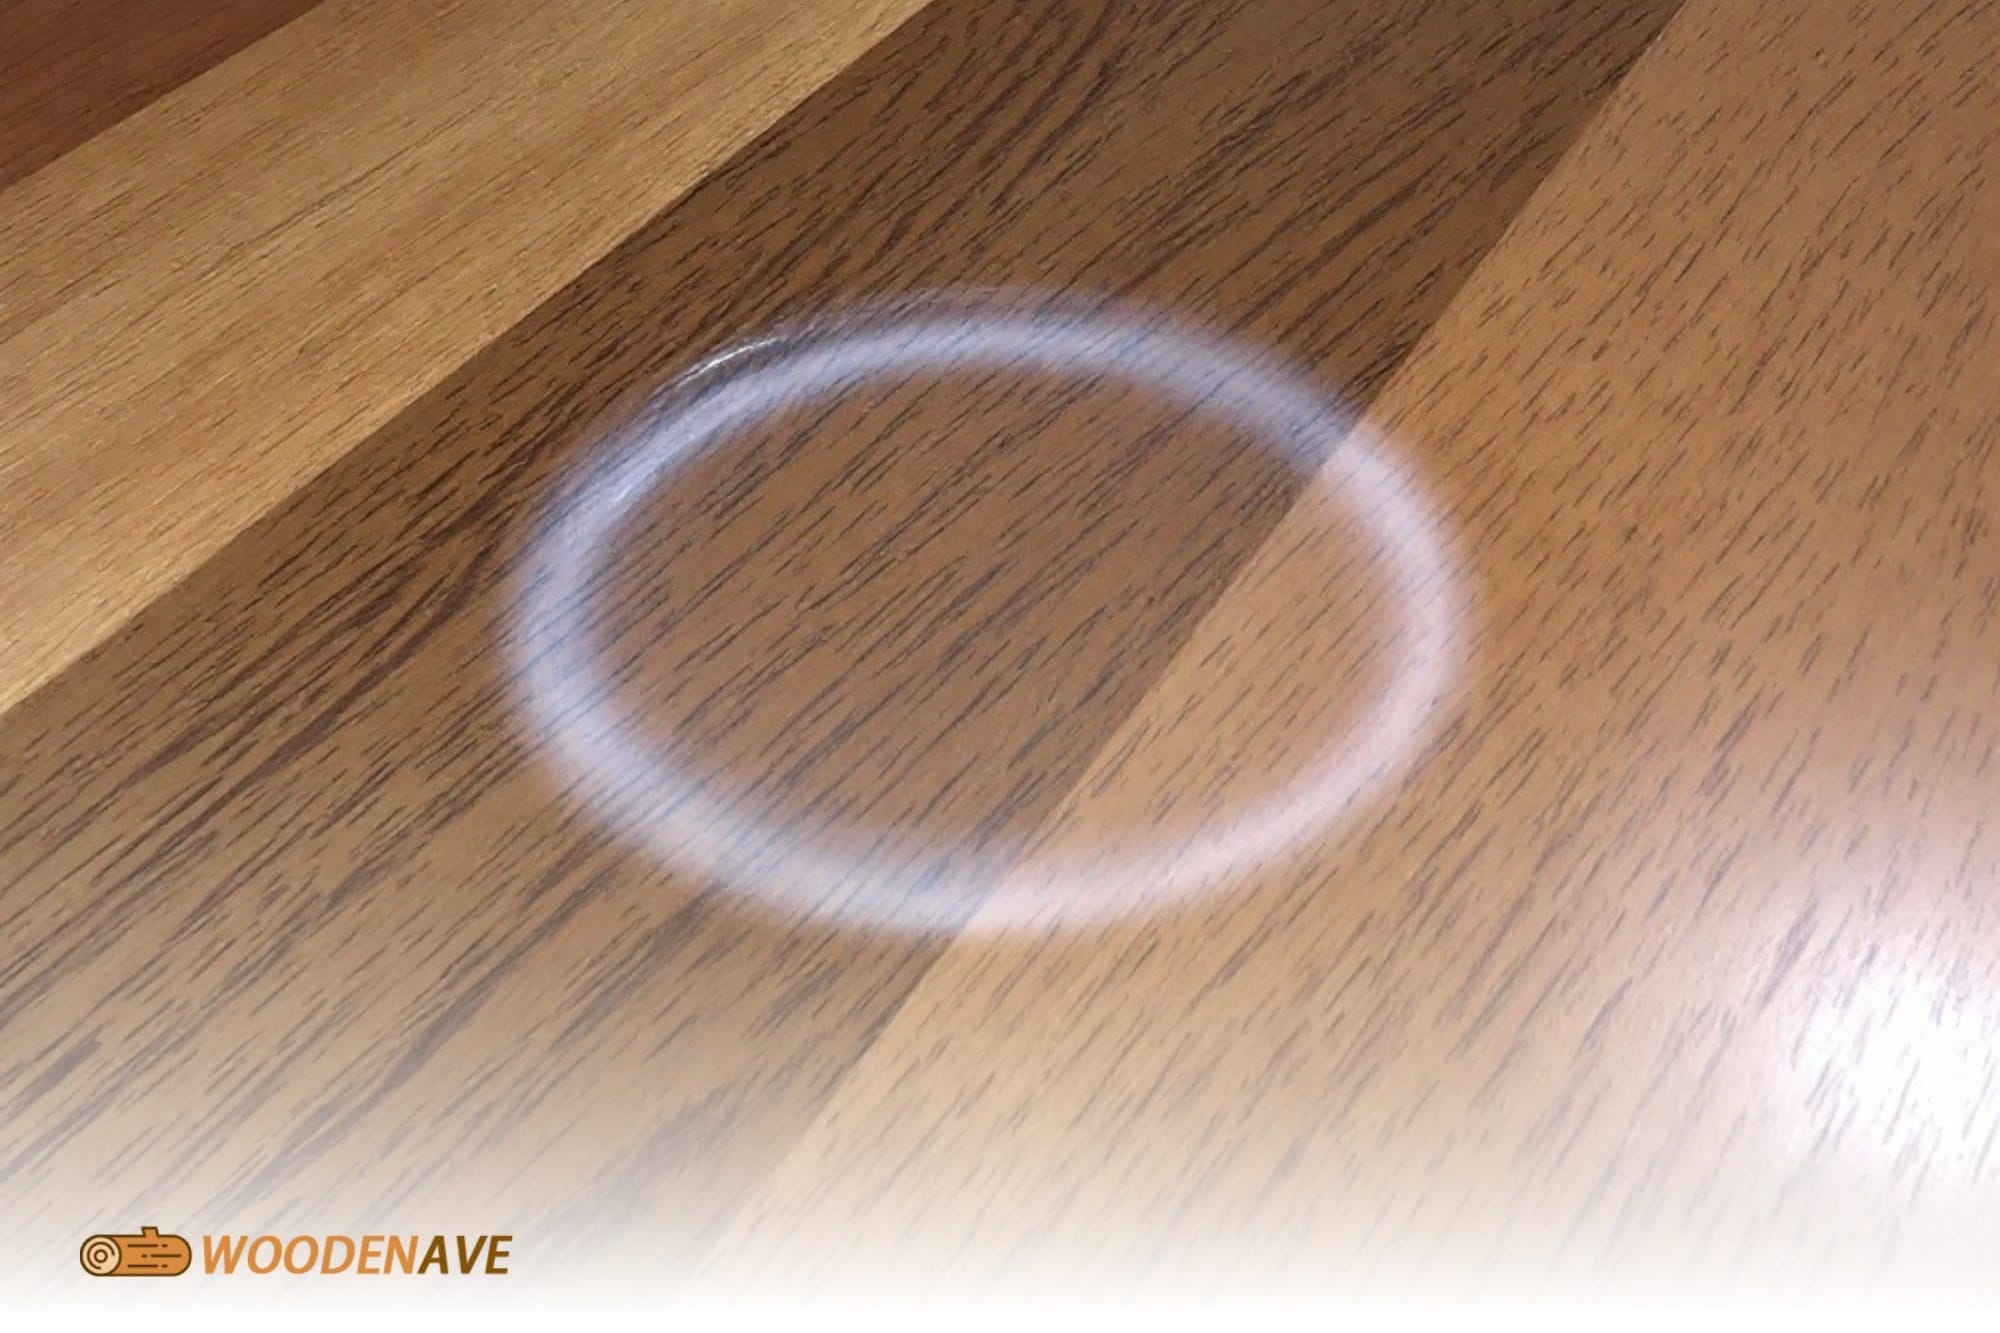
- White rings or cloudy spots: moisture trapped in the finish (the protective top layer).
- Dark stains: water has moved past the finish and into the wood fibers (often involving tannins or metal).
Quick decision guide:
- White ring: start gentle (dry time, hair dryer), then step up to iron-and-cloth, then try a mild oil-based option. Use abrasives last.
- Dark stain: you are usually looking at spot refinishing or a full top refinish for a truly even result. Oxalic acid can help, but it typically needs bare wood.
First, figure out what you are dealing with
White vs. dark: a 10-second check
- White mark usually looks hazy, milky, or pale. It often feels smooth, but some finishes can swell a little and feel slightly raised.
- Dark mark looks brown, gray, or nearly black. Often you can see the grain darkened. That is the wood itself, not just the topcoat.
- Quick “check” move: shine a flashlight across the surface at a low angle (raking light). Haze in the finish pops; deep darkening in the grain reads more like a true stain.
Heat mark vs. water mark
They can look annoyingly similar. Heat can cause a cloudy “blush” in some finishes (especially lacquer), while water leaves the classic ring. Either way, white haze usually means the problem is in the finish, not deep in the wood, which is why gentle warming methods can help.
Identify the finish (because not every trick is finish-friendly)
If you know the finish, you can skip a lot of trial and error. Here are quick, practical clues. When in doubt, test on the underside or inside a drawer first.
- Polyurethane or varnish (common on newer furniture): hard, plastic-like protection, usually very water resistant.
- Lacquer (common on mid-century and many vintage pieces): thinner film, can blush (turn cloudy) with moisture and heat. Some modern “pre-cat” lacquers are more chemical resistant.
- Shellac (very common on antiques): warm glow, but sensitive to alcohol and heat.
- Wax or oil finish (some vintage, some handmade): looks matte or softly sheened, feels more “wood-forward,” marks more easily but is easier to refresh.
Quick finish tests (hidden spot only):
- Alcohol test (shellac check): dab a cotton swab with denatured alcohol and touch a hidden spot. If it gets tacky quickly, it is likely shellac.
- Lacquer test (only if needed): if alcohol does nothing, try a different hidden spot with a tiny dab of lacquer thinner or acetone. If it softens or gets sticky, it is likely lacquer. If neither alcohol nor lacquer thinner affects it, it is likely polyurethane/varnish.
Do not do these tests on a visible surface. Use good ventilation, and stop immediately if you see the finish moving. If you are not sure, skip testing and choose the gentlest methods first.

Before you try anything: quick prep
- Clean gently: wipe with a barely damp microfiber cloth, then dry. Dust and grime can make a stain look worse.
- Let it dry: if the mark is fresh, give it a few hours (or overnight). Sometimes a white ring fades as trapped moisture evaporates.
- Work in small steps: the goal is to fix the mark without dulling or stripping the surrounding finish.
Best fixes for white water rings (cloudy marks)
White rings usually mean moisture is trapped in the finish. Your mission is to gently warm or displace that moisture without scorching the wood or printing the finish.
1) Hair dryer on low (gentlest heat option)
If the thought of an iron makes you sweat, start here. A hair dryer gives you a lot more control.
- Best for: most finished surfaces when you want the lowest-risk heat approach.
- Watch out: do not park the heat in one spot. Keep it moving.
Steps:
- Set to low heat.
- Hold it several inches away and keep it moving over the mark for 30 to 60 seconds.
- Stop, let it cool, check. Repeat in short rounds.
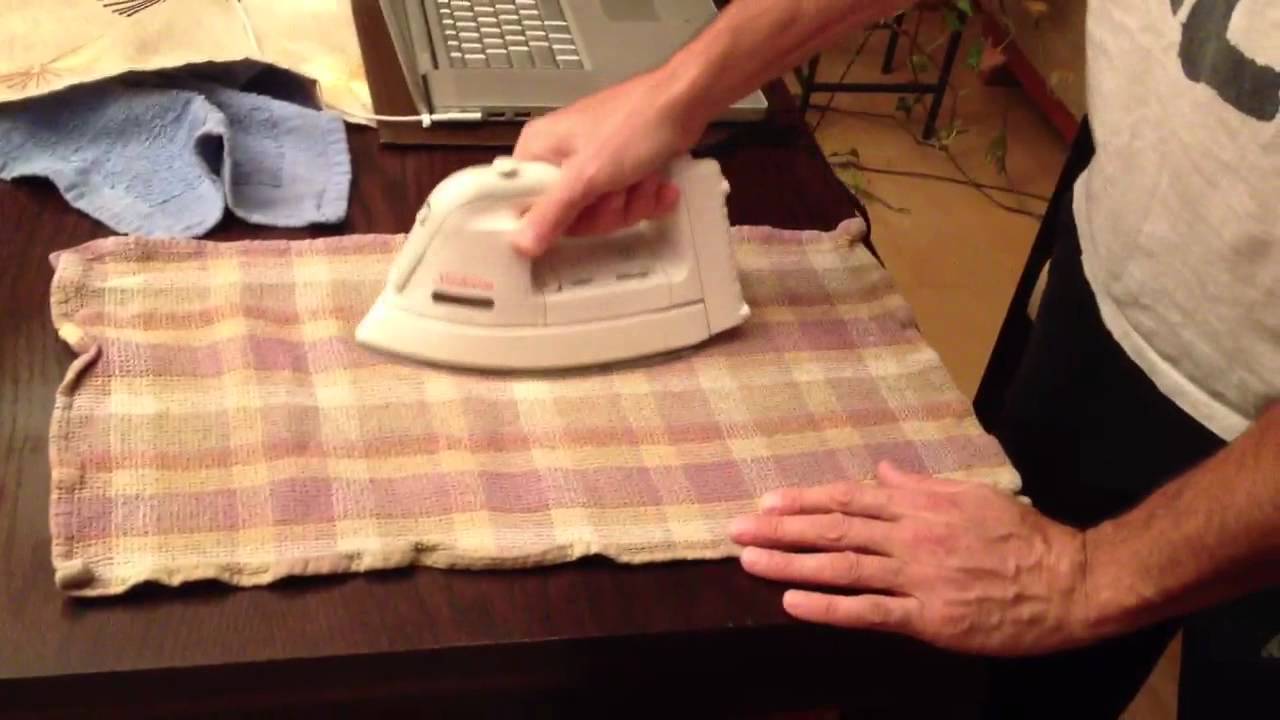
2) The iron-and-cloth trick (fast when it works, real risk if rushed)
This is the classic for a reason. It helps drive moisture out of the finish, but yes, it can also permanently change some finishes if you overdo it. Proceed only if you accept that risk.
- Best for: many polyurethane and some lacquered surfaces.
- Use caution on: shellac, waxed finishes, and thin vintage lacquer (printing, softening, or sheen changes can happen fast).
What you need: a clean cotton cloth (or thin towel), iron, patience.
Steps:
- Set the iron to low heat (start with no steam). Steam adds more moisture, which is not what we want.
- Place the cloth over the ring.
- Press the iron down for 5 to 10 seconds, lift, and check.
- Repeat in short bursts until the haze fades. Stop the moment you see improvement and reassess.
My styling-table rule: if you have to hold your breath because you are nervous, turn the heat down and slow down. Heat damage looks like a larger, duller problem than the original ring.
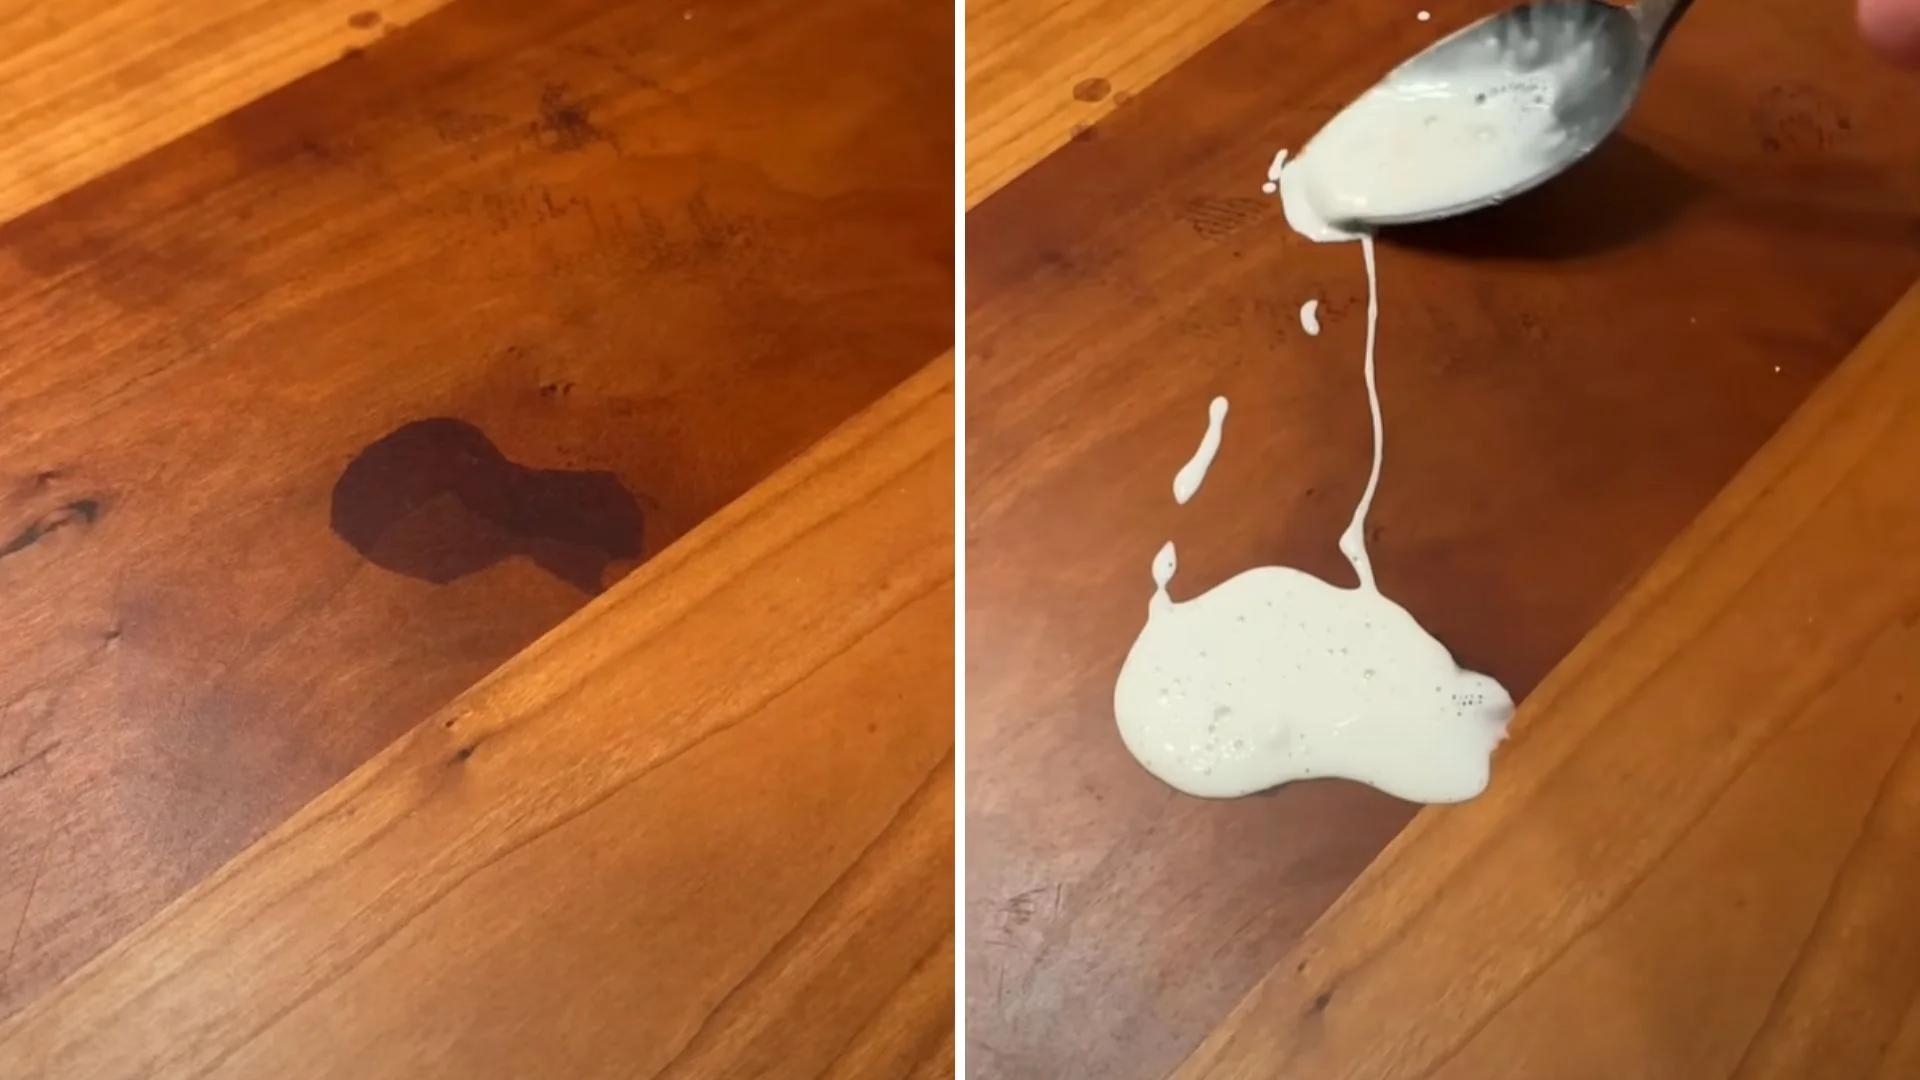
3) The mayonnaise method (gentle, sometimes surprisingly helpful)
Mayonnaise sounds like a prank, but it is basically oil and emulsifiers. On some white rings, it helps displace moisture and condition a thirsty finish. On others, it does very little. Either way, it is usually a low-drama first try.
- Best for: lacquer, polyurethane, and many older finishes that look dry.
- Avoid on: wax-only finishes unless you are willing to thoroughly remove residue afterward.
Steps:
- Apply a thin layer of mayonnaise directly on the white ring.
- Let it sit for 1 to 8 hours (overnight is fine if the room is cool).
- Wipe clean with a soft cloth, then buff.
Residue note: mayonnaise and petroleum jelly can leave an oily film. After buffing, do a final wipe with a cloth barely dampened with mild soapy water, then wipe again with plain water, and dry immediately.
Food and allergy note: if leaving mayo on a surface feels gross (or you have allergy concerns), use plain petroleum jelly instead. The concept is similar: gentle, oily occlusion.
4) Baking soda paste (last resort, micro-scratch risk)
Baking soda is mildly abrasive. It can help, but it can also create micro-scratches and change sheen, especially on glossy finishes. Think: whisper, not workout.
- Best for: durable polyurethane finishes.
- Use caution on: lacquer and shellac, which can dull more easily.
Steps:
- Mix baking soda with a few drops of water to make a soft paste.
- Using a microfiber cloth, rub very lightly along the grain for 5 to 10 seconds.
- Wipe clean, dry immediately, and buff.
If the surrounding area looks a bit less shiny afterward, you may need to even out the sheen with a good furniture polish or a very light wax buff, depending on the finish.
How to treat dark water stains (when the wood itself is stained)
Dark stains mean water went through a crack in the finish, sat too long, or reacted with metal and tannins in the wood. This shows up most famously in tannin-rich woods like oak. These take more patience, and sometimes the right move is a small refinish instead of endless home remedies.
Step 1: confirm it is not just dirt
Wipe with a gentle cleaner appropriate for wood furniture, then dry thoroughly. A shocking number of “stains” are actually a sticky film that grabbed grime over time.
Step 2: look for a metal culprit
If the stain formed under a planter, a can, a bottle cap, a metal coaster, or near old hardware, you may be seeing an iron-tannin reaction (those inky black marks). That is useful to know because simple polishing rarely fixes it.
Step 3: try the least invasive brightening first
If the dark mark is faint and relatively new, you can sometimes improve its appearance with a conditioning approach (like the mayonnaise or petroleum jelly method) plus a good buff. It will not remove a true deep stain, but it can soften the look.
Step 4: when you need oxalic acid (the real dark-stain lifter)
For true blackish water stains, oxalic acid is the go-to wood bleach used by restorers. It can lighten water and iron stains in the wood fibers.
- Best for: unfinished wood or wood that you are willing to strip and refinish in the stained area.
- Not ideal for: treating through an intact film finish. It needs access to the wood, which typically means removing the finish first.
Safety notes: follow the product label, wear gloves and eye protection, and ventilate. Keep it away from kids and pets.
Color note: oxalic acid can lighten surrounding wood too. Plan on blending (sometimes with stain) and then reapplying a protective topcoat for an even look.
Practical reality: if you have a dark stain on a finished tabletop and you want it truly gone, you are usually looking at spot stripping plus blending, or refinishing the whole top so the color looks even.
What works best by finish type
If you are standing in front of the stain with your sleeves rolled up, use this as a quick map.
Polyurethane or varnish (most modern furniture)
- White rings: hair dryer on low, then iron-and-cloth (low heat, no steam) if you are comfortable with the risk, then mayonnaise. Baking soda paste only if needed and only with a very light hand.
- Dark stains: often means water got through a scratch or seam. Consider spot refinishing if the stain is true black or brown.
Lacquer (common on vintage and mid-century pieces)
- White rings: hair dryer is a great first move; mayonnaise is a gentle next step. Iron-and-cloth can work but keep heat low and time short. Some lacquers are more resistant than others, so always test and go slow.
- Dark stains: usually requires refinish work for a clean result.
Shellac (many antiques)
- White rings: avoid high heat and avoid alcohol-based cleaners. Start with mayonnaise or petroleum jelly and gentle buffing.
- Dark stains: often a refinish situation, or live-with-it patina if you love honest age.
Wax or oil finish
- White rings: often improve with gentle warming from a hair dryer on low (kept moving), then rewaxing or re-oiling.
- Dark stains: may require sanding back and re-oiling, or a localized wood bleach approach if it is deep.
When to stop and refinish (or call a pro)
I love a scrappy DIY win as much as anyone, but there are times when the kindest thing you can do for a piece is give it a proper refresh.
- The stain is dark and clearly in the wood, not just in the finish.
- The finish is cracking, peeling, or flaking around the mark.
- You have multiple rings and the whole top looks cloudy or dull.
- The repair spot looks different (sheen mismatch) and you cannot blend it with buffing.
Refinishing options:
- Refinish the whole top: the most even, furniture-maker-approved look.
- Spot repair: possible, but blending color and sheen takes practice, especially on large flat surfaces in bright light.
Mistakes to avoid (learned the hard way in real homes)
- Using high heat for too long: it can soften, wrinkle, or print finishes, especially lacquer.
- Scrubbing abrasives like you are cleaning a pan: baking soda and toothpaste can dull sheen fast.
- Adding steam: it can make a white ring worse.
- Using alcohol-based products on shellac: you can create a new problem instantly.
- Overusing “internet acids”: vinegar or lemon can etch some finishes and make sheen patchy.
- Magic erasers: melamine foam is basically ultra-fine sandpaper. It can flatten gloss in seconds.
- Oiling everything: some oils can interfere with future refinishing. If you might refinish soon, keep methods minimal.
Keep it from coming back
The most stylish fix is the one you never have to do twice.
- Use coasters you actually like, so you use them. I keep a little stack that feels good in the hand, not the slippery promo ones.
- Add a tray on nightstands for water glasses and skincare.
- Seal and maintain: a well-maintained finish is your best defense. Wax or polish only as appropriate for your finish.
- Mind hot items: mugs and takeout containers can also leave heat marks that look similar to water rings.
Quick troubleshooting checklist
- White ring and smooth (or slightly raised) surface: let it dry, then try hair dryer on low. Step up to iron-and-cloth only if you are comfortable with the heat risk. Mayonnaise is a gentle option if you prefer “slow and steady.”
- White haze that will not budge: baking soda paste very lightly, especially on polyurethane.
- Dark stain: check for a metal source (planter, can, hardware). Prepare for spot refinishing or a full top refinish if you want it fully gone.
- Antique or unknown finish: start with the gentlest method and test in a hidden area.
If you want, tell me what piece you have (vintage or new), what the stain looks like (white or dark), and whether the surface is glossy or matte, and I will help you pick the safest first method.