Remove Dried Paint Splatter From Upholstery Without Spreading It
Clara Townsend
Clara Townsend is an interior stylist, vintage furniture enthusiast, and the creative voice behind Velvet Abode. With over a decade of experience transforming both cramped city apartments and sprawling fixer-uppers, she believes that a beautiful home is built on personal stories rather than massive budgets. When she isn't hunting for the perfect brass sconce at a local flea market, she can usually be found rearranging her living room for the third time this month.
Paint splatter on upholstery is one of those accidents that feels dramatic in the moment and totally fixable once you slow down. The trick is simple: you are not trying to rub paint out. You are trying to lift it off in tiny, controlled steps so it does not smear into the weave or wick deeper into cushion foam.
If the paint is still wet: blot immediately with a clean cloth or paper towel, working from the outside in. Do not scrub. Then skip ahead to the water-based steps (for latex or acrylic) or the oil-based steps (for enamel or alkyd), depending on what you used.
Below is my go-to process for dried splatter, with separate paths for water-based (latex, acrylic) and oil-based (alkyd, enamel) paints, plus solvent choices that make sense for real-life fabrics.
Before you touch it: 60-second setup
This is the part that keeps a small splatter from becoming a larger stain.
- Stop dry-brushing. Brushing or aggressive vacuuming can snap paint into smaller bits and push pigment into the fabric.
- Move the cushion if you can. Put it on a table with a towel underneath so you can work flat and avoid pushing paint into seams.
- Check the manufacturer tag first. Upholstery cleaning codes (W, S, WS, X) are helpful, but the maker’s instructions should override general advice. Codes can also vary by component (body vs cushion vs removable cover), so read the tag carefully.
- Test first. Choose an invisible spot (back hem or under cushion) and test any liquid you plan to use. Watch for dye transfer, darkening, or texture change.
- Gather “precision” tools. A dull plastic scraper or old credit card, tweezers, a soft toothbrush, white cotton cloths, cotton swabs, a spray bottle with water, mild dish soap, and a small bowl.
Code quick guide: W = water-based cleaners only. S = solvent only (no water). WS = water or solvent. X = vacuum only (no liquids). If you have S or X and the spot is visible, it’s often safest to stop after dry removal and call a pro.
Step 1: Identify the paint
If you know what you used, great. If you do not, here are quick clues. Just know that paint chemistry can blur the lines, and fully cured latex can be stubborn too.
- Water-based (latex or acrylic): Common wall paint and craft paint. Usually low odor. Dried paint can feel slightly rubbery or plastic-like.
- Oil-based (alkyd, enamel): Stronger odor, often used for trim, cabinets, metal, and high-wear surfaces. Dried paint feels harder and glossier.
- In-between paints (waterborne alkyds): These can behave like oil paint once cured, even though cleanup may have been “soap and water.”
If you’re unsure, start with the gentlest path (dry removal, then water and soap if your code allows it). If nothing budges, it could be oil-based, waterborne alkyd, or fully cured water-based paint. Proceed cautiously and avoid escalating to strong solvents unless you’ve spot-tested.
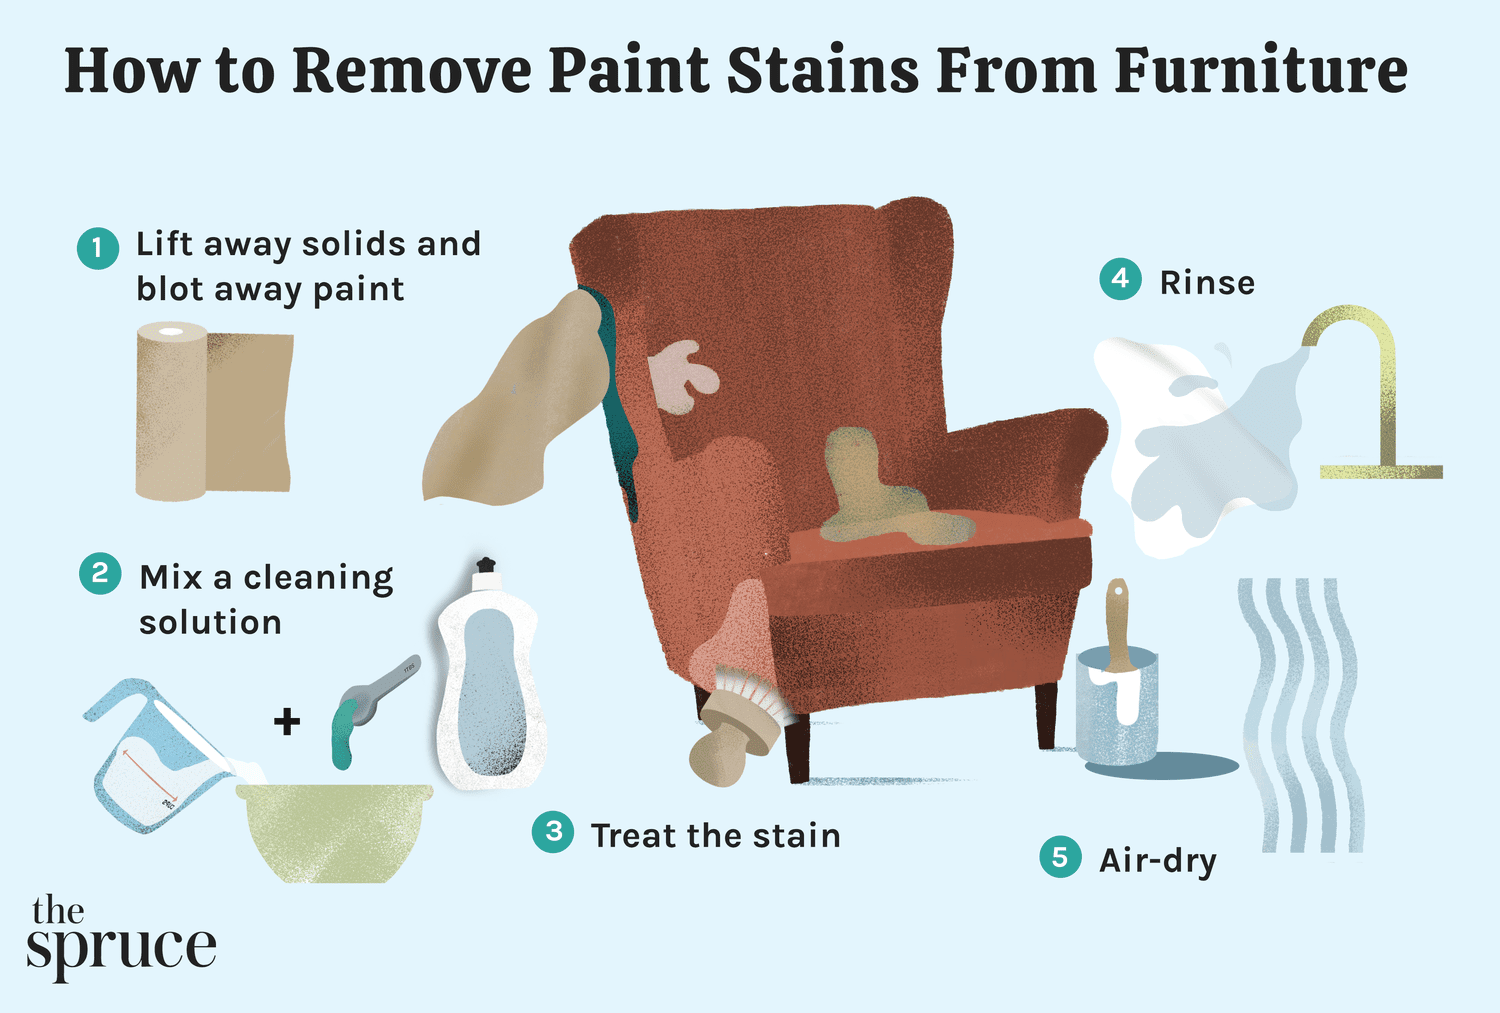
Step 2: Dry removal first
This is the same for water-based and oil-based paint. Removing as much paint as possible while it’s dry reduces how much turns into a smear once you introduce liquid.
How to lift splatter without grinding it in
- Scrape, do not rub. Hold a plastic scraper nearly flat to the fabric and gently flick paint off the surface.
- Use tweezers for thick blobs. Pinch and lift straight up.
- Toothbrush trick for specks: Lightly tap or “tickle” the paint with a soft toothbrush to break the bond, then lift the crumbs away.
- Pick up debris as you go. Use a piece of tape wrapped around your fingers (sticky side out) to collect paint crumbs, or vacuum with a hose attachment held just above the area. Do not drag a vacuum head across the fabric.
If you’ve got a fabric with loops (bouclé, some tweeds), go extra gentle. Scraping can snag loops and create a bigger problem than the paint.
Water-based paint: safest path
Water-based paint usually responds well to patience, moisture, and mild soap (as long as your cleaning code allows water). The goal is to soften the paint film and lift it into your cloth, not spread it around.
1) Rehydrate in tiny doses
- Mist plain water onto a white cloth, not directly onto the fabric.
- Blot the paint spot. Hold pressure for 10 to 20 seconds, then lift straight up.
- Repeat. You’re coaxing, not scrubbing.
2) Add a drop of dish soap if needed
- Mix 1 cup cool water + 1 to 2 drops of clear dish soap.
- Dampen a cloth or cotton swab and work from the outer edge toward the center.
- Alternate between blotting with the soapy mix and blotting with plain water to rinse.
3) For stubborn acrylic: careful alcohol dabs
If the paint is craft acrylic or has a plasticky feel, isopropyl alcohol (70% or lower) can help. Use it sparingly and avoid prolonged contact.
- Test first for color loss.
- Apply alcohol to a cotton swab or cloth, then dab only the paint.
- As soon as paint transfers, switch to a clean area of cloth.
- Rinse by blotting with plain water (if your code allows water).
Avoid acetone on most upholstery. It can melt or dull synthetics, dissolve coatings, and damage adhesives and backings. It’s also especially risky on acetate, rayon, and many velvets.
Oil-based paint: safer solvents
Oil-based paint typically needs a solvent, but upholstery is not a paintbrush. Many “strong” removers can leave rings, dissolve backing, or pull dye. Your safest approach is to use the mildest solvent that works and keep it on the paint, not the surrounding fabric.
Start here: mineral spirits as a spot treatment
Odorless mineral spirits are often the most effective middle ground for oil-based paint. Be extra cautious on fabrics with unknown backing, latex backing, laminated or bonded constructions, or anything that feels glued together. When in doubt, treat that as a pro-clean situation.
- Ventilate the room and keep away from flame.
- Test on a hidden area for colorfastness and texture change.
- Put a white cloth under the fabric layer if possible (between cover and cushion) to protect the foam.
- Dampen a cloth or swab with mineral spirits. It should be barely wet.
- Dab and lift. Do not flood. Do not rub back and forth.
- Once paint loosens, scrape gently with the plastic edge and blot again.
Then clean off residue
After mineral spirits, blot with the dish soap solution (cool water plus a drop of soap) to lift oily residue, then blot with plain water to rinse. If your code is S, skip water and talk to a professional cleaner about proper solvent-only finishing.
Solvent rag safety
Do not ball up solvent-soaked rags or toss them straight into a trash can. Lay them flat to air-dry outdoors away from heat and flame (or place them in a sealed metal container with water, per local guidelines), then dispose of them according to your local hazardous-waste rules. This helps reduce fire risk.
Solvent cheat sheet by fabric
If you know your upholstery fiber, use it to make safer choices. You can often find fiber content on the tag. Also, “microfiber” is usually a fabric type or marketing label, not a single fiber, so check what it’s actually made of (often polyester).
Polyester, microfiber, most performance fabrics
- Usually tolerant: water, mild dish soap, small amounts of isopropyl alcohol.
- Oil paint: mineral spirits can be okay with a careful test, but avoid soaking to protect backing and adhesives.
- Watch for: water rings if you over-wet, especially on microfiber. Keep moisture minimal and even.
Cotton and cotton blends
- Usually tolerant: water and soap, gentle alcohol dabbing for acrylic.
- Oil paint: mineral spirits can work, but cotton can absorb and spread quickly. Use a swab and blot immediately.
- Watch for: dye transfer on richly colored cotton.
Linen
- Approach: treat like cotton but even gentler. Linen bruises easily and shows water marks.
- Oil paint: mineral spirits only with a solid spot test, and use the smallest amount possible.
- Watch for: halo rings. Keep your working area slightly larger and blend outward with a lightly damp cloth, then dry evenly.
Wool
- Avoid high-pH cleaners and hot water.
- Water-based paint: cool water and a tiny amount of wool-safe soap, blotting only.
- Oil paint: proceed cautiously. Solvents can alter texture and dye. This is often a pro-clean call if the spot is noticeable.
Silk, rayon, acetate, velvet (especially viscose velvet)
- High risk fabrics. They can watermark, crush, or lose dye very easily.
- Best move: dry removal only, then consult a professional upholstery cleaner if paint remains.
- If you must try at home: minimal dabbing, minimal liquid, and stop at the first sign of color lift.
Leather and faux leather: this guide is for upholstery fabric. For leather, the safest plan is usually gentle scraping plus a leather-safe cleaner, and professional help for oil-based paint.
Removable covers and foam
If the cover zips off
- Remove the cover and work on it off the cushion whenever possible. It’s easier to control, and you won’t push paint into foam.
- Check the tag on the cover itself. Some removable covers are meant for professional cleaning only, even if the sofa frame has a different code.
- If the cover is dry-clean-only, skip DIY soaking. Do dry lifting, then bring it to a cleaner and point out the paint type.
If paint soaked into foam
If paint has penetrated into the cushion insert, you may keep seeing shadowing or feel a stiff patch even after the surface looks clean. At that point, professional extraction (or replacing the cushion insert) is often the cleanest fix.
Avoid rings and crunchy spots
Even when the paint is gone, upholstery can look “off” if moisture dries unevenly or residue remains.
- Rinse by blotting. Any time you use soap (and any time your code allows water), follow with plain water on a cloth and blot.
- Do not over-wet. Moisture that reaches the cushion foam can bring back an odor later.
- Dry evenly. Press a dry towel to the area, then aim a fan across it. Avoid high heat.
- Fluff fibers back up. When fully dry, lightly brush microfiber or velvet-style nap in one direction with a clean, soft brush.
What not to do
- No aggressive scrubbing. It frays fibers and pushes pigment deeper.
- No pouring solvent directly on the spot. It travels outward and creates a larger ring.
- No bleach or “magic eraser” on upholstery. Both can strip color and damage fibers.
- No heat first. Heat can further cure or harden paint and make removal harder.
Prevention tips for painting day
I love a weekend paint glow-up, but I love not replacing a renter sofa even more. Here’s how I set up small-space painting so splatter never reaches upholstery.
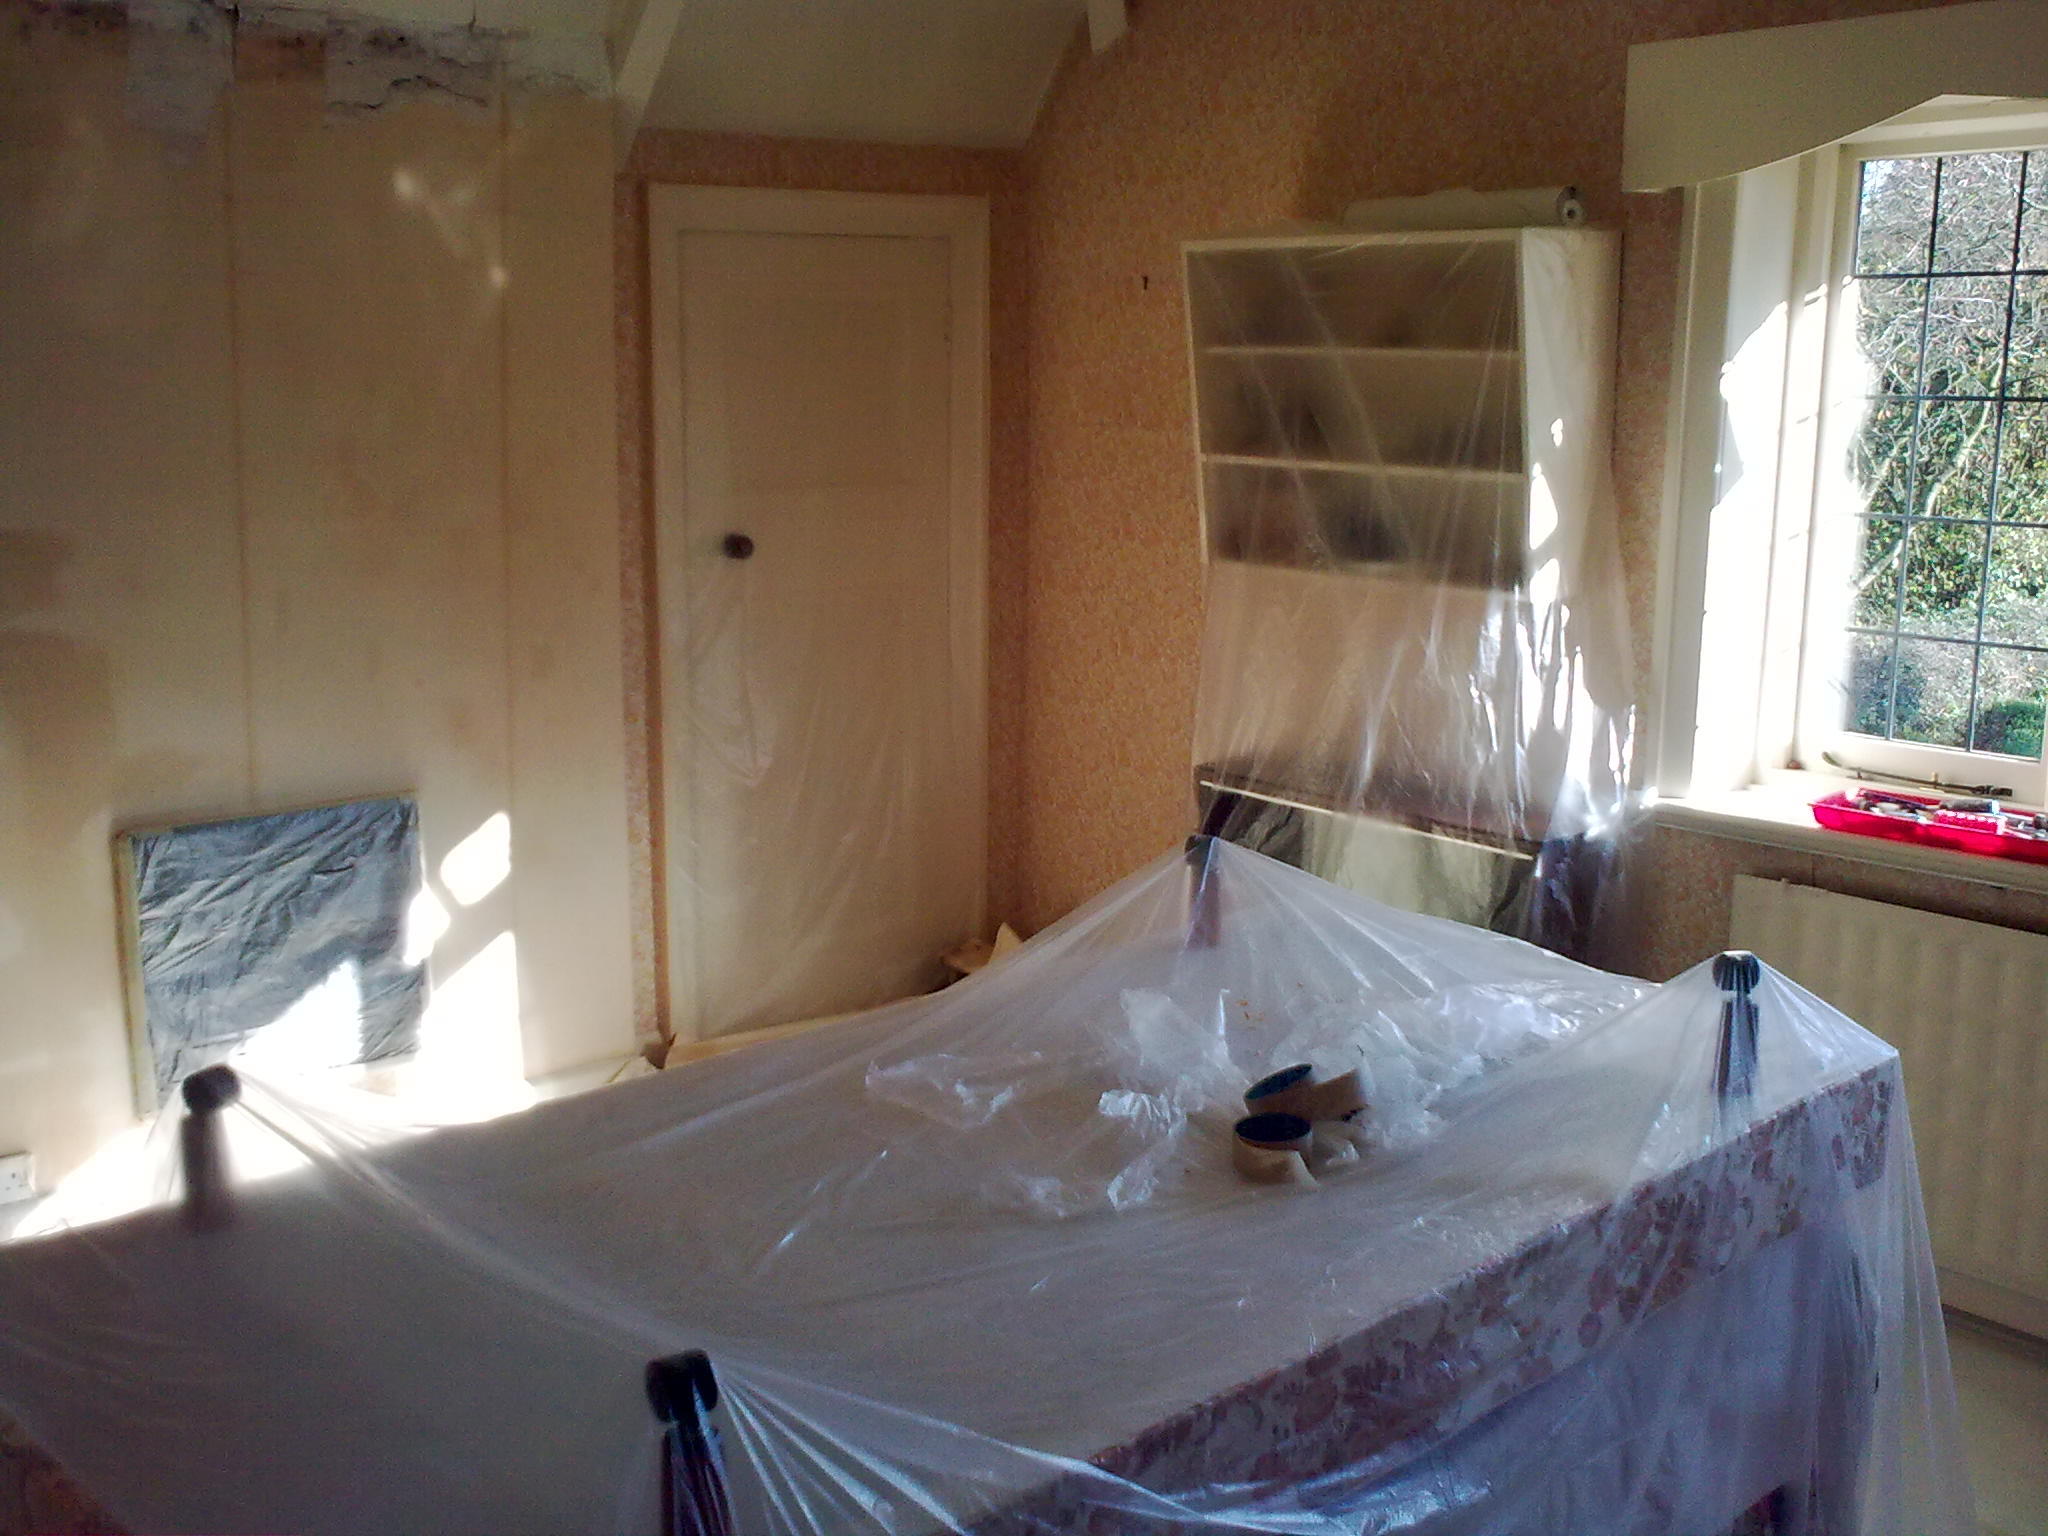
Mask like you mean it
- Remove what you can from the room, even if it’s just the accent chair and a lamp.
- Plastic plus tape for vertical protection: hang lightweight plastic sheeting behind the area you’re cutting in, especially near upholstered headboards.
- Cover baseboards and trim with painter’s tape if you’re new to cutting in.
Drop cloth strategy that works
- Use canvas drop cloths on floors. They stay put better than plastic.
- Use plastic only as a top layer over furniture, then add an old sheet or moving blanket over it. The sheet catches drips, the plastic blocks seep-through.
- Seal the edges. Tuck and tape the cover under cushions and along the back so it cannot shift when you bump it.
Keep a “splatter kit” close
- Baby wipes or damp cloths
- Paper towels
- A small bowl of water with a drop of dish soap
- Cotton swabs
- Painter’s multi-tool or old plastic card
If you catch splatter while it’s still wet, blot immediately and you’ll avoid most of the drama later.
When to call a pro
Sometimes the best design decision is knowing when to stop.
- The fabric is labeled X, or it’s delicate (silk, rayon, viscose velvet).
- The code is S and you’re not comfortable working solvent-only.
- The paint covers a large area or has soaked through to padding.
- You see dye transfer on your cloth during testing.
- The spot is on a visible, high-touch area like the front edge of a seat cushion and perfection matters.
Professional upholstery cleaners have controlled solvents, extraction tools, and the experience to avoid watermarking on tricky textiles.
Quick recap: no-spread order
- 1) Dry lift: scrape and pick, collect crumbs.
- 2) Water-based paint: water blot, then soap blot, then rinse blot (only if your code allows water).
- 3) Acrylic stubbornness: tiny alcohol dabs (70% or lower), then rinse blot.
- 4) Oil-based paint: mineral spirits dabs, then soap blot, then rinse blot.
- 5) Dry evenly: towel press, fan, gentle brush when dry.
If you want, tell me your upholstery fiber (or share a close photo), the cleaning code from the tag, and what type of paint you used, and I can suggest the safest exact route for your piece.