Refrigerator Drip Pan Smell in a Rental
Clara Townsend
Clara Townsend is an interior stylist, vintage furniture enthusiast, and the creative voice behind Velvet Abode. With over a decade of experience transforming both cramped city apartments and sprawling fixer-uppers, she believes that a beautiful home is built on personal stories rather than massive budgets. When she isn't hunting for the perfect brass sconce at a local flea market, she can usually be found rearranging her living room for the third time this month.
If your fridge smells a little like a forgotten gym bag even after you have wiped shelves and tossed the suspicious leftovers, the culprit is often hiding in plain sight: the drip pan . It is the shallow tray that catches condensation and defrost water. In a rental, it is also one of those “no one told me this existed” parts of the appliance.
The good news: you can often access and clean it with minimal fuss and gentle supplies. Some models do require a small panel to be removed, and many newer units have pans that are not user-removable. Either way, there is usually a safe, rental-friendly way to handle the smell without doing anything that would make a landlord nervous. Think of it like freshening a mirror with warm soap and patience. A little care, a little rinse, and suddenly the whole kitchen feels calmer.
Note: This is general home-care guidance, not lease or legal advice. If your lease, building rules, or manufacturer instructions differ, follow those first.
What it does and why it smells
Your refrigerator removes moisture from the air and periodically defrosts. That water has to go somewhere, so it drains into a pan where it usually evaporates over time. When things are working well, you never notice it.
Smell happens when the pan becomes a tiny swamp. Common reasons include:
- Standing water from high humidity, frequent door openings, a warm kitchen, or slow evaporation.
- Biofilm, which is a thin, slimy layer of bacteria and gunk that clings to plastic.
- Spills that traveled through the defrost drain, especially sugary drinks or meat juices that find their way into the drain trough.
- Mold and mildew, especially if the fridge sits close to a wall and airflow is poor.
- A clogged defrost drain that keeps sending water down too slowly or not at all.
- A poor door seal (worn gasket) that lets humid air in, increasing condensation and drain load.
- A cracked pan that leaks, keeping the area damp and stinky.
If the odor is strongest near the bottom front of the fridge or hits you when the compressor kicks on, the drip pan is a prime suspect.
Before you start
Let’s keep this calm, clean, and damage-free.
What to grab
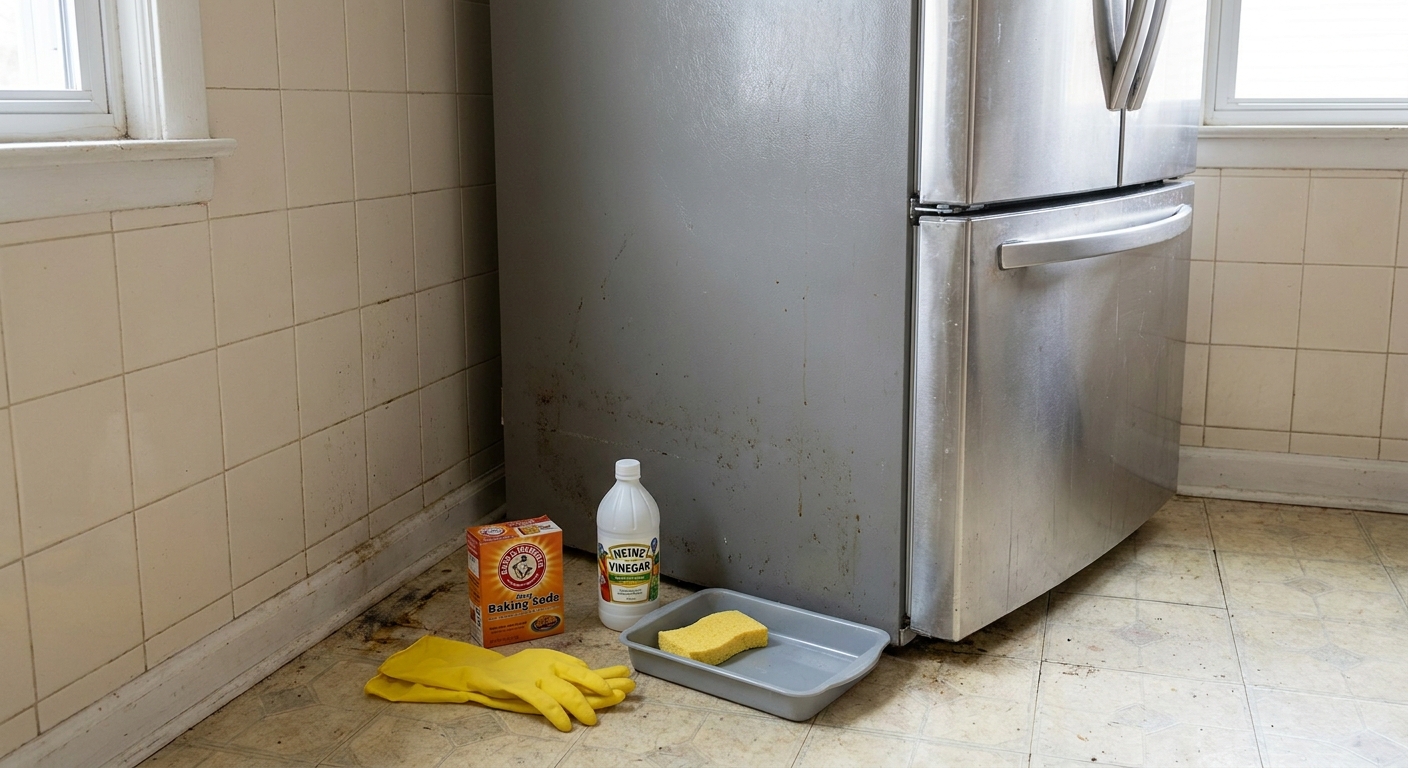
- Rubber or nitrile gloves
- Old towel or a shallow baking tray to catch drips
- Sponge or microfiber cloth
- Soft bottle brush or old toothbrush
- Dish soap
- White vinegar or baking soda
- Optional: 3% hydrogen peroxide for stubborn funk
Quick safety steps
- Unplug the fridge if you will be reaching underneath or removing panels. If the plug is hard to reach, switch the breaker off for the kitchen outlet circuit only if you are confident doing so.
- Avoid bleach under the appliance in a cramped space. If you use bleach elsewhere, never mix it with other cleaners, and rinse thoroughly. For the drip pan area, gentler options are usually plenty.
- Protect the floor with a towel, especially if you have older vinyl, wood, or laminate.
- Move slowly when pulling the fridge out. Many rentals have delicate flooring and baseboards.
If your refrigerator is built-in or wedged tightly, skip the wrestling match and jump down to the section on “If the pan will not come out.”
Where the pan is
Manufacturers love to play hide-and-seek with drip pans. The pan is often near the compressor so the warmth can help evaporate water, but designs vary. When in doubt, check your manual or search your model number.
Common layouts
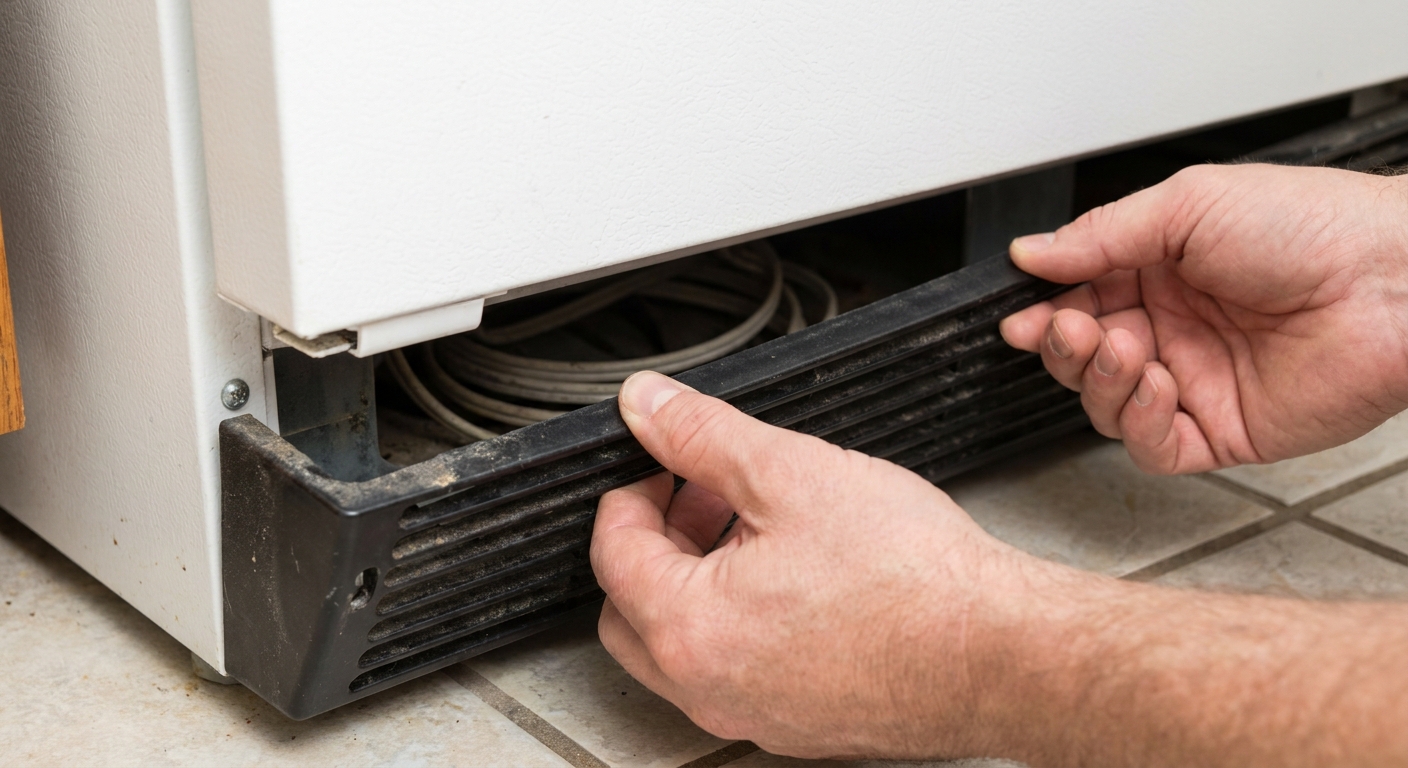
- Behind the front kick plate: You pop off the toe grille at the bottom front and slide the pan out.
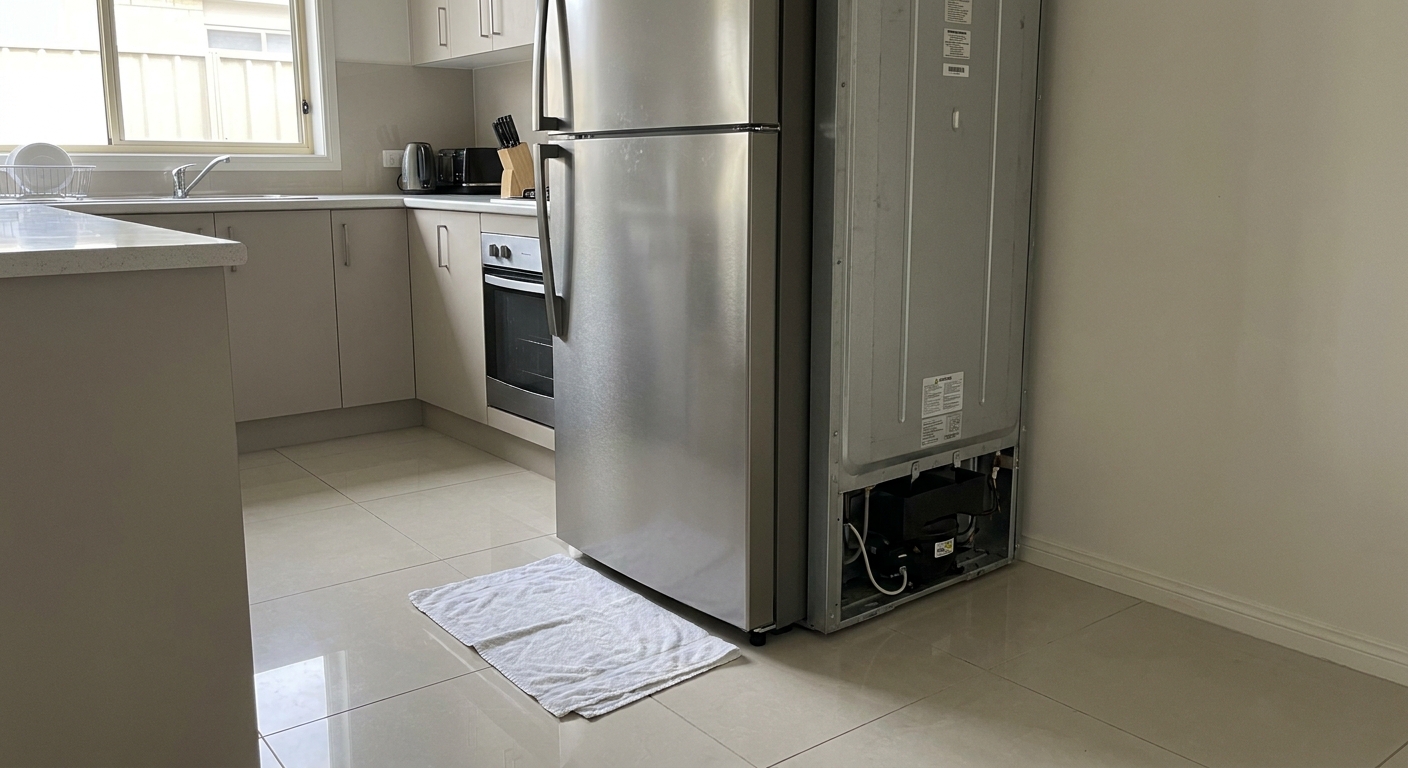
- At the back, near the bottom: You pull the fridge away from the wall and access the pan from behind.
- Under a rear access panel: Some models require removing a small panel with a few screws.
- Not removable: Many newer units have a drip pan that is fixed in place above the compressor.
If you can find your model number (often on a sticker inside the fridge wall or door frame), search “[model number] drip pan location” to confirm before you start pulling things apart.
How to access it
Option A: Front kick plate
Empty the very bottom shelf of the fridge door if needed so nothing falls when you shift the fridge.
Unplug the fridge.
Remove the toe grille. Many grilles pop off with gentle pressure. Some have tabs. If it resists, look for two small screws at the corners.
Slide the pan out like a shallow drawer. Keep it level. It may have water in it.
Option B: From the back
Unplug the fridge and turn off the ice maker water supply if you need extra wiggle room (usually a small shutoff valve behind the fridge).
Place a towel where the fridge will roll or slide.
Pull the fridge out slowly, keeping it straight to avoid scraping floors and baseboards.
Look near the compressor for a shallow pan. If you see a plastic tray but it does not budge, it may be fixed.
Option C: Rear access panel
If you see a thin metal or cardboard-like panel held by screws, you may need a screwdriver. If your lease is strict about “no appliance disassembly,” stop here and use the cleaning-in-place method below.
If you do proceed, take a quick photo before removing it so you can reattach it exactly as it was. Do not leave this panel off. On many refrigerators it helps direct airflow for proper cooling efficiency.
How to clean it
Your goal is to remove both the visible grime and the invisible film that holds odor. Plastic pans scratch easily, and scratches can trap smells later, so gentle tools matter.
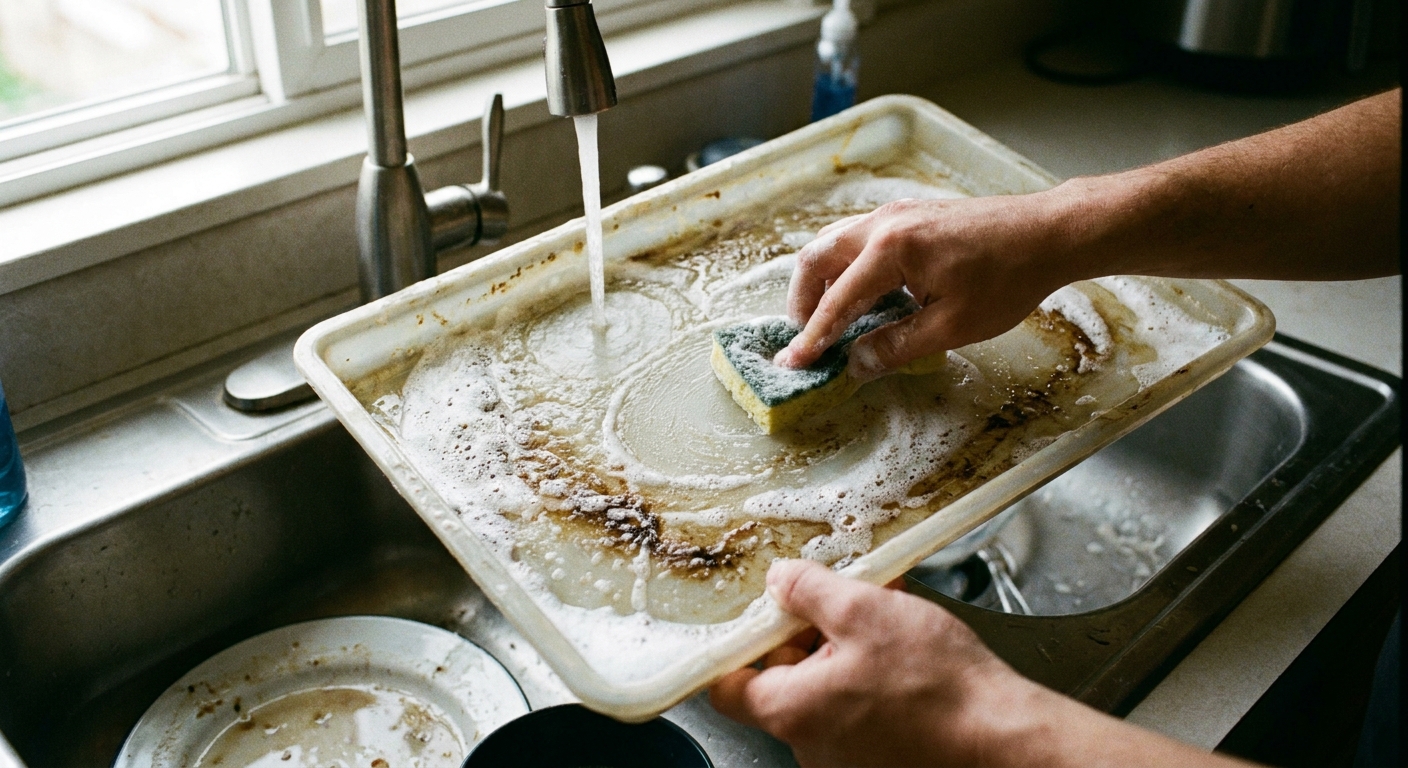
1) Wash with warm soapy water
Dump any water into the sink or a utility drain (a toilet works in a pinch, then wash hands and clean the sink area afterward).
Rinse the pan with warm water.
Wash with dish soap and a soft sponge.
Use a toothbrush for corners and ridges.
2) Deodorize
- Vinegar soak: Fill the pan with a 1:1 mix of white vinegar and warm water. Let sit 10 to 20 minutes, then scrub and rinse.
- Baking soda paste: Sprinkle baking soda, add a small splash of water to form a paste, spread it on grimy spots, wait 10 minutes, then scrub and rinse.
- Hydrogen peroxide (3%): Spray or pour a small amount over odor spots, let it sit 5 to 10 minutes, then rinse well. This is a nice option when the smell reads “mildew.”
3) Dry fully
Dry the pan with a towel and let it air dry for a few minutes if you can. Putting it back damp is like folding laundry that is almost, but not quite, dry.
4) Wipe the cavity
Before you slide the pan back in, wipe the surrounding area with warm soapy water or a vinegar solution. Odor often clings to dust and grime around the compressor area.
5) Re-seat and reattach
Make sure the pan is seated correctly and the grille or panel is fully reattached before plugging the fridge back in.
If the pan will not come out
Some refrigerators have a fixed pan, and in rentals that can be a blessing because you do not have to remove anything. You just need a slightly different approach.
Clean it in place
Unplug the fridge.
Lay down towels under the area.
Remove standing water with a turkey baster or large syringe (even a clean soap pump bottle can work).
Wipe what you can reach with a microfiber cloth wrapped around a long spoon or a bottle brush.
Add a small amount of warm soapy water, swish gently with the brush, then remove the liquid again.
Repeat with a vinegar and water mix, then remove.
Do not flood the area. A little liquid goes a long way, and too much can leak onto the floor or into components.
Stop the smell coming back
Once the pan is clean, repeat smells usually mean water is sitting too long, airflow is poor, or organic gunk is making its way into the drain.
Simple prevention
- Keep the fridge a little cooler: Aim for about 37 to 40°F (3 to 4°C).
- Leave breathing room: If possible, keep an inch or two behind the fridge so heat can escape and moisture can evaporate.
- Check the door gasket: Close the door on a strip of paper. If it slides out easily, the seal may be weak, which can drive condensation and odors.
- Watch for drain symptoms: If you notice water pooling inside the fridge or under the crisper, or ice buildup near the freezer drain, the defrost drain may be clogged.
- Clean the defrost drain trough: Inside the fridge or freezer, look for a small drain hole. Wipe the area regularly so spills do not migrate down.
- Optional: vacuum dust and coils: If you can safely reach them, gently vacuum dust from the condenser coil area and around the compressor. Dust can hold odor and also makes the fridge work harder. Use a coil brush or vacuum attachment, and avoid bending fins or snagging wires.
- Use an open box of baking soda in the fridge to catch everyday odors so you notice issues earlier.
- Check for slow leaks: If you have a water dispenser or ice maker, make sure there is no drip traveling down the back and into the pan area.
How often
For most homes, a quick check every 3 to 6 months is enough. If your kitchen is humid, you cook a lot, or the fridge is older, aim for every 2 to 3 months until you learn its personality.
When to call maintenance
I love a good DIY moment, but rentals have a line. If any of these are true, it is time to message maintenance so you are not held responsible later:
- The pan is cracked or missing, or you see water pooling under the fridge.
- The smell returns within days even after a thorough cleaning.
- You see heavy mold growth you cannot safely reach.
- The fridge is not cooling properly or you hear unusual noises after moving it.
- A rear panel must be removed and your lease forbids it.
A simple note like “There is standing water and odor coming from the refrigerator drip pan area, and it may need a replacement pan or drain check” is clear, factual, and landlord-friendly.
Quick troubleshooting
Sour or mildew smell
- Clean pan with soap first, then vinegar soak or hydrogen peroxide
- Wipe the surrounding cavity and vacuum dust if you can
Rotten food smell
- Check for spills in the drain trough inside the fridge or freezer
- Clean the trough area with warm water on a cloth, not by pouring
Smell when the compressor runs
- Dust buildup around the compressor area can hold odor
- Wipe carefully and keep airflow behind the fridge
It comes back fast
- Likely a drain issue, a leak, a bad door seal, or a cracked pan
- Document with photos and contact maintenance
Fresh finish
Once the source is handled, I like to reset the space in small, satisfying ways. Wipe the fridge exterior, wash the sticky condiment bottles, and swap out the dish towel for a clean one that feels good in your hands. These are tiny acts, but they change the mood of a rental kitchen fast.
And if you do nothing else: give yourself credit for tracking down a hidden odor source most people never think about. That is the kind of quiet, practical home care that makes a space feel truly yours.