Portable Upholstery Cleaners on Sofas: What to Buy, Dilute, and Never Do
Clara Townsend
Clara Townsend is an interior stylist, vintage furniture enthusiast, and the creative voice behind Velvet Abode. With over a decade of experience transforming both cramped city apartments and sprawling fixer-uppers, she believes that a beautiful home is built on personal stories rather than massive budgets. When she isn't hunting for the perfect brass sconce at a local flea market, she can usually be found rearranging her living room for the third time this month.
If you have ever looked at a sofa cushion and thought, How is it both spotless in the middle and somehow dingy where heads and hands actually go? You are exactly the person portable upholstery cleaners were made for. They are the sweet spot between a full professional extraction and the risky, overly wet DIY soak that leaves water rings like little coffee cup halos.
This is my no-gatekeeping guide to buying the right machine, mixing solution without leaving residue, reading fabric codes (the tiny tag that runs your life), cleaning edges and seams gently, and drying fast so your couch smells like fabric again, not like a forgotten towel.
Quick boundary: This guide is for fabric upholstery. Skip extractors on leather, faux leather, suede, and nubuck unless the manufacturer specifically says wet extraction is allowed.
Extractor vs steamer
People use the words interchangeably online, but they do very different jobs. In this guide, I will call the portable spray-and-suction machines extractors.
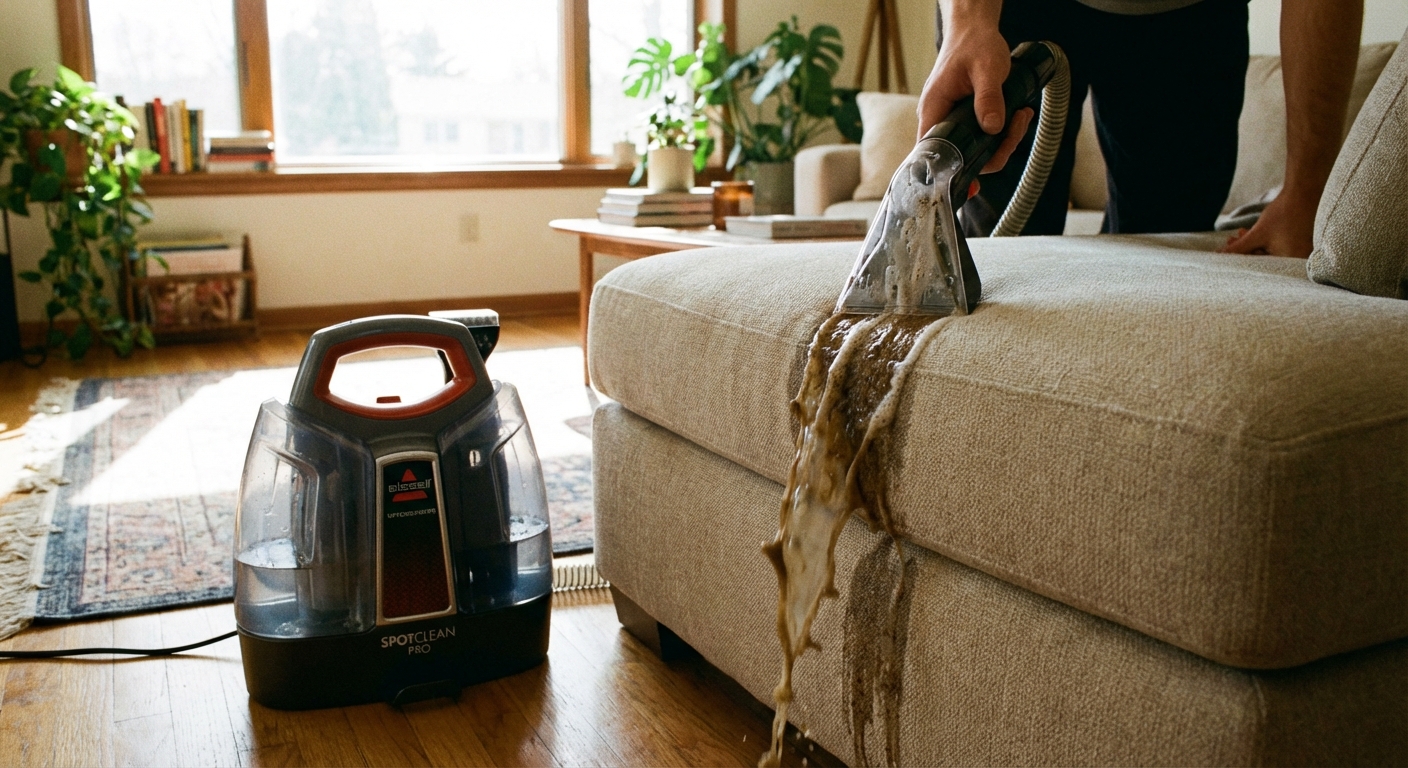
Portable upholstery cleaner (extractor)
- What it does: sprays a small amount of cleaning solution, then sucks it back out into a dirty-water tank.
- Why it is great for sofas: it removes soil and most of the moisture instead of pushing it deeper.
- What it cannot do: it will not magically disinfect, and it cannot undo years of sun fading or worn fibers.
Steam cleaner (steamer)
- What it does: outputs hot vapor to loosen grime and refresh surfaces.
- Why it can be risky on sofas: heat plus moisture can make some stains harder to remove (especially protein-based stains like milk, egg, or blood), relax some adhesives, distort certain synthetics, and create water marks if you overwet.
Velvet Abode rule of thumb: If your goal is stain removal and you want the fabric to dry as evenly as possible, choose an extractor. If your goal is light refreshing on a fabric you already know tolerates moisture and heat, a steamer can be helpful, but it is not the same tool.
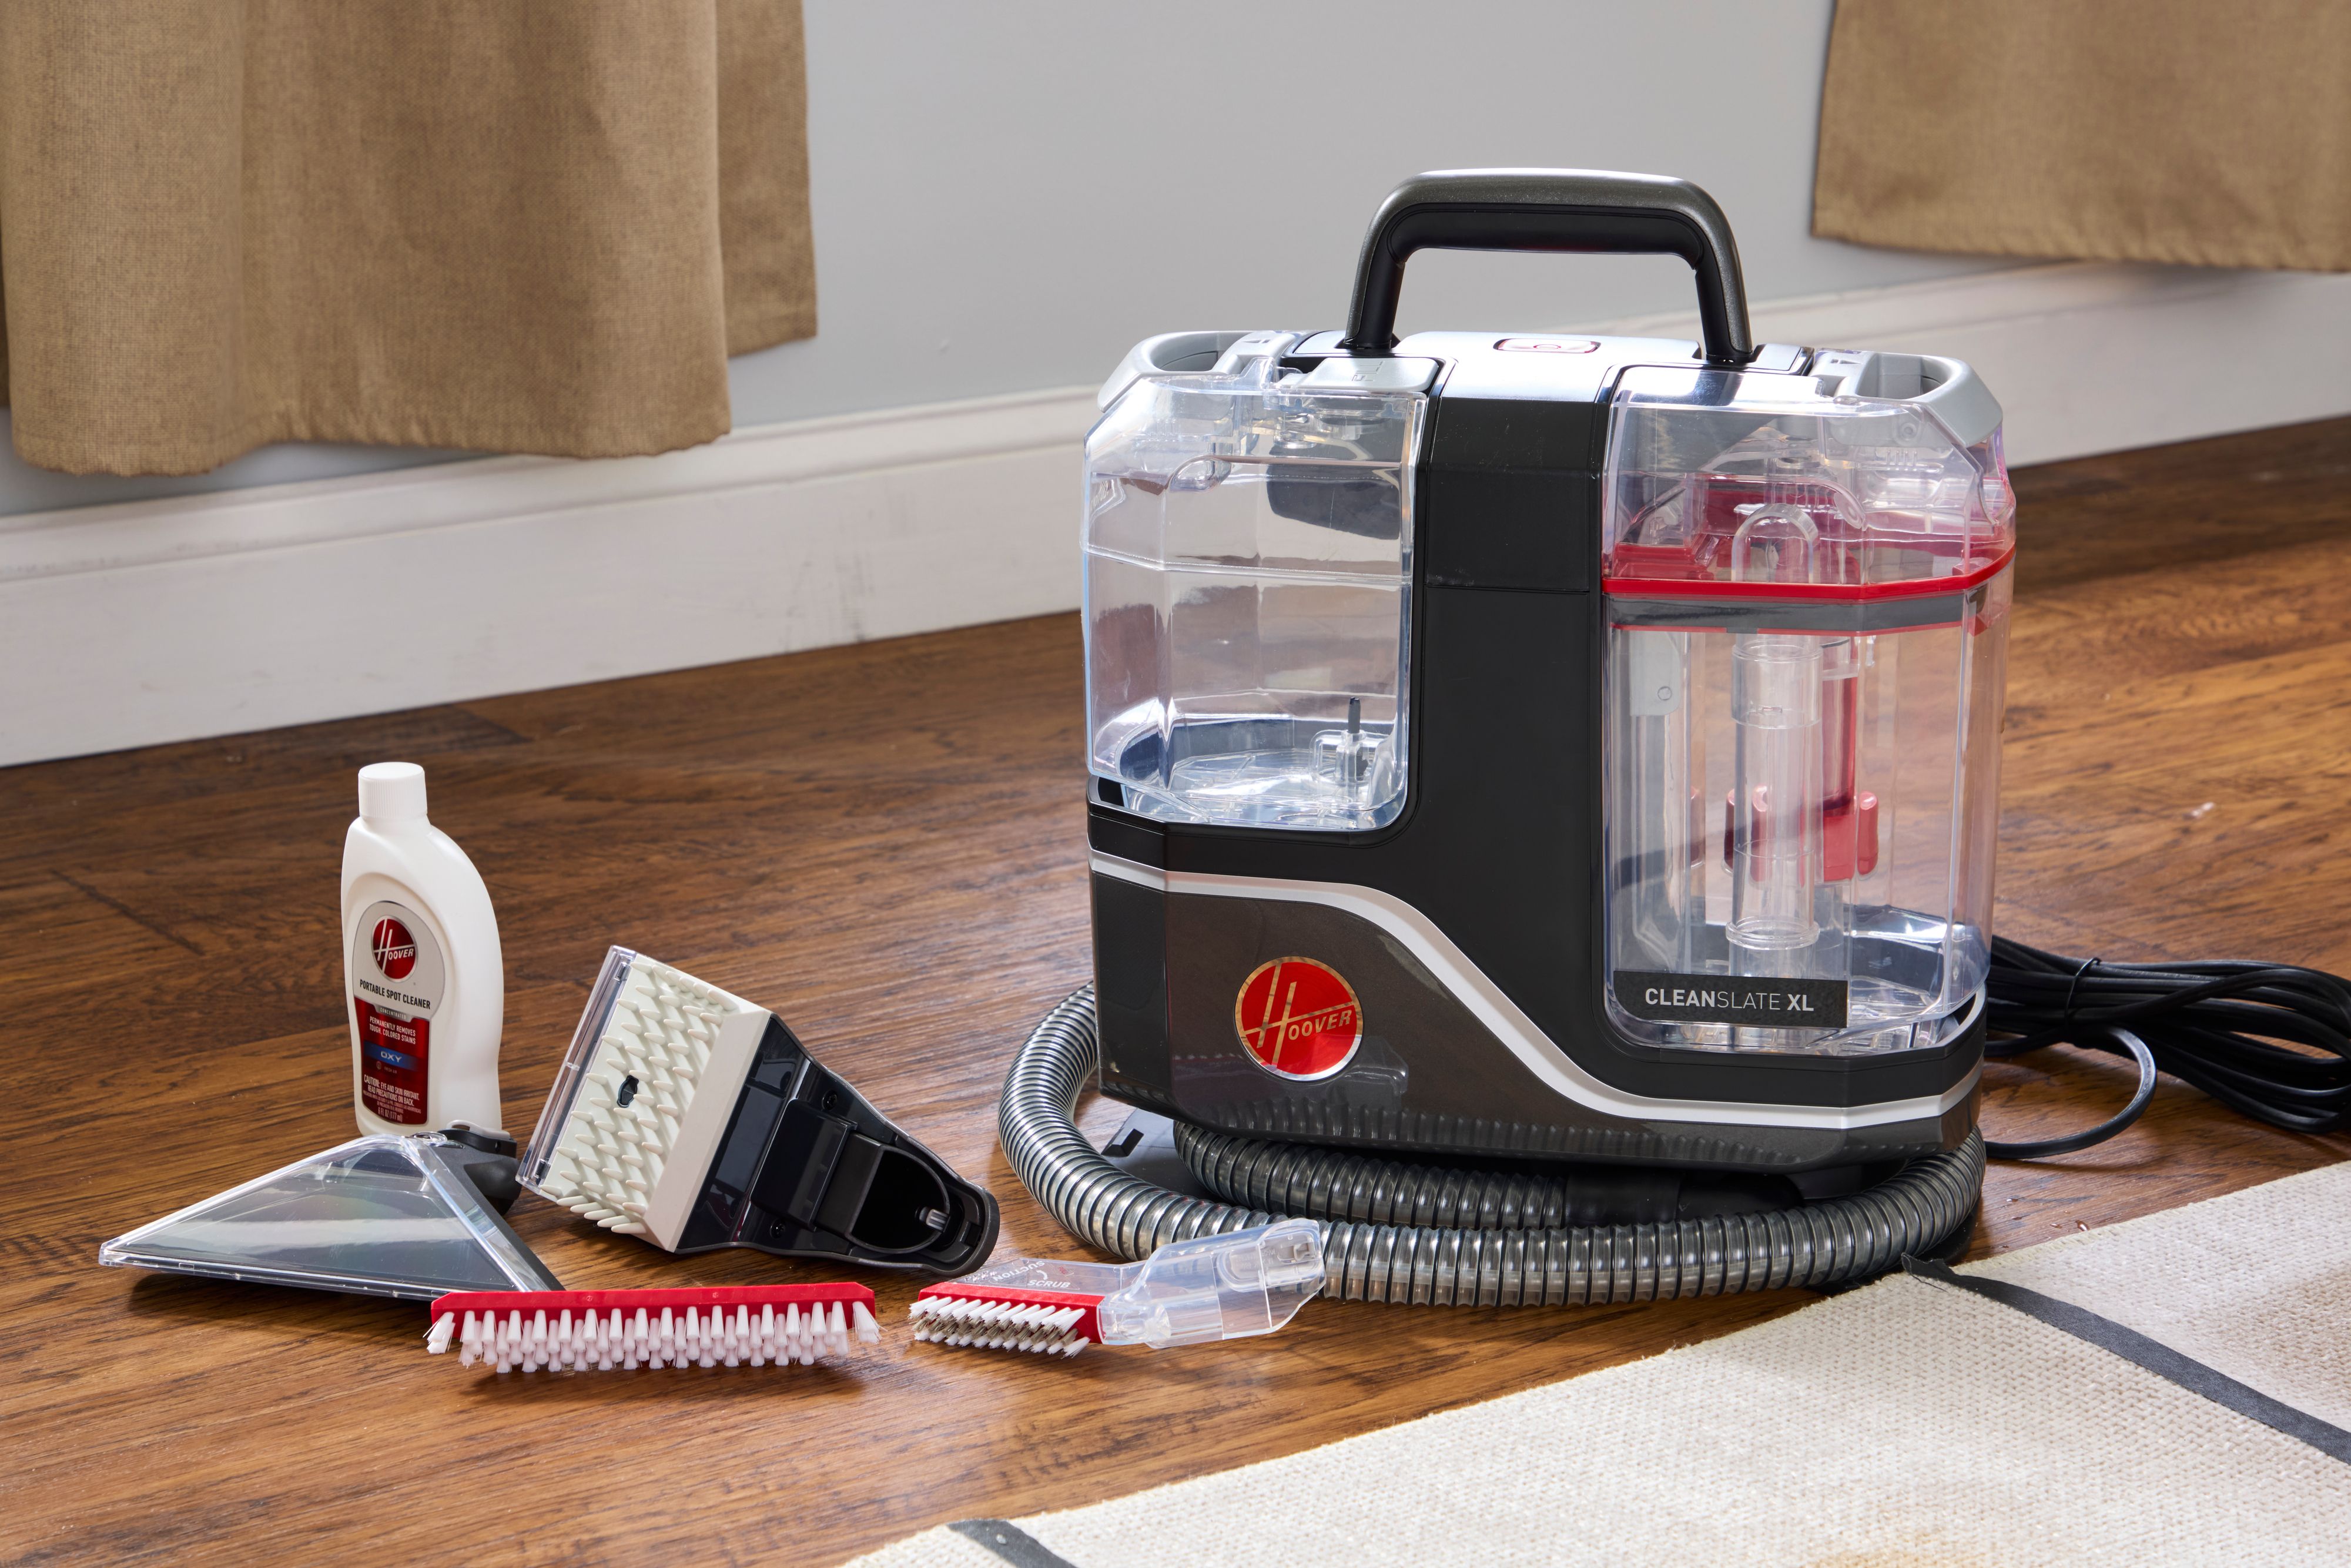
What to buy
Portable upholstery cleaners range from “cute gadget” to “mini professional.” Here is what I look for when I am styling a home and want to keep the sofa photo ready without drama.
Non-negotiables
- Strong suction: drying is half the battle. Weak suction equals lingering moisture and rings.
- Separate clean and dirty tanks: also make sure the dirty tank is easy to rinse so it does not start smelling like a swamp.
- A clear nozzle: seeing the water pull through is not just satisfying, it helps you avoid overworking one spot.
- A true upholstery tool: a small, narrow head for seams and piping and a wider head for cushion faces is ideal.
Nice to have
- Heated spray: warm solution can help with body oils, but it is not automatically “better.” Chemistry, dwell time, and gentle agitation matter just as much, and heat is not always safer for delicate fabrics.
- Long hose and cord: so you are not balancing the machine on the sofa like a chaotic little robot.
- Easy access to filters: pet hair and lint will find their way in.
What I skip
- Very harsh “max power” detergents bundled with the machine: some high-alkaline or heavy-surfactant formulas can leave residue if not rinsed well, which can attract more soil later.
- Oversized floor units if you only need upholstery: they work, but they are heavy, loud, and a pain to store in real apartments.
Quick safety notes
- Keep the machine on the floor, not on the sofa.
- Do not overfill tanks, and do not tip the unit while running.
- Unplug before cleaning the unit, clearing clogs, or rinsing tanks.
Check the fabric code
If there is one detail that separates “confident DIY” from “why is my couch crunchy,” it is the little manufacturer tag tucked under a cushion or under the frame. These codes are most common on upholstered furniture in the U.S., and they are manufacturer guidance, not an industry-wide guarantee.
- W: water-based cleaning is generally considered safe. Extraction is usually fine if you do not overwet.
- S: solvent-only. Do not use a water-based extractor unless the manufacturer confirms water is acceptable. Water can cause rings, distortion, or dye movement.
- WS or W/S: water-based or solvent-based products may be used. Still patch test because dyes and finishes vary.
- X: vacuum only. No water, no solvent. This is a “call a pro” or “live with it” situation.
If you cannot find a tag: look up the brand’s care instructions (model name, SKU, or collection name helps), or contact the manufacturer. If you are unsure, treat it like a delicate fabric and patch test with minimal moisture.
Important: Fabric code is guidance, not a promise. You still need a patch test because some upholstery has finishes, backing, or dyes that behave badly even when the code says W.
Solutions and residue
Portable upholstery cleaners tempt us into thinking more soap equals more clean. On sofas, that is the fastest route to residue, stiff fibers, and re-soiling. Upholstery does not get rinsed like clothing in a washing machine, so whatever you leave behind becomes a dirt magnet.
The easiest safe mix
- Warm water in the clean tank (not hot enough to be steamy).
- Low-foam upholstery detergent at the lightest dilution listed for upholstery or spot cleaning.
My residue-minimizing approach
- Use half the recommended detergent amount for the first pass.
- Plan a rinse pass with plain water afterward (more on that below).
Why dilution matters
- Too strong: suds and sticky residue that attract grime, plus stiff “crunch.”
- Too weak: you overwet trying to compensate, and that is how rings happen.
What I do not put in the tank
- Laundry detergent: often too foamy and hard to rinse from upholstery.
- Dish soap: same issue, plus it can leave a film.
- Vinegar straight: acidic and not always color-safe, especially on dyed natural fibers.
- Bleach: can weaken fibers and create permanent discoloration.
- Essential oils: can spot, oxidize, or leave oily marks.
Patch test (10 minutes)
Patch testing sounds fussy until you realize it can prevent permanent rings or dye bleed on the most visible seat in your house.
- Choose a hidden area: back lower corner, under a cushion, or inside the skirt line.
- Vacuum first.
- Lightly mist or apply a tiny amount of your diluted solution.
- Blot with a white cloth.
- Do one short extraction pass.
- Let it dry fully (use a fan), then check: color transfer, stiffness, rings, or texture change.
If the fabric changes texture, gets rough, or the dye moves, stop and rethink the method or call a professional.
Technique that works
If you remember nothing else, remember this: even moisture is everything. Rings happen when one area gets wetter than the surrounding fabric, then dries with a tide line.
Step 1: dry prep
- Vacuum slowly, including seams and crevices. Dirt plus water equals muddy wicking.
- Remove cushions and check for zippers, loose trim, or weakened seams.
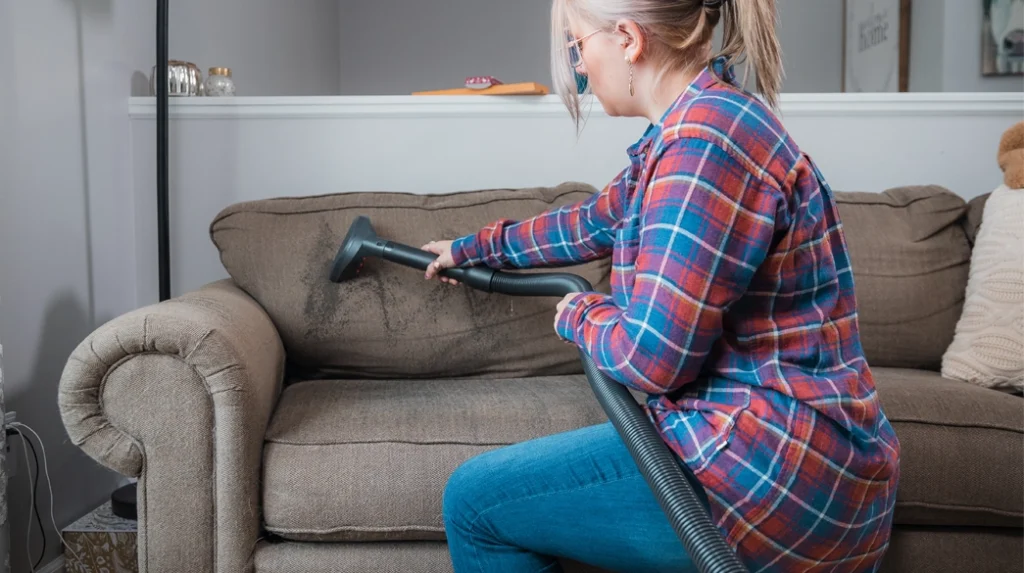
Step 2: work in sections
Instead of blasting one stain until it disappears, clean the entire panel (one cushion face, one arm, one seat section). This keeps drying consistent.
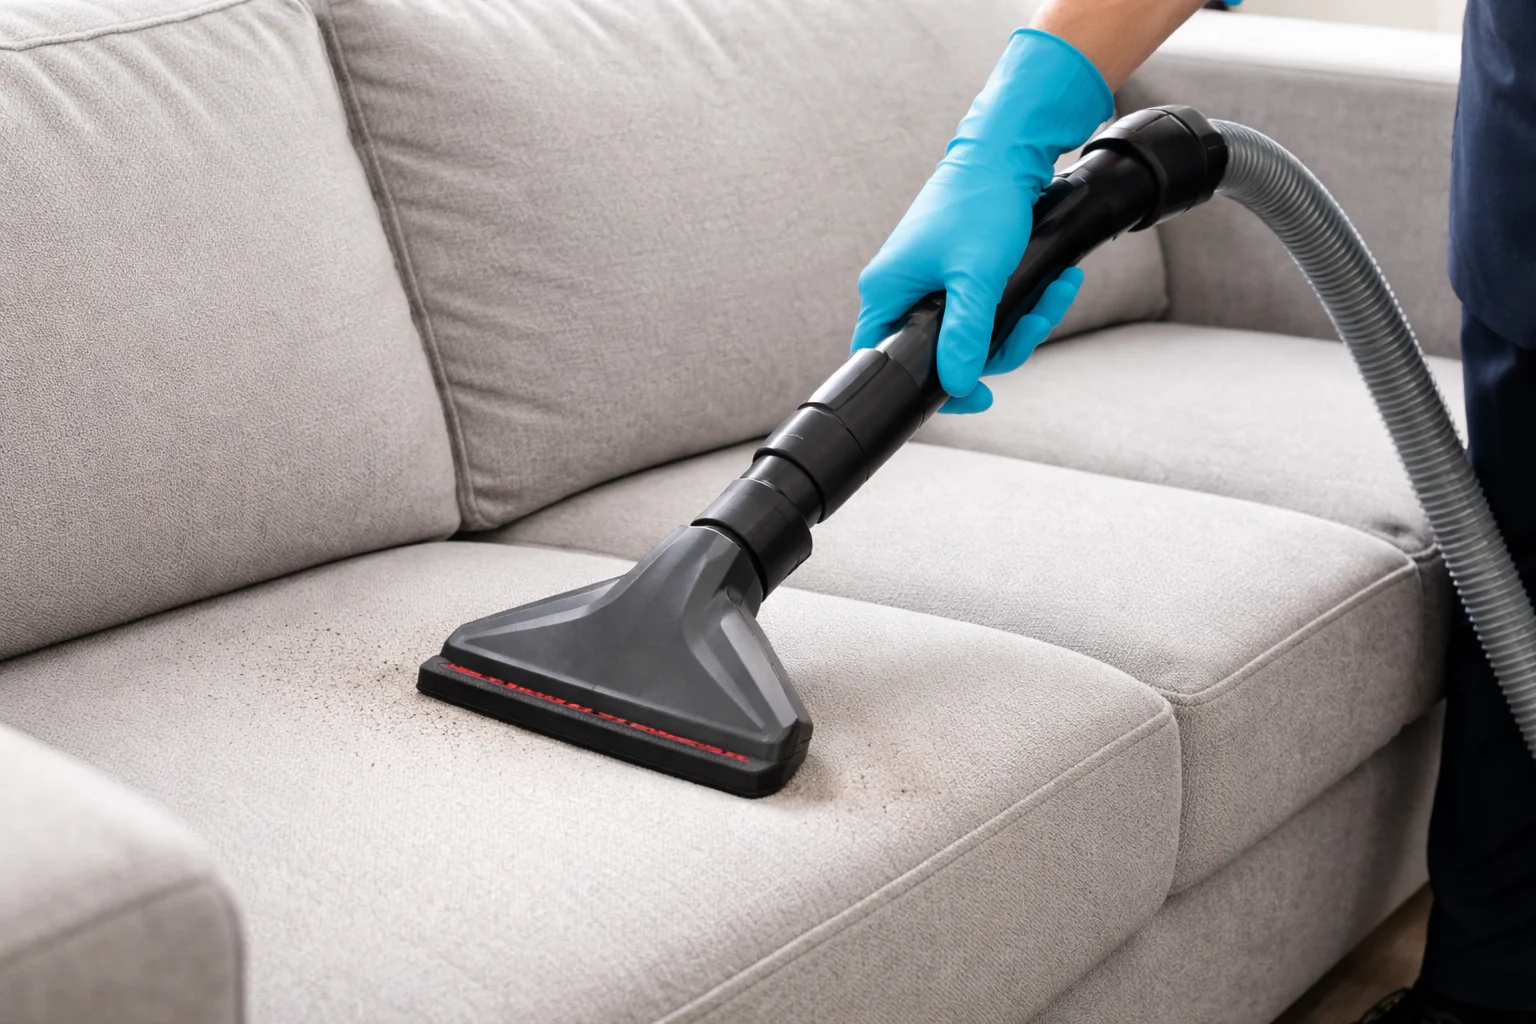
Step 3: spray lightly, extract slowly
- Do a light spray pass.
- Then do slow, overlapping suction passes. Think of it like squeegeeing rain off a window.
- Finish with extra “dry passes” with spray off to pull out as much moisture as possible.
Edges and seams
Edges, piping, and seams are where water loves to hide, and where fabric is most likely to pucker or fray.
- Do not flood seams. Use minimal spray along stitching lines.
- Angle the tool so suction pulls moisture away from the seam rather than pushing into it.
- Short passes at seams are better than one long, wet glide.
- If the seam looks stressed or vintage-fragile, skip the extractor there and blot only.
Common stains
A quick reality check: there is no magic combo of products that works on everything. Keep it simple, do not mix chemicals, and stop if the fabric starts to change.
- Body oil and headrest grime: a light pre-spray can help, then give it a short dwell (a few minutes), then extract. Do not let it dry on the fabric.
- Coffee, wine, juice: blot first, then clean the whole panel to avoid a ring. Warm (not hot) solution is usually plenty.
- Pet accidents: blot as much as possible first. If odor remains after full drying, the contamination may be in the cushion insert or backing and you may need a pro.
Never do this
- Never soak the cushion insert through the cover unless it is specifically designed for wet cleaning. Saturated foam can hold moisture for days and grow odor.
- Never clean just a tiny circle around a stain on most woven upholstery. That is a classic recipe for a visible ring.
- Never use boiling hot water or continuous high heat on unknown fabric. Heat can make some stains harder to remove and weaken some fibers.
- Never scrub aggressively with a brush head on delicate weaves, velvet, chenille, or anything with a nap. You will distort the pile.
- Never ignore color transfer on your cloth during a patch test. That is your warning flare.
- Never close windows and “let it dry overnight” with no airflow. Slow drying invites rings and that damp-basement smell.
Avoid water rings
Water rings are usually wicking: moisture travels through the fabric carrying dissolved soil, then deposits it at the edge as it dries.
Ring prevention checklist
- Vacuum thoroughly first.
- Clean whole panels, not only the stain.
- Use less solution than you think and more suction passes than you think.
- Do a final rinse pass with plain water if your fabric code allows it. This reduces detergent residue, which can create dull patches and attract soil.
- Dry fast and evenly (next section).
If a ring appears anyway
- Lightly mist the entire panel with plain water, just enough to even it out.
- Extract with slow, overlapping passes.
- Blot edges with a clean white towel.
- Dry aggressively with airflow.
If the ring is persistent on an S or X coded fabric, stop. At that point, professional upholstery cleaning can be the cheaper option than replacing a cover or living with the mark forever.
Drying matters
In my styling world, the best cleaning job is the one that dries like nothing happened. That means airflow, lifted cushions, and a little patience.
My post-clean routine
- Do extra dry passes on every section before you move on.
- Press with a white towel to wick remaining moisture, especially along seams.
- Stand cushions on edge so air reaches both sides.
- Run a fan pointed across the sofa, not directly into one spot.
- Open windows if humidity is reasonable, or run AC or a dehumidifier if it is muggy.
- Keep pets and bodies off it until it is fully dry. Sitting on damp fibers can create new compression marks and uneven drying.
Timing: many sofas feel dry on top before the padding underneath is dry. Give it several hours, sometimes overnight, depending on fabric thickness and room humidity.
Mold and mildew note: if it smells musty after it is truly dry, or if you accidentally soaked the cushion, stop using it and address the insert or backing. That is a situation where professional help is often worth it.
Fabric caveats
I love a thrifted, slightly moody sofa as much as anyone, but older upholstery can be less forgiving. Here is how I adjust.
Velvet, velour, chenille
- Patch test is mandatory.
- Use minimal moisture and minimal passes.
- When dry, gently reset the nap with a soft brush, following the natural direction.
Linen and cotton blends
- They can ring if overwet. Clean full panels and dry quickly.
- Use low detergent and plan a rinse pass.
Wool blends
- Avoid hot water.
- Go gentle and do not overwork. Wool can felt or distort with friction and heat.
Performance fabrics
- Many are W or WS and clean beautifully with extraction, but still follow the manufacturer guidance if you can find the brand.
- Do not assume performance means bleach-safe or heat-safe.
Maintenance timing
- Spot clean as needed (gently, and ideally by panel).
- Light extraction about 1 to 2 times per year for most households, more often if you have kids, pets, or a pale sofa you actually sit on.
- Vacuum weekly if you can. It is the easiest ring prevention there is.
Buying checklist
- Strong suction and easy tank cleaning
- Clear upholstery nozzle
- Attachment that can handle seams and tight corners
- Low-foam detergent options, plus a plan for a plain-water rinse pass
- Fan or airflow plan for fast drying
If you want your sofa to feel like a comforting hug at the end of the day, the goal is not “wet and scrubbed.” The goal is lifted soil, minimal moisture, zero residue, and fast, even drying. That is the combination that keeps fabric soft, color steady, and your living room smelling like itself.
FAQ
Do I have to use the brand’s cleaning solution?
Not always, but you do want a low-foam upholstery-safe cleaner that rinses clean. The bigger issue is not the brand name, it is using too much product and leaving residue behind.
Should I pre-treat stains first?
You can, especially for body oils or food stains, but keep it light and do not layer multiple products. Patch test pre-treaters too, and avoid anything that leaves a sticky finish.
Is it okay to use just water in the extractor?
For many W or WS fabrics, yes. Water-only extraction can freshen and remove some soil, and it is also great as a final rinse pass to reduce residue.
My cushion still smells a little damp. What now?
Increase airflow, stand cushions on edge, and run a fan or dehumidifier. If the odor persists after full drying, the cushion insert may have been saturated. At that point, you may need professional help or insert replacement.