Peeling Wallpaper Seams (Renter-Friendly Fixes)
Clara Townsend
Clara Townsend is an interior stylist, vintage furniture enthusiast, and the creative voice behind Velvet Abode. With over a decade of experience transforming both cramped city apartments and sprawling fixer-uppers, she believes that a beautiful home is built on personal stories rather than massive budgets. When she isn't hunting for the perfect brass sconce at a local flea market, she can usually be found rearranging her living room for the third time this month.
There is a special kind of irritation reserved for wallpaper that is otherwise behaving, except for that one seam that keeps lifting like it has a tiny vendetta. The good news is that most peeling seams can be fixed gently, cleanly, and without angering your drywall or your security deposit. The goal is simple: get the paper to lie flat again and make the edge disappear into the wall as much as possible.
Below is my renter-friendly approach: light cleaning, the right adhesive in the right amount, a seam roller technique that does not bully the wall, and a little edge blending when the seam line still wants attention.
Identify the type of peel
Not every peeling seam needs the same fix. Take thirty seconds to diagnose so you do not accidentally make the edge worse.
- Clean lift: The seam edge is curling up, but the paper feels intact and the wall behind looks smooth. This is the easiest repair.
- Dry, brittle edge: The seam edge looks a little crunchy or frayed. You will need less moisture and a lighter hand.
- Gapped seam: The seam has separated and you can see a thin line of wall. This is where blending helps most.
- Bubbly or sagging area: The paper is loose beyond the seam. That can point to humidity, past water damage, or failing paste across a larger section. You can still do a renter fix, but keep expectations realistic.
Quick renter note: If you see active dampness, staining, or a soft wall, stop and notify your property manager. Adhesive will not solve a moisture problem, and you do not want to be blamed for it later.
What you will need
- Microfiber cloths (and a small sponge if you prefer)
- A bowl of warm water with a drop of dish soap
- Cotton swabs or a small paintbrush
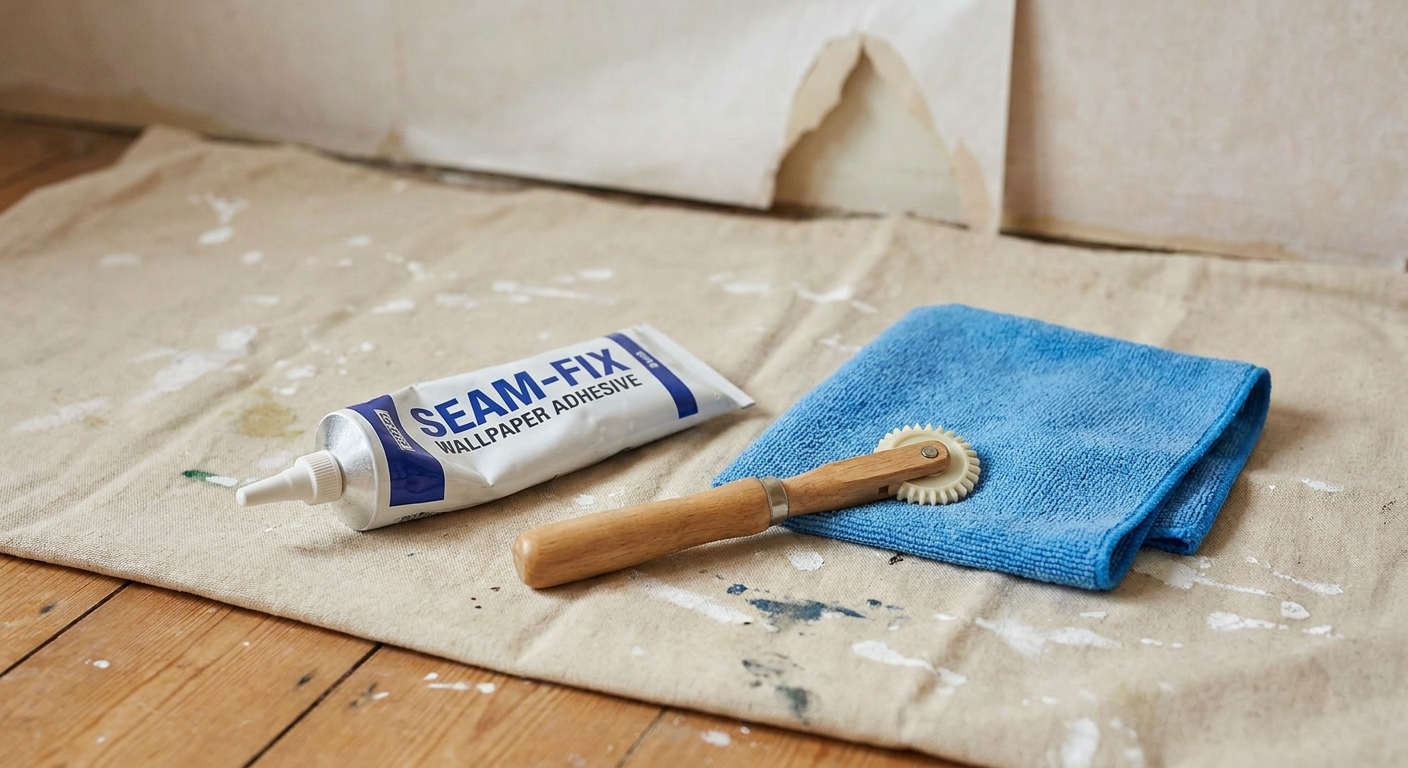
- Wallpaper seam adhesive or clear wallpaper repair adhesive (a small tube is usually enough)
- A seam roller (small, smooth roller made for wallpaper seams)
- Plastic putty knife or an old gift card wrapped in a soft cloth (for pressing and smoothing if you do not have a roller)
- Painter’s tape
- Optional: paintable acrylic border caulk (also sold as wallpaper border adhesive caulk)
- Optional: matching paint and a tiny artist brush (only if the lease allows touch-ups)
What to skip: Super glue, construction adhesive, double-sided tape, and anything labeled “permanent.” They can stain the paper, tear paint on removal, and turn a tiny seam fix into a lease problem.
Also skip: Metal scrapers. Drywall dents easily, and wallpaper faces scratch even faster.
Step-by-step repair
Before you start: If you are dealing with delicate wallpaper (uncoated paper, grasscloth, fabric-backed, matte prints), test your cleaning solution and adhesive in an inconspicuous spot first. Some surfaces stain or darken with moisture and can be picky about adhesives.
1) Clean the area
Dust and cooking residue are surprisingly good at preventing glue from bonding. Lightly wipe the wallpaper surface near the seam with a barely damp microfiber cloth and a drop of dish soap in warm water. Then wipe again with plain water.
Let it dry 10 to 15 minutes, or until fully dry to the touch. Adhesive bonds best when the wall is not still damp.
Tip: Do not soak the seam. You are cleaning the surface, not giving the wall a bath.
2) Lift the seam a little
Use your fingers or the edge of a clean, dry cotton swab to lift the seam just enough to get adhesive underneath. If it is brittle, go slower and lift less.
3) Apply adhesive sparingly
Use a cotton swab or small paintbrush to apply a thin layer of wallpaper seam adhesive under the lifted edge. You want coverage, not puddles. Too much glue is what causes shiny spots and squeeze-out that grabs dust later.
If the tube has a precision tip, apply a tiny bead, then spread it thin with the swab.
Material note: Vinyl wallpaper is usually more wipeable and forgiving, but still avoid harsh cleaners and solvents. Grasscloth and unsealed paper are the opposite. Use minimal moisture and minimal rubbing.
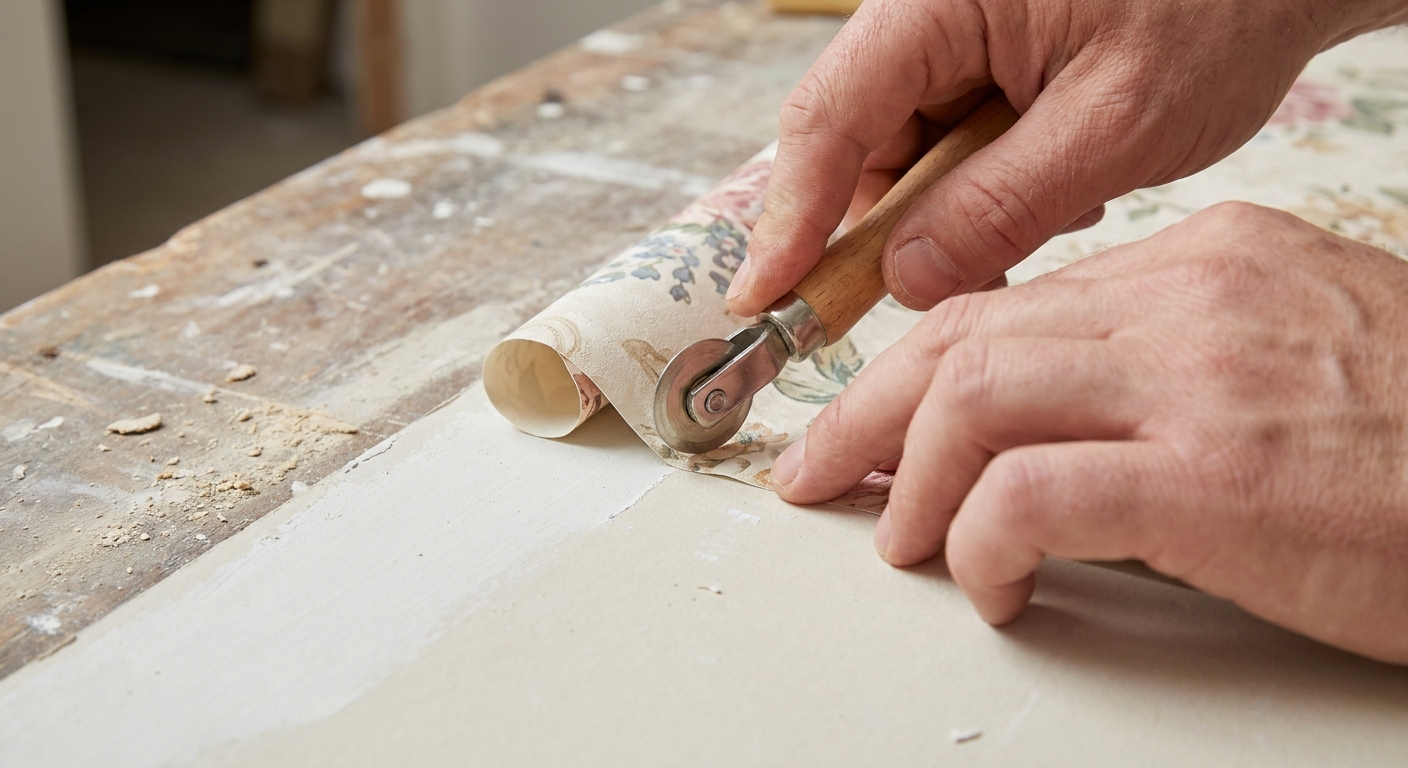
4) Press and smooth
Press the seam down with your fingertips first, working from the tightest part of the seam outward.
Then choose one:
- With a seam roller: Roll along the seam first to align it, then roll across the seam in short passes to bond the edge.
- Without a roller: Use a plastic putty knife or cloth-wrapped gift card to smooth the seam with light pressure, working from the center of the repair outward.
Pressure check: Imagine you are smoothing linen, not crushing crackers. If you bear down too hard, you can emboss the wallpaper texture or dent drywall.
Glue control: Smooth from the center of the repaired area toward the outer edge, then wipe immediately. The goal is to avoid pushing adhesive onto the wallpaper face.
5) Wipe squeeze-out right away
If any adhesive comes out at the edge, wipe it immediately with a barely damp cloth or sponge, then follow with a dry cloth. Rinse and wring often, and change the water if it starts to feel slippery. That is how you avoid smearing a thin glue film across the wallpaper.
6) Hold it while it sets
Some seams need a little extra “stay put” time. Use painter’s tape lightly across the seam to hold it flat while the adhesive grabs.
Most seam adhesives set fairly quickly, but follow your product label. As a general rule, tape it for 15 to 30 minutes and treat it gently for 24 hours. Avoid washing that wall for a day.
Remove the tape slowly, pulling it back on itself at a low angle.
Blend the edge
Sometimes the seam is adhered but still looks like a faint ridge or a hairline shadow. This is where subtle blending comes in.
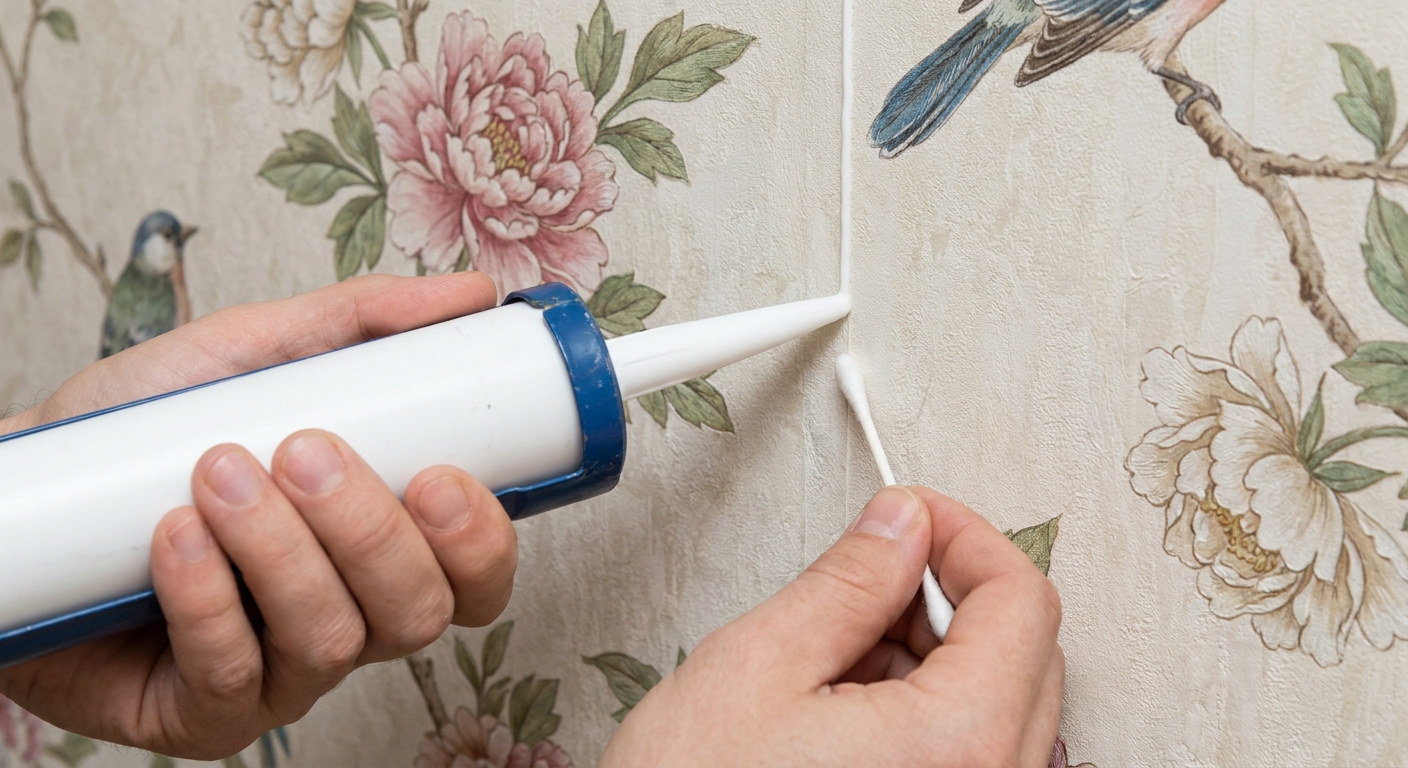
Option A: Border caulk
Use it when: the seam is flat but you still see a fine line, or there is a micro-gap you want to visually soften.
Important: This is for blending, not for gluing down a seam that is lifting. If the paper is still curling, re-adhere first with seam adhesive, let it set, then blend if needed.
Before you commit: Acrylic border caulk is not universally wallpaper-friendly. It can smear, stain, or leave a haze on porous or uncoated papers, and it is not always easy to remove later. Test in an inconspicuous spot first and keep your bead tiny.
How to do it cleanly:
- Choose paintable acrylic border caulk (not silicone). Acrylic is easier to tool and clean up.
- Cut the tip very small. You want a whisper-thin bead.
- Run a bead right along the seam line, then smooth it with a damp fingertip or a damp cotton swab.
- Immediately wipe the wallpaper surface with a barely damp cloth so no film remains.
Cure note: Caulk skins over fast, but full cure is often closer to 24 hours. Treat the area gently until then.
Paint touch-ups
If your wallpaper is painted or meant to be painted, a careful touch-up can make a stubborn seam line nearly disappear. But because painting is a lease issue more than a design issue, check your agreement first. When in doubt, ask in writing.
Option B: Paint (only with permission)
- Confirm permission to paint or touch up.
- Use a small artist brush for the seam line rather than rolling a big section of wall.
- Feather the paint outward with a nearly dry brush so you do not create a noticeable patch.
- Keep paint off the wallpaper texture peaks as much as possible if the wall has shine, because touch-ups can flash under certain lighting.
If you cannot paint: Neat border caulk, used cautiously and tested first, is usually the better visual blend that still feels reversible and maintenance-friendly.
Steam and rentals
Steam feels like the gentle solution, but on many rentals it is a fast track to drywall damage. Moist heat can:
- Soften the drywall face paper so it lifts or pills.
- Reactivate old paste unevenly, causing bubbles that spread beyond the seam.
- Leave the surface wavy once it dries, especially on older walls.
Professionals sometimes use controlled steaming for full wallpaper removal, but for a renter doing a spot seam repair, it is usually more risk than reward.
If you need heat at all, use the mildest option: a warm, barely damp cloth pressed briefly, then dry immediately. No soaking.
Troubleshooting
The seam lifts again the next day
- You may have used too little adhesive, or the wall had residue. Clean, dry fully, re-adhere, and hold with painter’s tape longer.
- In humid rooms, run the fan or dehumidifier for a day or two after the repair.
- If multiple seams start failing, document it and tell your landlord. That is often age, humidity, or a building issue.
The edge looks shiny
- That is usually dried adhesive on the wallpaper face. Next time, use less and wipe squeeze-out immediately.
- If it already happened, gently wipe with a barely damp cloth and buff dry. Test first in an inconspicuous spot.
The seam is flat but still shows as a dark line
- Try border caulk for blending if the wallpaper surface allows neat cleanup and your test spot looks good.
- Check lighting. A low, side lamp will dramatize seams. Sometimes adjusting a lamp shade or adding a softer bulb makes the wall look instantly calmer.
The wallpaper is torn at the seam
- For tiny tears, a small amount of seam adhesive under the tear and gentle smoothing can help.
- If the tear is larger, do not keep fussing. Photograph it and notify the landlord. Overworking torn paper often makes a bigger, fuzzier spot.
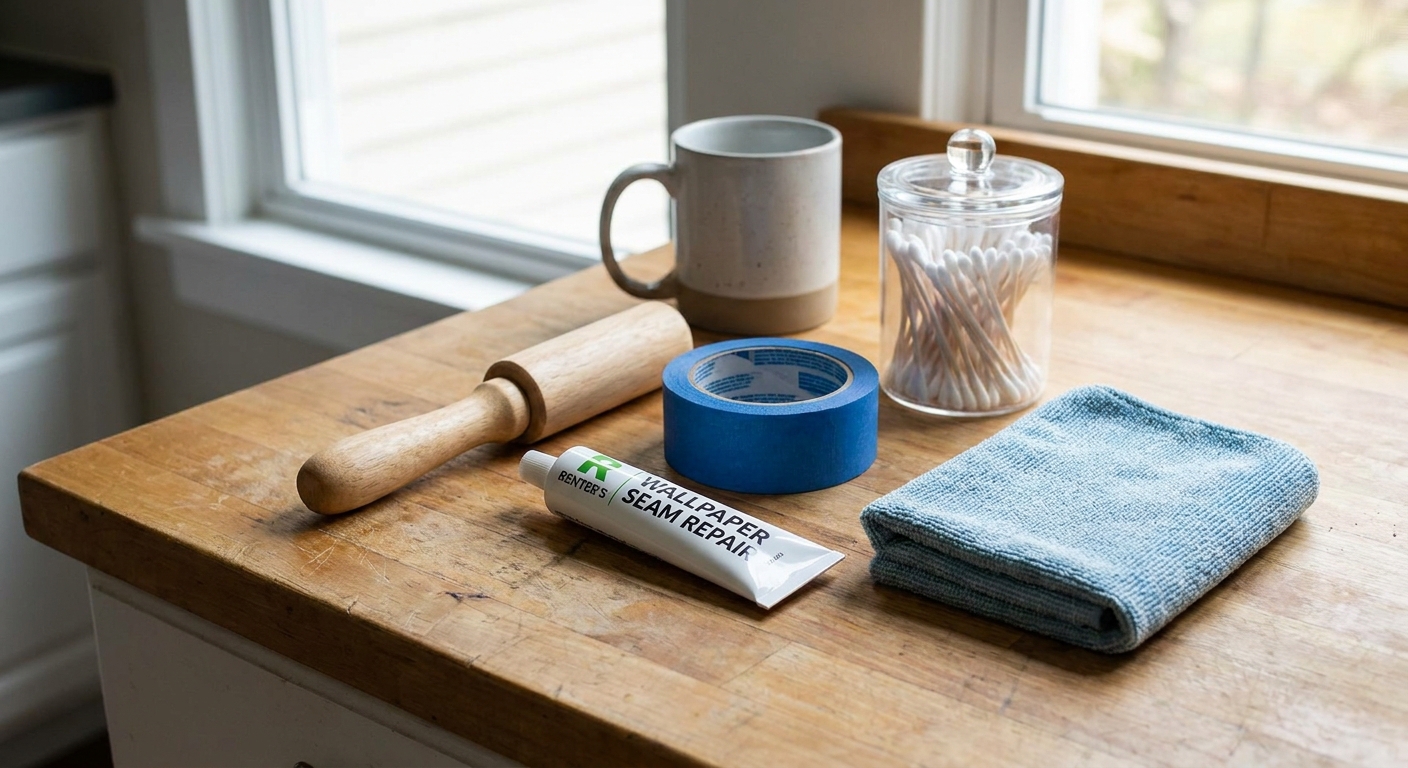
A tiny renter kit
If you live in a place with older wallpaper, keep a mini seam kit tucked under the sink. It is the home equivalent of having a spare button in your wallet.
- Wallpaper seam adhesive (small tube)
- Seam roller
- Microfiber cloth
- Cotton swabs
- Painter’s tape
- Acrylic border caulk (optional, and test first)
It is not glamorous, but it is deeply satisfying. Like smoothing a wrinkled linen sheet until it falls into place.
When to call your landlord
A renter-friendly fix is meant to be light-touch. Reach out for help if:
- The wall feels soft, damp, or crumbly behind the paper.
- Multiple seams are failing across the room.
- You see mold, persistent staining, or a musty smell.
- The wallpaper is lifting in big sheets or bubbling broadly.
In those cases, it is likely a building issue or an age-of-materials issue, not a “you did something wrong” issue. And documenting early protects you.
Quick checklist
- Test first on delicate wallpapers.
- Clean lightly, then dry fully.
- Use wallpaper seam adhesive, not craft glue.
- Smooth gently with a seam roller or cloth-wrapped card.
- Wipe squeeze-out immediately (and change rinse water).
- Tape it down if needed, then baby it for 24 hours.
- Blend with acrylic border caulk only after the seam is adhered, and only if it passes a test spot.
- Paint only with written permission.
- Avoid heavy steam for spot repairs to protect drywall.
If you want, tell me what room you are dealing with and whether the wallpaper is vinyl, textured paper, grasscloth, or painted over. The exact surface changes how much moisture and pressure it can tolerate.