Paint and Reface Old Kitchen Cabinets
Clara Townsend
Clara Townsend is an interior stylist, vintage furniture enthusiast, and the creative voice behind Velvet Abode. With over a decade of experience transforming both cramped city apartments and sprawling fixer-uppers, she believes that a beautiful home is built on personal stories rather than massive budgets. When she isn't hunting for the perfect brass sconce at a local flea market, she can usually be found rearranging her living room for the third time this month.
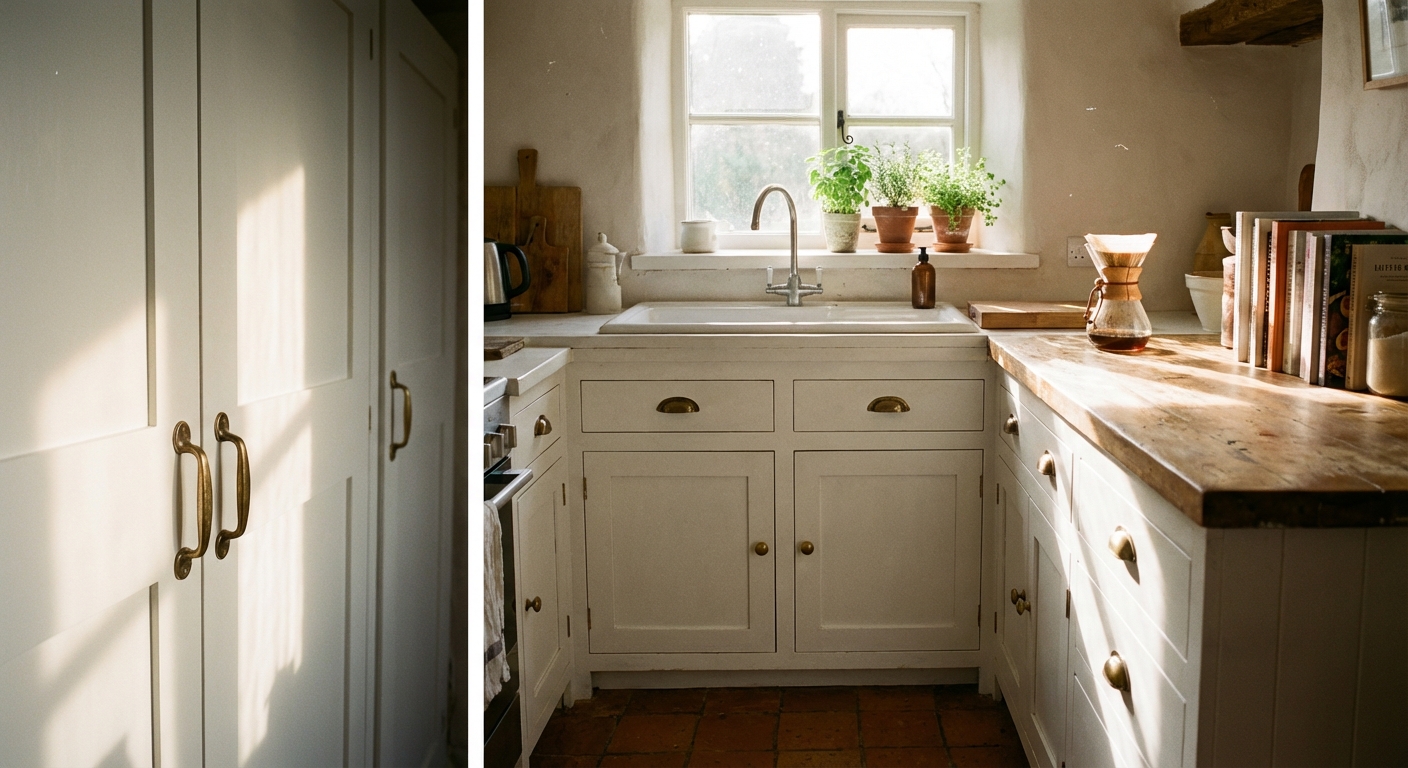
If your kitchen cabinets are structurally fine but visually stuck in another decade, a paint-and-reface refresh is the sweet spot: high-impact, manageable cost, and a transformation you can feel every time you make coffee. I have painted cabinets in tiny rentals and in big, dusty fixer-uppers, and the difference between “looks okay for now” and “wait, did you replace these?” is almost always prep.
This guide walks you through the exact order that matters: degrease, scuff, prime, paint, cure, then upgrade the details. Take it slow, label everything, and trust that boring steps are what make the pretty parts last.
Decide: paint or reface
People use “refacing” to mean a few different things. Here is what I mean, and how to choose.
Paint only (fastest refresh)
- You keep: cabinet boxes, doors, drawer fronts, and hinges.
- You do: prep, prime, paint, and reinstall.
- Best for: solid wood or MDF doors in good shape, hinges that still work, and a layout you like.
Paint + partial reface (my favorite balance)
- You keep: cabinet boxes.
- You update: new doors and drawer fronts, or you add veneer to exposed ends, plus new hinges and pulls.
- Best for: warped or heavily routed doors, or when you want a cleaner, more modern slab look.
Full reface (bigger leap, still cheaper than new)
- You keep: cabinet boxes.
- You cover: face frames and visible sides with veneer or panels, plus new doors/drawer fronts and hardware.
- Best for: dated wood tones with lots of visible frame, or mismatched cabinets you want to visually unify.
If your boxes are falling apart, water damaged, or the layout makes you miserable every day, skip the makeover and put that energy toward replacement. Painting cannot fix sagging particleboard that has swollen like a sponge.
Tools and materials
You do not need a garage full of gadgets, but you do need the right basics. This list is built around getting a smooth finish that can handle sticky hands and spaghetti sauce nights.
Cleaning and prep
- Degreaser: TSP substitute or a kitchen degreaser
- If using real TSP: wear gloves and eye protection, and follow the label carefully. It is effective, but it is harsh.
- Microfiber cloths and non-scratch scrub pads
- Painter’s tape and masking paper or plastic
- Zip-top bags or small cups for screws
- Labeling: painter’s tape + marker
Sanding and repairs
- Sanding sponge (medium and fine grit)
- Sandpaper: 120 to 150 grit, then 180 to 220 grit
- Vacuum with brush attachment
- Tack cloth or damp microfiber cloth
- Wood filler (or filler appropriate for MDF)
- Putty knife
Priming and painting
- Bonding primer (critical for durability)
- Cabinet and trim paint (waterborne alkyd or high-quality acrylic enamel)
- High density foam rollers (4 inch) and angled brush (2 to 2.5 inch)
- Paint tray liners
- Optional: paint sprayer for the smoothest finish
- Optional: liquid deglosser (helpful on detailed profiles or stubborn gloss, but it does not replace cleaning)
Hardware upgrades
- New pulls or knobs
- Optional: concealed hinges for a more modern look (if your cabinet style supports it)
- Hardware jig (optional but very helpful)
- Wood dowels and glue (to fill old holes if you change hardware placement)
Step 1: Set up your workspace
Cabinet painting gets messy in a very fine, very persistent way. A little setup keeps dust out of your finish and keeps you from losing hinge screws into the fourth dimension.
- Choose a painting zone: garage, basement, or a spare room with good airflow. Lay down a drop cloth and masking paper where you will paint.
- Create drying racks: use sawhorses with 1x2s, or set doors on painter’s pyramids. The goal is airflow under the doors.
- Ventilate: open windows, use a fan, and wear a respirator if you are sensitive or spraying.
- Control dust: close nearby HVAC vents if you can, and vacuum the area before painting.
- Photograph everything: take quick photos of hinge placement and door orientation before you remove anything.
Safety note: If your home was built before 1978, consider lead paint testing before sanding. Use the right precautions for your situation.
Step 2: Remove and label
This is the part where your kitchen starts to look like it is moving out, but it is worth it. Painting cabinets in place is possible, but it is harder to get crisp edges and a smooth finish.
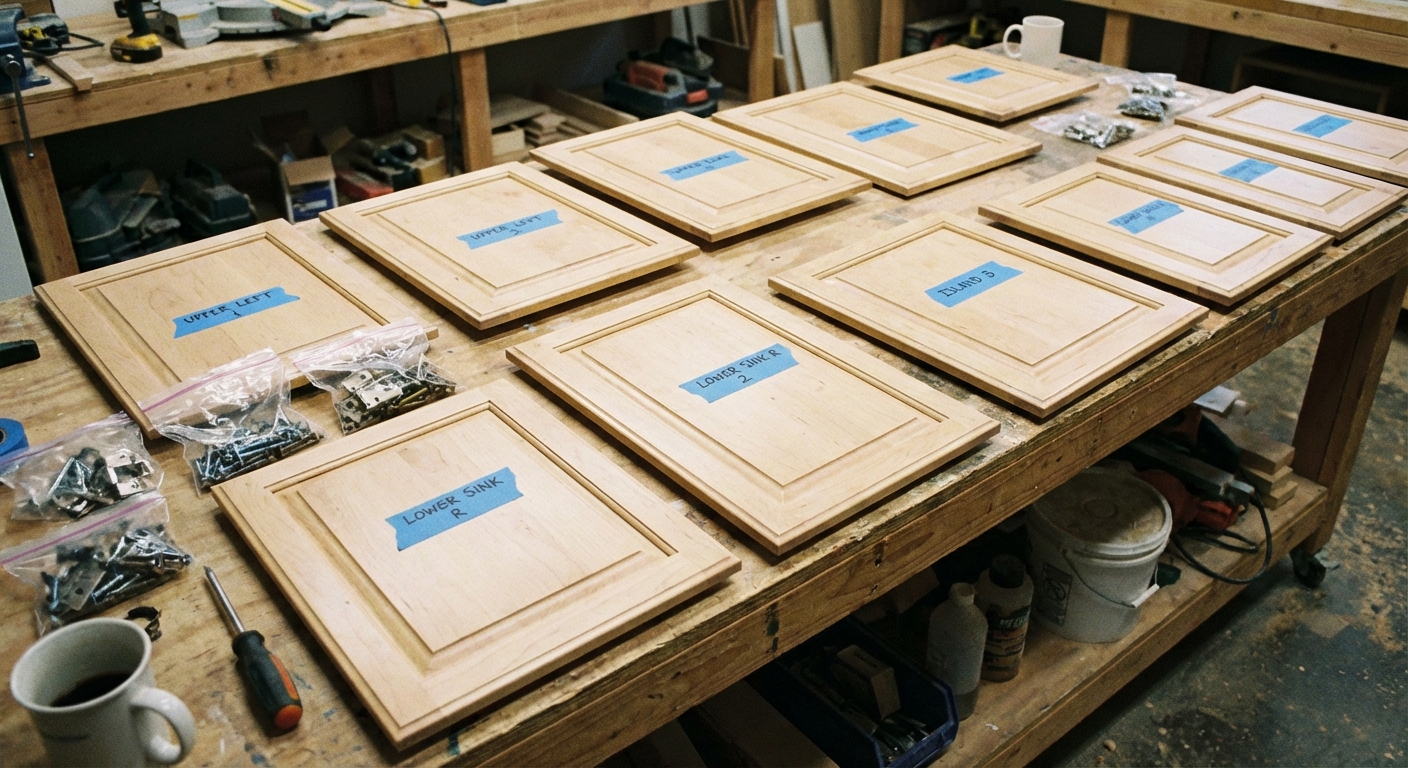
- Number each door and its matching cabinet opening with painter’s tape.
- Remove doors and drawers.
- Remove hinges, knobs, and pulls.
- Bag screws and label each bag to match the door number.
Pro labeling tip: Put the numbered tape inside the hinge cup recess on the back of the door (or inside a hinge mortise area) so it does not get painted over or lost during prep.
Also helpful: Label hinges too if you are reusing them, and mark door top and bottom. Left and right can matter more than you think.
Drawer question that trips people up: If your drawer fronts are screwed on from inside the box, unscrew and remove the fronts and paint them separately. If they are one-piece drawer boxes with attached fronts, you can leave them on and mask off the inside of the drawer box, but separate pieces are usually easier to paint neatly.
Tip: if you are replacing hinges, keep one old hinge and one door with you when you shop. Hardware can be weirdly specific, and “close enough” rarely is.
Step 3: Degrease
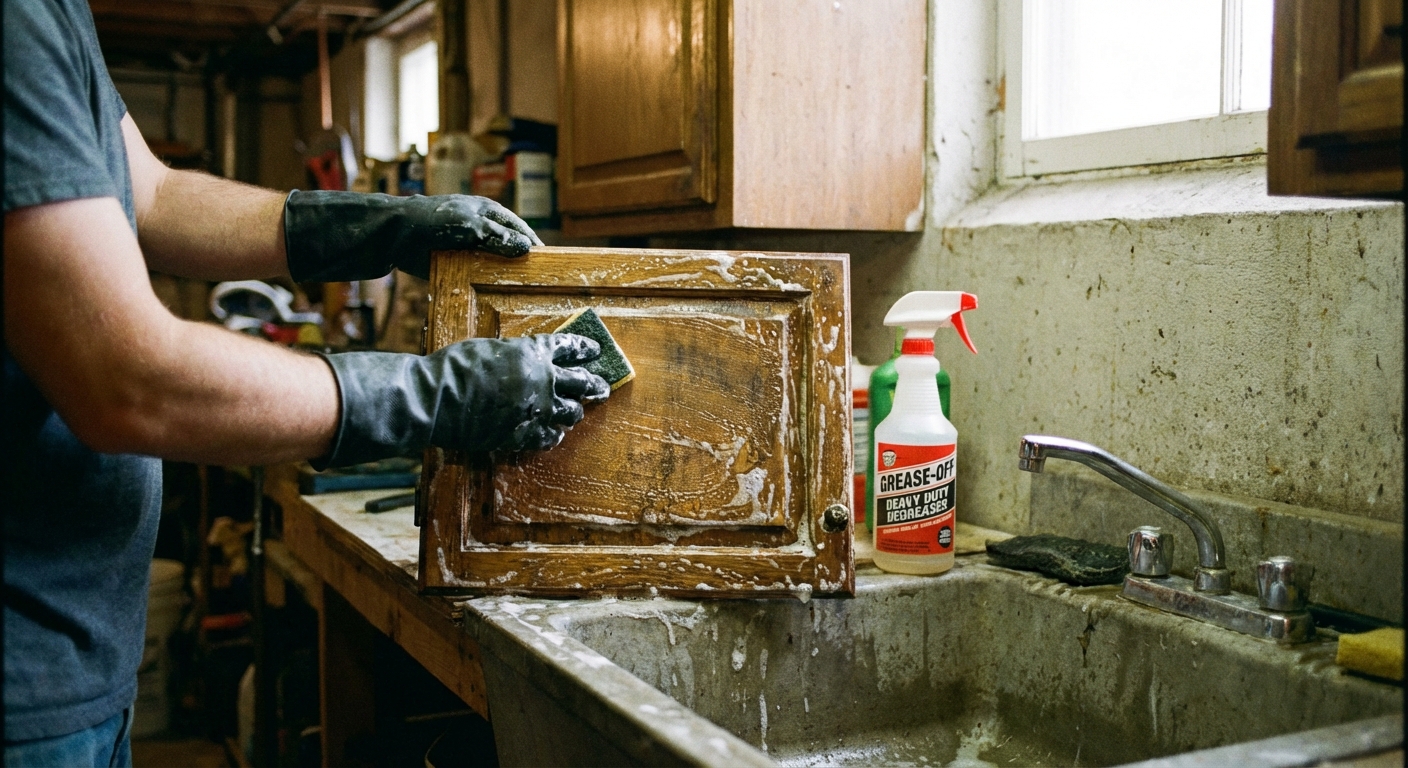
Kitchen cabinets collect a thin film of cooking oils, hand grime, and cleaning residue. Paint does not bond to grease. Primer does not bond to grease. Nothing bonds to grease.
How to degrease properly
- Mix your degreaser according to the label.
- Scrub doors, drawer fronts, and cabinet frames, especially around handles and near the stove.
- Rinse with clean water to remove cleaner residue.
- Let everything dry completely.
Reality check: if your rinse water beads up on the surface, it is often a sign there is still oil or residue present (though some finishes bead water anyway). When in doubt, clean once more, then do a final wipe with a clean damp cloth and let it fully dry.
Step 4: Repair and grain
After cleaning, you will finally see what you are working with. Fill chips and dents now, because paint highlights flaws the way sunlight highlights dust on a mirror.
Fill and sand repairs
- Use wood filler for solid wood, and a compatible filler for MDF or laminate repairs.
- Overfill slightly, let it fully dry, then sand flush.
- Repeat if needed. Two light passes look better than one bulky blob.
Hide wood grain?
If you have heavy oak grain and you want a smooth, modern finish, you will need grain filling or multiple coats of primer plus sanding. If you like a little texture and you are going for cozy, you can skip grain filling and embrace the subtle pattern.
Step 5: Sand for adhesion
You are not trying to remove all the existing finish. You are simply giving primer something to grab onto. Think “softly scuffed” not “stripped to bare wood” unless the old finish is failing.
What grit to use
- 120 to 150 grit: for glossy or tough finishes, or if there are drips and rough spots.
- 180 to 220 grit: for a final smoothing pass before primer, and between coats.
Best sanding routine
- Sand doors, drawer fronts, and frames evenly.
- Focus on edges and hand-contact areas.
- Vacuum thoroughly.
- Wipe with a tack cloth or a barely damp microfiber cloth.
Important: dust is the enemy of a silky finish. If you can feel powder on your fingertips, you are not ready for primer.
Step 6: Prime
If I could tattoo one cabinet painting truth onto every DIY brain, it would be this: primer is the safest path to a finish that lasts. The right primer blocks stains, improves bonding, and helps your paint level out beautifully.
Pick the right primer
- Bonding primer: best for previously finished wood, glossy surfaces, and most cabinet situations.
- Stain blocking primer (shellac or oil-based): best if you have tannin bleed, smoke stains, or mystery marks that keep coming back.
Some paint systems claim they are self-priming on previously painted and scuffed surfaces. They can work in the right situation, but in most cabinet makeovers, a bonding primer is the safer, longer-lasting choice. Follow your product’s system if it specifies a certain primer or no primer.
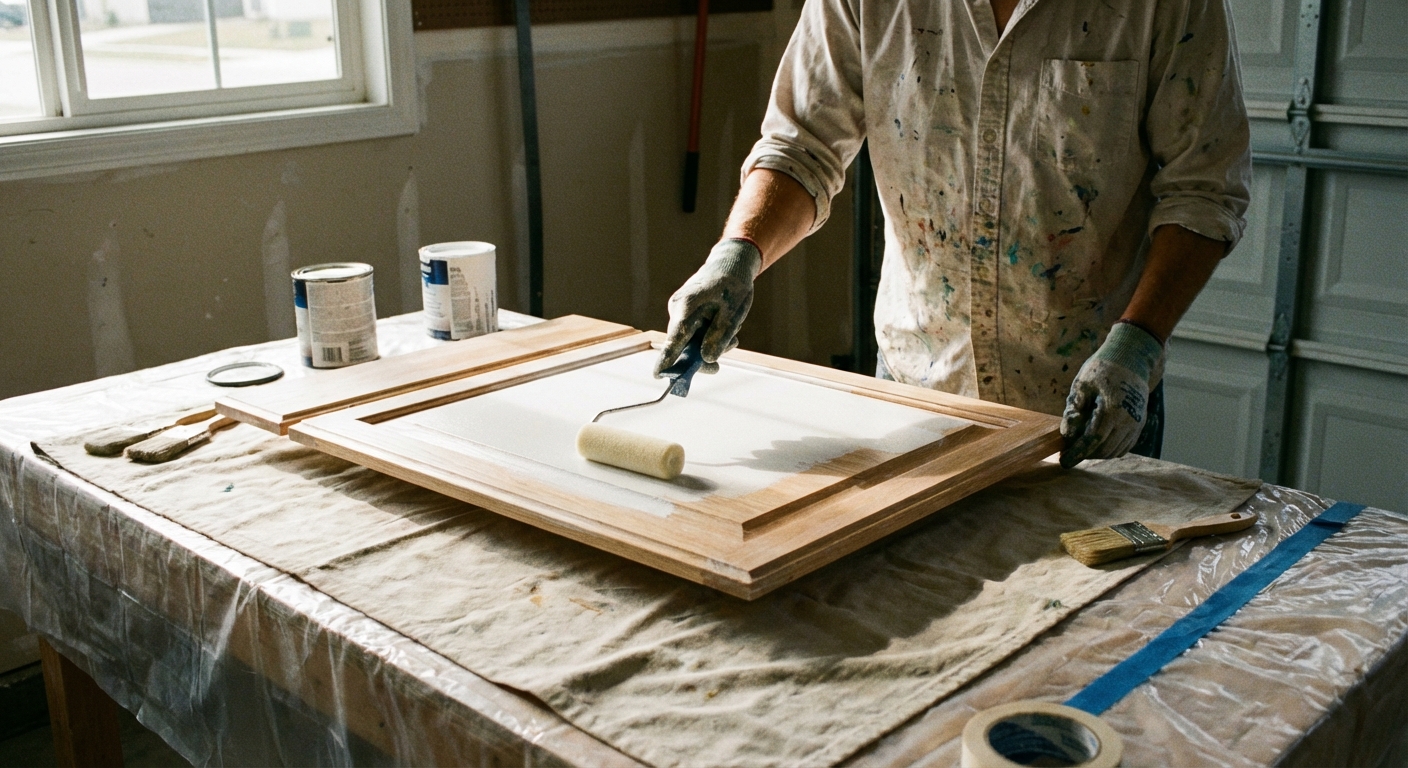
Apply primer in thin, even coats. Start with the backs of doors, then move to the fronts. Let it dry fully as directed. Most failures happen when we paint again before the previous layer has actually cured.
Sand after priming
Once primer is dry, lightly sand with 220 grit to knock down fuzz and roller texture. Wipe clean.
Step 7: Paint
Cabinet paint needs to be tough and washable. Wall paint is not built for this job.
Choose a cabinet-friendly paint
- Waterborne alkyd: hard, smooth finish that feels more like traditional oil paint, with easier cleanup. It can take longer to harden in cool or humid conditions.
- Acrylic enamel (cabinet and trim): durable and beginner-friendly, especially with good primer underneath.
For sheen, I usually recommend satin or semi-gloss. Satin hides imperfections a bit more. Semi-gloss is easier to wipe down and gives that crisp, tailored look.
Brush and roll method
- Cut in edges and profiles with an angled brush.
- Roll flat areas with a high density foam roller, using light pressure.
- Keep a wet edge. Work in sections so you are not painting into drying paint.
- Do not overwork it. The paint needs a minute to level.
Sprayer method
If you have a sprayer, it can give that factory-like finish, especially on flat slab doors. You still need the same prep and primer. Practice on cardboard first, keep the sprayer moving, and do multiple thin coats rather than one heavy one.
Coats and dry time
- Plan for 2 coats of paint after primer, sometimes 3 for deep colors or tricky surfaces.
- Lightly sand between coats with 220 grit once dry, then wipe clean.
- Follow the can for recoat time, and add extra time if your space is humid or cool.
Do you need a clear topcoat?
Usually, no. Most cabinet enamels are designed to be the final finish, and a clear coat can add compatibility issues (yellowing, cracking, or poor adhesion) if it is not part of the system. If you want extra protection, use a paint line that includes a recommended clear coat and follow that exact pairing.
Step 8: Cure time
Paint can feel dry to the touch quickly, but curing takes longer. If you rehang too soon, doors can stick, imprint, or chip at the edges.
- Dry: surface no longer tacky.
- Cure: paint has hardened through and through.
As a general rule, treat cabinets gently for at least 7 days, and ideally up to 30 days for full hardness depending on the product. Waterborne alkyds in particular can take longer in cool or humid conditions. During this time, avoid harsh cleaners and be mindful of sticky fingers pulling on edges.
Step 9: Rehang and hardware
This is where it starts to feel like a new kitchen. Take your time. Crooked hardware can make even perfect paint look slightly off.
Reinstall doors and drawers
- Reattach hinges and hang doors according to your labels.
- Adjust hinges so gaps are even and doors sit flush.
- Add bumpers to the inside corners if you do not have them. This prevents sticking and softens the close.
Timeline tip: If you can, reinstall cabinet frames and drawer boxes sooner, but let doors and drawer fronts cure a bit longer before rehanging. If you must rehang early, bumpers are your best friend.
Install new pulls or knobs
- Use a hardware jig or measure carefully and mark with pencil.
- If old holes do not match, fill them with dowels and wood filler, sand smooth, spot prime, then touch up paint.

Optional upgrades
If you want the “I would swear these are new” effect, these small refacing moves go a long way.
New doors or drawer fronts
Replacing heavily detailed doors with simple shaker or slab fronts instantly modernizes a kitchen. You can still paint everything the same color for a seamless look.
Cover exposed ends
Many older kitchens have unfinished or mismatched ends. Adding a finished panel or veneer makes the cabinetry look intentional and built-in.
Add trim (selectively)
A simple light rail under upper cabinets can hide under-cabinet lighting and finish the look. Keep it clean and minimal if you are going modern.
Upgrade hinges
Hidden hinges can make cabinets look sleeker, but they require compatible doors and drilling. If that sounds stressful, new matching exposed hinges and fresh pulls will still feel like a big upgrade.
Special surfaces
Not all cabinets are wood or MDF, and this is where paint projects can go sideways.
- Thermofoil: can be tricky. If it is peeling, bubbling, or lifting at edges, painting is rarely a long-term fix. Consider new doors instead.
- Laminate or melamine: paint can work, but prep and primer choice matter. Clean extremely well, scuff thoroughly, and use a true bonding primer rated for slick surfaces.
- Previously painted cabinets: if the old paint is solid, scuff sand and prime where needed (or follow a proven system). If it is peeling, you need to remove failing areas before you build on top of them.
Troubleshooting
Paint is peeling or scratching off easily
- Most likely: grease left behind, no bonding primer, or not enough cure time.
- Fix: clean and scuff sand the failing areas, spot prime, repaint, then let it cure longer.
Tannin bleed or yellow stains showing through
- Most likely: wood tannins in oak, cherry, or knotty wood.
- Fix: use a stain-blocking primer (often shellac-based), then repaint.
Brush marks and roller texture
- Most likely: paint too thick, overworking, cheap roller, or painting as it starts to dry.
- Fix: sand smooth, switch to a better roller, use thinner coats, and consider a paint additive only if recommended for your product.
Doors sticking to the frame
- Most likely: rehung too soon or paint buildup on edges.
- Fix: let cure longer, add bumpers, lightly sand edges if needed.
Color and finish ideas
This is the fun part, and it should still feel personal. A kitchen can be modern without being sterile.
- Soft warm white: pairs beautifully with brass and vintage pottery.
- Mushroom or greige: quietly chic, forgiving, and cozy in low light.
- Deep olive or inky blue: looks stunning with warm wood accents and aged metals.
- Two-tone: darker lowers, lighter uppers for balance, especially in smaller kitchens.
If you are nervous, test your color on a removable door and look at it morning, afternoon, and night. Kitchen lighting changes everything.
Simple maintenance
- Clean with mild soap and water, not harsh degreasers, especially in the first month.
- Wipe up splatters quickly, particularly around the sink and stove.
- Avoid hanging damp towels over doors while paint is still curing.
- Tighten hardware every so often. Loose pulls lead to chips around holes.
My personal rule: if you can do the prep without rushing, you can do the whole project. The glow-up is in the patient steps, not in the fanciest paint.
Quick timeline
Every kitchen is different, but here is a realistic rhythm for most cabinet paint makeovers.
- Day 1: remove doors and hardware, degrease, dry
- Day 2: sand, repair, clean, prime
- Day 3: sand primer lightly, paint coat 1
- Day 4: paint coat 2, begin dry time
- Day 5 to 7: reinstall drawers and frames as needed, add bumpers, rehang doors carefully when they are ready
If you can stretch the project so doors cure longer before rehanging, do it. That extra patience pays you back every single day you open a drawer.