Open Kitchen Shelving Without the Clutter
Clara Townsend
Clara Townsend is an interior stylist, vintage furniture enthusiast, and the creative voice behind Velvet Abode. With over a decade of experience transforming both cramped city apartments and sprawling fixer-uppers, she believes that a beautiful home is built on personal stories rather than massive budgets. When she isn't hunting for the perfect brass sconce at a local flea market, she can usually be found rearranging her living room for the third time this month.
Open kitchen shelves can feel like a little design daydream until you actually live with them. Suddenly the “airy” look becomes a jumble of mugs, cereal boxes, and that one random lid that never matches anything.
The good news is this: open shelving usually looks cluttered when it is trying to do too many jobs at once. When you edit intentionally, create a few clear zones, and repeat shapes and materials, your shelves start to read like a calm still life. Not a storage panic.
One honest note before we start: open shelves do ask more of you. They collect dust and kitchen film faster than closed cabinets, especially near the stove. The fix is simple. Keep daily-use items up there (they get washed often), and keep the rarely used, grease-prone stuff in closed storage when you can.
Edit rules that work
I love a collected kitchen, but open shelves require boundaries. Think of these as your house rules, not design snobbery.
Rule 1: Keep what you use weekly
If you have to climb, dig, or hunt for it, it does not belong on display. Daily and weekly items earn shelf space. Everything else can live behind closed doors, in drawers, or in a labeled bin in the pantry.
- Yes: everyday plates, bowls, glasses, mugs, olive oil, a salt crock, a cutting board you actually use
- No: novelty glassware, mismatched plastic containers, backup gadgets, half-used bags of snacks
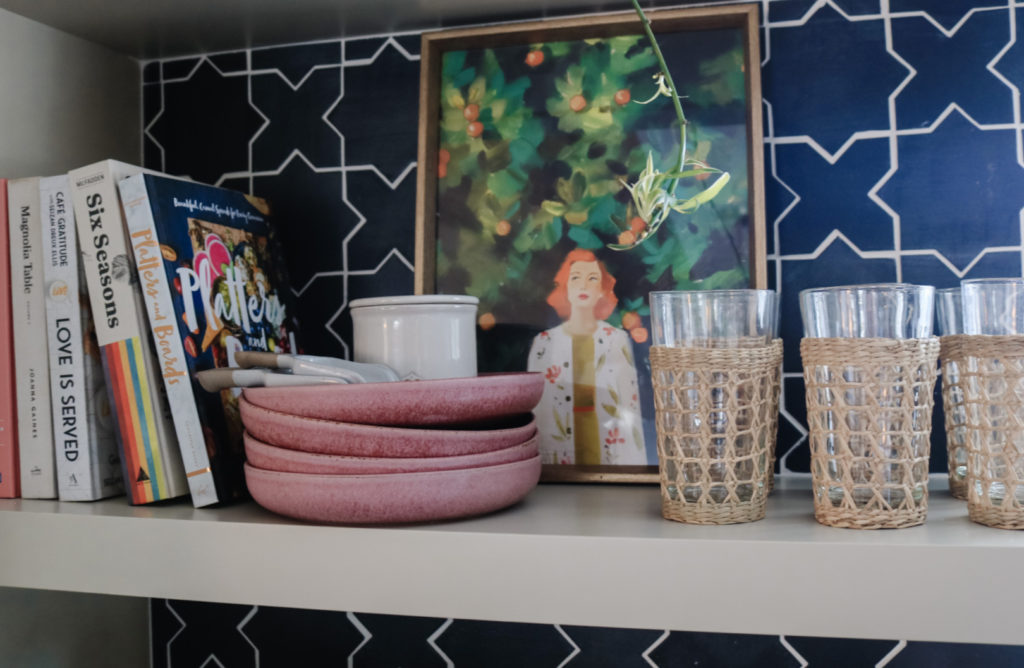
Rule 2: Repeat, then add one story piece
Repetition is what makes a shelf look calm. Choose a base set that repeats (white plates, clear glasses, a single wood tone) and then add one or two pieces with personality, like a vintage pitcher or a little piece of art leaned against the wall.
A good ratio to start with: 80 percent practical, 20 percent decorative.
Rule 3: Choose a palette on purpose
You do not need a “beige kitchen.” You just need a palette that is intentional. Pick:
- One neutral: white, cream, charcoal, soft gray
- One metal: brass, chrome, black, or stainless (you can mix metals, just repeat each one intentionally)
- One accent color: olive green, rust, cobalt, or whatever makes you smile
If you love color, keep the dishes mostly consistent and let the accent show up in a few pieces that repeat, like two blue bowls and one blue vase. The repetition is what prevents visual noise.
Zone by function
Clutter happens when everything is everywhere. Zoning makes your shelves look styled and makes your kitchen easier to use.
Three easy zones
- Everyday dining: plates, bowls, glasses, mugs
- Prep zone: oils, salt, pepper, a crock for wooden spoons, cutting boards
- Serving zone: linen napkins, a big platter, a pitcher, a salad bowl
Try to keep each zone to a section of shelf rather than scattering items across the whole wall. When the eye can read the shelf in chapters, it automatically looks more organized.
Practical decor, not props
The best open shelves do not look like a showroom. They look like someone lives there and has good taste. The trick is using decor that behaves like a useful object.
Decor that earns its keep
- Wood cutting boards: lean one large, stack one small, keep the shapes simple
- Glass jars: store rice, pasta, oats, or treats you actually eat
- A small bowl: for lemons, garlic, or tea bags
- A pitcher or carafe: doubles as a vase for herbs or a few stems
- A cookbook: one or two, not a library
Use anchors
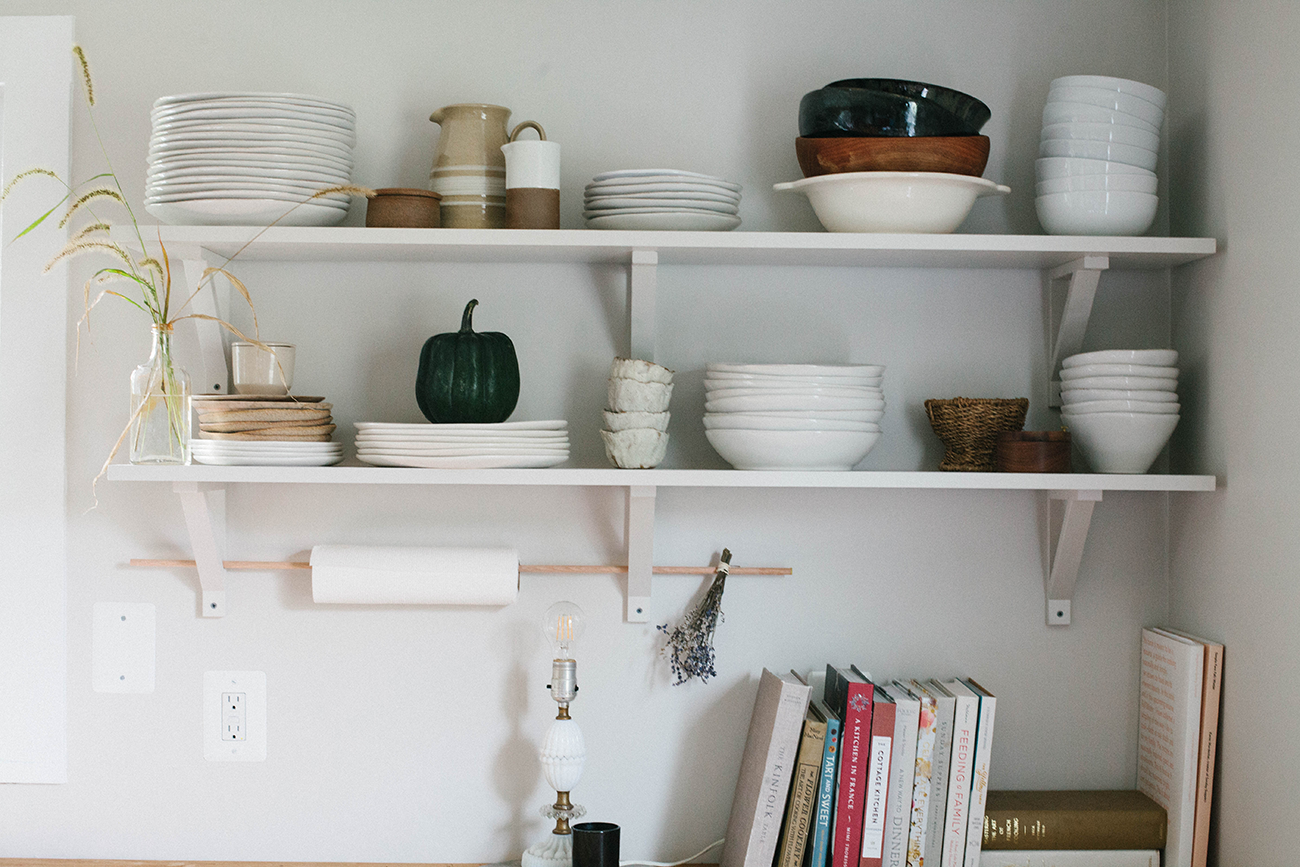
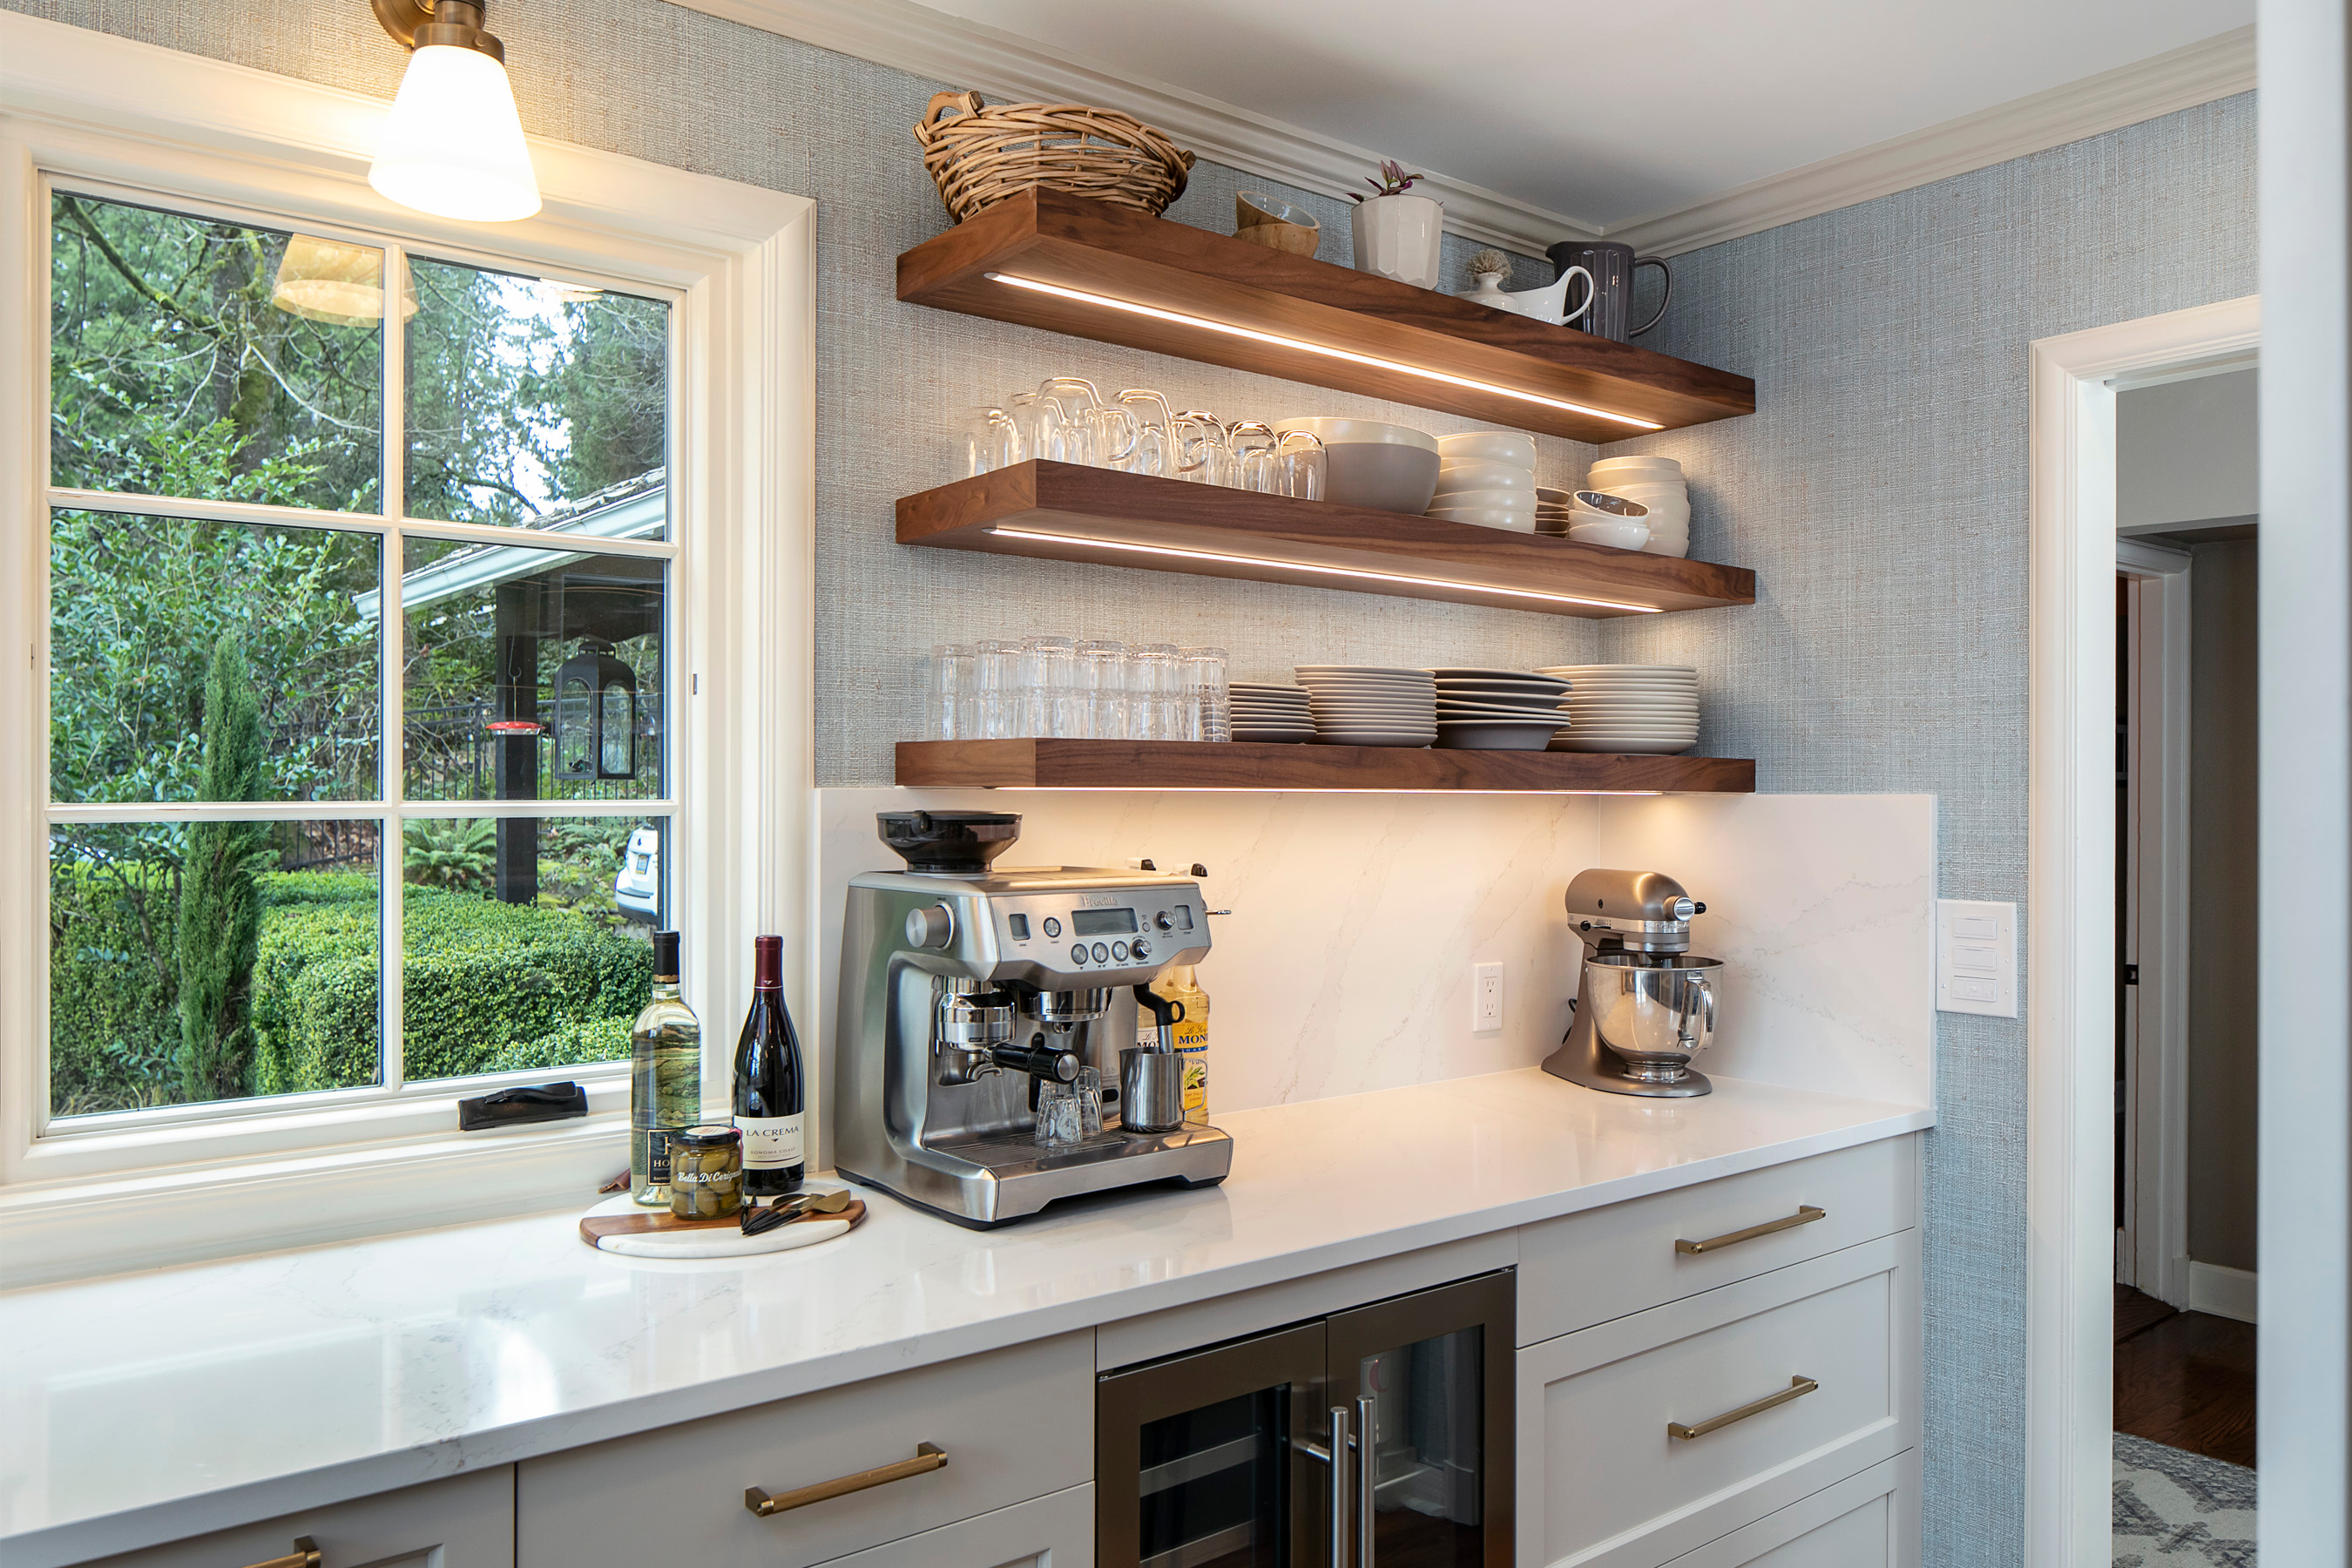
An anchor is a slightly larger item that gives a shelf structure. A stack of dinner plates, a big bowl, or a wide tray creates a visual base. Then you build smaller items around it.
Leave some negative space
This is the part most of us skip because we are trying to squeeze in storage. Open shelving needs breathing room. Leave some intentional empty space so your groupings feel chosen, not crammed.
A simple shelf formula
If you want a simple starting point, style each shelf in two to three groupings. More than that tends to look busy in a kitchen.
Groupings that work
- Stack + stand: stacked plates with a cutting board or platter standing behind
- Cluster + repeat: three matching glasses plus one small bowl, then repeat the glass somewhere else
- Tray + tools: a small tray with oil and vinegar plus a salt crock
And remember the little stylist cheat: odd numbers often look relaxed. A trio of jars can read calmer than four, but if four fits your shelf better, go for it.
Small-space tips
In a smaller kitchen, open shelving often has to do real storage work. You can still keep it looking clean, you just need tighter rules.
Go taller
If you have multiple shelves, make the top shelf the “pretty but light” shelf (vases, serving pieces, extra glasses) and keep the middle shelves for daily items. The lowest shelf is where clutter shows most, so keep it extra edited.
Pick one workhorse set
One set of plates and bowls in a simple color is your best friend. If you love mixing vintage, do it with mugs or small bowls where the variety feels charming instead of chaotic.
Decant loud packaging
Few things make shelves look messy faster than branded boxes and neon bags. A few clear jars can transform the whole vibe, especially for:
- coffee and tea
- pasta and rice
- flour and sugar
- snacks you reach for daily
You do not need to decant everything. Just the items that visually dominate.
Quick safety note: use airtight containers for dry goods, and add a simple label (what it is, plus an expiration date or allergy note if needed). Future you will be grateful.
Renter-friendly upgrades
Open shelves can be a renter’s best styling tool because you can make a big impact without touching the cabinets.
Add subtle liners
A washable liner or a thin cork mat helps items grip and reduces that “clink” factor. Choose something subtle so it reads calm.
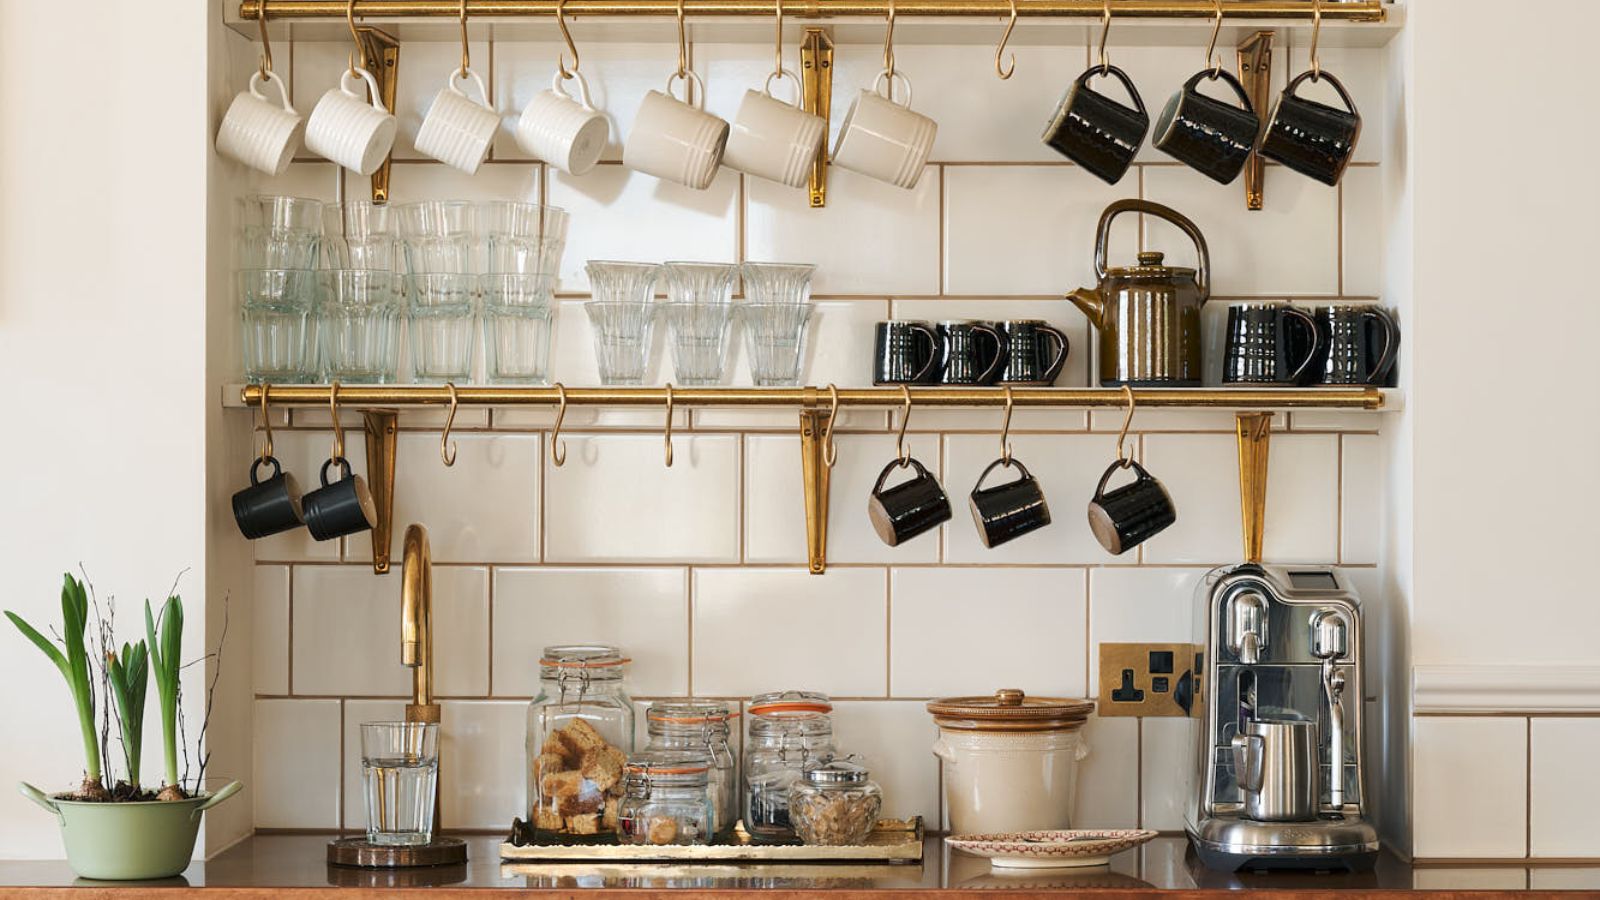
Try removable hooks
Stick-on or clamp hooks can hold:
- mugs
- measuring cups
- small strainers
This frees up shelf space and creates a tidy little coffee or baking moment. Just check the weight rating, and test adhesives in an inconspicuous spot since some finishes and paints are delicate.
Upgrade lighting
If your shelves look messy at night, it might be the lighting. Warm under-shelf puck lights (battery or plug-in) make everything feel intentional and cozy, and they help glassware and ceramics look more collected than stored.
Placement and safety
Pretty matters, but so does not worrying about a stack of plates taking a dive mid-dinner.
- Put heavy items low: plates, bowls, and appliances belong on lower shelves.
- Be smart with glass: avoid storing delicate glassware above high-traffic prep zones if it makes you nervous.
- Mounting matters: make sure shelves are properly anchored (ideally into studs, or with the correct anchors for your wall type).
- Watch heat and sun: oils and spices can degrade near heat or direct sunlight, so keep them in a cooler spot when possible.
One more practical detail: shelf depth and spacing can make or break the experience. If items feel like they are tipping forward, you may need fewer pieces per shelf or a deeper shelf for everyday dishes.
Quick resets
Even the best-styled shelves get messy during real life. The key is having a reset you can do quickly, like making the bed.
The 90-second reset
- Put anything that does not belong in a “drop basket” to deal with later
- Restack plates and bowls into one clean pile
- Line up glasses in a row or two tight clusters
- Wipe the front edge of the shelf (this makes a huge difference)
The weekly five-minute refresh
- Remove everything from one shelf only
- Wipe it down (especially if it is near the stove)
- Put back the essentials first
- Add one decorative piece last, then stop
If you take one thing from this entire guide, let it be this: function first. Then the pretty details.
Common mistakes
Too many tiny items
Fix: Corral small things on a tray or in a low bowl. One grouped moment reads calmer than six scattered objects.
Everything is the same height
Fix: Vary heights. Add one taller piece per shelf, like a pitcher, a bottle, or a cutting board standing up.
Mixed finishes everywhere
Fix: Choose one finish to repeat (brass, black, stainless). If you mix, repeat each finish at least twice so it reads intentional.
Junk drawer categories on display
Fix: Give messy categories a closed home. Open shelves are not for rubber bands, spare batteries, or random takeout condiment packets. They are for the things you want to see.
A plan you can use today
If you are staring at your shelves and feeling overwhelmed, do this in order:
- Clear everything off. Yes, everything.
- Sort into three piles: daily use, weekly use, and not-for-shelves.
- Pick your palette. One neutral, one metal, one accent.
- Create zones. Dining, prep, serving.
- Restock with repetition. Stack, line up, repeat shapes.
- Add one story piece per shelf. A vintage bowl, a little art, a simple vase.
- Stop early. Leave breathing room.
Open shelving is a little like a good outfit. It is not about owning more, it is about choosing better, pairing thoughtfully, and leaving space for the whole thing to feel like you.