Microfiber Couch Cleaning: Oily Marks and Water Rings
Clara Townsend
Clara Townsend is an interior stylist, vintage furniture enthusiast, and the creative voice behind Velvet Abode. With over a decade of experience transforming both cramped city apartments and sprawling fixer-uppers, she believes that a beautiful home is built on personal stories rather than massive budgets. When she isn't hunting for the perfect brass sconce at a local flea market, she can usually be found rearranging her living room for the third time this month.
Microfiber is one of those miracle fabrics that looks luxe, wears like iron, and then suddenly reveals every little life moment: a forehead print from movie night, a snacky hand, a mystery water ring from a sweating glass. The good news is that microfiber is usually very cleanable. The trick is using the right method for your specific microfiber and finishing correctly so the spot does not turn into a bigger, darker halo.
This guide will walk you through what to avoid, dry vs wet cleaning, how to lift oily marks and water rings, plus the final blending pass that keeps the whole cushion looking even.

First: check the cleaning code
Most microfiber couches have a tag tucked under a seat cushion or along the frame. Look for one of these codes:
- W: Water-based cleaner is safe.
- S: Solvent-based cleaner only. No water.
- WS or SW: Either water-based or solvent-based is okay.
- X: Vacuum only. No liquids. (If you have an X code, skip to the “When to call a pro” section.)
If you cannot find a tag, do not guess. Start with vacuuming and dry brushing, then patch test in a hidden area with the mildest option first. In many cases, that means a cloth barely dampened with distilled water. If water darkens the fabric, leaves a ring, or the tag later turns out to be S code, switch to a solvent method like rubbing alcohol instead. When in doubt, check the manufacturer site or contact the retailer for the care code.
What to avoid on microfiber
Microfiber is essentially very fine synthetic fibers. Some products can damage the finish, loosen adhesives in backing, or leave residue that attracts dirt.
Skip these unless the manufacturer recommends them
- Bleach or oxidizers (including strong whitening sprays): can discolor and weaken fibers.
- Acetone, nail polish remover, paint thinner, or lacquer thinner: too aggressive and can melt synthetic fibers or strip color.
- High-alkaline cleaners (many heavy-duty degreasers): can leave crunchy texture and dull patches.
- Oily “conditioning” products or furniture polishes: they soak in, darken, and become dirt magnets.
- Too much dish soap: soap residue is a very common reason microfiber looks blotchy after cleaning.
- Steamers used too close: too much heat and moisture can create rings and flatten the nap.
If you take nothing else: avoid over-wetting and avoid residue. Those two cause most of the “why does it look worse now?” moments.
Dry vs wet cleaning
Microfiber responds beautifully to the right approach. Here is a simple way to pick your lane.
Use a dry method when
- Your tag says S.
- The stain is oily, makeup-based, or body-oil based.
- You are dealing with a water ring on an S-code fabric.
Use a wet method when
- Your tag says W or WS.
- The stain is sticky or food-based (juice, soda, syrup) or smells (pet accidents, milk).
- You need enzymes to break down organic residue.
If you are unsure, start with the least invasive steps: vacuum, brush, then patch test (distilled water for W and WS, rubbing alcohol for S). Let it dry fully and check texture and color before committing.
Prep that makes stains easier
Before you spot clean, do this quick setup. It prevents tidelines and keeps you from chasing the stain in circles.
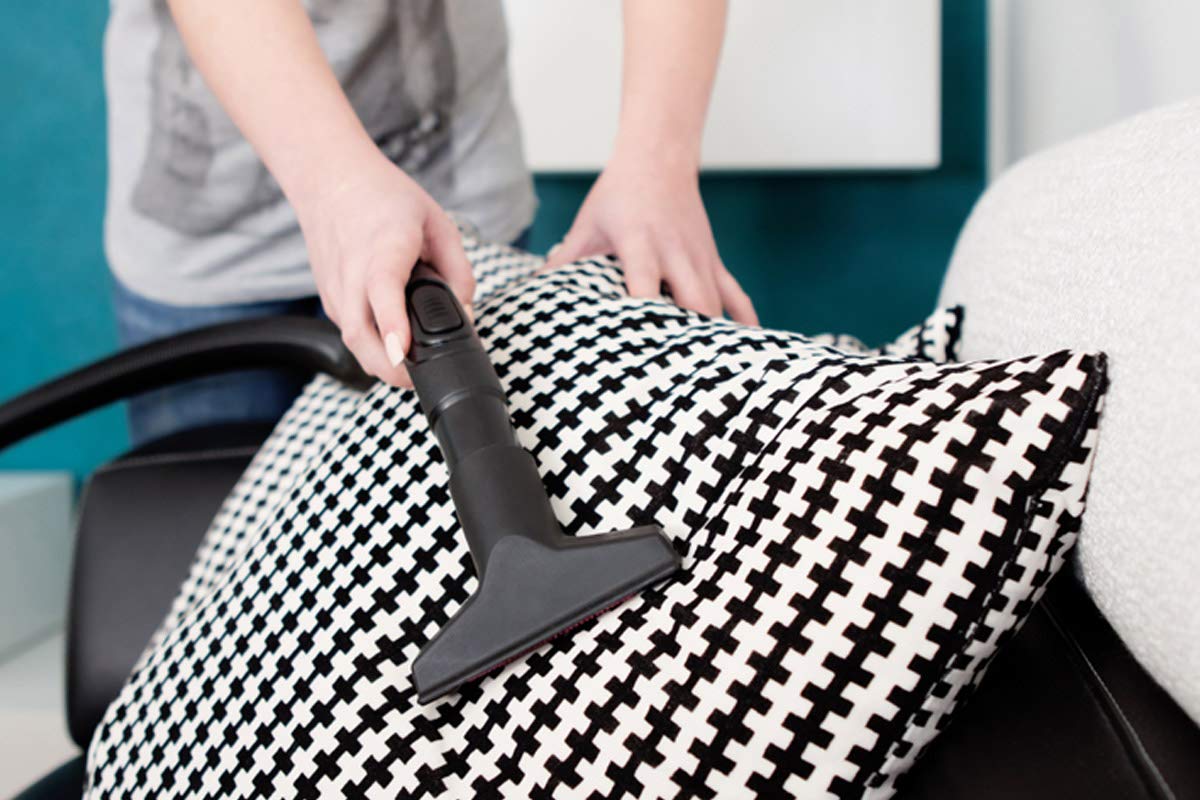
- Vacuum thoroughly, including seams and piping. Use the upholstery tool. Grit can turn into “sandpaper” while you rub.
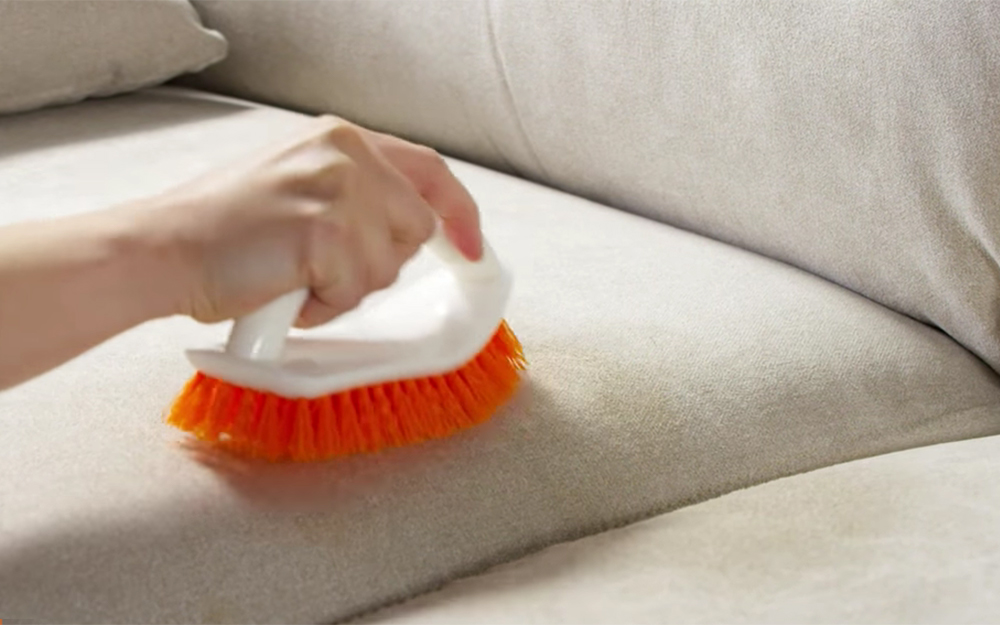
- Brush the nap lightly with a soft upholstery brush or clean, dry dish brush. (The nap is the direction the fibers lay.) Use light strokes. Go with the nap first, then gently against it if needed. Avoid aggressive brushing, which can fuzz some microfiber.
- Test in a hidden spot (back panel or under a cushion) using your chosen cleaner.
- Work in good light. Microfiber hides dampness until you step back and see a shadowy patch later.
How to remove oily marks
Oily marks are common on arms, headrests, and the “favorite spot” cushion. You want to lift oils without leaving a clean circle that looks like a spotlight.
Method A: Rubbing alcohol (best for S or WS)
Use 70% isopropyl alcohol in a spray bottle. It is commonly recommended because it evaporates quickly but is still easy to control. Higher percentages can flash-dry very fast and can be harsher on some dyes, so always patch test.
- Safer for control: spray alcohol onto a clean white cloth (not the couch) until it is lightly damp.
- Blot and gently rub in small circles from the outside in. Keep pressure light.
- As the cloth picks up grime, switch to a clean section so you are not re-depositing oil.
- Let it air-dry completely. (Ventilate the room and keep alcohol away from flames or heat sources.)
- Once dry, brush the nap to restore softness and even color.
Why it works: alcohol is a solvent that breaks down oils and evaporates quickly, which is ideal for microfiber that hates lingering moisture.
Method B: Enzyme cleaner (best for W or WS)
If the “oil” is really a mix of body oils, sweat, and snack residue, an enzyme cleaner can help. Use it carefully to avoid over-wetting.
- Choose a clear, upholstery-safe enzyme spray. If possible, avoid heavy dyes and strong fragrances.
- Lightly mist the area and let it dwell per the label (often 5 to 10 minutes).
- Blot firmly with a clean cloth. Do not scrub aggressively.
- Follow the product instructions for rinsing. If rinsing is recommended and your fabric is W or WS, use a cloth dampened with plain distilled water to remove leftover cleaner, then blot dry.
- Use a fan to dry fast, then brush the nap.
Note: residue from many cleaners, including some enzyme formulas, can leave the fabric slightly tacky. That tackiness attracts lint and soil, which can make the spot look darker again. When your code allows it, a gentle rinse and thorough blotting help.
Method C: Dry absorbent for fresh grease
If the oily mark is new, start by pulling up as much as you can before introducing any liquid.
- Sprinkle cornstarch (or baking soda if that is what you have) over the spot.
- Let it sit 30 to 60 minutes.
- Vacuum thoroughly.
- Then use Method A or B if a shadow remains.

How to remove water rings
Water rings happen because microfiber can dry unevenly. The edge of the wet area dries last, leaving a visible boundary. The solution is counterintuitive: you often need to evenly re-dampen the area (with the correct cleaner for your code) and dry it uniformly.
If your couch is S-code
- Lightly mist rubbing alcohol onto a cloth, then work it over the entire ring area, not just the edge.
- Feather out beyond the ring by a couple of inches so there is no hard border.
- Blot with a clean cloth to lift moisture and any dissolved residue.
- Let dry fully, then brush the nap in one direction.
If your couch is W or WS
- Mix a very mild solution: 1 to 2 drops of clear dish soap in 2 cups of distilled water (less soap than you think).
- Dampen a cloth (do not drench) and lightly wipe the whole ring area, feathering outward.
- Follow with another cloth dampened with distilled water only to remove soap residue.
- Blot dry, then aim a fan at the area until fully dry.
- Brush the nap to blend.
Why distilled water: it reduces mineral deposits that can show up as pale rings, especially on darker microfiber.
How to avoid blotchy patches
Microfiber loves to telegraph where you cleaned. That is not you being “bad at cleaning.” It is the nap and the way the fibers lay after moisture or friction.
The finishing routine
- Feather your cleaner outward beyond the stain. Hard edges create hard edges.
- Do not over-soap. Residue is a common cause of dark patches later.
- Dry fast. Use a fan, open windows, rotate cushions. Slow drying invites rings.
- Brush once fully dry with a soft brush to lift the nap. Brush one direction for a uniform look.
- Optional: use a clean, dry microfiber cloth to buff lightly after brushing if the fabric looks “tracked.”
If you still see a shadow, it is often leftover residue or uneven nap direction. Repeat a light, broader cleaning pass rather than concentrating more product in the same small spot.
Spot-cleaning cheat sheet
Use this as your quick decision tree when you are standing in front of the couch with a cloth in hand.
- Greasy fingerprints, headrest shine, makeup: rubbing alcohol (S/WS) or enzyme with label-approved rinse (W/WS).
- Water ring: alcohol reset (S/WS) or controlled re-dampen and rinse (W/WS).
- Sticky spills: mild soap solution and rinse (W/WS).
- Odor plus stain: enzyme cleaner with careful drying (W/WS). For pet urine, odor can soak into foam and may require extraction to truly remove it. Avoid heat, which can make odor harder to remove.
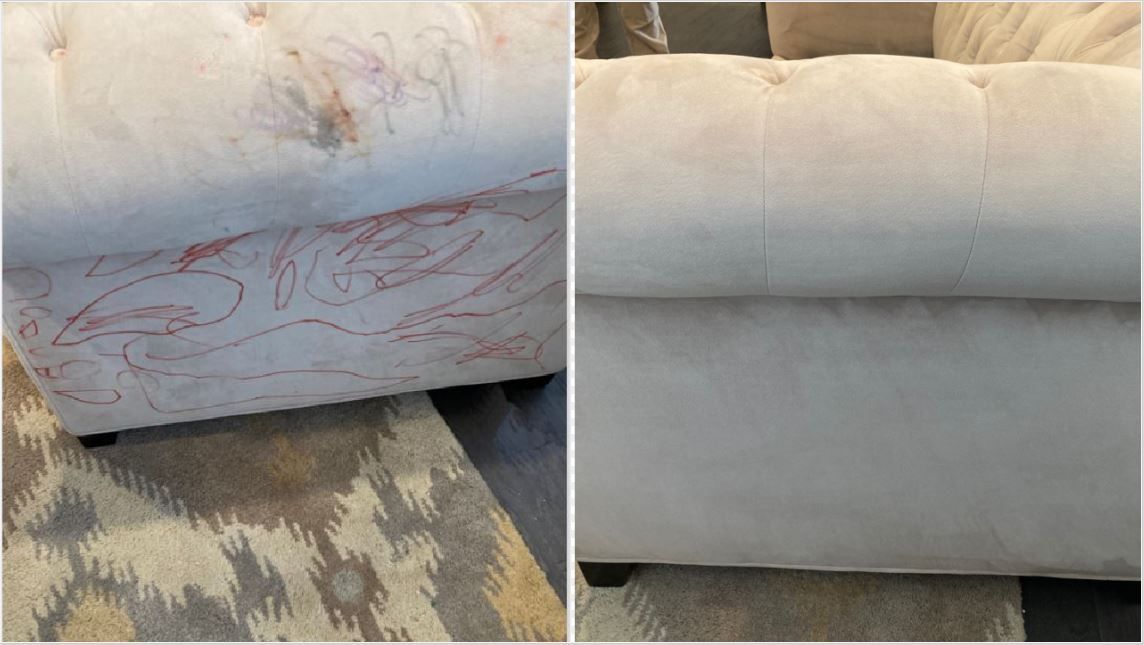
- Ink or dye transfer (like new jeans): proceed carefully. DIY scrubbing can spread dye and set it deeper. Patch test, work gently, and consider calling a pro if it is large or bright.
- Unknown stain: vacuum, dry brush, patch test the mildest option, then choose method based on results and the tag.
Tools that help
- Upholstery vacuum attachment
- Soft upholstery brush or clean dish brush
- White cotton cloths (so you can see transfer)
- 70% isopropyl alcohol in a fine-mist spray bottle
- Distilled water
- Clear, low-sudsing dish soap (ideally dye-free and lightly scented or unscented)
- Enzyme cleaner (upholstery-safe, clear)
- A fan for fast drying
When to call a pro
Microfiber is durable, but there are times it is smarter to bring in a professional upholstery cleaner:
- Your tag says X.
- The cushion is stained through to the insert, or the odor is coming from inside the foam.
- You have widespread body oil darkening across multiple seats.
- The stain is from dye transfer (new jeans), ink, or unknown chemicals.
- You have tried twice and the fabric now looks stressed, rough, or faded.
Ask specifically if they have experience with microfiber and whether they use low-moisture methods. Microfiber does best when it is not saturated.
A calm routine for real life
If you want a simple maintenance rhythm that keeps microfiber looking even: vacuum weekly, brush monthly, and do quick alcohol touch-ups on arms and headrests (only if your code allows it) before they look visibly shiny. Microfiber rewards the small, regular resets, and your couch keeps that soft, velvety look that made you fall for it in the first place.
Want help troubleshooting a stubborn spot? Share your cleaning code (W, S, WS, or X) and what caused the stain in the comments, and we can point you to the safest method and how wide to feather your finish pass for your couch color and texture.