Low Shower Pressure From Mineral Buildup
Clara Townsend
Clara Townsend is an interior stylist, vintage furniture enthusiast, and the creative voice behind Velvet Abode. With over a decade of experience transforming both cramped city apartments and sprawling fixer-uppers, she believes that a beautiful home is built on personal stories rather than massive budgets. When she isn't hunting for the perfect brass sconce at a local flea market, she can usually be found rearranging her living room for the third time this month.
Nothing makes a bathroom feel less like a little sanctuary than a shower that sputters like it is running on spite. If your pressure has slowly gotten worse, mineral buildup is a very likely culprit, especially if you live in a hard water area. The good news: most fixes are cheap, fast, and totally renter-safe if you keep things gentle and reversible.
This is my favorite kind of home fix because it is equal parts practical and oddly satisfying. A simple soak can bring back that clean, even spray pattern, like rinsing a dusty window and suddenly letting the light back in.
Is it mineral buildup or something else?
Before you start taking anything apart, do a quick little detective routine. Mineral buildup (the classic white, tan, or sometimes greenish deposit) usually shows up as a slow decline in pressure, a spray that shoots sideways, or tiny jets that look clogged with crust.
Quick reality check: Vinegar is best for limescale and calcium-type deposits. If the issue is heavy rust, iron bacteria, or old pipe problems, it may not budge much and that is a sign to escalate to maintenance.
Fast checks (2 minutes)
- Test other faucets. If your bathroom sink and kitchen sink are also weak, the issue may be broader than the showerhead.
- Check hot vs. cold. If cold is strong and hot is weak, sediment could be affecting the hot side or the water heater, which is typically landlord territory in a rental.
- Look at the spray face. Rubber nozzles with crust or uneven spray almost always respond to a soak and scrub.
- Listen for gurgling. Odd noises can sometimes point to a diverter or valve issue rather than the head itself, but they can also be air in the line or a partial blockage.
If only your shower is struggling and the problem crept up gradually, proceed with the cleaning steps below.
A quick safety note
Do not mix vinegar with bleach or other cleaners. Rinse well before you use anything else. If you are sensitive to smells, crack a window or run the fan. And if vinegar drips onto stone (like marble or travertine), wipe it up right away.
The vinegar soak
White vinegar is the classic for a reason. It dissolves limescale without needing harsh abrasives that can scratch finishes.
What you need
- White distilled vinegar
- A plastic bag or bowl (depending on how your showerhead is mounted)
- A rubber band, twist tie, or string
- An old toothbrush or soft nylon brush
- Microfiber cloth
- Plumber’s tape (Teflon tape) if you remove and reattach the showerhead
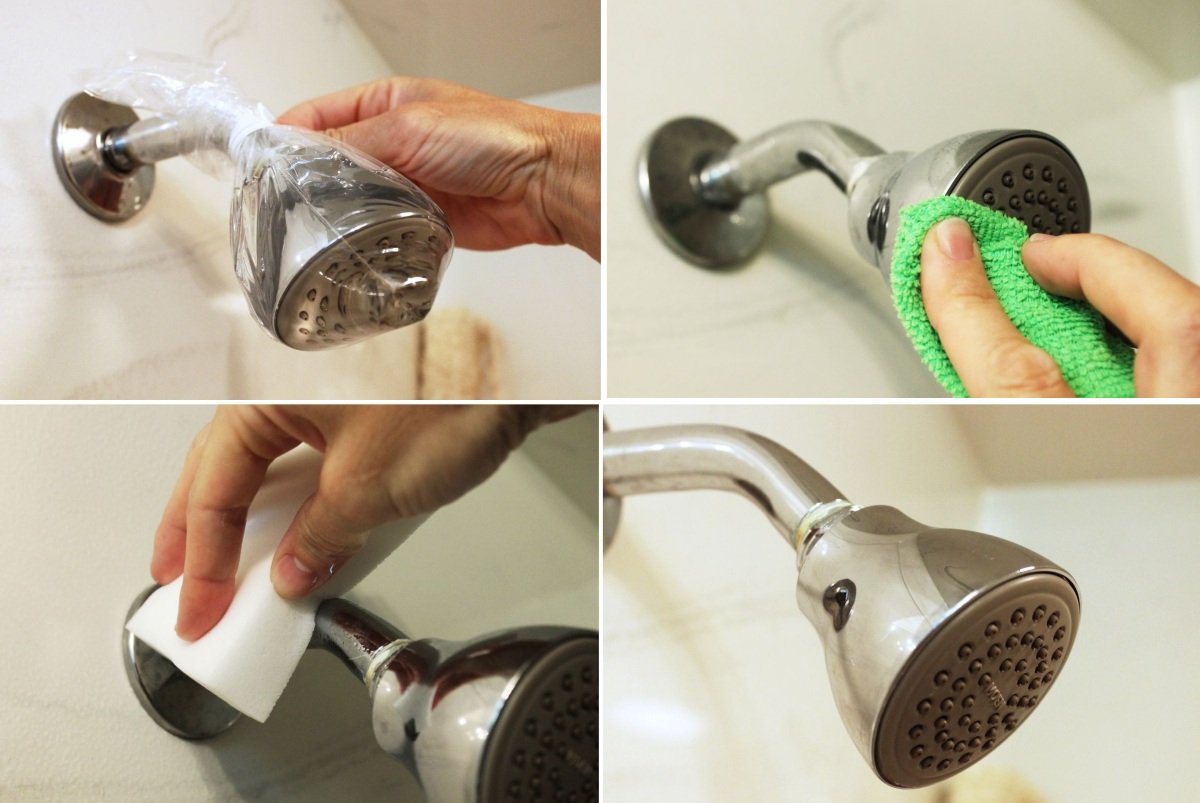
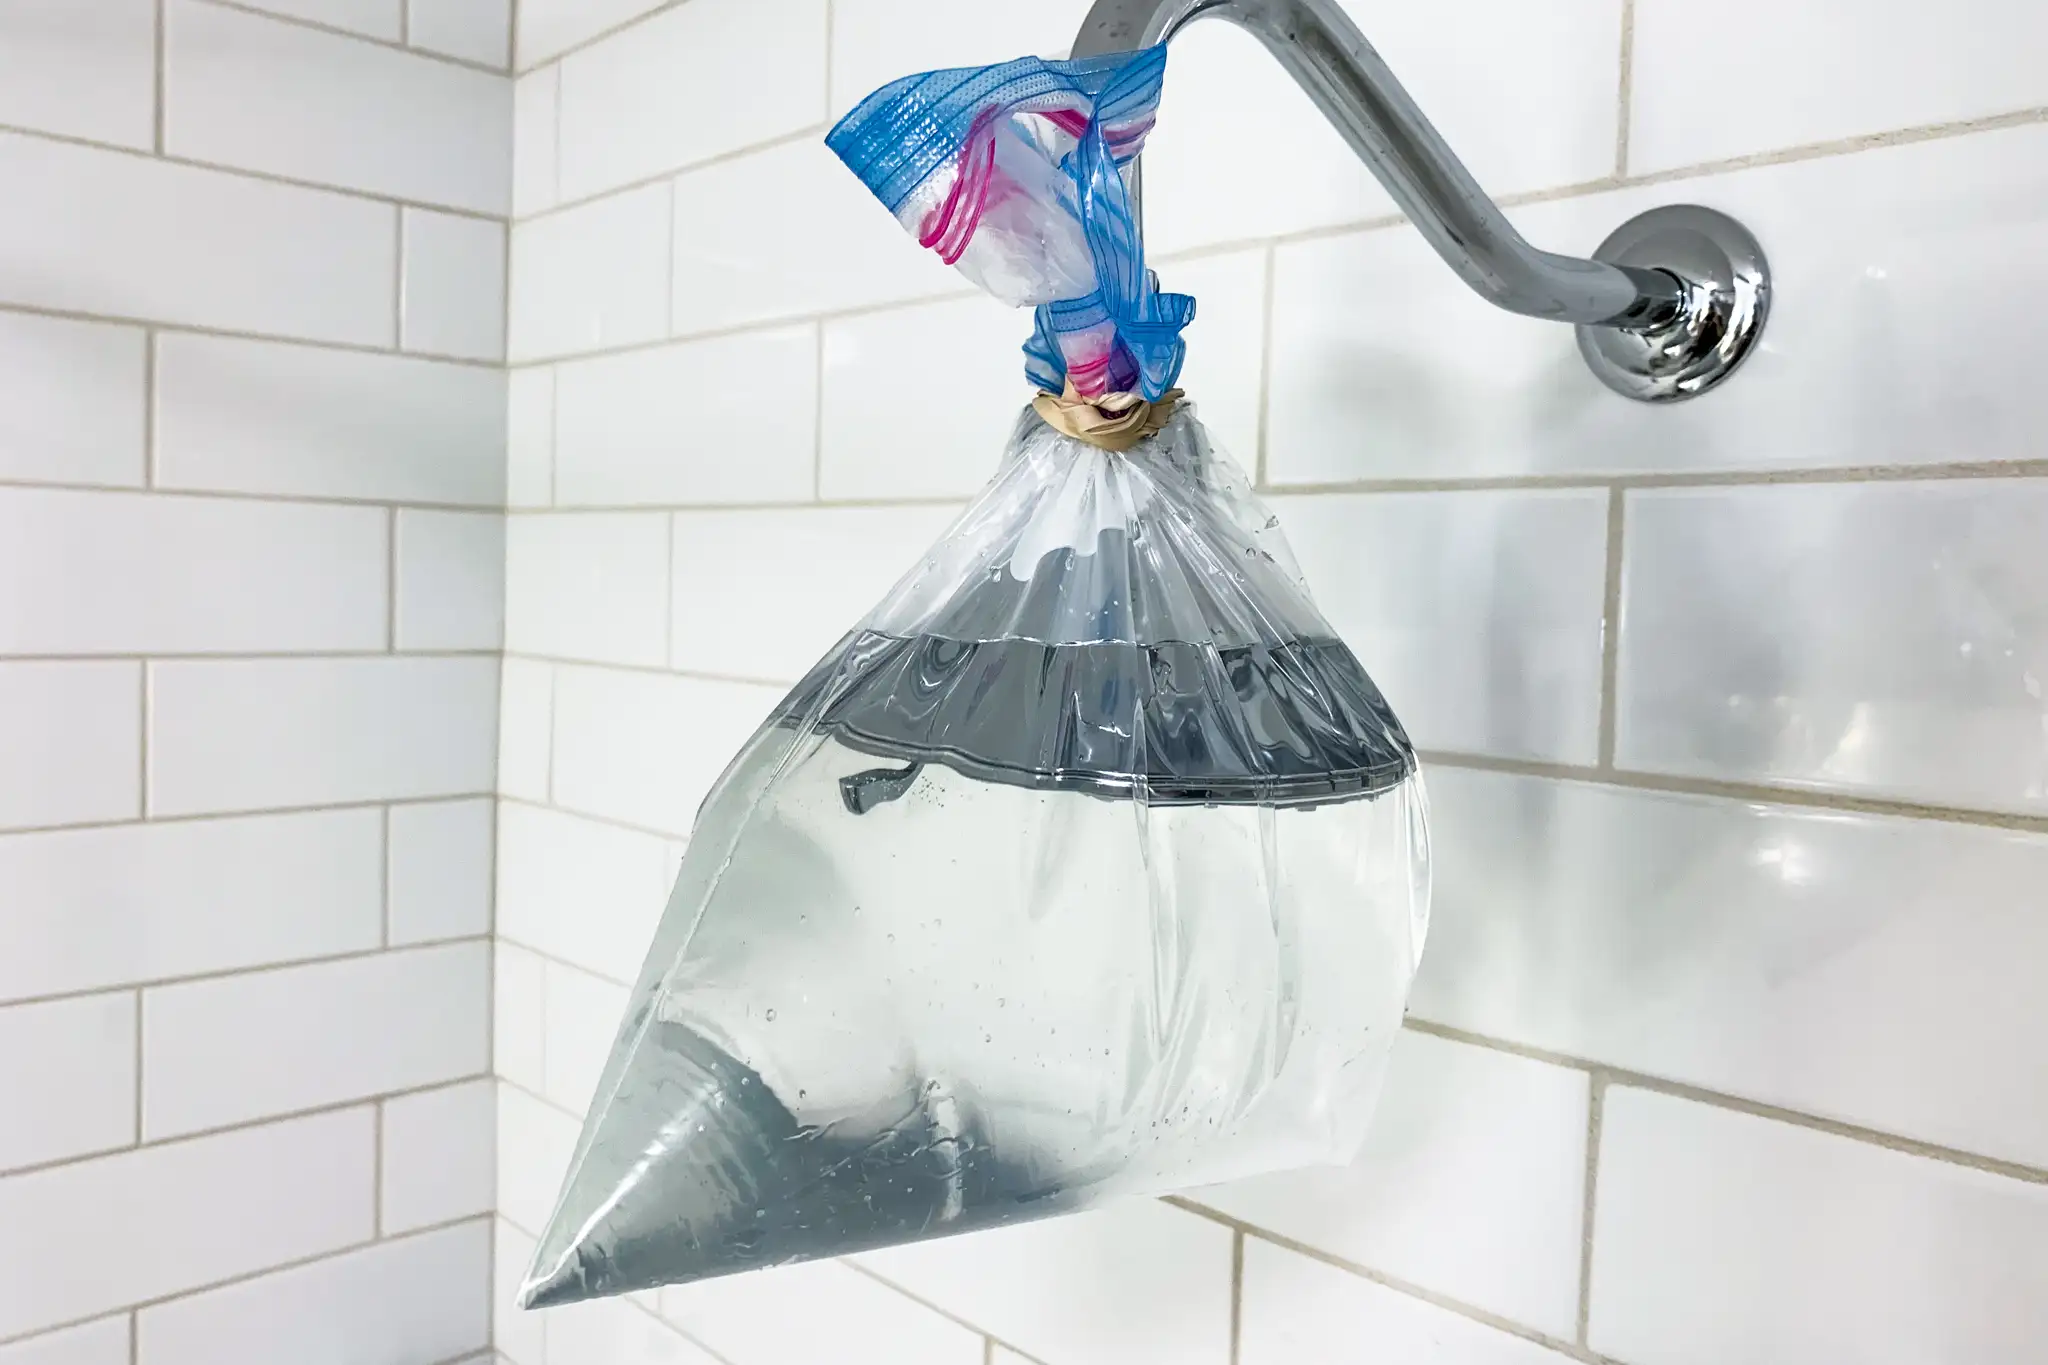
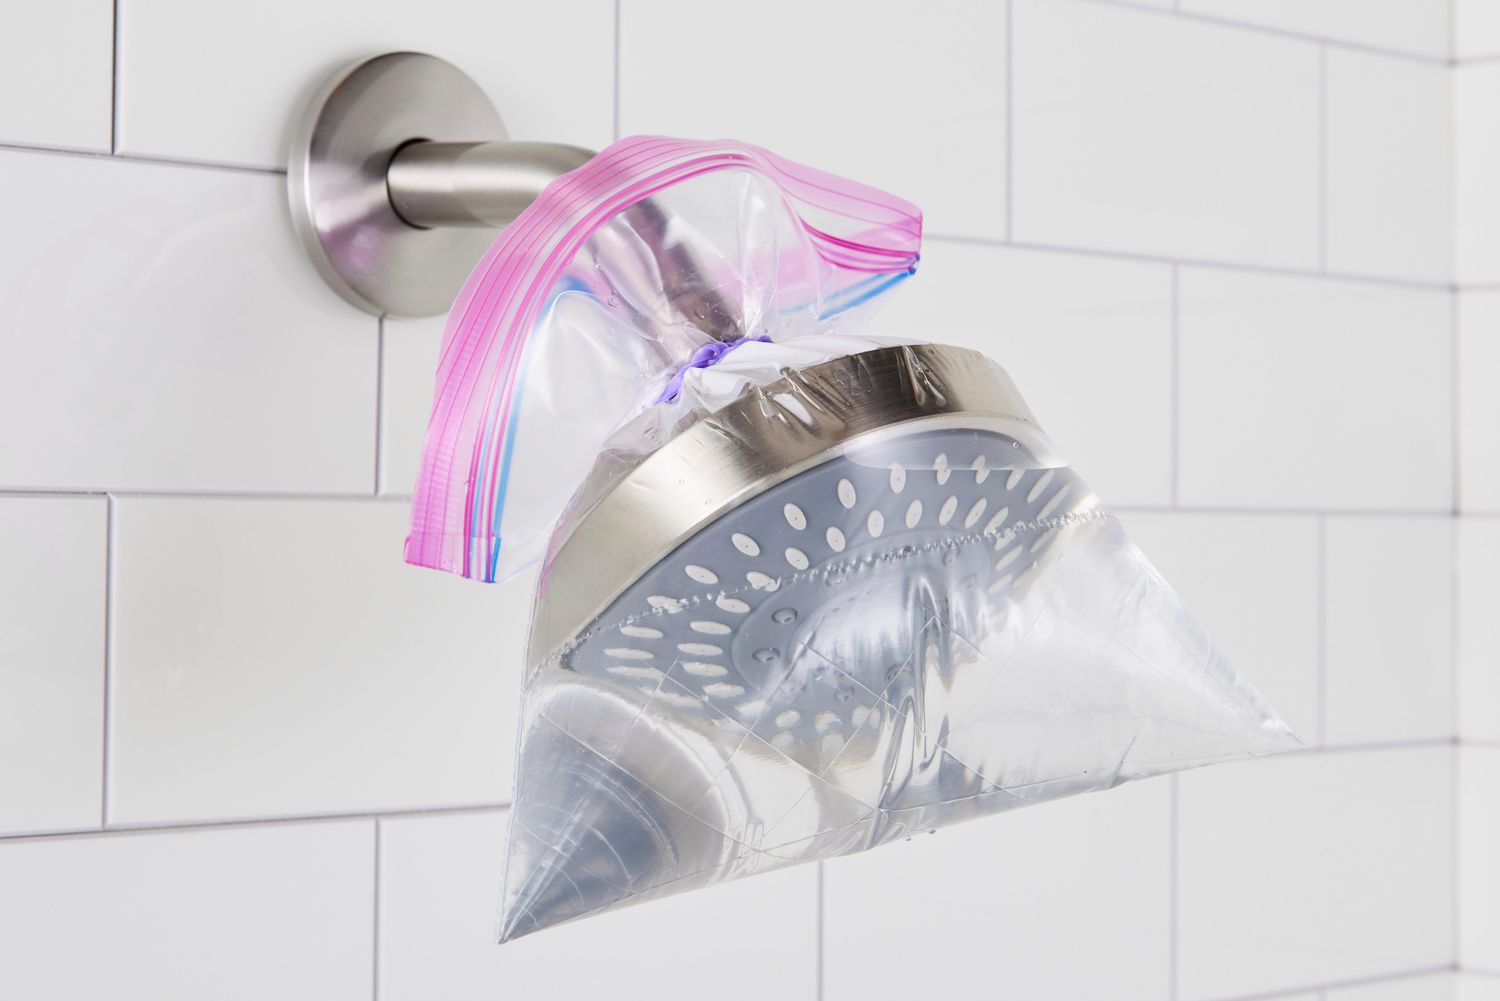
Method A: Bag soak (no removal)
- Fill a plastic bag with enough vinegar to submerge the showerhead face.
- Slip the bag over the showerhead and secure it with a rubber band or string around the neck.
- Soak for 30 to 60 minutes. For heavy buildup, you can go up to 2 hours.
- Remove the bag and run hot water for 1 to 2 minutes to flush loosened minerals.
- Gently scrub the spray face with a toothbrush, then rinse again.
Method B: Bowl soak (remove the head)
If your showerhead twists off by hand, it is often easier to soak it in a bowl. This also keeps vinegar off nearby finishes.
- Put a towel in the sink to prevent scratches.
- Soak the showerhead in vinegar for 30 to 60 minutes.
- Scrub the nozzles gently and rinse thoroughly.
- Before you reattach: check the rubber washer or O-ring inside the showerhead connection. If it is cracked or flattened, it can cause leaks.
- Wrap fresh plumber’s tape on the shower arm threads (clockwise as you face the threads) for 3 to 5 wraps.
- Reattach the showerhead and flush with hot water.
Note: Skip soaking for hours and hours if you have delicate finishes. If your fixture is oil-rubbed bronze, matte black, unlacquered brass, or “vintage looking,” do shorter soaks and wipe it down right after. Vinegar is effective, but it is still an acid. Protect surrounding surfaces, and wipe drips immediately.
Gentle scrubbing
When minerals loosen, they need a little encouragement to fully leave. The goal is to remove buildup without scratching plating or leaving dull patches.
Best tools for rentals
- Old toothbrush or soft nail brush for the spray face and crevices
- Microfiber cloth for wiping and buffing
- Wooden toothpick for poking individual holes carefully
- Rubber gloves if you have sensitive skin
What to avoid
- Abrasive powders
- Steel wool or harsh scouring pads
- Metal picks or pins (they can enlarge or damage spray holes)
- Leaving vinegar sitting on decorative finishes for long periods
If your showerhead has soft rubber nozzles, you can often massage the buildup off with your fingers after soaking. It is weirdly satisfying, like erasing chalk from a blackboard.
Screen and restrictor
Many showerheads have a small screen filter inside the connection point. It traps grit, but it can also trap mineral flakes and sediment, which reduces flow. If you have a handheld shower, check the hose ends too. Many have a tiny screen tucked into the connector.
How to clean the screen
- Turn off the shower and place a towel in the tub to catch small parts.
- Unscrew the showerhead if possible. Use a cloth around the nut if you need pliers, so you do not scratch the finish.
- Locate the screen inside the showerhead inlet. It may be a small mesh disc.
- Rinse and soak the screen in vinegar for 15 to 30 minutes.
- Brush gently, rinse, and reassemble.
- Before reattaching: check the washer, add fresh plumber’s tape to the shower arm threads, then reinstall.
If you see a small plastic piece that looks like it limits flow, that is often the flow restrictor. In rentals, I recommend cleaning around it rather than removing it. Removing it may violate local codes, building rules, or your lease, and it can create a noticeable water usage jump.
Reassembly tip: Hand-tighten first, then give it a small snug turn. Over-tightening can crack plastic parts and chew up threads.
Flush the shower arm
Sometimes mineral flakes build up in the shower arm itself. After you remove the showerhead, do a quick flush before you put it back on.
- Point the open shower arm into the tub.
- Turn the water on for 5 to 10 seconds to flush debris.
- Turn it off and wipe the threads clean.
- Wrap fresh plumber’s tape on the threads, then reinstall the showerhead.
This tiny step can prevent newly loosened grit from immediately reclogging your freshly cleaned showerhead.
Prevent repeat clogs
If you are cleaning the showerhead every few weeks, prevention is your best friend. These are easy, reversible options that usually do not require permanent changes.
Add a shower filter
Inline shower filters can help with sediment, rust particles, and chlorine. Most do not truly soften water the way an ion-exchange softener does, meaning they typically will not remove dissolved hardness minerals like calcium and magnesium. But they can still reduce the gritty stuff that contributes to clogging.
- Choose a filter that installs between the shower arm and the showerhead.
- Look for replacement cartridges that are easy to source.
- Keep the old parts so you can restore everything when you move out.
Use a filter washer
A filter washer is a simple washer with a little mesh screen. It catches grit before it reaches the showerhead. It is inexpensive and very renter-friendly.
Wipe the spray face weekly
After a shower, a quick wipe with a microfiber cloth keeps minerals from drying into crust. If you want a gentle routine cleaner, a 1:1 vinegar and water mix works well, just do not leave it sitting on finishes.
When to call maintenance
There is a point where your vinegar bottle is not the problem solver, it is just your coping mechanism. If any of the situations below apply, it is time to loop in your landlord or building maintenance.
Reach out if you notice:
- Sudden, dramatic pressure drop across multiple fixtures
- Pressure that comes and goes depending on time of day (could be supply or demand issues)
- Only hot water is low (possible water heater sediment or valve issue)
- Visible rust, sand-like grit, or discolored water
- Neighbors have the same complaint
In older buildings, mineral scale can build up in pipes, pressure regulators, and valves. That is not a toothbrush-and-vinegar situation. It is maintenance, and you deserve a shower that actually showers.
If you are renting, phrase it simply: “The shower pressure has dropped over time, I cleaned the showerhead and screen, and it is still low. Could maintenance check the shower valve, pressure regulator, or building water pressure?”
A simple reset routine
Here is my realistic, low-effort maintenance plan for hard water homes:
- Weekly: Wipe the showerhead face dry after one shower, especially if you see spotting.
- Monthly: 30-minute vinegar soak and a gentle scrub.
- Every 3 to 6 months: Clean the inlet screen and flush the shower arm.
- As needed: Replace filter cartridges if you use an inline shower filter.
It is not glamorous, but it is the kind of small care that makes a bathroom feel calm and functional. Think of it like fluffing the towels, trimming a candle wick, or giving your mirror a quick polish. Tiny rituals, big comfort.
