Loose Towel Bar or Toilet Paper Holder: When Anchors Spin in Drywall
Clara Townsend
Clara Townsend is an interior stylist, vintage furniture enthusiast, and the creative voice behind Velvet Abode. With over a decade of experience transforming both cramped city apartments and sprawling fixer-uppers, she believes that a beautiful home is built on personal stories rather than massive budgets. When she isn't hunting for the perfect brass sconce at a local flea market, she can usually be found rearranging her living room for the third time this month.
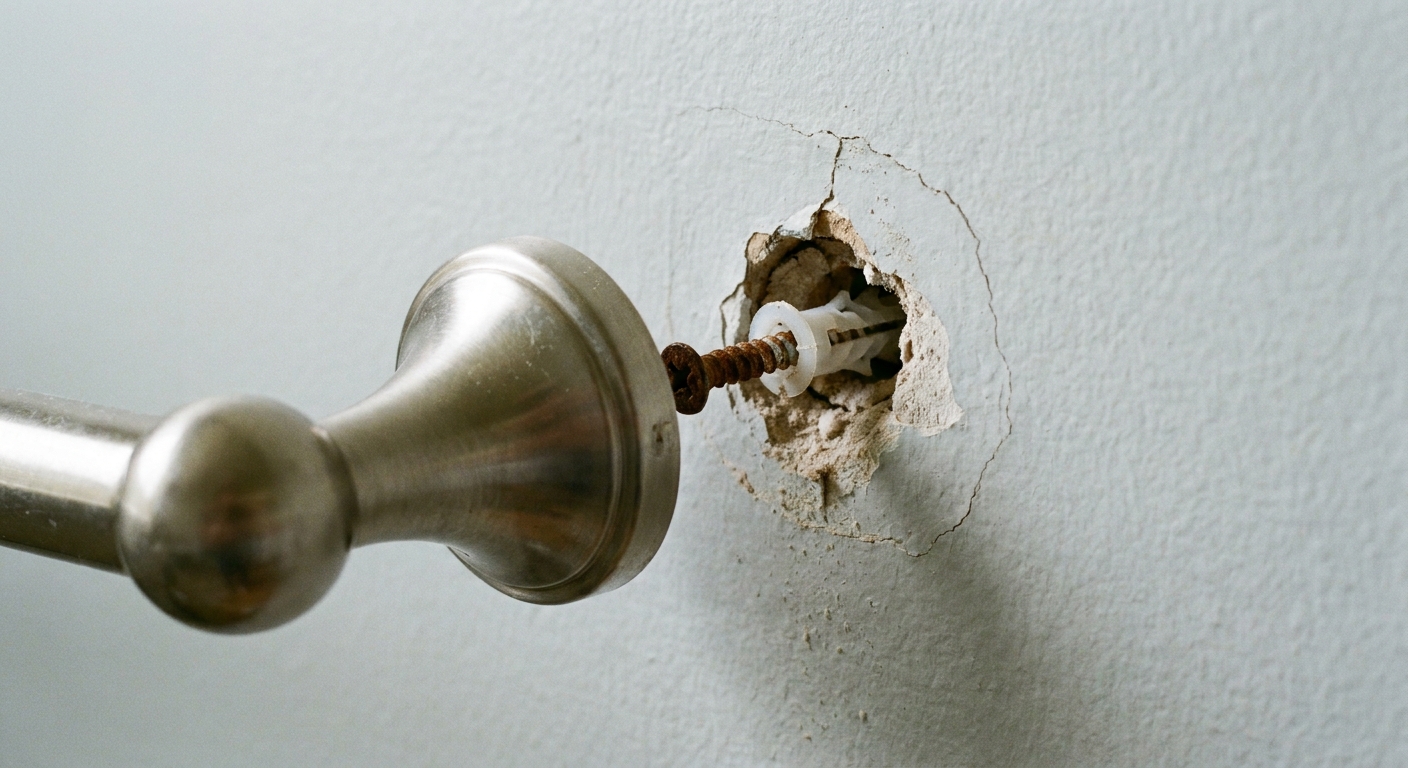
If your towel bar or toilet paper holder is doing that infuriating little wiggle every time you touch it, you aren’t alone. In small bathrooms, hardware gets tugged, bumped, and leaned on, and drywall is basically a polite suggestion of a structure when the wrong anchor is involved.
The usual culprit is simple: the anchor in the wall is spinning, so the screw never truly tightens, and the bracket keeps rotating until the whole thing feels like a loose tooth.
Let’s fix it in a way that matches your situation, from renter-friendly to forever-solid, with the least amount of patching drama.
Why it’s spinning
A spinning anchor usually means one of these is happening:
- The anchor is the wrong type for the load (common with cheap plastic expansion anchors on towel bars).
- The hole is too big because the anchor was forced in, wobbled over time, or got reinstalled a few times.
- The drywall is crushed behind the bracket from over-tightening, so nothing can bite anymore.
- You aren’t in a stud and the hardware depends entirely on the anchor, which may not be designed for movement and leverage.
Quick stud check: If the bracket is within a few inches of a stud, shifting the mount slightly to catch wood can be the cleanest fix. If moving it isn’t possible, a better hollow-wall fastener is the answer.
Common towel bar reality: One side often lands near a stud while the other is floating in drywall. It’s totally fine (and often ideal) to mount one bracket into a stud and use a toggle or molly on the other side.
Renter check
If you rent, your goal is usually one of these:
- Temporary-sturdy: Strong enough to use daily, but reversible with minimal patching.
- Permanent-sturdy: Strongest solution, accepting you’ll patch when you move out.
Lease note: Many leases allow small nail holes, but anchors are a gray area. Don’t guess. If you can’t find the policy, assume you’ll need to patch neatly and keep it simple.
Your options
Option 1: Tighten the bracket (if the anchor isn’t failed)
Sometimes the anchor is fine, but the bracket is slipping because the set screw is loose, or the mounting plate isn’t seated flat.
- Look under the towel bar or TP holder arm for a tiny set screw. Tighten it gently with the right Allen key.
- Make sure the bracket plate is flush to the wall. If paint buildup or a drywall ridge is keeping it proud, it’ll wobble no matter how tight the screws are.
Snug tip: If you feel the screw suddenly get easier to turn, stop. That’s the moment you’re stripping the anchor or crushing drywall.
Option 2: Use a larger screw (only if it still grips)
This is a quick save when the anchor is still seated and not spinning freely, but the screw threads aren’t biting.
- Remove the screw.
- Bring it to the hardware store and go one diameter size up (for example, #8 to #10), keeping a similar length.
- Reinstall and tighten until snug, not heroic.
Skip this if the anchor spins as soon as you apply pressure. A bigger screw will just chew it up faster.
Option 3: Upgrade the anchor (good renter compromise)
If the hole is only slightly enlarged and you want a cleaner, more controlled fix than toggles, look for anchors designed for drywall that spread the load.
- Self-drilling drywall anchors (the corkscrew style): quick and common, but performance varies a lot. Some do fine in thick, solid drywall. Others fail by pulverizing gypsum, especially with towel bars (dynamic tugging loads) or soft, older drywall.
- Molly bolts (hollow-wall anchors with a metal sleeve): once properly set behind the wall, they hold well and usually resist spinning better than plastic.
For towel bars and TP holders, I lean toward metal molly-style when you want sturdy without going full toggle.
Molly install tip (prevents spinning): Tap the molly collar flush to the wall before tightening so the little teeth bite the drywall. Also, if the hole is oversized, a molly can still spin during install, so size the hole carefully.
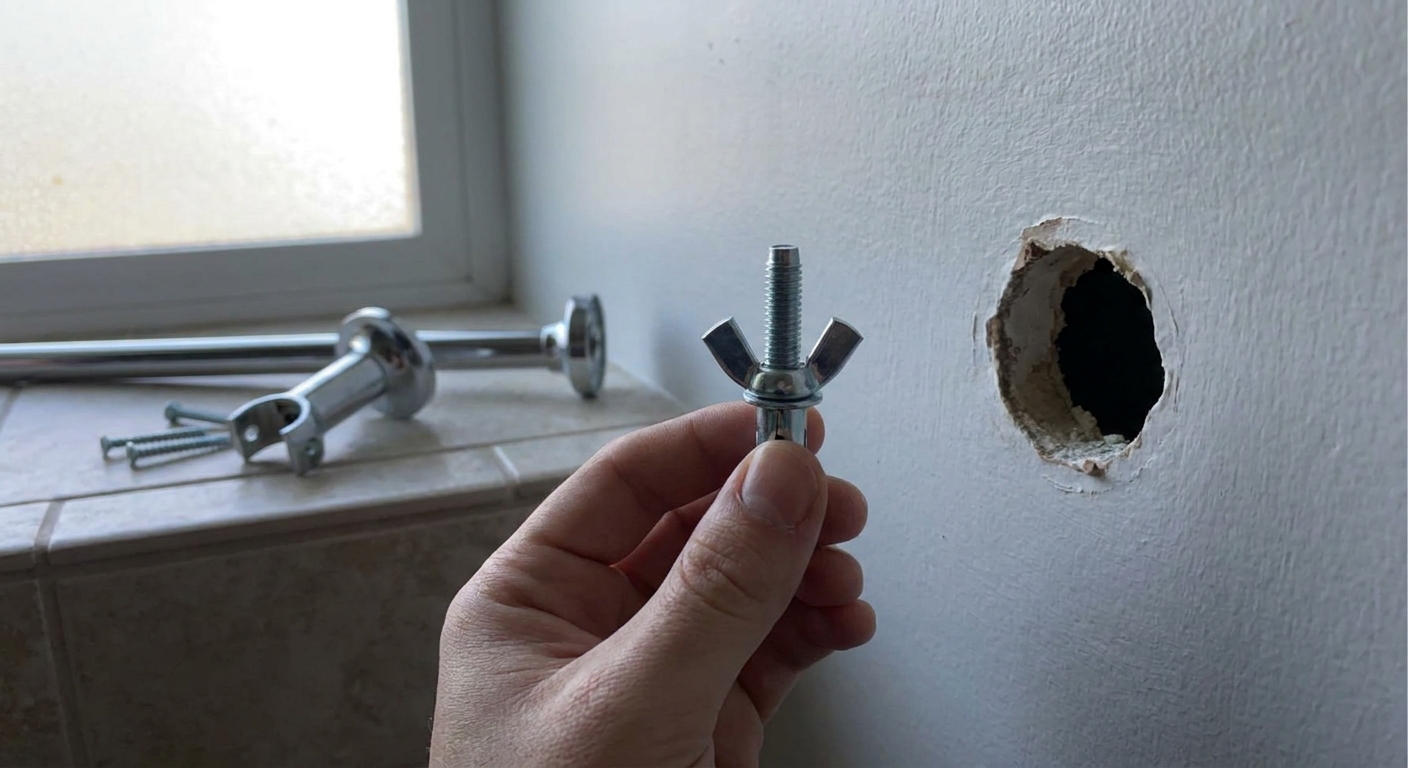
Option 4: Toggle bolts (best for blown-out holes or yanked hardware)
If you want the bracket to stop spinning and stay that way, toggles are usually the winner in hollow drywall because they clamp the wall from behind.
Classic spring toggles are very strong, but they require a larger hole. Strap toggles (sometimes called toggle straps) are easier to use and great for bathroom hardware.
- Pros: Excellent holding strength for hollow walls, very resistant to anchor spin, great for frequent use.
- Cons: Bigger hole, more patching later if you remove it, you have to line things up carefully.
Small nuance: A toggle can be rock-solid in the wall and you can still get a little movement if the bracket design allows rotation (or the set screw is loose). That’s why the set screw check still matters.
Renter note: Toggles aren’t forbidden magic. They just mean you should plan to patch properly when you leave. If your towel bar keeps falling, a clean toggle install can actually prevent repeated damage.
Option 5: Move it into a stud
If you can shift each bracket even 1 inch or 2 inches and still keep the bar level, hitting a stud is the most satisfying option. Stud-mounted hardware feels like a good handshake: firm, calm, dependable.
- Use a stud finder, or the old-school method of finding nails with a strong magnet.
- Pre-drill a pilot hole to prevent splitting.
- Use wood screws long enough to bite solidly into the stud.
This is usually the least fussy long-term fix, but it depends on your layout.
Toggle vs molly
If you’re standing in the aisle, holding a tiny baggie of hardware and feeling your soul leave your body, use this:
- Choose a molly bolt if the current hole is close to the right size, the hardware is light to moderate, and you want a clean install with less hole enlargement.
- Choose a strap toggle if the hole is damaged, the bracket keeps spinning, the towel bar gets pulled hard, or you’re reinstalling into the same sad spot for the third time.
- Choose a stud if you can reasonably relocate the bracket and want the strongest and cleanest mount.
For most towel bars that get daily use, strap toggles or studs are the most “stop thinking about this forever” choices.
How to fix it
What you need
- Screwdriver (manual gives you better feel than a drill)
- Painter’s tape
- Level or a level app
- Your chosen anchor or toggle
- Spackle or setting-type joint compound for patching
- Putty knife
- Sandpaper (220 grit)
Step 0: Know your wall
This guide assumes painted drywall. If you’re dealing with plaster, tile, or cement board (common near showers), the drill bits and anchor choices change. If you’re not sure, check by looking inside the hole or behind the bracket: plaster is harder and gritty, tile is obvious, cement board is dense and often gray with fiberglass texture.
Quick safety note: Be cautious drilling near sinks, vanities, outlets, or sconces. If there’s any chance plumbing or wiring is in that zone, stop and reassess before you make a larger hole.
Step 1: Remove the bracket and assess the hole
Pull the bracket off and look at the drywall:
- If the hole is crisp and snug, you may be able to upgrade the anchor without patching.
- If the hole is ragged or wider than the anchor, plan to enlarge cleanly for a toggle or patch and reposition.
Step 2: Stop the spin while you remove the screw
If the anchor spins as you back the screw out:
- Slip a thin flathead screwdriver behind the bracket plate and apply gentle outward pressure while turning the screw.
- If the anchor is visible, needle-nose pliers can sometimes grab the rim.
The goal is to add friction so the screw can back out without shredding the drywall.
Step 3: Install the new fastener
For molly bolts: Insert the molly, tap the collar flush so the teeth bite, then tighten to expand the sleeve behind the drywall. Then mount the bracket.
For strap toggles: Drill the recommended hole size, insert the toggle, pull it tight so the back sits flush behind the drywall, then slide the plastic collar tight to the wall and snap off the straps. Then install the screw through the bracket into the toggle.
For classic spring toggles: Put the screw through the bracket first, then thread the toggle wing onto the screw. Push the folded wing through the hole, let it spring open behind the drywall, then tighten carefully. (If you forget and open the toggle in the wall first, you can’t remove the screw to get it through the bracket. Everyone does this once.)
Snug tip: Tighten until the bracket is snug and doesn’t shift when you nudge it. Stop when resistance increases and the bracket plate sits flat. Over-tightening can crush drywall, even with strong anchors.
Step 4: Reattach the arm and snug the set screw
Once the wall plate is solid, reattach the bar or holder and tighten the small set screw. That tiny screw is often the secret to a “still wobbly” complaint.
Step 5: Do a real-life test
Pull the towel off like you normally do. Not gently like a museum visitor. If it holds without shifting, you’re done.
Small fit check (don’t skip)
Before you commit to a toggle screw size, make sure it actually fits your bracket hole or slot. Some towel bar brackets have small openings that won’t accept the thicker toggle screw. If needed, use a washer (so the screw head seats cleanly) or choose a toggle kit with a compatible screw diameter.
If you need to patch
Sometimes the best fix is admitting defeat on the old holes and starting fresh, especially if the drywall around them is crushed.
Small holes
- Lightly sand any torn paper edges.
- Apply spackle in thin layers, feathering out 1 inch to 2 inches.
- Let dry, sand smooth, repeat if needed.
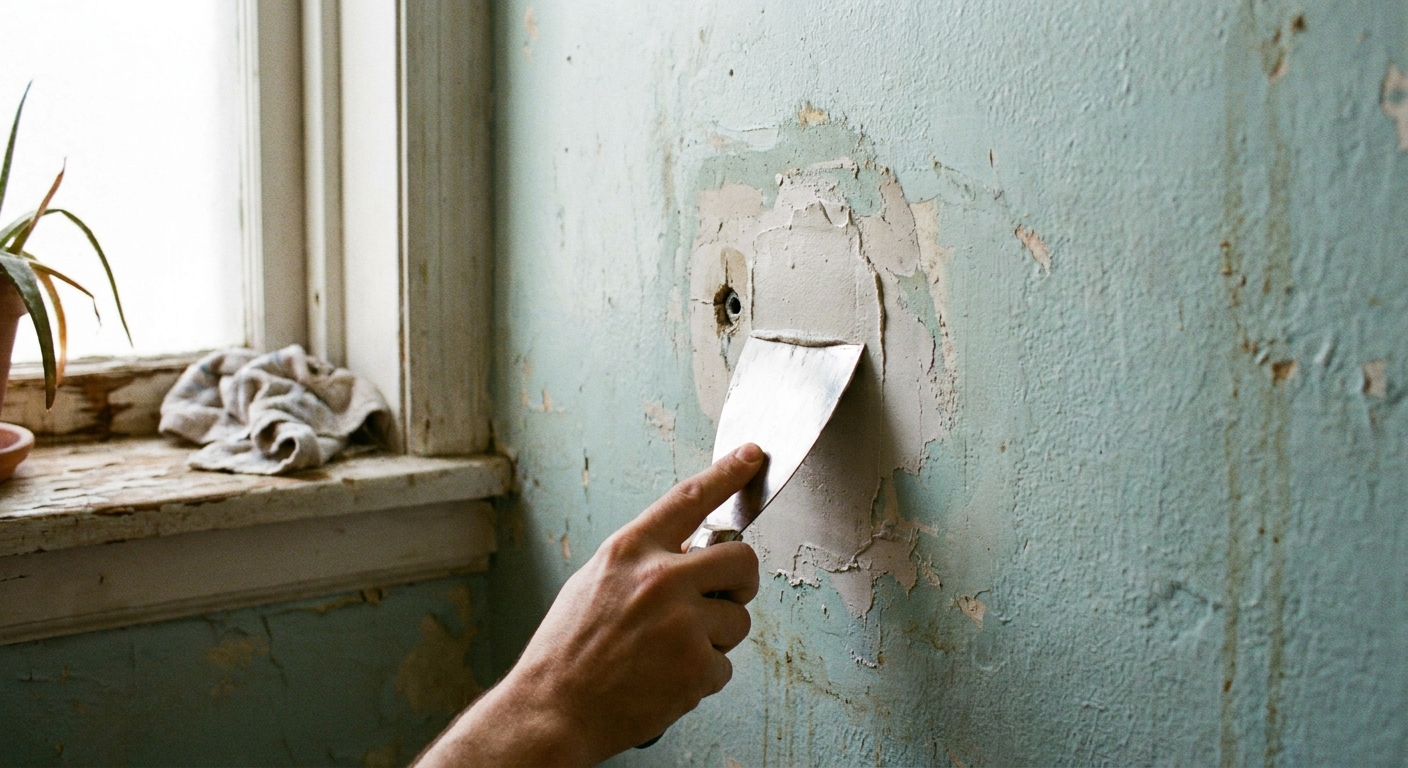
Bigger holes
- Trim loose paper with a utility knife so the area is stable.
- Use a setting-type joint compound if you can, it shrinks less and feels sturdier.
- Feather wider than you think you need, then sand smooth.
Paint touch-up
- Prime patches before painting. Unprimed spackle can flash through as a dull spot.
- If you don’t have the original paint, take a small chip (even from behind a switch plate) to color match.
- Use a small roller for the final pass if the wall has any texture. A brush-only touch-up can look like a shiny stamp.
My favorite low-drama trick: paint slightly beyond the patch and feather the edges with a nearly dry roller so it melts into the existing wall.
What not to do
- Don’t keep tightening a spinning screw. It’ll only enlarge the hole and crush more drywall.
- Don’t rely on adhesive strips for towel bars if the bar will be pulled on daily. Steam, humidity, and leverage are brutal in bathrooms.
- Don’t install anchors into mushy drywall without patching or moving. If it feels soft, it’ll fail again.
- Don’t skip the set screw check. A perfectly installed bracket can still feel loose if the decorative arm isn’t locked in.
When it’s not just anchors
If you see bubbling paint, crumbling drywall, or a soft spot that feels damp, pause. Bathroom moisture can quietly destroy the drywall behind hardware. In that case, the right fix may involve drying the area, sealing, or replacing damaged drywall before reinstalling anything. If you rent, this is a good time to document with photos and loop in your landlord.
A calm finish
Once the hardware is solid, you get the satisfying part: styling. A towel bar that doesn’t wobble makes even a basic towel look more intentional, like it belongs there. Choose a towel with a little texture, waffle weave or linen blend, and suddenly the whole bathroom feels more put-together without buying anything new.
And if you only take one thing from this article, let it be this: snug is enough. In drywall, the sweet spot is secure, not strained.