Kitchen Cabinet Organization for Tiny Kitchens
Clara Townsend
Clara Townsend is an interior stylist, vintage furniture enthusiast, and the creative voice behind Velvet Abode. With over a decade of experience transforming both cramped city apartments and sprawling fixer-uppers, she believes that a beautiful home is built on personal stories rather than massive budgets. When she isn't hunting for the perfect brass sconce at a local flea market, she can usually be found rearranging her living room for the third time this month.
If your kitchen is small, your cabinets have to work like a well-edited wardrobe: everything earns its place, and nothing gets to hide behind something you forgot you owned. The goal is not “perfect,” it is easy. Easy to see, easy to grab, easy to put back.
Below are my favorite tiny-kitchen cabinet moves, focused on four high-impact areas: drawer dividers, vertical sheet pan storage, corner solutions, and a simple “first shelf” visibility rule that quietly changes everything.

Start with a 12-minute reset
Before you buy a single bin, do this quick reset. It keeps you from organizing clutter into prettier clutter.
- Empty one zone at a time (one drawer, one cabinet shelf). Tiny kitchens punish big messes.
- Wipe it down. Crumbs and sticky rings are space thieves because they make you avoid using the back of the shelf.
- Sort into three piles: daily use, weekly use, rarely use.
- Measure the inside of the drawer or cabinet: width, depth, and height. Write it in your phone notes.
Set a timer for 12 minutes (or 10 to 15 if that is more realistic today). The point is momentum, not a miracle.
Now we can set up systems that stay put, even on a busy Tuesday night.
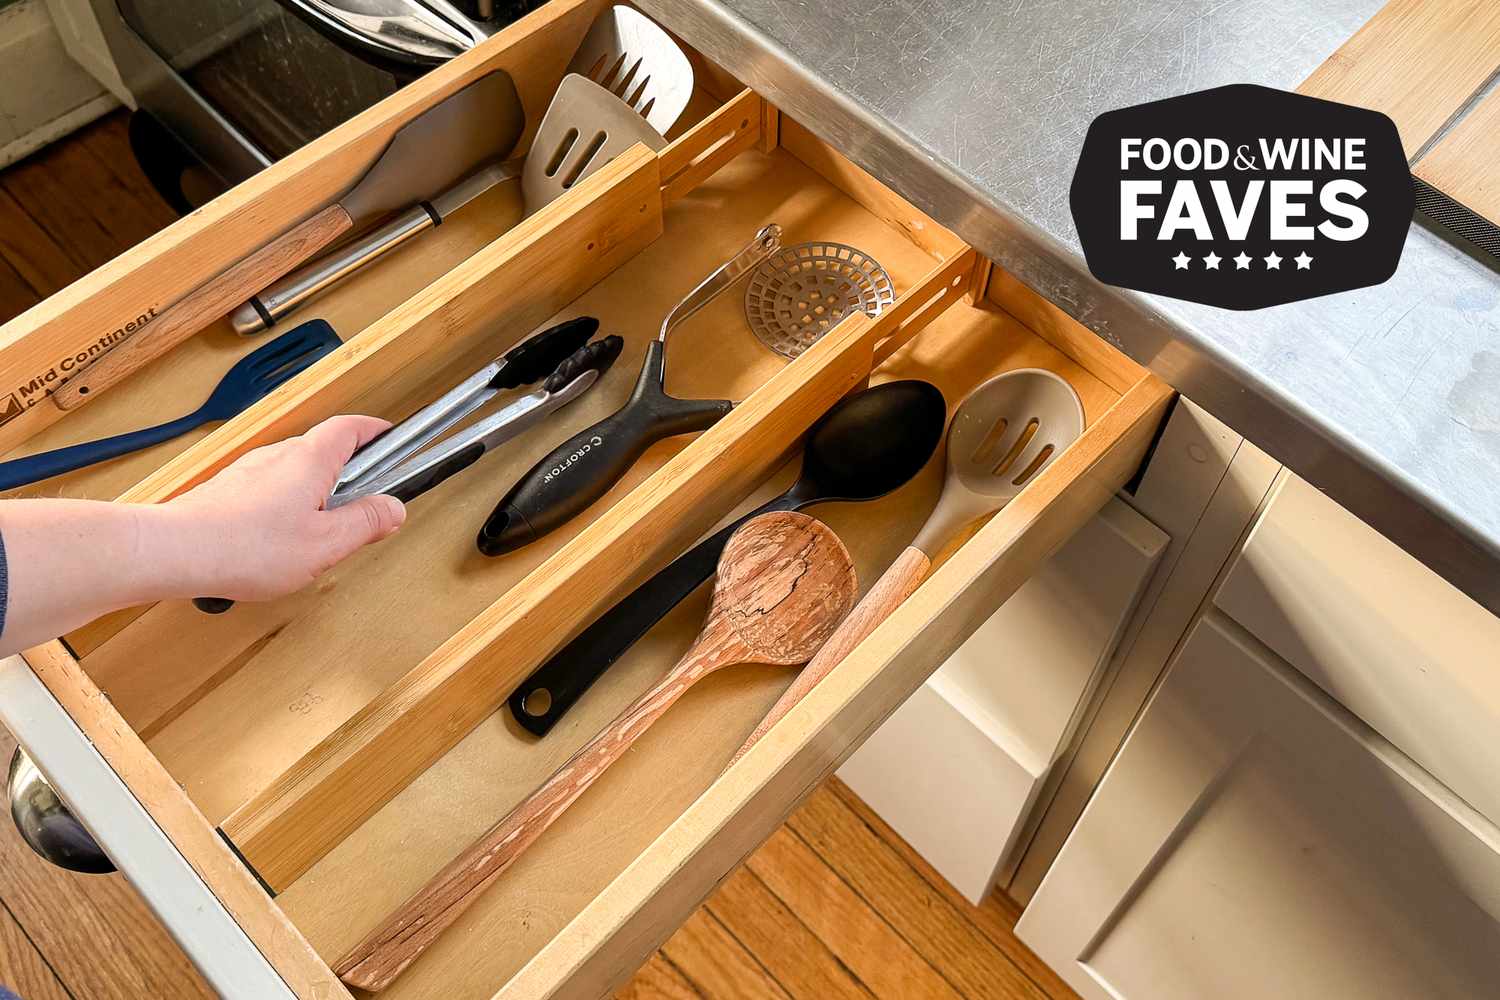
Drawer dividers that work
Drawers are premium real estate. In a tiny kitchen, one chaotic drawer can ripple into the whole room because you keep “parking” items on the counter instead. The fix is not more dividers. It is the right kind of dividers, sized to your real life.
Pick dividers by drawer behavior
- For utensil drawers: a classic compartment tray, but go slimmer than you think. Look for long, narrow channels so serving spoons are not stacked like firewood.
- For junky “tool” drawers: adjustable dividers that lock in place. This is where can openers, a zester (Microplane-style), peelers, and measuring spoons go to tangle. Give each category a lane.
- For spices in a drawer: a low angled insert or step insert so labels face up. If you cannot see it, you will buy it again.
- For wraps and bags: a simple file-style divider system so foil, parchment, and zip bags stand upright. Note: upright wrap boxes need a deep drawer (or a tall pull-out). In a standard shallow drawer, they can jam the drawer fast.
One tiny but mighty tip: leave a two-finger gap (about 1 to 1.5 inches) at the front of utensil compartments so your knuckles do not collide with the drawer edge when you grab something quickly.
My “no stacking” rule
If you use it every day, it should not be stacked under anything. In a small kitchen, “I will put it back later” turns into “it lives on the counter now.”
- Keep your most-used spatula, tongs, and whisk in a single top layer.
- Move duplicates and specialty tools (melon baller energy) to a back-up bin elsewhere.
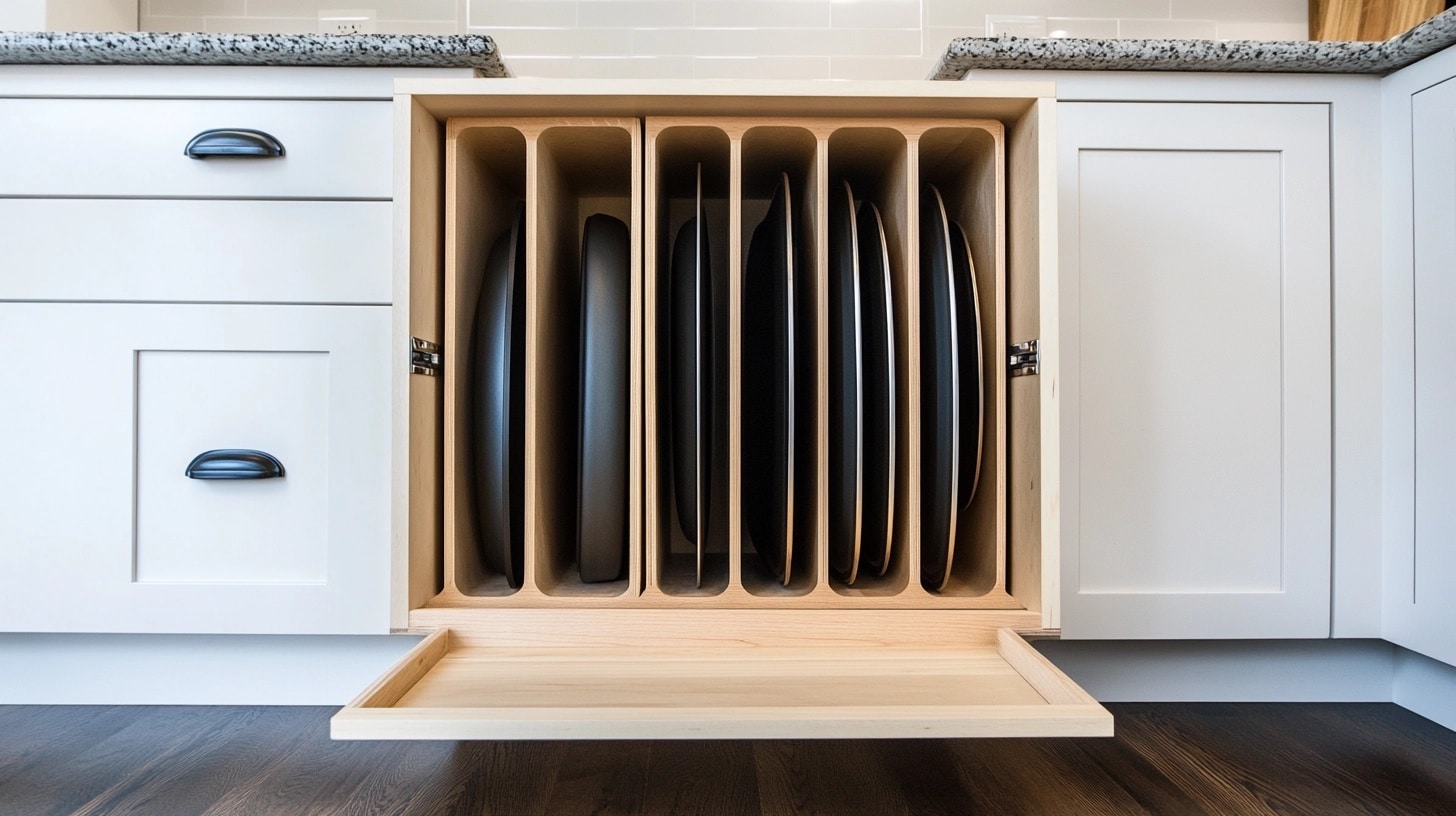
Vertical sheet pan storage
Sheet pans and cutting boards are awkward. They stack into a heavy, clanging pile that makes you dread cooking. Storing them vertically changes the entire mood.
Where to go vertical
- A narrow base cabinet near the oven for sheet pans, muffin tins, and cooling racks.
- Under the sink (only if it is dry and leak-free) for cutting boards and flat trays, kept away from cleaning supplies in a separate caddy. Make sure cleaners are sealed, and keep kid and pet safety in mind.
- Above the fridge only for rarely used flat items, because you will not want to haul heavy pans overhead regularly.
How to stop the topple
- Use a sturdy rack, or install simple vertical dividers so each pan has its own slot.
- Put your heaviest items in the most stable spot, usually where the cabinet floor is fully supported and nothing wobbles. In some cabinets, keeping weight closer to the sides can help. For pull-outs, follow the manufacturer’s weight guidance.
- Group by frequency: your everyday sheet pan and cutting board in the front slots, specialty pieces behind.
When pans live upright, you stop doing that “pull three things out to get one thing” dance. And in a tiny kitchen, fewer micro-annoyances equals more cooking confidence.
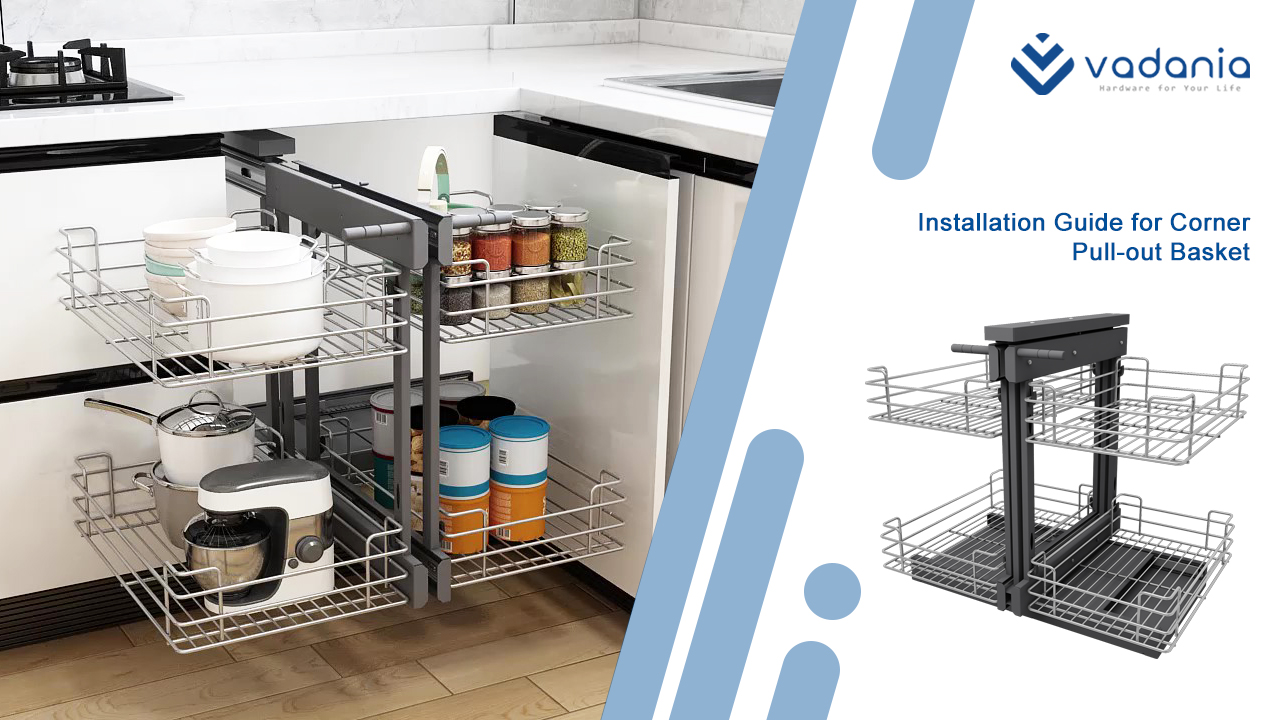
Corner cabinet solutions
Corner cabinets are the Bermuda Triangle of small kitchens. Things go in and never come out. Your goal is to make the corner retrieval-friendly, not just storage-capable.
If you have a lazy Susan
Make it work harder with micro-zones.
- One wedge for oils and vinegars (add a small non-slip liner so bottles stay calm).
- One wedge for baking (vanilla, baking powder, cocoa, sprinkles if you are joyful like that).
- One wedge for sauces you use weekly.
Keep height in mind. Tall bottles belong on the bottom tier, shorter jars up top so you can actually see them.
If you have a deep blind corner
Deep corners are best for categories you can lift out as a unit.
- Use two handled bins: one for savory (broth, canned tomatoes, beans), one for sweet (flour, sugar, chocolate chips).
- If labels stress you out, skip them and keep the categories consistent. If labels calm your brain, a simple label is great. Either way, you should be able to pull a bin and carry it to the counter like a little pantry basket.
- Do not store loose single items back there. Loose items become lost items.
If you have a corner drawer
Corner drawers can be wonderful if you keep them calm.
- Assign it to bulky, not-too-heavy items: dish towels, pot holders, lunch containers, baking mats.
- Avoid heavy stacks of pots. Those angles make piles shift and jam.
The first shelf rule
This is the simplest rule I teach, and it is the one that keeps small kitchens from feeling claustrophobic:
If you cannot see it on the first shelf when you open the cabinet, it is not part of your daily kitchen.
Clarification that matters: this rule is mostly about the lowest shelf of upper cabinets (your natural eye and reach level). Base cabinets play by different rules, because you are bending and digging by default.
In practice, that means your most-used items live where your eyes naturally land.
What deserves first-shelf status
- Everyday plates and bowls
- Your favorite mug lineup (yes, even if they are mismatched, that is the charm)
- Daily pantry staples you reach for without thinking (salt, pepper, olive oil, rice, pasta)
- Your go-to storage containers, with lids that do not require a scavenger hunt
What should move up or down
- Top shelves: entertaining pieces, seasonal bakeware, bulk paper goods, rarely used gadgets.
- Bottom cabinets and lower shelves: heavy items like a Dutch oven, blender base, big mixing bowls.
If you are constantly using a step stool, your cabinet layout is asking too much of you. Tiny kitchens already ask a lot.
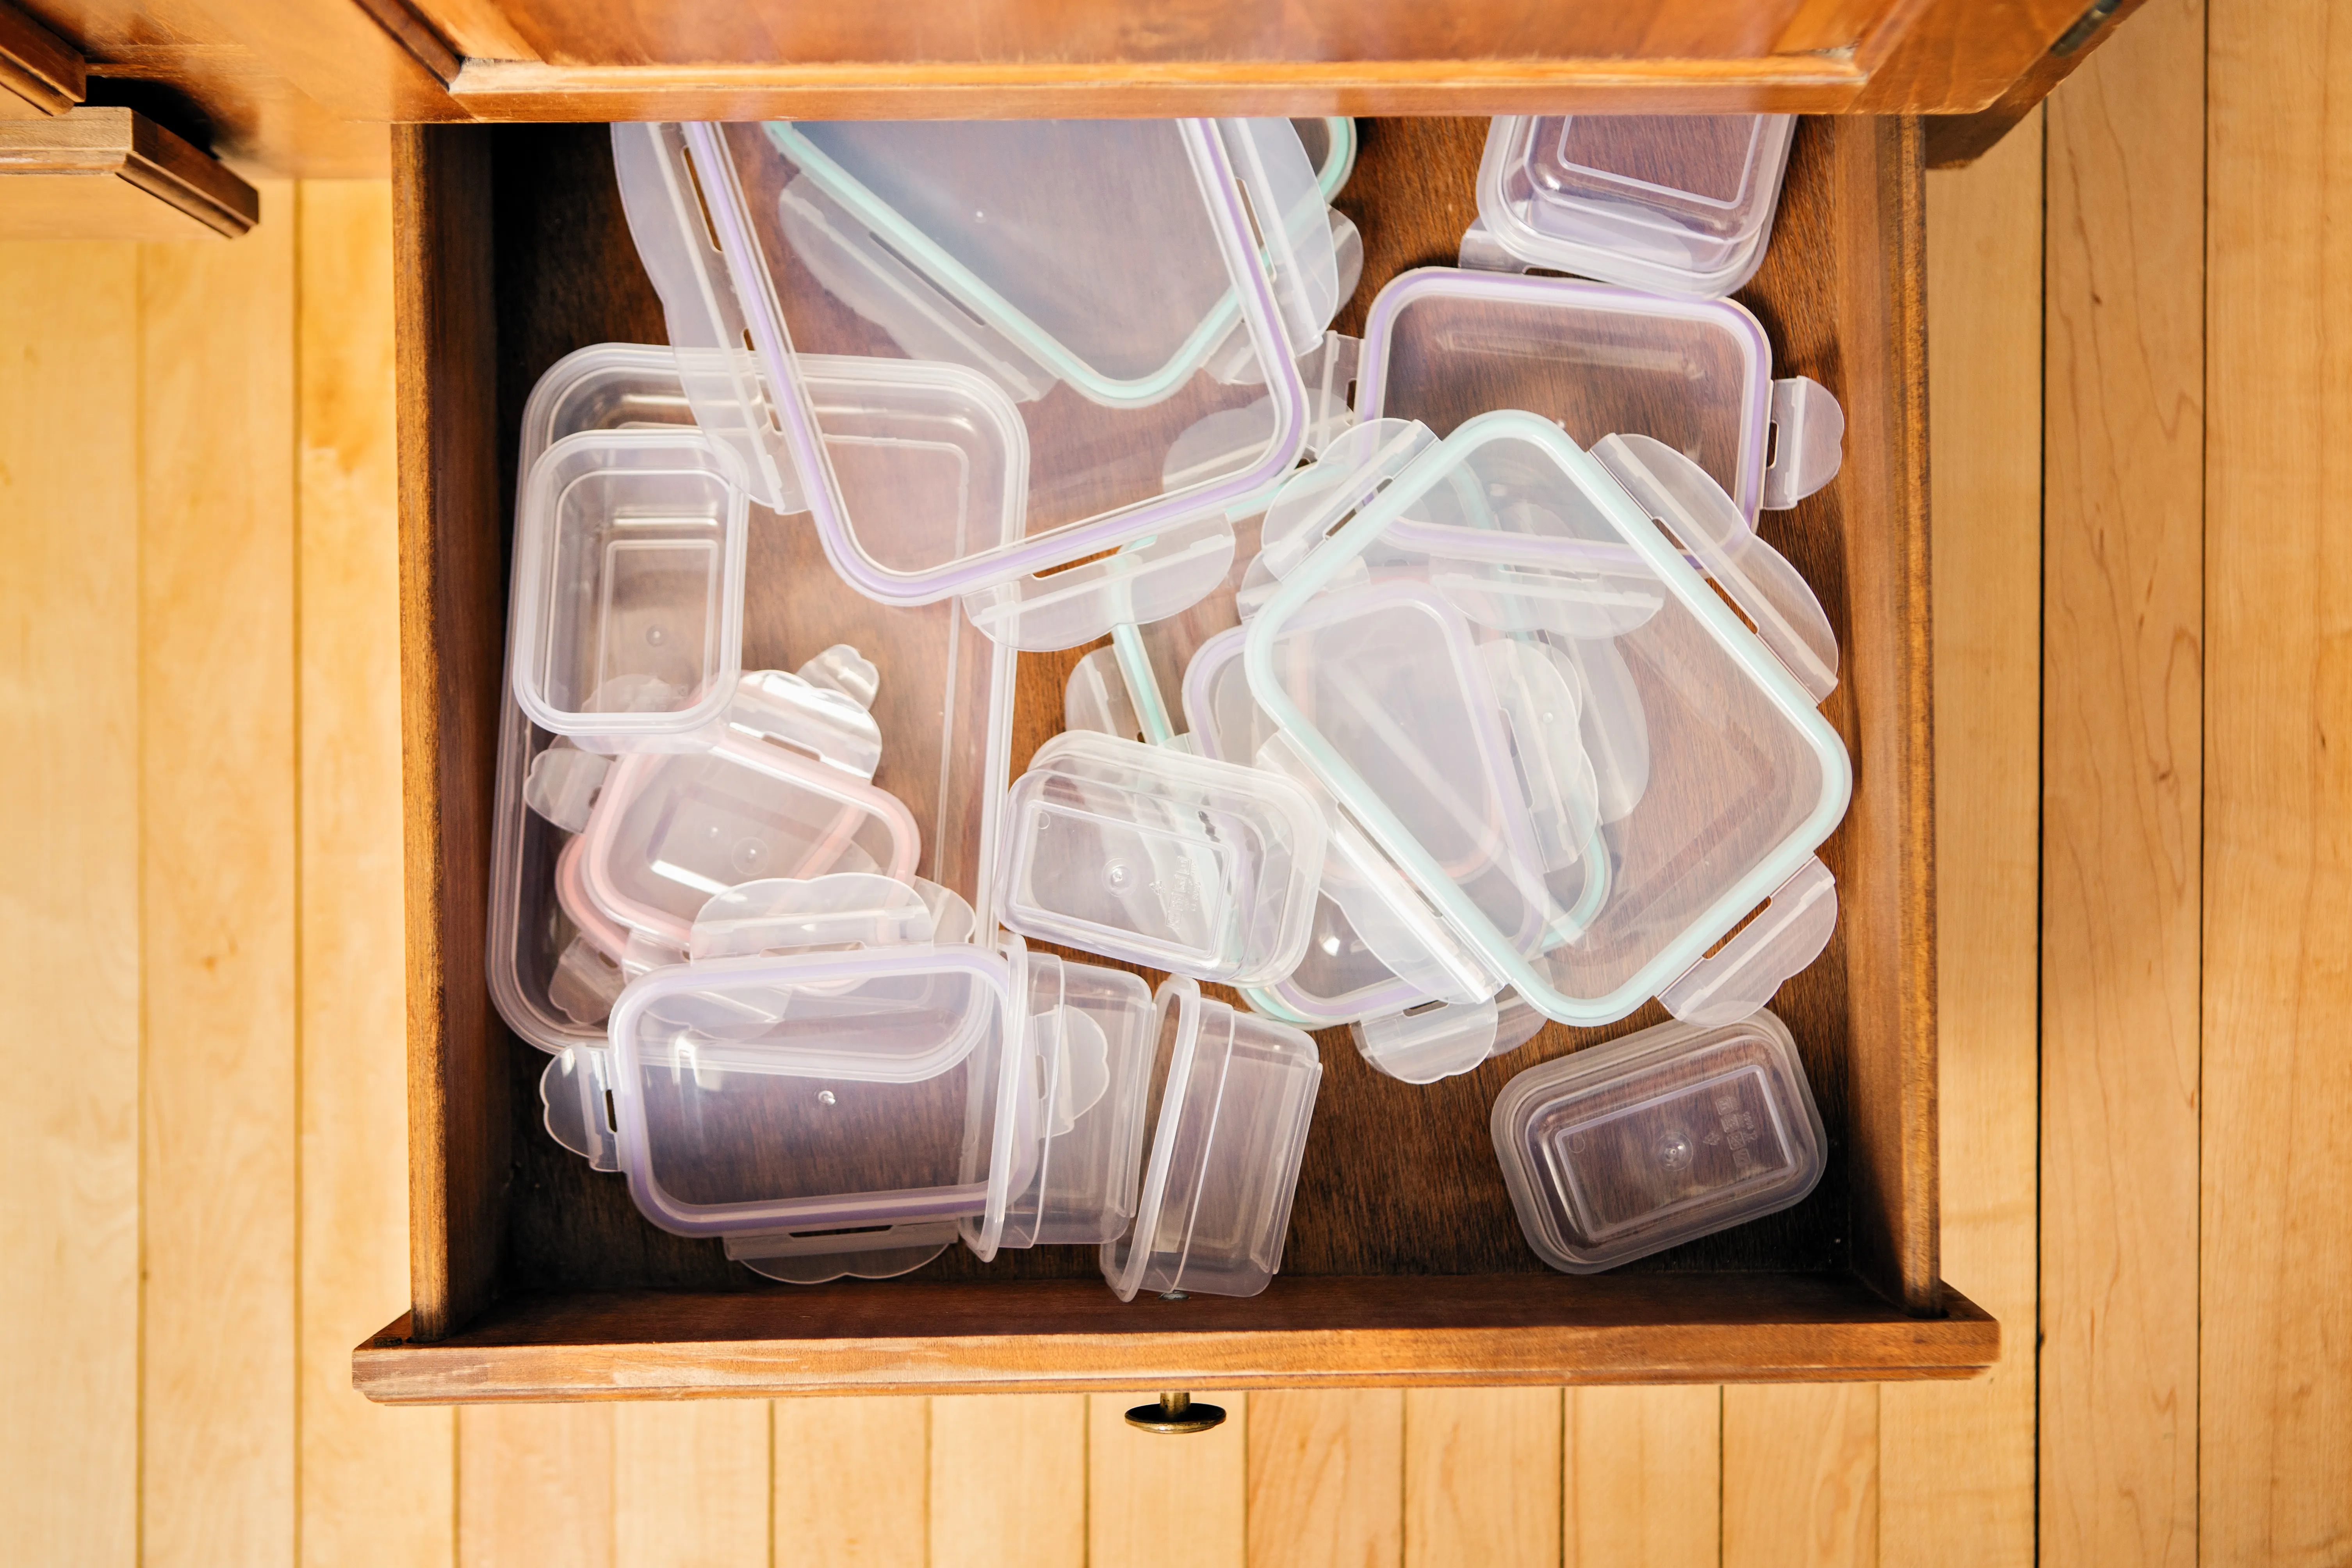
Make lids and containers behave
Container chaos is a small-kitchen classic. The fix is pairing, not perfection.
Two methods that stick
- The “one system” method: choose one main container system (same brand and line, so the lids truly interchange) and let everything else go. That lid pile shrinks overnight.
- The “file the lids” method: store lids vertically in a narrow bin or rack, like files in a drawer. Store containers nested nearby.
Also: keep only what fits your real leftovers. If you do not routinely store a vat of soup, you do not need five giant tubs.
Use cabinet doors
In a tiny kitchen, cabinet doors are quiet extra storage. Keep it light and flat so doors still close like they mean it.
- Adhesive hooks for oven mitts, measuring cups, or a small dish brush.
- A slim door rack for wraps, snack bags, or spice packets (go light so hinges are not fighting for their lives).
- A small lidded bin mounted inside for dishwasher tabs, if it keeps them out of reach of kids and pets.
Renter note: adhesive and tension-rod solutions are usually the friendliest. If you drill, check your lease and aim for hardware you will actually keep.
A cabinet map to copy
If you want a starting point, here is a simple layout that works in most small kitchens. Adjust based on where your dishwasher and stove live.
- Cabinet closest to the dishwasher: everyday plates, bowls, glasses on the first shelf.
- Drawer closest to the stove: cooking utensils, foil and parchment, oven mitts.
- Base cabinet near the oven: vertical storage for sheet pans and cutting boards.
- Corner cabinet: grouped categories in bins or on a lazy Susan.
- Highest shelf: backup items, big serving platters, seasonal pieces.
The magic is proximity. Store things where you use them so your body does not have to negotiate with your kitchen.
Maintain it weekly
Organized cabinets are not a one-time project. They are a gentle rhythm.
- Once a week: pick one drawer or shelf, remove anything that drifted, and reset it in under five minutes.
- Once a month: do a quick pantry check so duplicates do not multiply in the shadows.
- Before buying a new gadget: decide exactly where it will live. If there is no home, it is not coming home.
Mini checklist
- Daily tools: no stacking
- Flat things: store vertical
- Upper cabinets: first shelf equals daily life
- Corners: nothing loose, everything in a bin or zone
- Under sink: only if dry, and keep chemicals sealed and separate
A tiny kitchen can feel like a comforting hug when it is edited and honest. Let your cabinets tell the truth about how you cook, not how a catalog says you should.