IKEA Tarva Hacks That Look Custom
Clara Townsend
Clara Townsend is an interior stylist, vintage furniture enthusiast, and the creative voice behind Velvet Abode. With over a decade of experience transforming both cramped city apartments and sprawling fixer-uppers, she believes that a beautiful home is built on personal stories rather than massive budgets. When she isn't hunting for the perfect brass sconce at a local flea market, she can usually be found rearranging her living room for the third time this month.
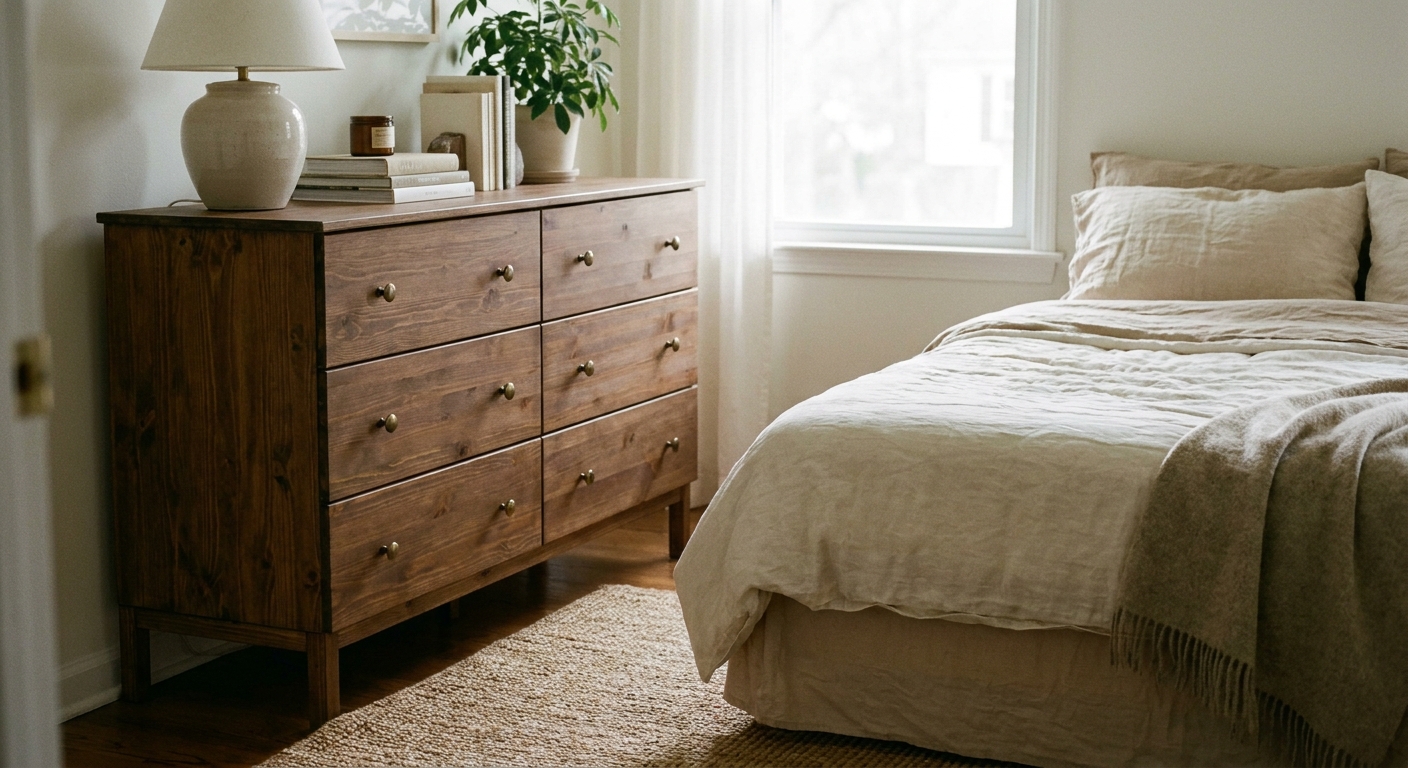
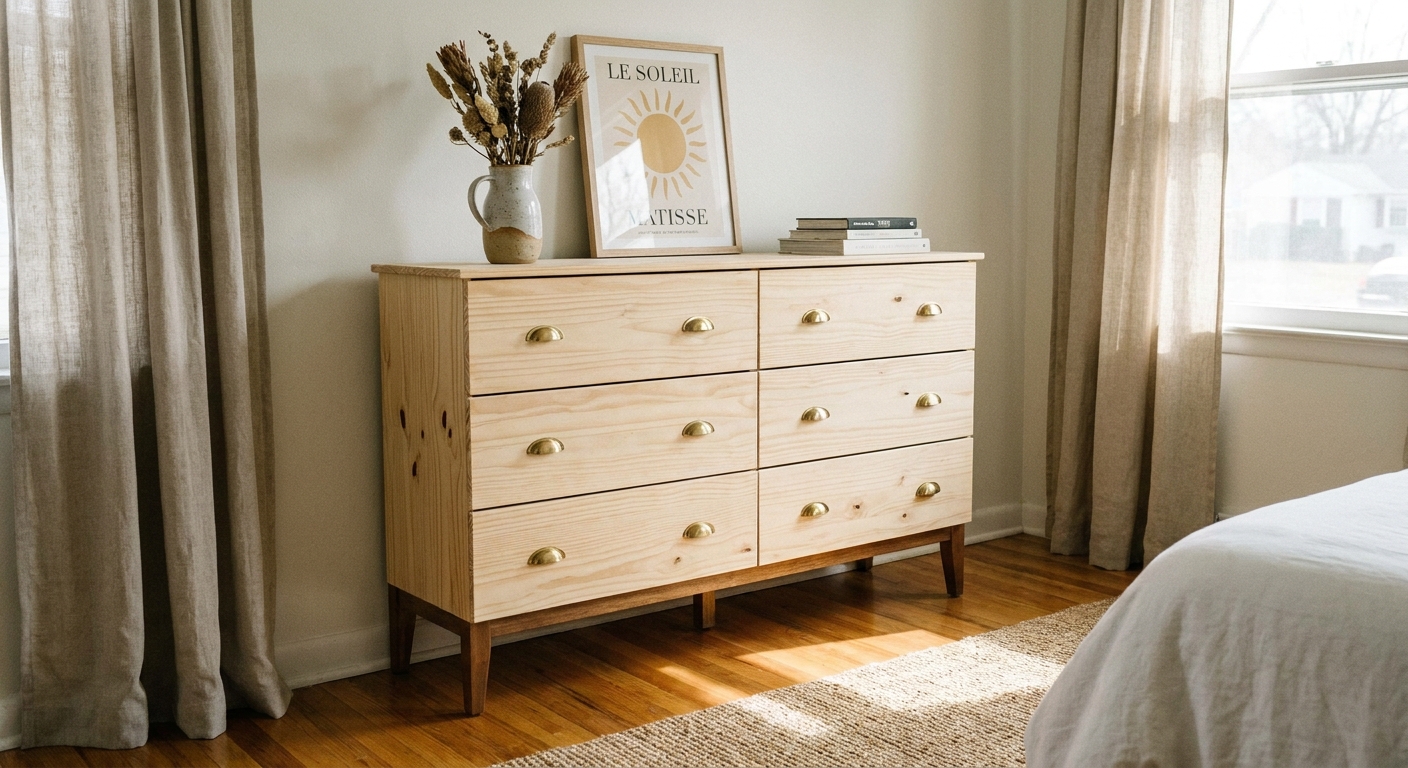
There is a reason the IKEA Tarva line has a quiet cult following. It is simple, solid pine that shows up ready for your personality. The “problem” is also the opportunity: Tarva can look a little dorm-room out of the box. With a few targeted upgrades, it starts reading like a piece you hunted down at a vintage shop or had built by a carpenter who charges by the hour.
Below are my favorite Tarva hacks that consistently look custom: stain systems that behave, base upgrades that change the whole silhouette, trim that fakes inset cabinetry, and hardware that makes the piece feel finished.
Before you start: the Tarva secret
Tarva is unfinished pine. Pine is beautiful, but it can stain blotchy because some areas drink stain and others repel it. The path to “custom” is less about fancy products and more about controlling absorption and building your finish in calm, predictable steps.
Quick prep checklist
- Sand lightly with 150 grit, then 180 grit. You are smoothing fibers, not reshaping furniture.
- Vacuum and wipe with a tack cloth or a slightly damp microfiber. Dust is the enemy of smooth topcoats.
- Fill smart: if you add trim or move hardware, use a stainable wood filler for stained looks, or regular filler for paint.
- Always test your finish on the back of a drawer front or a scrap of pine. Pine will surprise you.
Stain systems that look high-end
If you want Tarva to pass for a pricier wood species, your finish needs depth, not just color. Think of it like styling an outfit: one layer can look flat, but layering textures makes it feel intentional.
Option 1: Conditioner + stain + topcoat
This is the most beginner-friendly route and the one I recommend when you want a straightforward “I own a walnut dresser now” vibe.
- Apply pre-stain wood conditioner (follow the label timing). This helps reduce blotchiness.
- Wipe on stain with a rag for control. Work one panel at a time.
- Wipe off excess within the recommended window. Leaving it longer does not always mean richer, it can mean sticky.
- Seal with a clear topcoat. Water-based poly stays clearer, oil-based warms and ambers slightly.
Option 2: Dye stain + topcoat
Dye stains sink in more evenly than many pigment stains, which makes them a sweet spot for pine. The result often looks less muddy and more like real, stained wood cabinetry.
- Use a water-based dye for more open working time and easy cleanup.
- Build color in thin passes instead of trying to nail it in one coat.
- Topcoat after fully dry so you do not drag color around.
Option 3: Whitewash or liming
If you love light, airy rooms, Tarva can look shockingly expensive with a muted, washed finish that keeps the grain visible.
- Apply a whitewash (diluted paint or a dedicated product) and wipe back.
- Focus on consistency: do your wiping pattern the same way on every surface.
- Seal with a matte or satin topcoat for that soft, modern look.
Base upgrades: change the silhouette
Tarva already comes with tall, square legs that are built into the side panels, which is part of its clean, simple look. If you want a different vibe, you can absolutely change the base, but it is not a screw-on situation. A true leg swap means modifying the existing legs first.
Three base styles that look custom
- Tapered mid-century legs: makes Tarva feel like a vintage find, especially with warm stain and simple pulls.
- Chunky block legs: reads more modern and built-in adjacent, especially in a matching painted finish.
- Brass or black metal legs: leans boutique-hotel, great in small bedrooms where you want visual lightness.
How to do a leg swap (the important step)
- Plan your final height: decide how tall you want the piece after the swap, then mark a level cut line around all four legs so everything stays even.
- Saw off the built-in legs: Tarva’s legs are a continuous part of the side panels, so you will need to cut the bottom portion off to create a flat base.
- Add a mounting plate or a new plinth: this gives your new legs solid structure and keeps the swap from looking like an afterthought.
- Attach new legs using the hardware designed for them, and double-check level before you call it done.
- Match your metals: if you choose brass legs, echo that with brass hardware for cohesion.
Trim and overlays: built-in illusion
This is where Tarva goes from “nice IKEA hack” to “wait, where did you buy that?” Trim is the oldest set-design trick in the book: add dimension, create shadow lines, and suddenly it reads like tailored millwork.
Hack 1: Picture-frame trim
Add thin wood trim to each drawer front to mimic shaker or inset-inspired detailing.
- Measure and cut trim pieces with clean 45-degree corners.
- Wood glue + clamps for a tight bond. Painter’s tape can work in a pinch for lighter trim.
- Fill seams (especially for paint) and sand smooth so it looks like one surface.
Hack 2: Face frame
A simple frame added to the outer edges creates that cabinetmaker look and visually thickens the sides.
- Use straight, square stock for a crisp line.
- Align edges carefully so the frame looks structural, not decorative.
- Paint is easiest for this hack, but it can be done in stain if your cuts are very clean.
Hack 3: Thicker top
If your Tarva top looks thin, upgrade it. A thicker top changes the profile and makes the whole piece feel more substantial.
- Add a solid wood panel cut slightly larger than the top for a furniture-like overhang.
- Route the edge (optional) for a softer, more finished detail.
- Stain the top slightly darker than the body for a subtle, custom contrast.

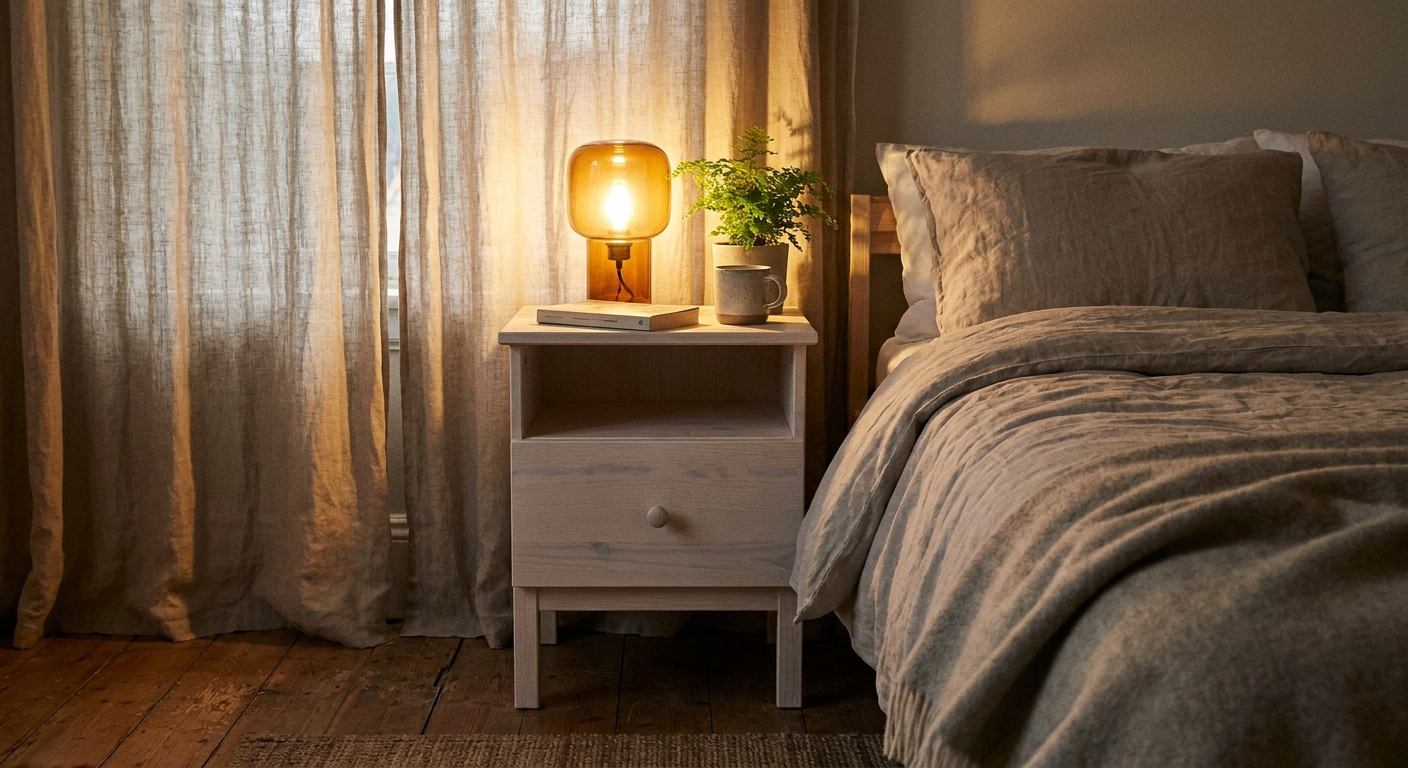
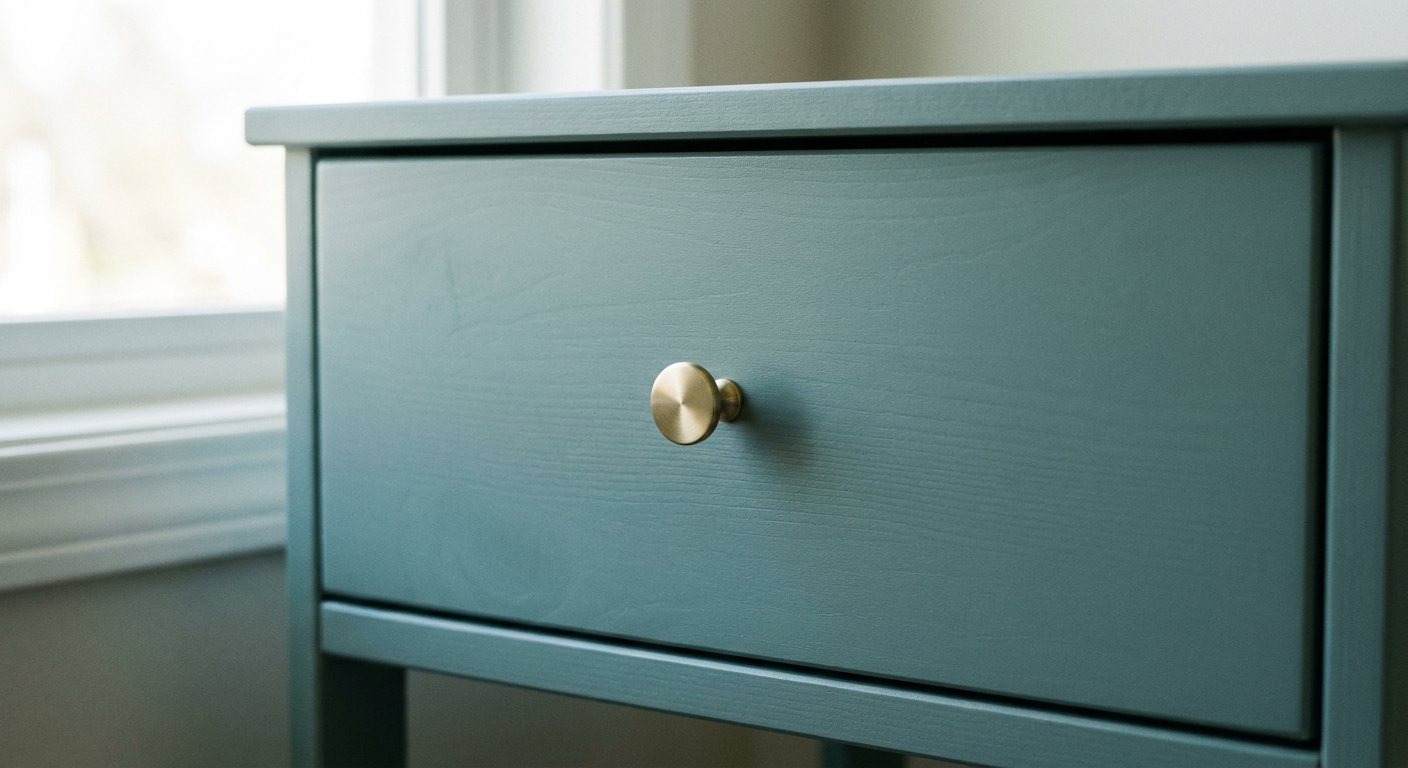
Hardware swaps that read expensive
Hardware is jewelry. And like jewelry, it does not have to be loud to look luxe. The key is scale and finish.
My go-to hardware
- Long bar pulls (especially on wider drawers): instantly modern and more “custom cabinetry.”
- Unlacquered brass knobs: they develop patina over time, which makes the piece feel collected, not mass-produced.
- Black cup pulls: perfect for farmhouse, vintage utility, and any space that needs grounding.
- Wood knobs: understated and very Scandinavian, especially with pale finishes.
Placement tips
- Use a template or make one from cardboard so every hole is identical.
- Size up slightly: undersized knobs can look temporary. A little bigger often looks more intentional.
- Match the style to the finish: warm stain loves warm metals, crisp paint loves black or nickel.
Painted Tarva that looks like millwork
Paint is not the “easy way out.” A perfectly painted Tarva with clean trim and the right sheen can look like built-in cabinetry, especially in a hallway, nursery, or small bedroom.
How to get a smooth finish
- Prime first, especially on knotty pine. For knot and sap bleed, a shellac-based primer (like Zinsser B-I-N) is the reliable move. Most standard water-based primers will eventually let knots telegraph through.
- Choose the right sheen: satin or soft semi-gloss tends to look more like millwork than flat paint.
- Sand between coats with 220 grit for that velvety, touchable finish.
- Let it cure: paint dries quickly but takes longer to harden. Be gentle with drawers for a few days.
Built-in look without building in
If you love the “custom wall of cabinetry” look you see with Billy and Kallax hacks, you can borrow the same visual logic with Tarva: make it look like it belongs to the architecture.
Three styling moves
- Go wall-to-wall when possible: place Tarva centered between two vertical elements like curtains, shelving, or sconces.
- Add a tall back moment: hang a large mirror or oversized art directly above so the arrangement reads like a designed unit.
- Repeat materials: if you use brass pulls, add a brass picture light or sconce nearby.
Bonus: the gap trick
That little shadowy gap between furniture and wall is a giveaway. If your baseboard allows it, you can use a thin filler strip or a simple cleat behind the piece to bring it snugger to the wall. It is a tiny detail that changes the whole read.
My favorite Tarva recipes
If decision fatigue is creeping in, pick one of these combos. They are proven, camera-friendly, and hard to mess up.
1) Vintage boutique
- Warm walnut stain
- Unlacquered brass knobs
- Tapered legs
- Large antique-style mirror above
2) Soft built-in
- Painted in a muted neutral (warm white, greige, or putty)
- Picture-frame trim on drawers
- Long bar pulls in black or aged brass
- Thicker top painted to match
3) Scandinavian calm
- Pale wash finish
- Simple wood knobs
- Keep the original square legs, or do a low block-style base
- Linen lamp shade and a woven tray on top
Common mistakes
- Skipping conditioner on stain projects: pine can go patchy fast. Testing and conditioning saves your sanity.
- Forgetting Tarva’s legs are built-in: if you want a new leg style, plan for cutting and a proper mounting base.
- Using the wrong primer for knots: a shellac-based primer blocks bleed better than standard water-based options.
- Using the wrong topcoat sheen: super glossy can look plasticky, dead flat can look chalky. Satin is usually the sweet spot.
- Hardware that is too small: scale matters. When in doubt, size up.
- Rushing cure time: paint and topcoats need time to harden. A careful week is better than a scratched weekend.
Final touch: style it on purpose
The last 10 percent is what makes Tarva look custom. Add one warm light source, layer one soft texture, and include one personal object that looks like it has a story. A little stack of art books. A thrifted brass catchall. A candle that smells like you actually live there.
Tarva is a blank page. With stain, base upgrades, trim, and hardware, it becomes your handwriting.