IKEA POÄNG Chair Fixes
Clara Townsend
Clara Townsend is an interior stylist, vintage furniture enthusiast, and the creative voice behind Velvet Abode. With over a decade of experience transforming both cramped city apartments and sprawling fixer-uppers, she believes that a beautiful home is built on personal stories rather than massive budgets. When she isn't hunting for the perfect brass sconce at a local flea market, she can usually be found rearranging her living room for the third time this month.
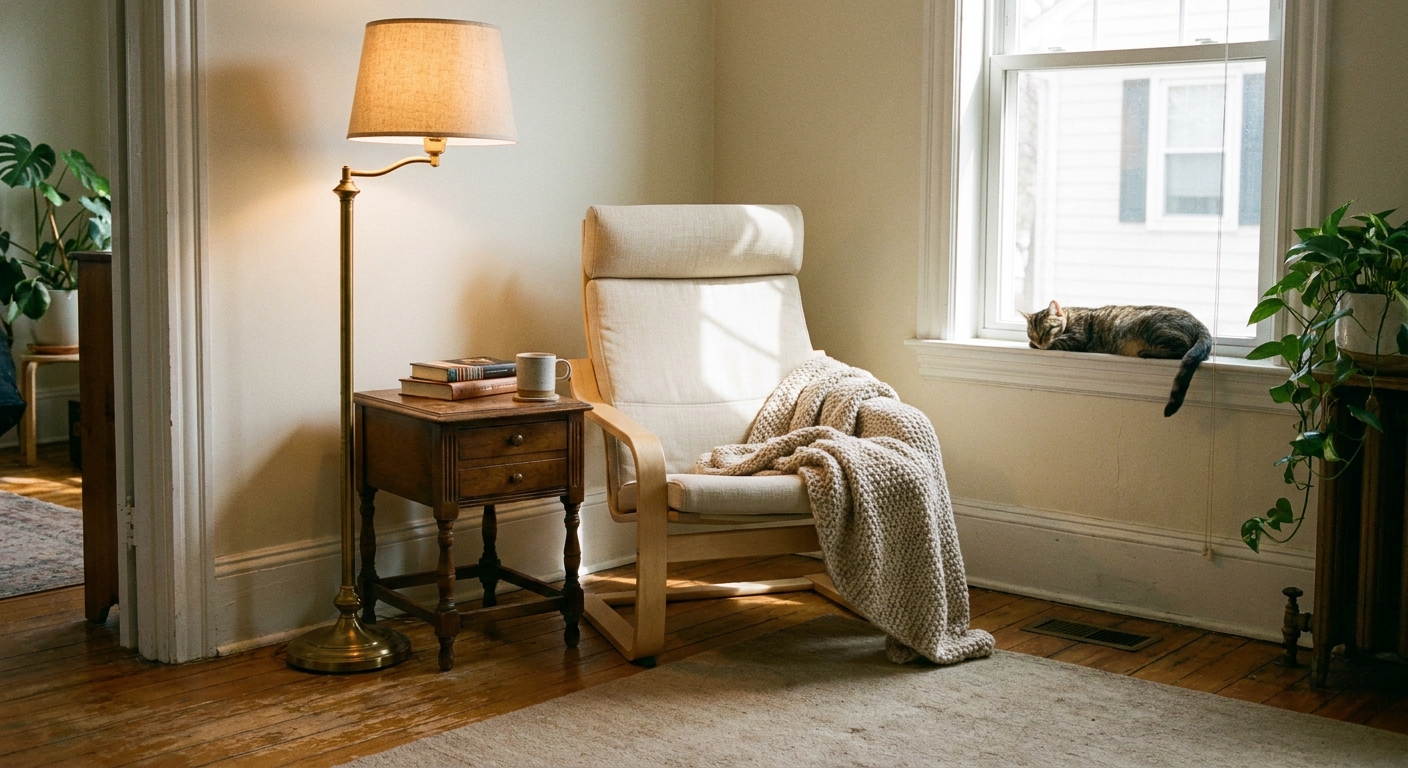
The POÄNG is one of those chairs that earns its keep. It looks good in a corner with a lamp, it bounces just enough to feel cozy, and it somehow survives years of real life. Then one day it starts talking back with a squeak every time you shift your weight, or it develops that tiny wobble that makes you feel like you are sitting on a question mark.
The good news: POÄNG issues often come down to friction, slightly loosened hardware, or floor contact. You can usually fix them in under 30 minutes with a basic hex key, a soft cloth, and a little patience.
Quick plan
- Time: 15 to 30 minutes
- Tools: 4 mm or 5 mm hex key (most common), soft cloth, optional felt pads
- You will fix: squeaks, clicks, minor wobble, floor scuffs
Before you start
Set yourself up for success and avoid chasing a squeak that is really a cracked part.
- Move the chair onto a rug or folded blanket so the frame does not scrape the floor while you work.
- Look for obvious damage like splits in the laminated wood frame, missing hardware, or a seat that has pulled away from its attachment points.
- Confirm your version: POÄNG armchair (standard bentwood frame) versus POÄNG rocking chair (rocking base). The steps below apply to both, but noise points can vary slightly.
- Have a helper if you can, especially for flipping the chair. If not, just go slow.
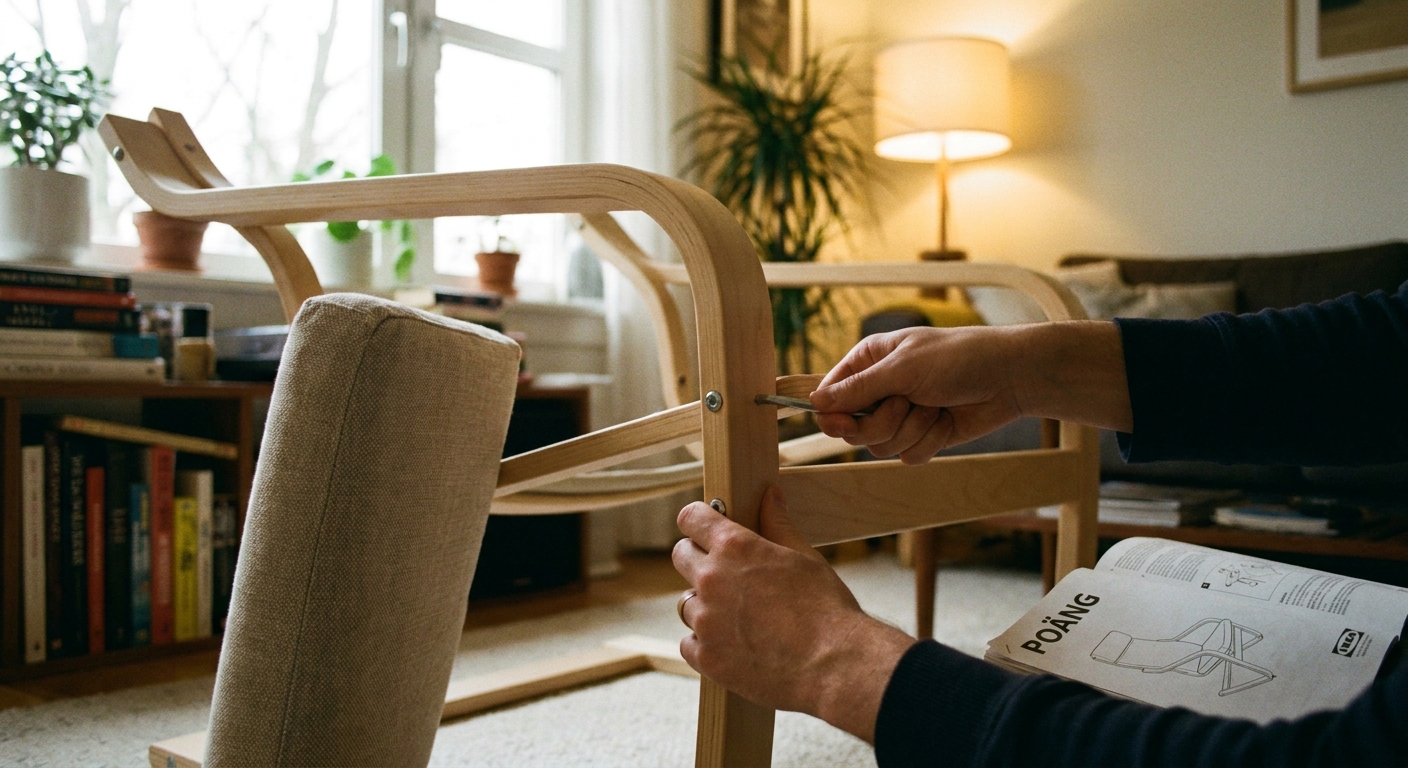
Loose bolts and wobble
If you tighten POÄNG bolts randomly, you can twist the bent laminated frame slightly out of alignment. That misalignment can invite squeaks and a subtle rock. The simple trick is to loosen just a touch first, let the joints settle, then tighten evenly in a balanced order.
What you need
- Hex key (Allen key): typically 4 mm or 5 mm for POÄNG hardware (it varies by production run, so test fit before you crank on it)
- Soft cloth
- Optional: a torque wrench with hex bit if you want to be very precise
- Optional: a tiny drop of medium-strength threadlocker (blue) for a bolt that repeatedly loosens
Threadlocker note
- Use only after confirming you have the correct bolt and washers, and only for recurring loosening.
- Use sparingly and keep it off wood surfaces.
- Skip it if you expect to disassemble the chair later, since it can make removal harder.
Step by step: re-seat and tighten
- Remove the cushion so you can access hardware and listen for frame noises later.
- Support the frame and place the chair on its side on a blanket. Do not let the bentwood flex while you work.
- Loosen each main frame bolt a quarter turn. This lets the joints settle back into their natural position.
- Re-seat the joints. Gently press the side rails so the chair sits square rather than slightly torqued.
- Tighten in a cross pattern: do one side, then the opposite side, moving from the bolts closest to the floor to the bolts closest to the seat. Think of it like tightening lug nuts on a wheel.
- Final snug, not heroic: tighten until firmly seated and the joint feels solid. Over-tightening can stress the laminated frame or crush washers over time.
A simple tightening order
If you want a repeatable rhythm, use this:
- Round 1: Floor-near bolt on left (snug) → floor-near bolt on right (snug) → seat-near bolt on left (snug) → seat-near bolt on right (snug)
- Round 2: Repeat in the same order, bringing each bolt to firm tightness
- Round 3: A final quick check, stopping the moment the frame feels stable
If you do use a torque wrench, stay conservative. IKEA does not publish a universal torque spec for every POÄNG variation, and wood-laminate assemblies can be damaged by over-torquing. Aim for “secure and stable” rather than “as tight as possible.”
Aftercare: after a few days of normal use, do a quick re-check. Wood and hardware can settle slightly, especially after a move or a seasonal humidity change.

Squeaks and clicks
A squeak is usually two surfaces rubbing under load. Your job is to figure out which surfaces, then separate them slightly or soften the contact.
Find the noise fast
- Sit down slowly and shift your weight left to right. Listen for whether the squeak comes from the side frame, under the seat, or where the cushion contacts the frame.
- Press each arm or side rail by hand while standing next to the chair. Many squeaks reveal themselves without you fully sitting.
- Touch-test: place your fingers lightly on a joint while you rock the chair. If the vibration is strongest there, you found it.
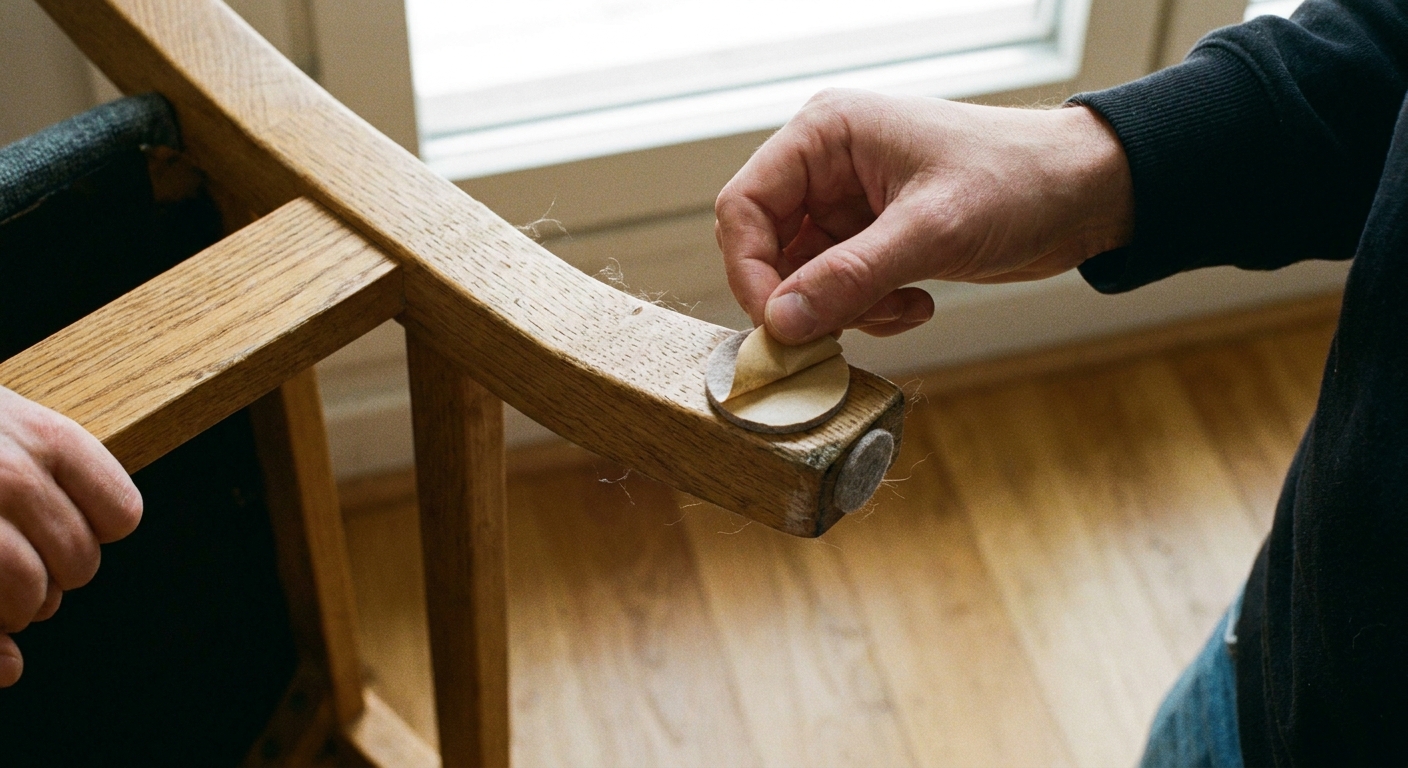
Fix 1: Felt at rub points
For squeaks where parts meet (wood-on-wood, or cushion frame on wood), thin adhesive felt works incredibly well. It is also renter friendly because it is removable.
- Use thin furniture felt (the kind sold in sheets or small dots).
- Cut small pieces and place them between rubbing surfaces, not on exposed areas where they will peel.
- Press firmly and let the adhesive set for a few minutes before testing.
Fix 2: Hardware clicks and creaks
If your chair makes a sharper click (less of a squeak), it is often hardware shifting slightly.
- Check washers: if a washer is missing, damaged, or bent, replace it with a matching size. A compromised washer can create a click as the bolt head shifts.
- Nylon washer, only if it fits: a very thin nylon washer can help where metal contacts metal, but do not change the stack height so much that the joint cannot seat properly. Keep the original washer order and stop if anything feels “mushy” or misaligned.
- Use a tiny amount of wax (clear candle wax or beeswax) on a rubbing point. Apply sparingly and wipe off residue so it does not attract dust.
- Avoid oily sprays near fabric. They can stain covers and attract grit, which makes squeaks return faster.
Fix 3: If it is the cushion
Sometimes the frame is fine and the cushion is squeaking against the bentwood. Try:
- A thin strip of felt where the cushion contacts the frame.
- Re-centering the cushion so it sits evenly and is not pulling to one side.
- Vacuuming grit from creases and seams. Tiny crumbs can create surprisingly loud friction noises.
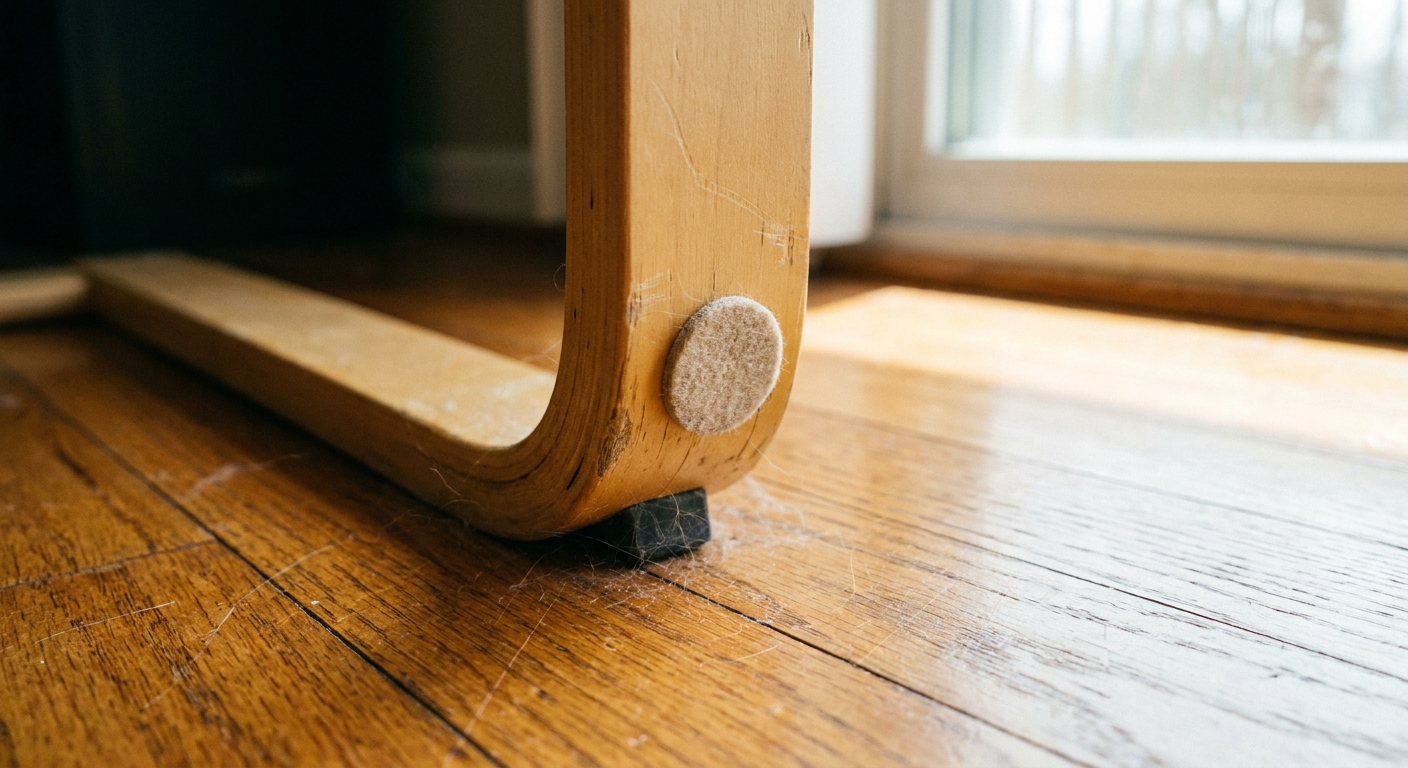
Floor pads and leveling
Even a perfectly tightened POÄNG can feel wobbly if your floor is slightly uneven or if one foot is dragging on a textured rug. Floor protection is not just about preventing scratches. It also stabilizes the chair and cuts down on noise.
Pick the right pad
- Hardwood or laminate: soft felt pads or high-quality felt with a grippy layer.
- Tile: rubber or silicone pads can grip better than felt.
- Carpet: felt is fine, but focus on leveling rather than grip. A thicker pad on one foot can solve a rocking issue.
Quick leveling trick
If one corner lifts:
- Place the chair where it normally lives.
- Press down on each corner to identify the “high” foot.
- Add a slightly thicker pad to the foot that is not making full contact.
- Test again. Repeat once if needed.
Keep pads small and tidy. Oversized pads can be visible and collect dust around the edges.
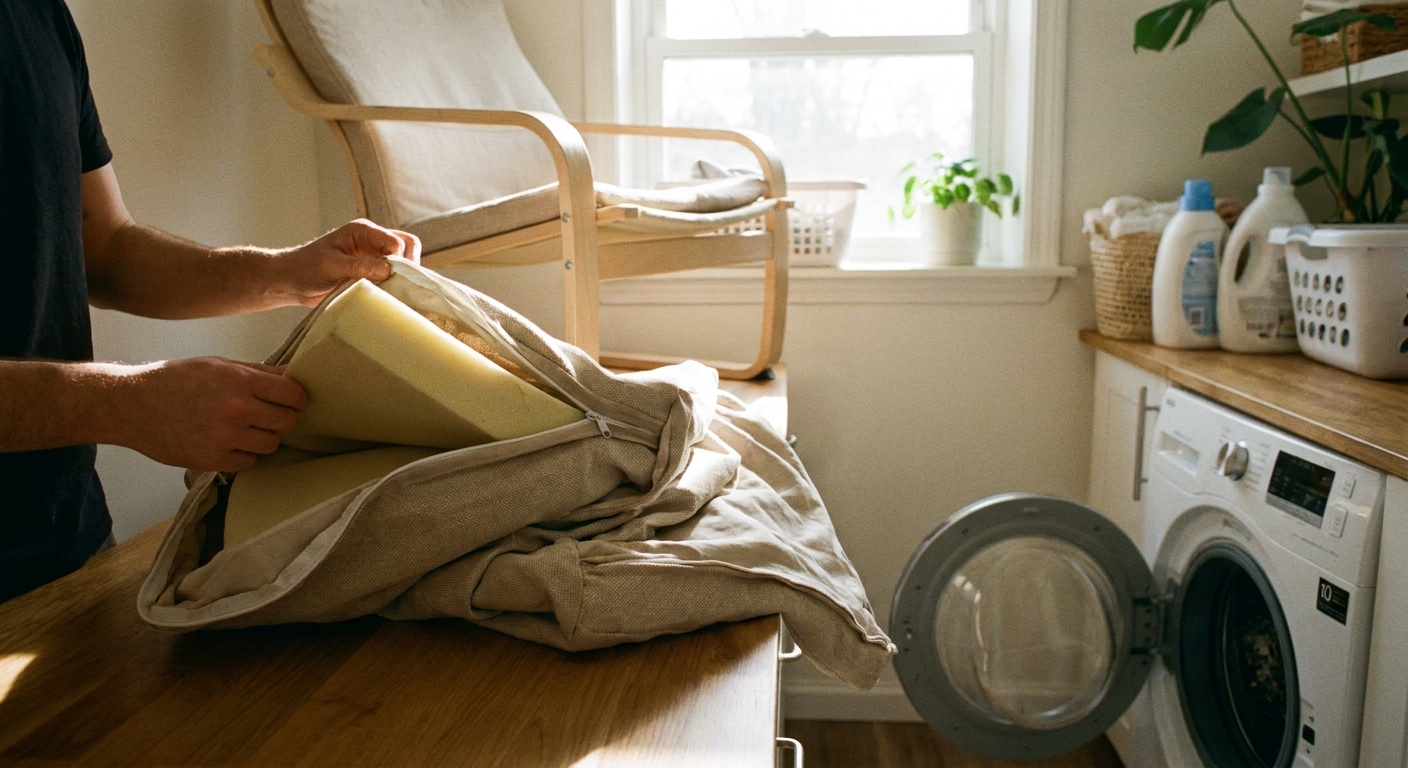
Washing POÄNG covers
Washing POÄNG covers is one of the easiest ways to make the whole chair feel brand new, especially if it lives in a sunny spot or has absorbed a few seasons of cozy evenings.
The safest approach is always: check the care label on your specific cover first. IKEA has produced many POÄNG cover fabrics over the years, and care instructions can differ by textile, backing, and dye method. If your label says do not wash or professional cleaning only, let that override everything below.
Best practices
- Zip and fasten everything so edges do not whip around and fray.
- Wash inside out to protect color and texture.
- Use cold to warm water (not hot) unless the label explicitly allows it.
- Choose gentle detergent and skip bleach.
- Avoid fabric softener for many upholstery fabrics. It can leave residue that attracts dirt and dulls texture.
Conservative starting points
Use this as a cautious baseline, then match your label.
- Cotton or cotton blend: gentle or normal cycle, cold to warm water. Air dry or tumble dry low if permitted. Remove promptly to reduce wrinkles.
- Polyester or performance-style: gentle cycle, cold water. Air dry is best, or tumble dry low if allowed. High heat can create shine or slight rippling.
- Velvet-style or plush: gentle cycle, cold water, minimal spin if your machine allows. Air dry to preserve pile. Brush lightly with a soft fabric brush once dry.
- Wool blend: wash only if the label allows, typically wool cycle or delicate, cold water. Lay flat to dry to avoid stretching.
Drying
If you are unsure, air dry. Upholstery covers are the kind of thing that can look fine coming out of the dryer and then feel just a bit tighter when you try to get them back on. I like to:
- Air dry until just barely damp.
- Put the cover back on while it is still slightly pliable.
- Let it finish drying on the cushion so it settles into shape.
Spot cleaning
For small spills:
- Blot, do not rub.
- Use a mild soap solution and a clean cloth.
- Rinse with a damp cloth (just water) to avoid detergent rings.
- Air dry fully before sitting.
Renter-friendly refresh
I love a “soft refresh” because it lets the chair evolve with you. No permanent modifications, no drama, just cozy upgrades that come off when you move.
1) A throw that stays put
Choose a throw with a little weight, like washed linen, cotton waffle, or a soft wool blend. Drape it so it tucks into the seat crease. It looks intentional and it stays put.
2) A textured lumbar pillow
POÄNG cushions can feel deep. Add a small lumbar pillow in a tactile fabric like bouclé, faded velvet, or chunky weave. It is also a sneaky way to introduce pattern if your room is mostly solids.
3) Removable armrest protection
If your armrests take a beating from watches, zippers, or pet nails, try:
- A narrow scarf or textile tie-on wrap
- A small piece of felt under a draped throw where it touches the arms
- A slip-on armrest cover (look for ones that grip without adhesive)
4) Quiet the corner
If your POÄNG lives beside a side table and lamp, add a rug or mat under the chair and table together. The room will feel calmer, and you will reduce micro-sounds from chair movement on hard floors.
Replace parts
If you have tightened, padded, and tested and the chair still feels unstable, it is worth checking for worn or damaged components.
- Replace missing hardware like bolts and washers with the correct size and type. Avoid “close enough” substitutes that change length or washer stack, since that can keep joints from seating properly.
- Stop using the chair if you see cracks in the laminated frame or separation at joints. That is a structural issue, not a squeak.
- Use IKEA Spare Parts: IKEA has an online Spare Parts service that lets you request replacement hardware (often free). Look up your chair in the digital assembly manual, find the 6-digit part codes, then enter those codes in the Spare Parts request form to get the exact bolts and washers for your version.
A POÄNG should feel springy, not shaky. Once it is properly tightened and sitting evenly, it goes back to being that quiet, dependable seat you forget to think about. Which, honestly, is the highest compliment a chair can get.