IKEA PAX Built-In Hacks That Look Custom
Clara Townsend
Clara Townsend is an interior stylist, vintage furniture enthusiast, and the creative voice behind Velvet Abode. With over a decade of experience transforming both cramped city apartments and sprawling fixer-uppers, she believes that a beautiful home is built on personal stories rather than massive budgets. When she isn't hunting for the perfect brass sconce at a local flea market, she can usually be found rearranging her living room for the third time this month.
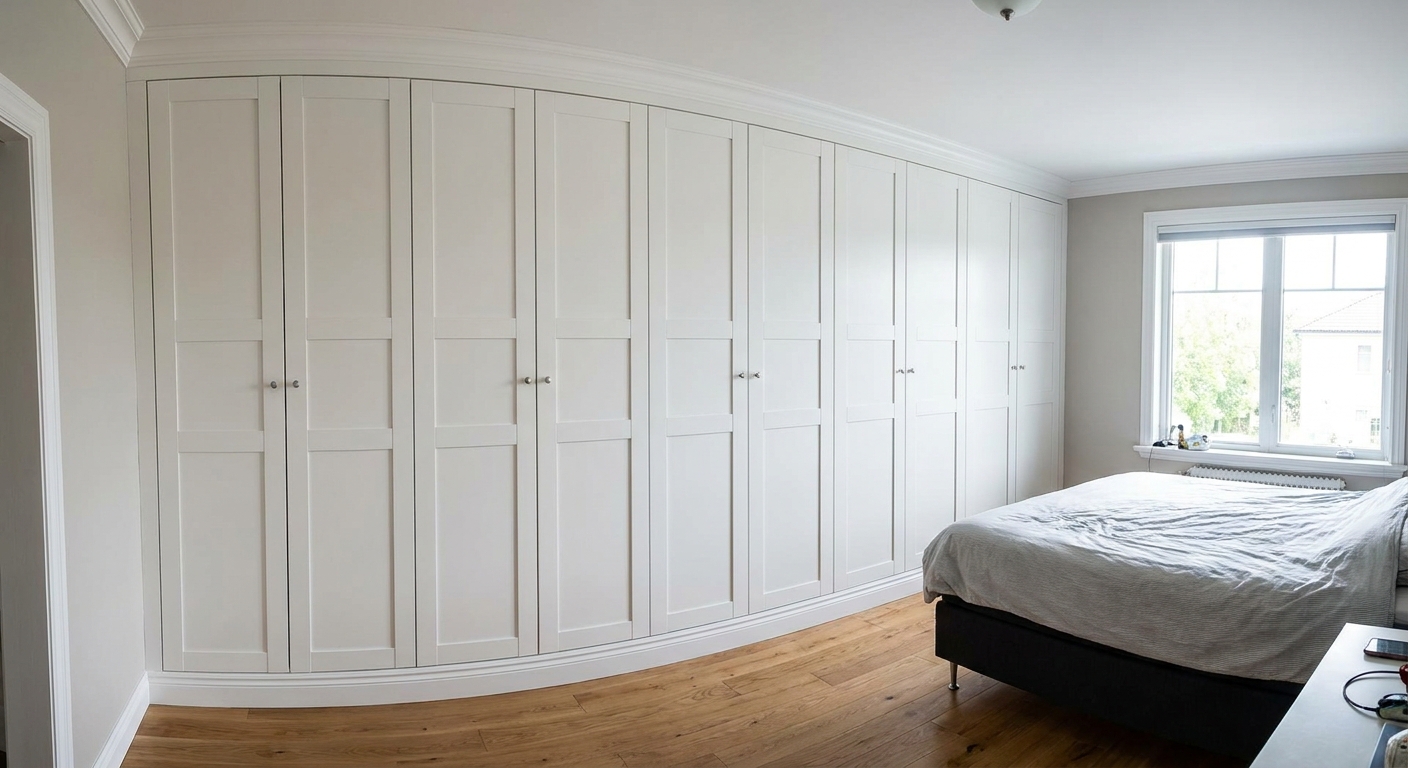
If you have ever stared at a blank bedroom wall and thought, I just want it to look like it came with the house, you are my kind of person. IKEA PAX is one of the best bones for that built-in look because it is tall, clean-faced, and meant to behave like a closet. With a little trim and a few strategic “hide the gaps” moves, you can get a wall-to-wall, millwork-y vibe without paying custom-cabinet prices.
Important note before we begin: PAX is for vertical wardrobe and closet storage. This is not a Billy bookshelf moment , and it is not a media wall. We are building a closet wall that looks intentional, like it was always supposed to be there.
Why PAX works for faux built-ins
PAX frames are tall, straight, and modular. The most common heights are 79 1/8 inches and 92 7/8 inches (always confirm current sizes and availability in your region). That modularity lets you “tile” them across a wall, then treat the whole run like one big piece of millwork.
- Closed storage. Doors make everything feel calmer and more finished than open shelving.
- Customizable interior. KOMPLEMENT inserts let you design around your life, not a generic closet layout.
- Easy to elevate. Because the fronts are simple, trim and hardware do a lot of visual heavy lifting.
Plan first
Step 1: Measure like a cabinetmaker
Measure width in three places (floor, mid-wall, near ceiling). Older homes love to be charmingly uneven. Also measure ceiling height in at least two spots.
Then locate and note:
- Baseboard height and thickness
- Any ceiling slope or crown molding you will keep
- Vents, outlets, or return air grilles
- Door swings and clearance for drawers (very important)
Step 2: Check ceiling clearance
This is the part that saves you from a bad surprise mid-install. You need clearance not only for the frame height, but also for standing the unit up during assembly and placement. Some rooms require assembling the frames upright, in place, because you cannot tilt them up under the ceiling.
Also think about the real life swing space. A PAX wall can look perfect on paper, then feel annoying if a bed or nightstand blocks a door from opening fully.
Step 3: Choose sizes, then design the gaps on purpose
The built-in look comes from two illusions:
- No weird slivers. You do not want a random 1 inch gap at one end that screams “flat-pack.”
- One continuous face. You want the whole run to read as a single unit.
Instead of forcing PAX to fit perfectly (rare), plan for intentional filler spaces at the ends and possibly the top. Those get covered with trim or filler panels so the final result looks tailored.
My rule: If a gap exists, make it symmetrical or make it disappear. Accidental gaps look like mistakes. Designed gaps look like carpentry.
Step 4: Pick your built-in level
- Level 1: Soft built-in (fastest). Fill strips at the sides, caulk, paint touch-ups, upgraded hardware.
- Level 2: Built-in vibe. Add baseboard returns, crown or ceiling trim, scribed fillers for tight edges, paint everything one color.
- Level 3: Full millwork illusion. Face frame across multiple units, continuous toe-kick, and a top soffit or “cap” to the ceiling.
The core hacks
1) End fillers that look like panels
Most walls are not perfectly square, so you rarely want to shove PAX tight to both sides. The fix is a filler strip between PAX and the wall. You can make this from:
- Pre-primed MDF (easy to paint, smooth)
- Plywood with a paint-grade face
- IKEA cover panels if they suit your layout
For a truly custom look, you can scribe the filler to the wall so it follows the wall’s tiny waves and disappears. That is the secret sauce that makes it feel built-in, even in a slightly wonky old apartment.

2) Raise the units for baseboard clearance
This is the make-or-break detail a lot of people miss. The standard PAX bottom plinth area is only about 2 3/4 inches tall. Many room baseboards are 3 1/4 to 5 inches tall. If you run standard baseboard across the front without raising the wardrobes, your doors can hit the baseboard and not open properly.
The clean fix is to build a simple base platform (often 2x4 framing with a plywood top) under the entire run. You are basically giving your wardrobes a stage so your room baseboard can continue across the front without interfering with the doors.
- Build the platform level, then shim as needed.
- Make it continuous across the whole run so everything aligns.
- Plan the height based on your baseboard, door swing, and the look you want.
Bonus: a platform also helps when floors are not level, because you can level once, then set all units on the same plane.
3) Hide the top gap with a soffit or crown
If your PAX does not hit the ceiling, you have two main choices:
- Ceiling trim approach: Add crown molding and a top rail so the eye reads “finished edge” instead of “floating box.” This works best when the gap is small.
- Soffit approach: Build a shallow box above the wardrobes and trim it out. This is extra work, but if the gap is larger, a soffit looks more intentional and more like true built-in cabinetry.
What matters most is continuity. Use the same molding profile across the whole run and keep lines crisp. Caulk and paint are what turn trim into “it came with the house.”
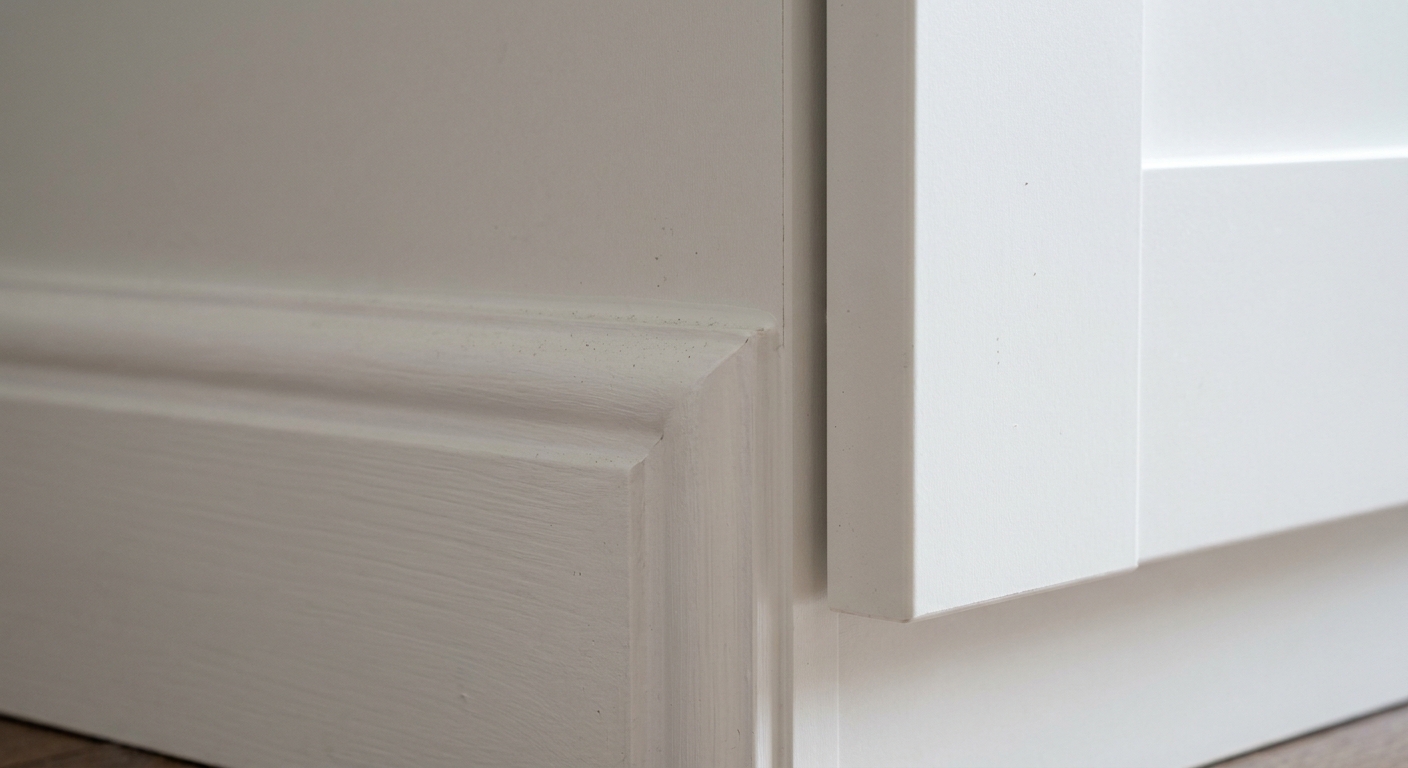
4) Baseboard returns
This is my favorite trick because it is small but instantly convincing. Instead of stopping your room’s baseboard at the edge of the wardrobe run, you “return” it into the built-in so it looks integrated.
Two common methods:
- Notch around baseboards: Remove baseboard where PAX will sit so frames can go closer to the wall. This is clean, but it is a bigger commitment.
- Build out and return: Keep baseboard, then add a base trim piece across the front of the PAX run (often over that platform) and return the existing baseboard into it.
5) Fill strips between units (optional)
If you want the look of a face-framed closet system, add narrow vertical trim pieces between PAX units. This can:
- Hide the slight seam where frames meet
- Create a more furniture-maker rhythm across a long wall
- Help doors read as one cohesive installation
Keep the thickness consistent. Even a simple 1x2 (or ripped-down MDF) painted to match can do the job.
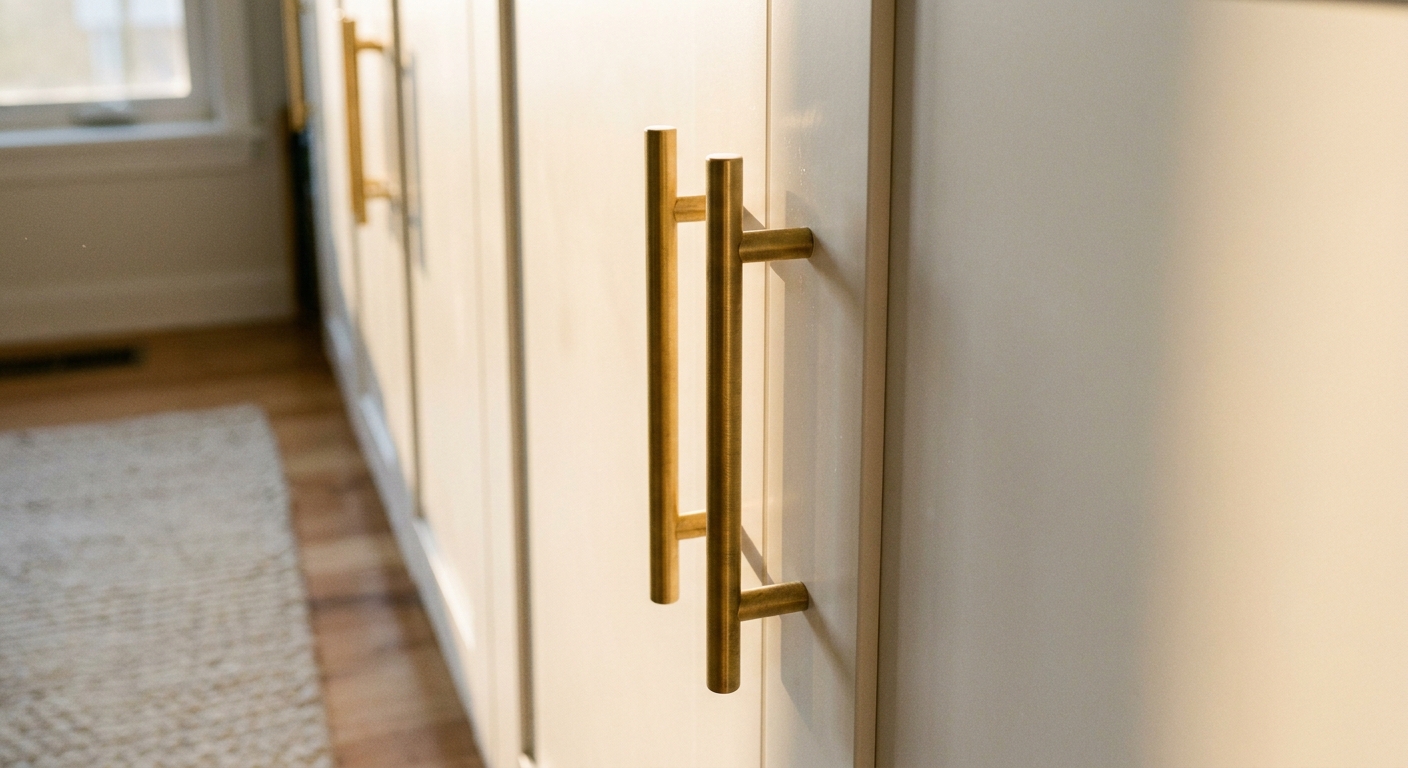
Hardware and doors
If trim is the bones of the built-in look, hardware is the jewelry. Swap the default pulls for something with a little personality and weight.
Easy upgrades
- Long, simple bar pulls for a modern built-in vibe
- Classic knobs for a softer, vintage-leaning feel
- Brass or bronze for warmth, especially with creamy paint
- Soft-close hinges if your door choice does not include them
Door choices matter too. Shaker-style or simple panel doors tend to look more architectural than ultra-minimal slabs, but both can work. The biggest trick is consistency. Use the same door style across the full run.
Anchoring and safety
PAX wardrobes are tall and can tip, especially with drawers open. For safety, secure every PAX unit to the wall . This is not optional. Follow the current IKEA assembly instructions for your exact frames and hardware, and do not skip the anchoring step.
How to anchor
Use IKEA’s included wall-anchoring hardware (or the specified anti-tip solution for your setup) and fasten into studs whenever possible. If you cannot hit studs, use heavy-duty anchors rated for your wall type and load, but understand that studs are the gold standard.
If you are unsure, it is worth getting a handyman or carpenter for one hour. This is the part where “budget DIY” should still feel like “responsible adult.”
Renter limits
If you rent, read your lease and think like your future security deposit. Many landlords consider built-ins a permanent alteration, even if you did it beautifully.
Common renter no’s
- Removing baseboards and not reinstalling them
- Attaching crown molding to the ceiling or walls with lots of nail holes
- Building a nailed-in soffit or face frame that cannot be removed cleanly
- Hardwiring lighting without permission
Renter-friendly ways to get the look
- Use minimal nail holes: Small brads into trim are easier to patch than chunky construction screws all over the wall.
- Skip ceiling crown: Do a tidy top filler and stop just below the ceiling for a polished “semi built-in” look.
- Build trim that attaches to the units: Wherever possible, attach trim to the PAX frames so wall patching is minimal. Note: the wardrobes still must be anchored to the wall for safety.
- Battery puck lights: Stick-on closet lighting gives you the boutique glow without electrical work.
My honest take: In a rental, prioritize a clean, symmetrical run with great hardware. You will be amazed how custom it can feel without turning the wall into a construction zone.
Step-by-step flow
- Design your layout. Choose frame widths and interior inserts first, then doors.
- Confirm ceiling and assembly clearance. Make sure you can stand frames up, or plan to assemble upright in place.
- Build a level base platform. Frame with 2x4s, top with plywood, then shim until level.
- Clear and level the floor line. Recheck level across the wall and note any dips.
- Assemble frames and position. Place units, clamp together, and align faces flush.
- Join units together. Use cabinet screws or the connector method appropriate for your frames. Predrill where needed, and keep everything aligned while you fasten.
- Anchor every unit to the wall. Find studs, anchor per IKEA instructions, and recheck plumb.
- Add side fillers. Scribe and install to close gaps at the ends.
- Add top treatment. Crown or soffit, then caulk for seamless lines.
- Finish the base. Add baseboard returns and trim across the platform for an integrated toe-kick look.
- Caulk, fill, sand. The unglamorous part that makes it look expensive.
- Paint and hardware. Match sheen and color thoughtfully . Install pulls evenly.
Shopping list
Here is a simple starter list. Adjust for your trim style and whether you are doing a soffit.
PAX basics
- PAX frames (measure your wall first and confirm local sizing)
- KOMPLEMENT interiors (shelves, drawers, rails)
- Doors and hinges
- Optional: lighting (battery puck lights or IKEA closet lighting if permitted)
Platform, trim, and fillers
- 2x4s and plywood for a base platform
- Pre-primed MDF or paint-grade plywood for side fillers
- 1x2 or 1x3 trim boards for face details (optional)
- Crown molding or a simple top trim profile
- Baseboard matching your existing profile (for returns) or flat stock to fake a continuous base
Fasteners and finish
- Wood screws and or cabinet screws for joining units
- IKEA anchoring hardware and any specified brackets
- Paintable caulk
- Wood filler or spackle
- Primer and paint (match existing trim sheen if blending)
- Hardware: pulls or knobs, plus a jig for consistent drilling
Tools
- Stud finder
- Level (longer is better)
- Shims
- Drill and bits
- Miter saw or miter box for trim cuts
- Caulk gun
- Clamps (helpful for aligning frames)
Finish details
Once the construction dust settles, the last 10 percent is pure magic.
- Paint for continuity. Painting trim and fillers to match the doors makes the whole wall read as one unit.
- Prep IKEA surfaces if painting. Light scuff-sanding and a bonding primer (matched to your door finish) help paint stick like it means it.
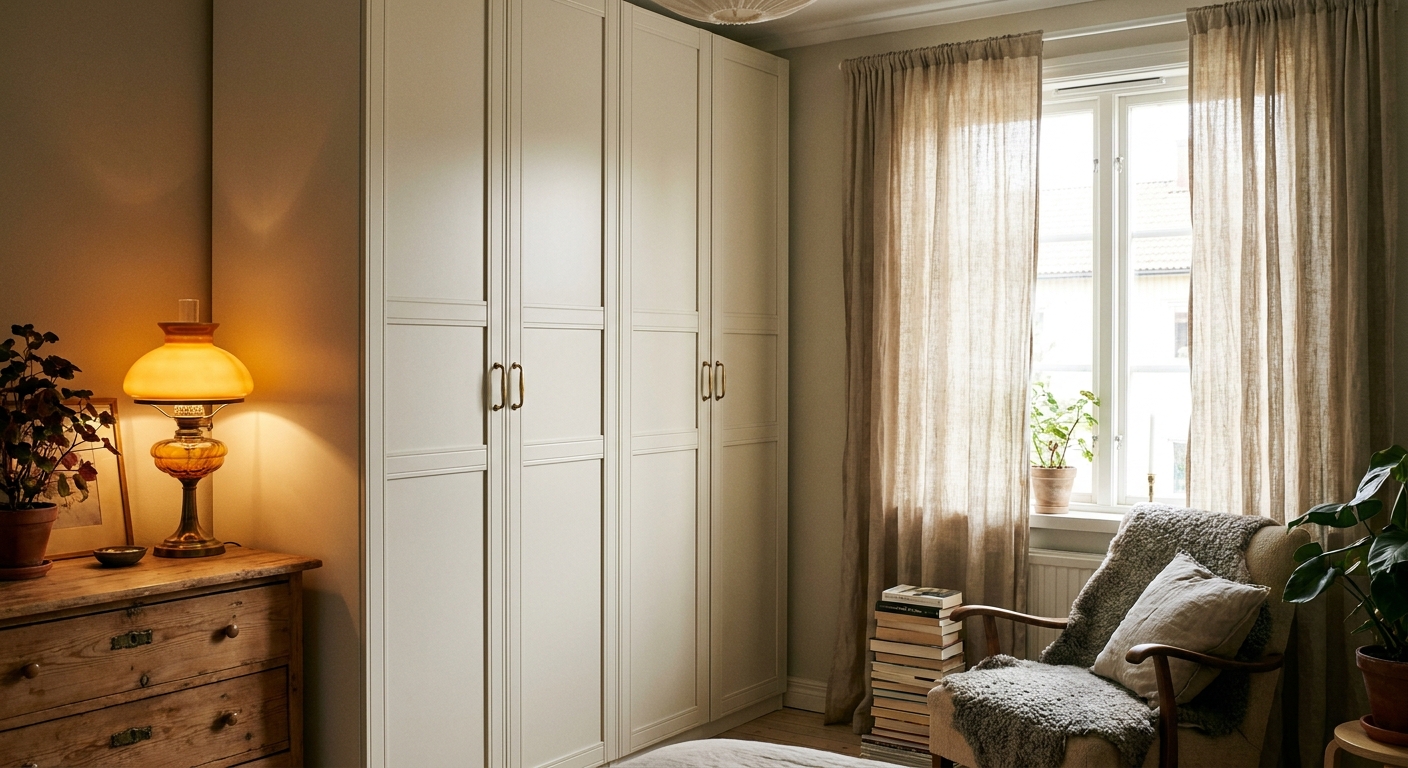
- Match nearby trim. If your room has warm white trim, do not introduce a stark cool white built-in. Harmony matters.
- Add a soft light source. A warm lamp nearby, or discreet closet lighting, makes it feel boutique instead of big-box.
- Keep the surrounding wall calm. Let the built-in be the architecture, then layer textiles and art elsewhere.
Troubleshooting
The run looks wavy across the front
Check for floor level and use shims. Clamp frames together before fastening so the faces line up. If you built a platform, level that first and the rest gets easier.
I have an awkward 2 inch gap at one end
Turn it into a real filler panel and scribe it to the wall. Paint it to match the built-in.
Doors rub or do not close cleanly
Recheck that frames are plumb, then adjust hinges. Tiny hinge tweaks make a big difference.
I want it to look more expensive without more carpentry
Upgrade hardware, add a top trim piece, and paint for a unified finish. Those three together are a surprisingly powerful trio.
The takeaway
A PAX built-in is really just a few honest steps repeated with care: measure, plan your clearances, level, align, fill the gaps, then trim and paint like you mean it. The goal is not to fool anyone into thinking you spent custom-closet money. It is to create a home that feels intentional and soothing, with storage that works hard and looks like it belongs.
If you try this, take a photo in warm evening light when the room is quiet. Built-ins always look their best when they are doing what they were made to do: making life feel a little more settled.