IKEA Kallax Hacks That Look Built-In
Clara Townsend
Clara Townsend is an interior stylist, vintage furniture enthusiast, and the creative voice behind Velvet Abode. With over a decade of experience transforming both cramped city apartments and sprawling fixer-uppers, she believes that a beautiful home is built on personal stories rather than massive budgets. When she isn't hunting for the perfect brass sconce at a local flea market, she can usually be found rearranging her living room for the third time this month.
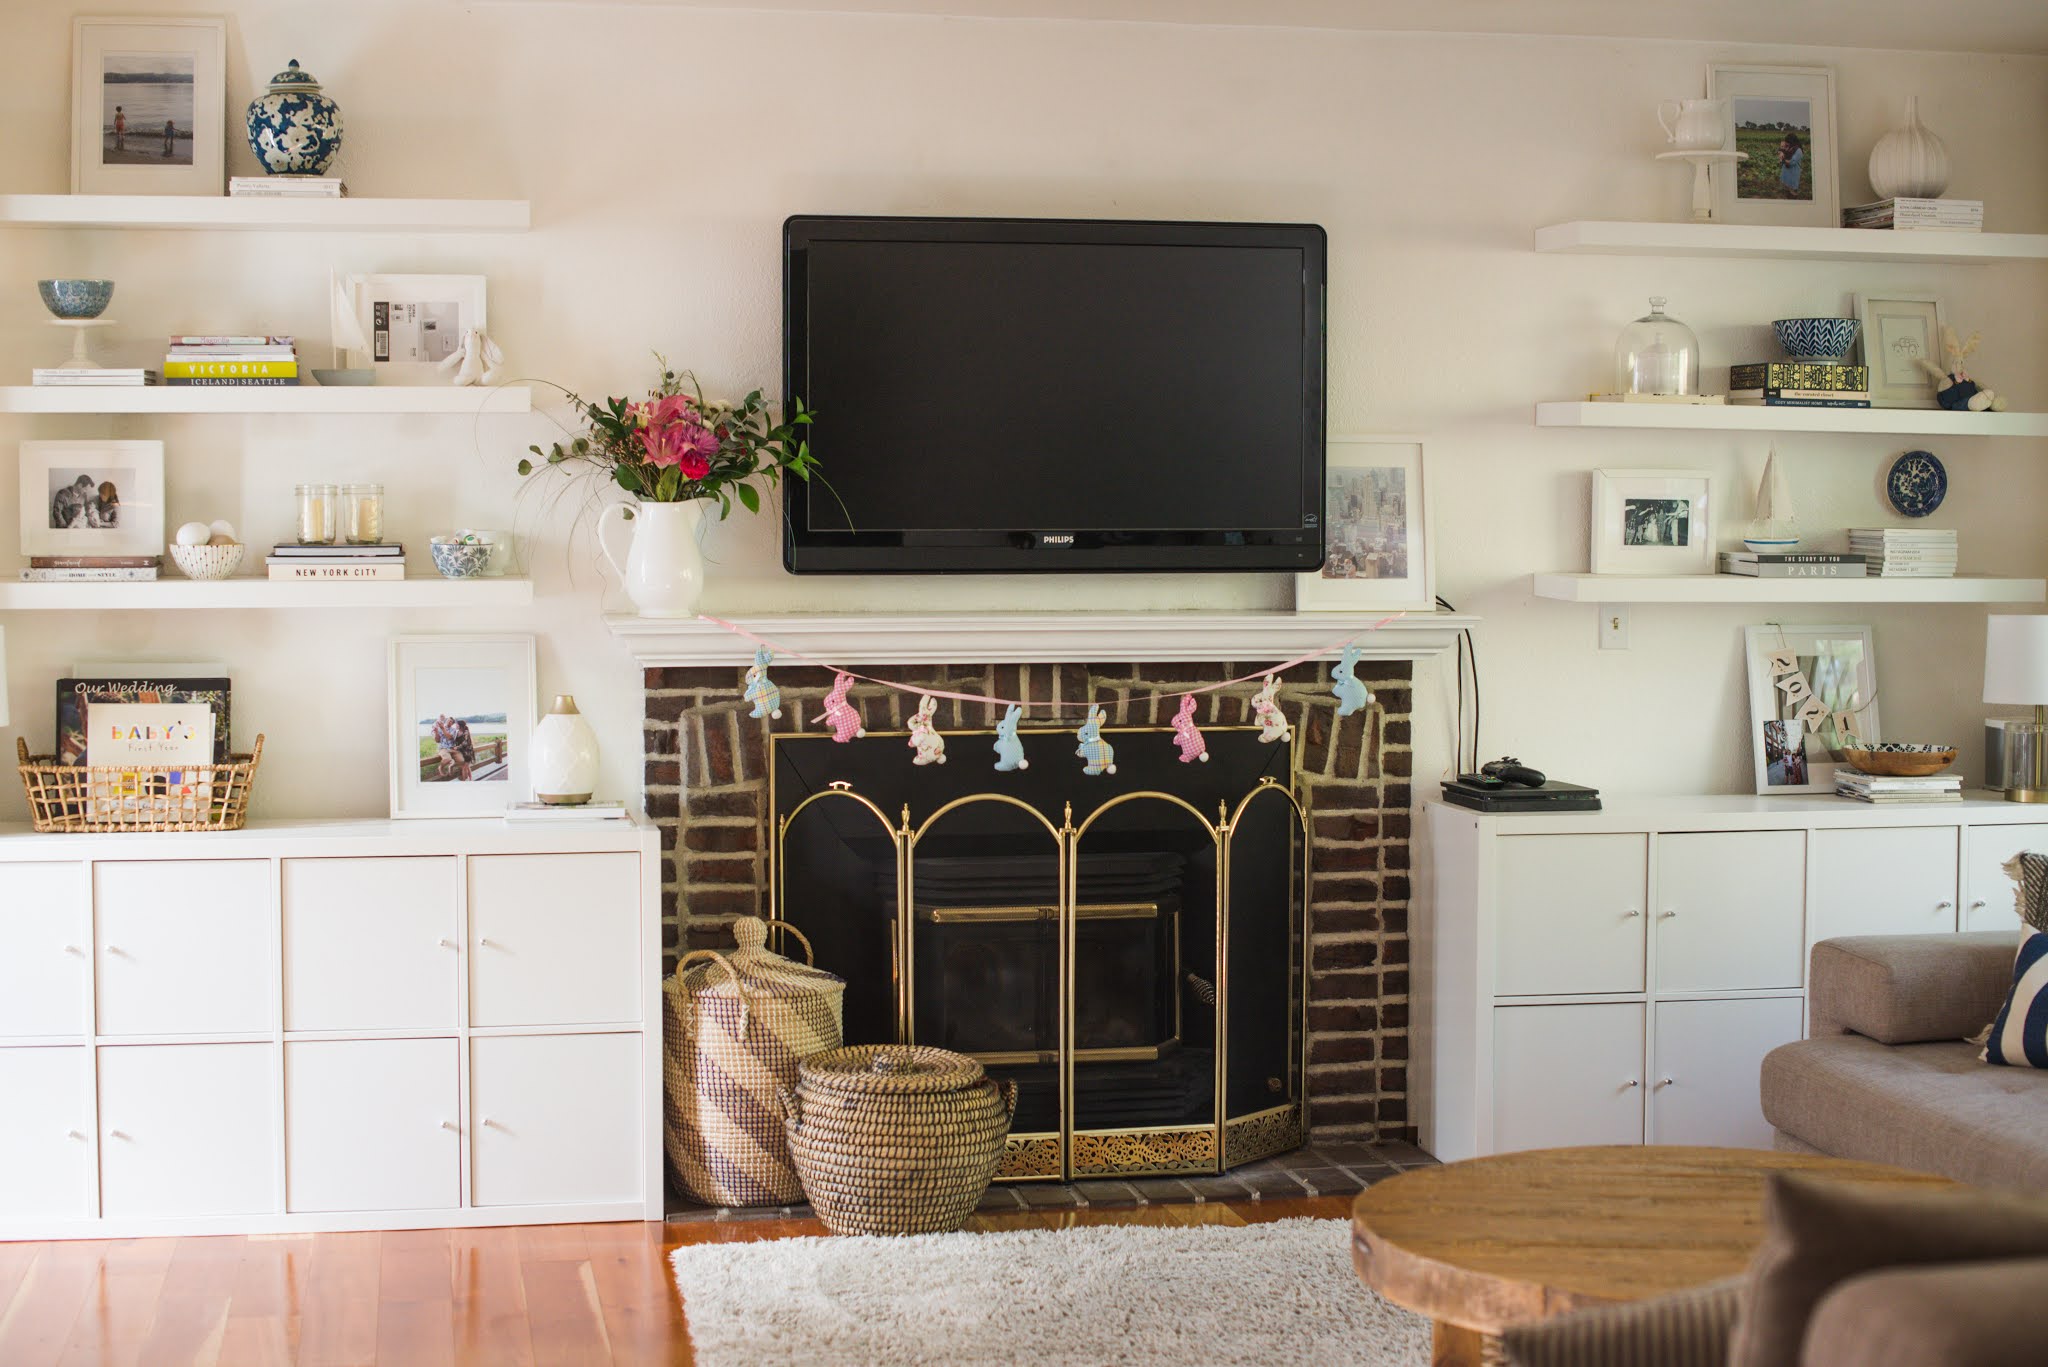
Kallax has a funny reputation. It is either the humble workhorse of first apartments or the backbone of the chicest studio I have ever styled. The difference is never the shelf itself. It is the way you finish it.
Below are my favorite IKEA Kallax shelving hacks for getting that built-in, high-end look without turning your living room into a full construction zone. Think: clean bases, intentional trim, confident anchoring, and styling that looks collected over time.
Quick safety + planning
Before we talk trim and paint: treat Kallax like real furniture. Built-ins look expensive because they feel solid, square, and safe.
- Follow IKEA’s manual for your exact unit and orientation. Some configurations are designed for vertical or horizontal use. Check before you flip anything.
- Anchor to the wall. Use studs when you can, and the right anchors for your wall type (drywall, plaster, masonry).
- Know your load. Records, books, and TVs are heavy. Verify IKEA load limits for your specific size and keep heavy items low.
- Wear basic PPE. Eye protection for drilling, a mask for sanding, and hearing protection if you are cutting trim.
Tool cheat sheet: stud finder, level, drill/driver, clamps, tape measure, pencil, shims, finish nails or brad nailer, caulk gun, sanding block.
Start with the built-in checklist
If you do nothing else, do these five things. This is the difference between “flat-pack shelf” and “custom millwork energy.”
- Make it flush: reduce gaps at the top and sides with filler strips and trim.
- Ground it: add a base or legs so it feels like furniture, not a cube grid floating on the floor.
- Anchor it: the safest built-ins are the prettiest built-ins because they are stable and square.
- Unify the finish: paint or wrap so the Kallax reads as one intentional piece.
- Style in layers: add depth, negative space, and a few “heavy” objects so it feels expensive.
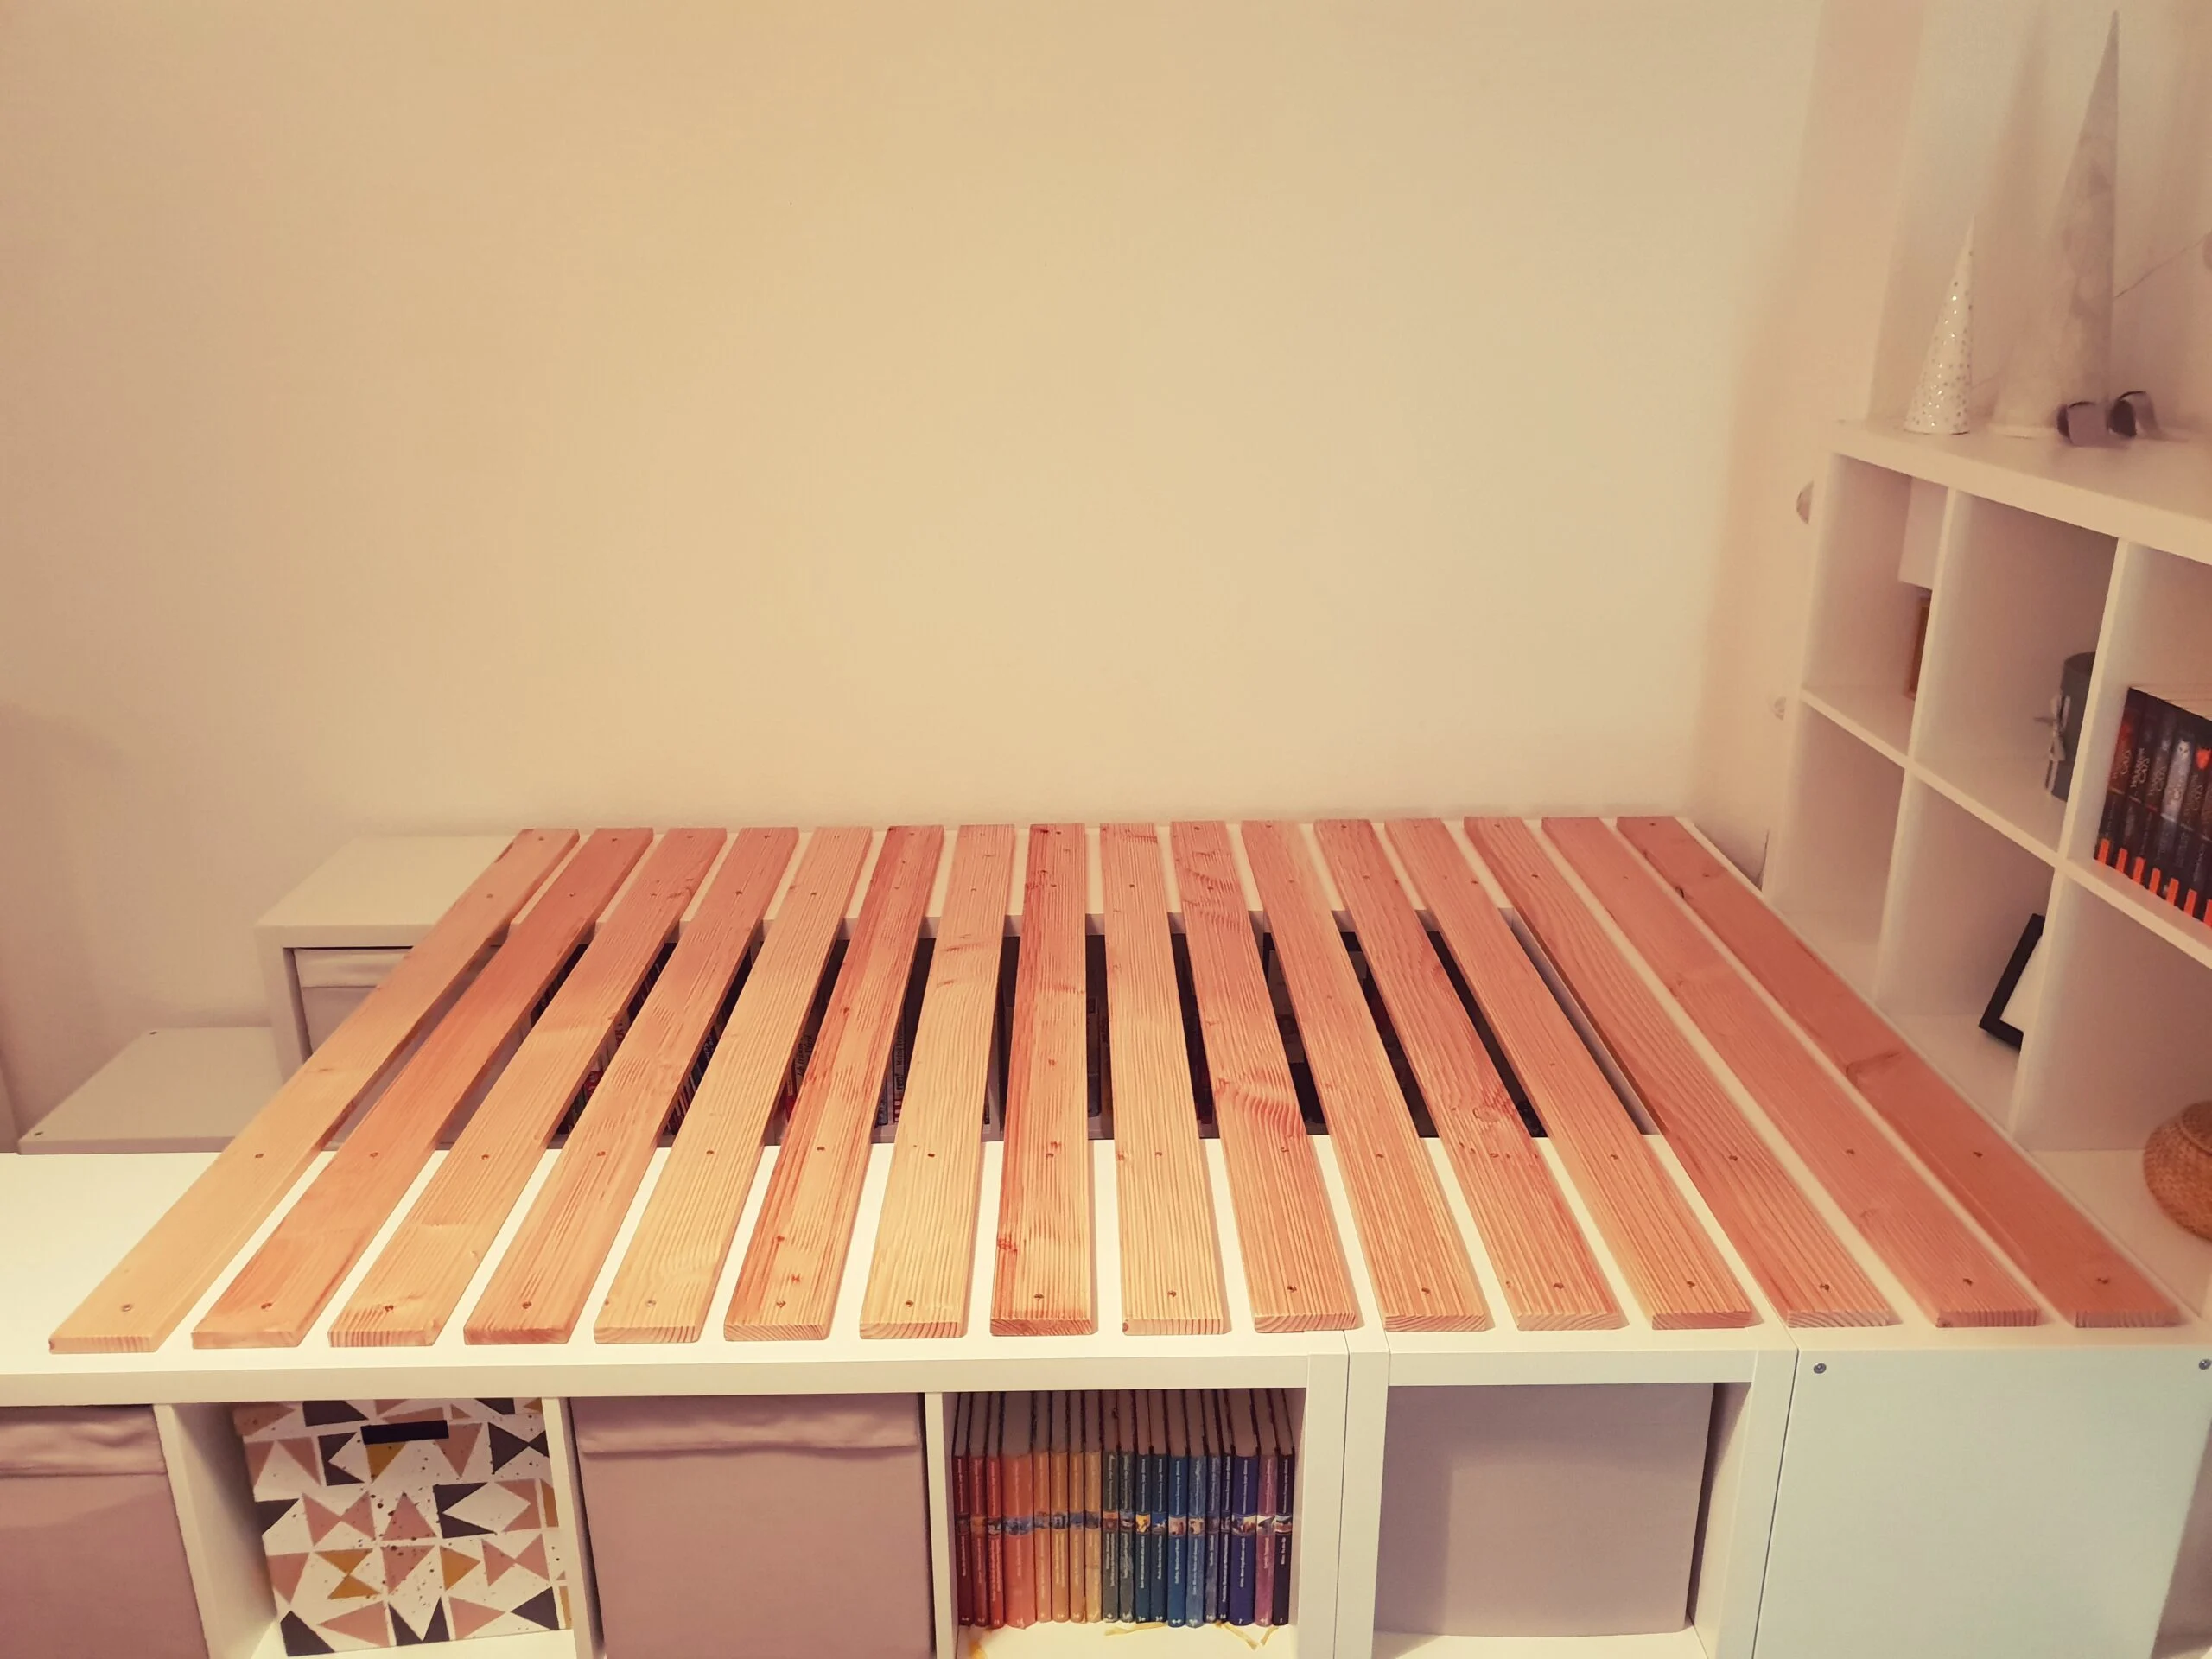
Hack 1: Build a simple base
A continuous base is my number one built-in shortcut. It makes multiple Kallax units look like one long, custom installation.
What you are building
A shallow platform that is slightly smaller than the footprint of your Kallax run, so the shelf overhangs just a touch. Aim for about 1/8 to 1/4 inch. That tiny shadow line is what makes it feel like furniture.
Materials
- 2x4s or 1x4s for a simple frame
- Plywood or MDF top (optional, but helps level and distribute weight)
- Shims for leveling on uneven floors
- Construction adhesive and screws
- Baseboard or a flat toe-kick panel to finish the front
Steps
- Measure your total run. If you are using two or three Kallax units, measure them together including any planned spacing.
- Build the frame. Make a rectangle and add cross supports every 16 to 24 inches. For heavy loads (records, lots of books), use closer spacing, about every 16 inches.
- Level it. Shim until the frame is level front-to-back and side-to-side.
- Stop sliding. Secure the base to the wall or floor where appropriate. Simple L-brackets into studs works well. At minimum, mechanically attach the Kallax to the base so the whole assembly acts as one unit.
- Set the Kallax on top. If you want extra rigidity, fasten through the Kallax bottom into the platform. Pre-drill and keep fasteners short enough to avoid popping through.
- Finish the face. Add a toe kick, baseboard, or flat trim piece and caulk the seams.
Stylist note: If your home has tall baseboards, repeat that same baseboard profile on the Kallax base. Matching existing trim is one of those quiet “money” details.
Baseboard reality: If the unit needs to sit tight to the wall, you have three options: remove the baseboard behind it, build out with spacers so it clears the baseboard, or scribe a filler panel to bridge the gap cleanly.
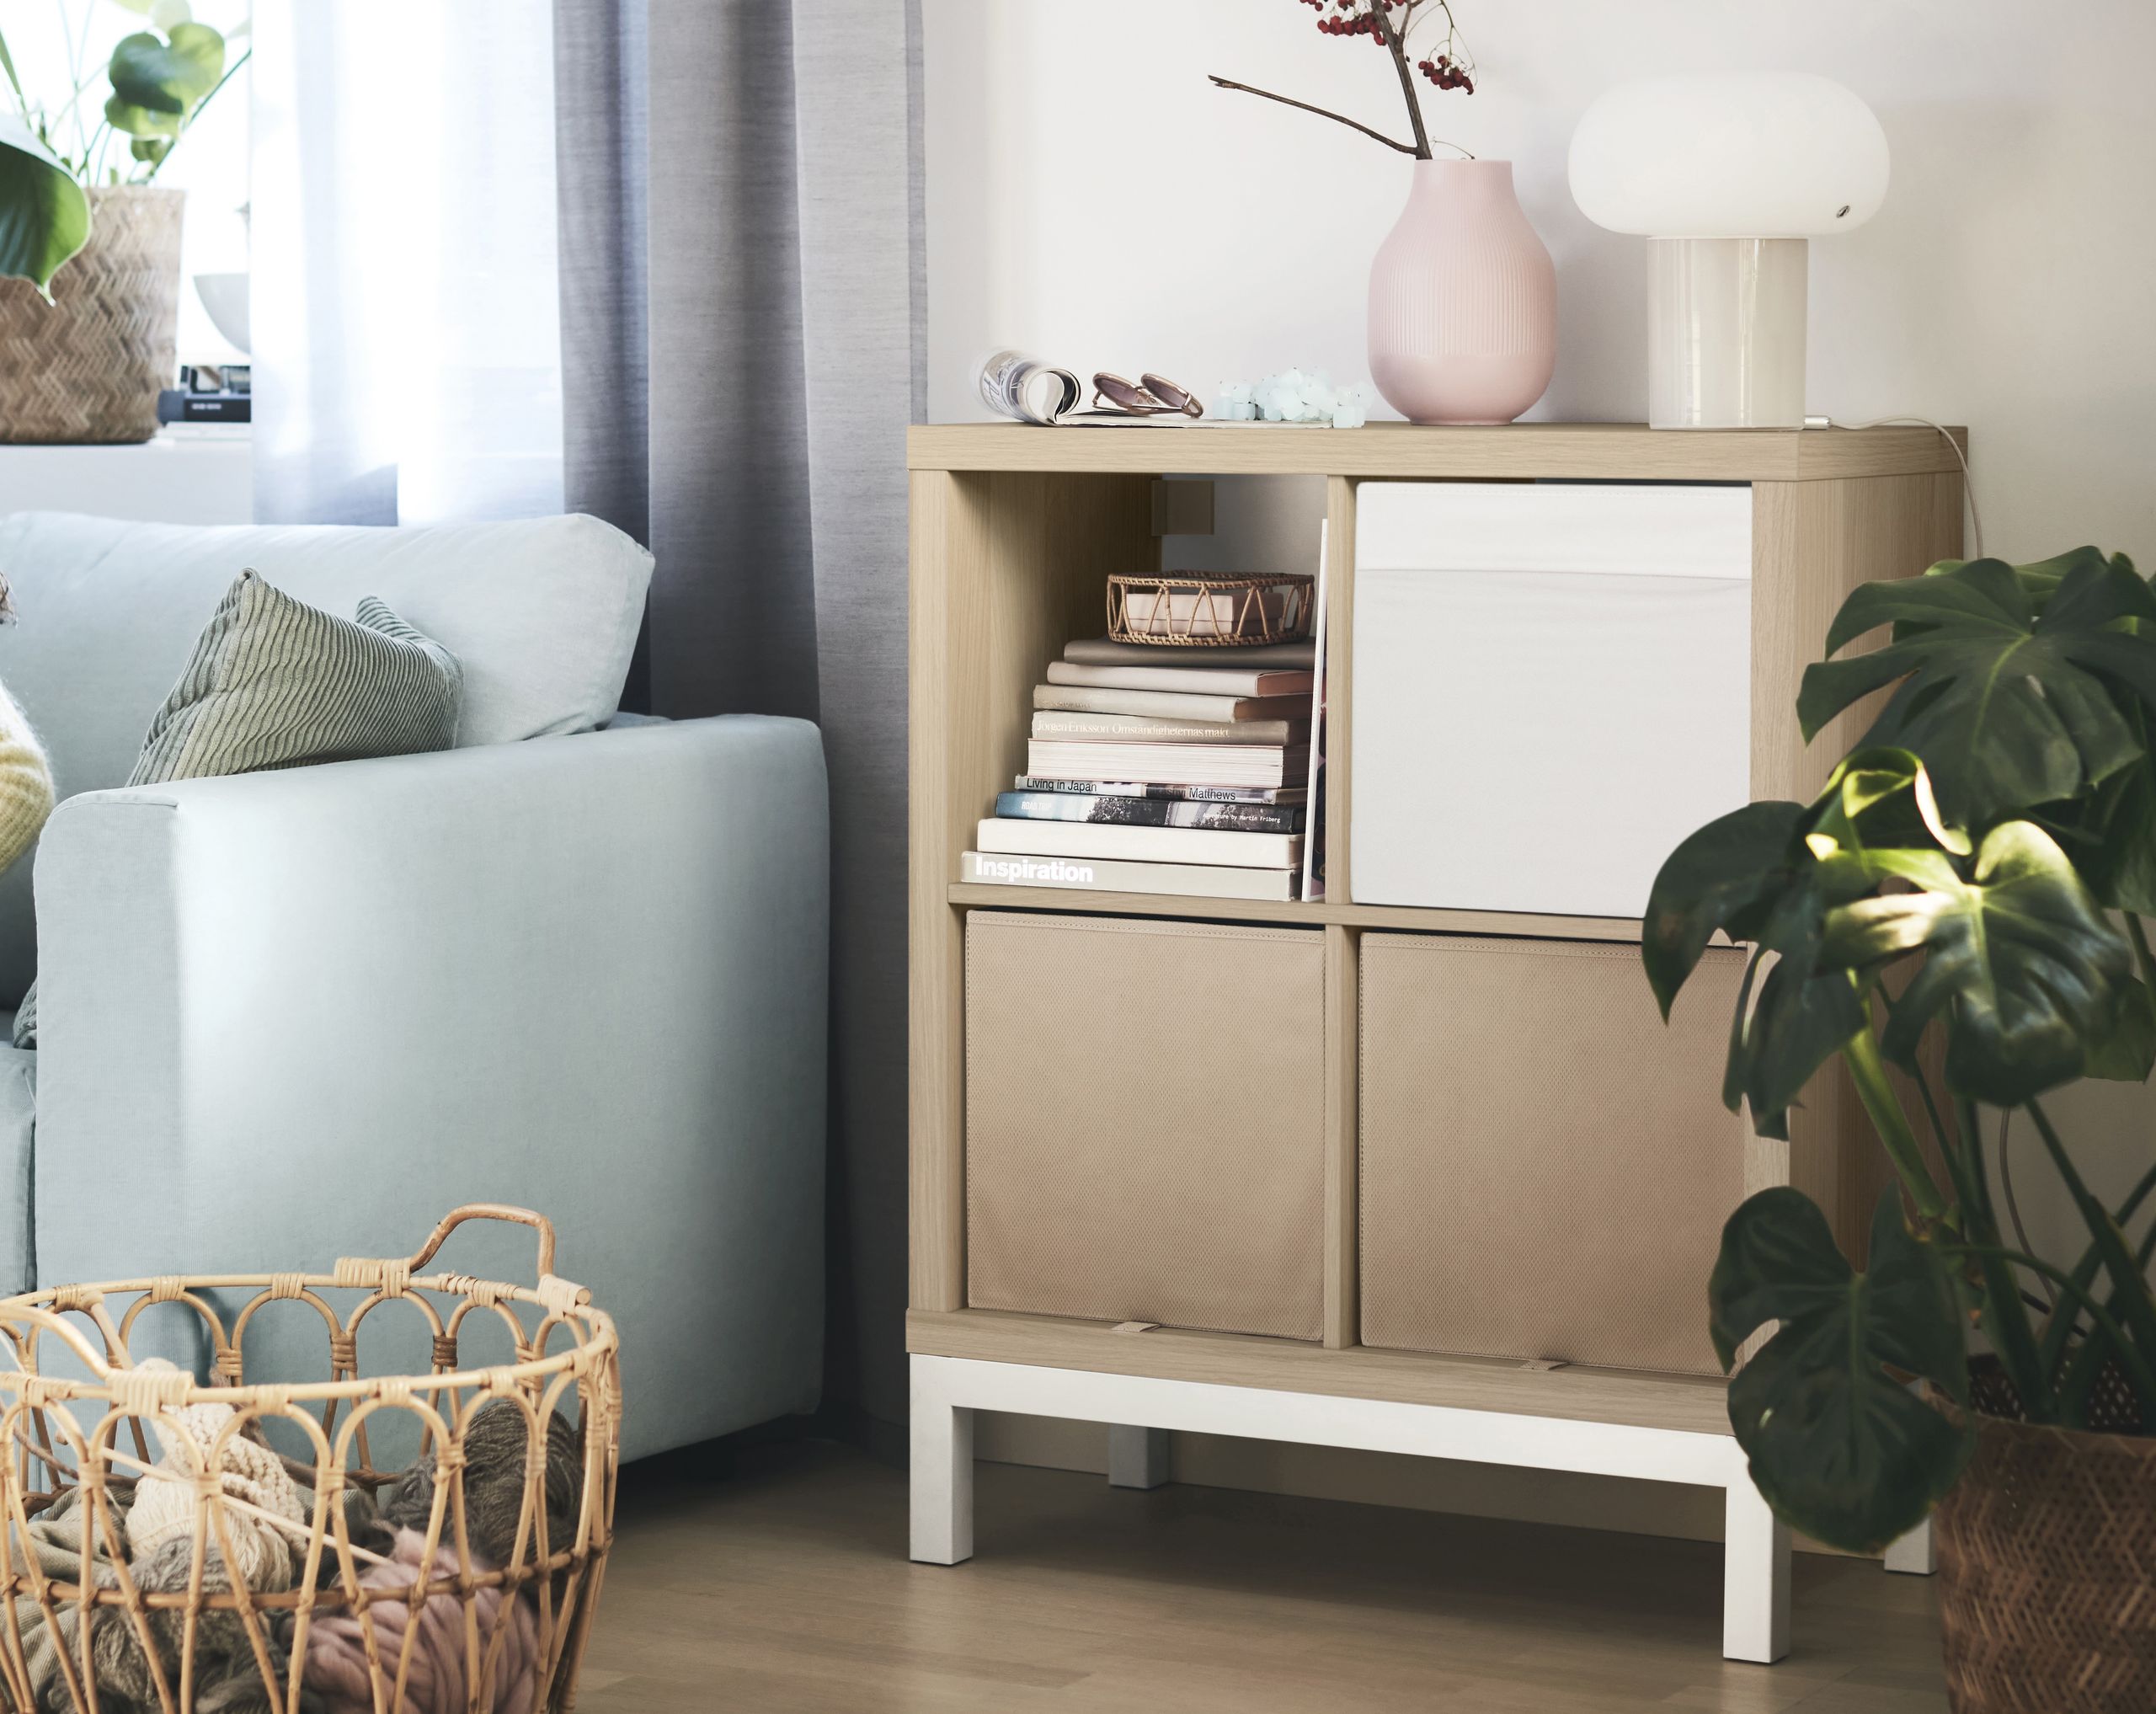
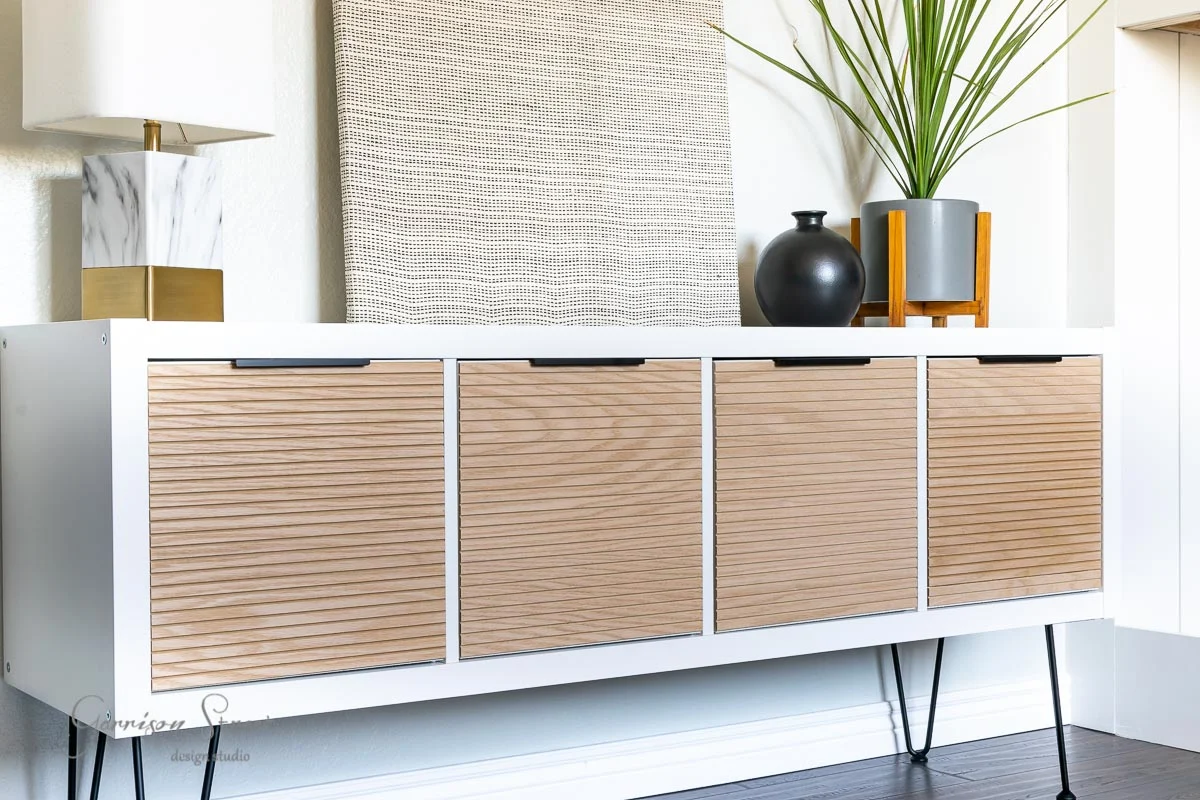
Hack 2: Add legs
If you want Kallax to feel more like a credenza than a cube organizer, legs are your friend. They also help in small spaces because visible floor area makes a room feel bigger.
Leg styles that look high-end
- Tapered wood legs: very mid-century, very forgiving.
- Chunky plinth legs: modern and architectural.
- Metal pins: airy and minimal, best when your styling is disciplined.
How to install legs safely
Kallax panels can be lightweight in places (some versions use honeycomb-style construction in certain areas). Translation: do not rely on a couple of short screws into an “unknown” spot and call it good.
- Use a mounting plate designed for hollow or lightweight furniture, or
- Add a continuous plywood reinforcement panel underneath, then mount legs into that, or
- Build a low base frame and mount legs to the frame instead.
If the unit will hold records, lots of books, or a TV, choose a base frame or reinforcement panel. Heavy loads deserve a sturdier foundation, and you will feel the difference every time you open a drawer or bump the corner.
Hack 3: Trim the edges
Trim is how you erase the IKEA outline. The goal is to make the outer frame look thicker and more intentional, like a carpenter built it to fit your wall.
Two easy trim routes
- Flat stock frame: 1x2 or 1x3 boards around the outside for a clean, modern look.
- Picture-frame trim: a slightly more detailed profile for traditional or vintage-leaning rooms.
Tips so it looks seamless
- Use wood filler on nail holes and seams, then sand.
- Caulk every gap where trim meets the unit or wall.
- Paint everything together in the same sheen, usually satin or matte.
- Keep reveals consistent. Even a 1/8-inch wobble reads as DIY.
My rule: if you can feel a seam with your fingertip, you will see it in daylight. Take five extra minutes with filler and sanding. It pays you back every time the sun hits the wall.
Hack 4: Combine units
This is the crowd-pleaser. A full wall of Kallax can look shockingly custom when you treat it like cabinetry instead of separate boxes.
The basic formula
- Base: one continuous platform across the whole run.
- Units: align and clamp, then fasten units together through the side panels.
- Fillers: slim wood strips to close gaps at the sides and between the run and the wall.
- Top trim: a single long board across the top to unify everything.
- Paint: one color over shelf, trim, and fillers.
Make the join clean
- Clamp first. Clamping keeps faces flush while you fasten.
- Pre-drill. It reduces splitting and helps with clean alignment.
- Use the right screws. Choose a length that will not blow out the far side. Avoid placing screws where the panel may be lightweight. When in doubt, fasten near solid edges and follow manufacturer guidance.
Spacing and proportion
- Leave at least 1 to 2 inches from the ceiling if you are not adding crown molding.
- If you are adding crown, plan for the molding height so it does not feel squished.
- Center the whole composition on a focal point if possible, like a sofa, a desk, or a TV wall.
Where fillers go
- Side fillers: between the outer unit and the wall to eliminate the vertical gap.
- Back scribe (optional): if the wall bows, use a scribed filler strip so the front stays straight and the gap disappears.
- Top filler: if you have a small gap under crown or ceiling trim, close it with a top strip before you caulk and paint.
Hack 5: Anchor cleanly
Built-ins feel expensive partly because they feel solid. No wobble, no tipping risk, no weird gaps where the shelf leans away from the wall.
Anchoring basics
- Find studs and anchor there whenever possible.
- Use IKEA anti-tip hardware according to the manual for your exact unit and orientation, then upgrade with sturdier brackets if your setup is heavy.
- Match anchors to your wall. Drywall, plaster, and masonry all need different fasteners.
- Shim behind the unit if the wall bows so the face stays straight.
- For a true built-in look, hide brackets behind a top valance or inside upper trim areas.
Important: If you are stacking Kallax vertically or using it in a kid room, anchoring is non-negotiable. Style should never come at the expense of safety.
Hack 6: Paint it well
Paint is the fastest way to make Kallax look less like laminate furniture and more like cabinetry. The key is prep. Always prep.
Prep steps that matter
- Clean: degrease with a gentle cleaner, then rinse and dry.
- Scuff sand: a light sand helps primer grip.
- Prime: use a bonding primer made for slick surfaces.
- Paint: cabinet-grade enamel gives a tougher finish.
Two notes that save heartbreak
- Surface varies. Kallax finishes can differ (foil or laminate). Adhesion depends heavily on choosing a primer compatible with your surface. Check the primer label and do a small test patch if you are unsure.
- Cure time matters. Dry is not cured. Be gentle for a few days, and follow your paint’s cure guidance before loading heavy bins or stacking objects.
Application tips for a smoother finish
- Use a high-density foam roller for a smoother cabinet look.
- Do light sanding between coats once fully dry to knock down dust nibs.
- If you spray, keep coats thin and even. The goal is smooth, not thick.
Finish choices
- Matte: velvety and modern, but shows scuffs more easily.
- Satin: my favorite for most homes, wipeable and still soft-looking.
- Semi-gloss: very durable, more kitchen-cabinet vibes.
Hack 7: Swap hardware
Kallax does not come with fancy doors and drawers out of the box, but many people add inserts. This is where hardware can do a lot of visual heavy lifting.
High-impact, low-cost upgrades
- Swap basic knobs for solid brass, aged bronze, or matte black pulls.
- Use backplates behind knobs if the insert material feels thin.
- Choose one hardware finish across the whole run for a built-in look.
My favorite looks-custom trick
Use longer pulls than you think on drawers. A generous pull reads more like cabinetry and less like flat-pack.
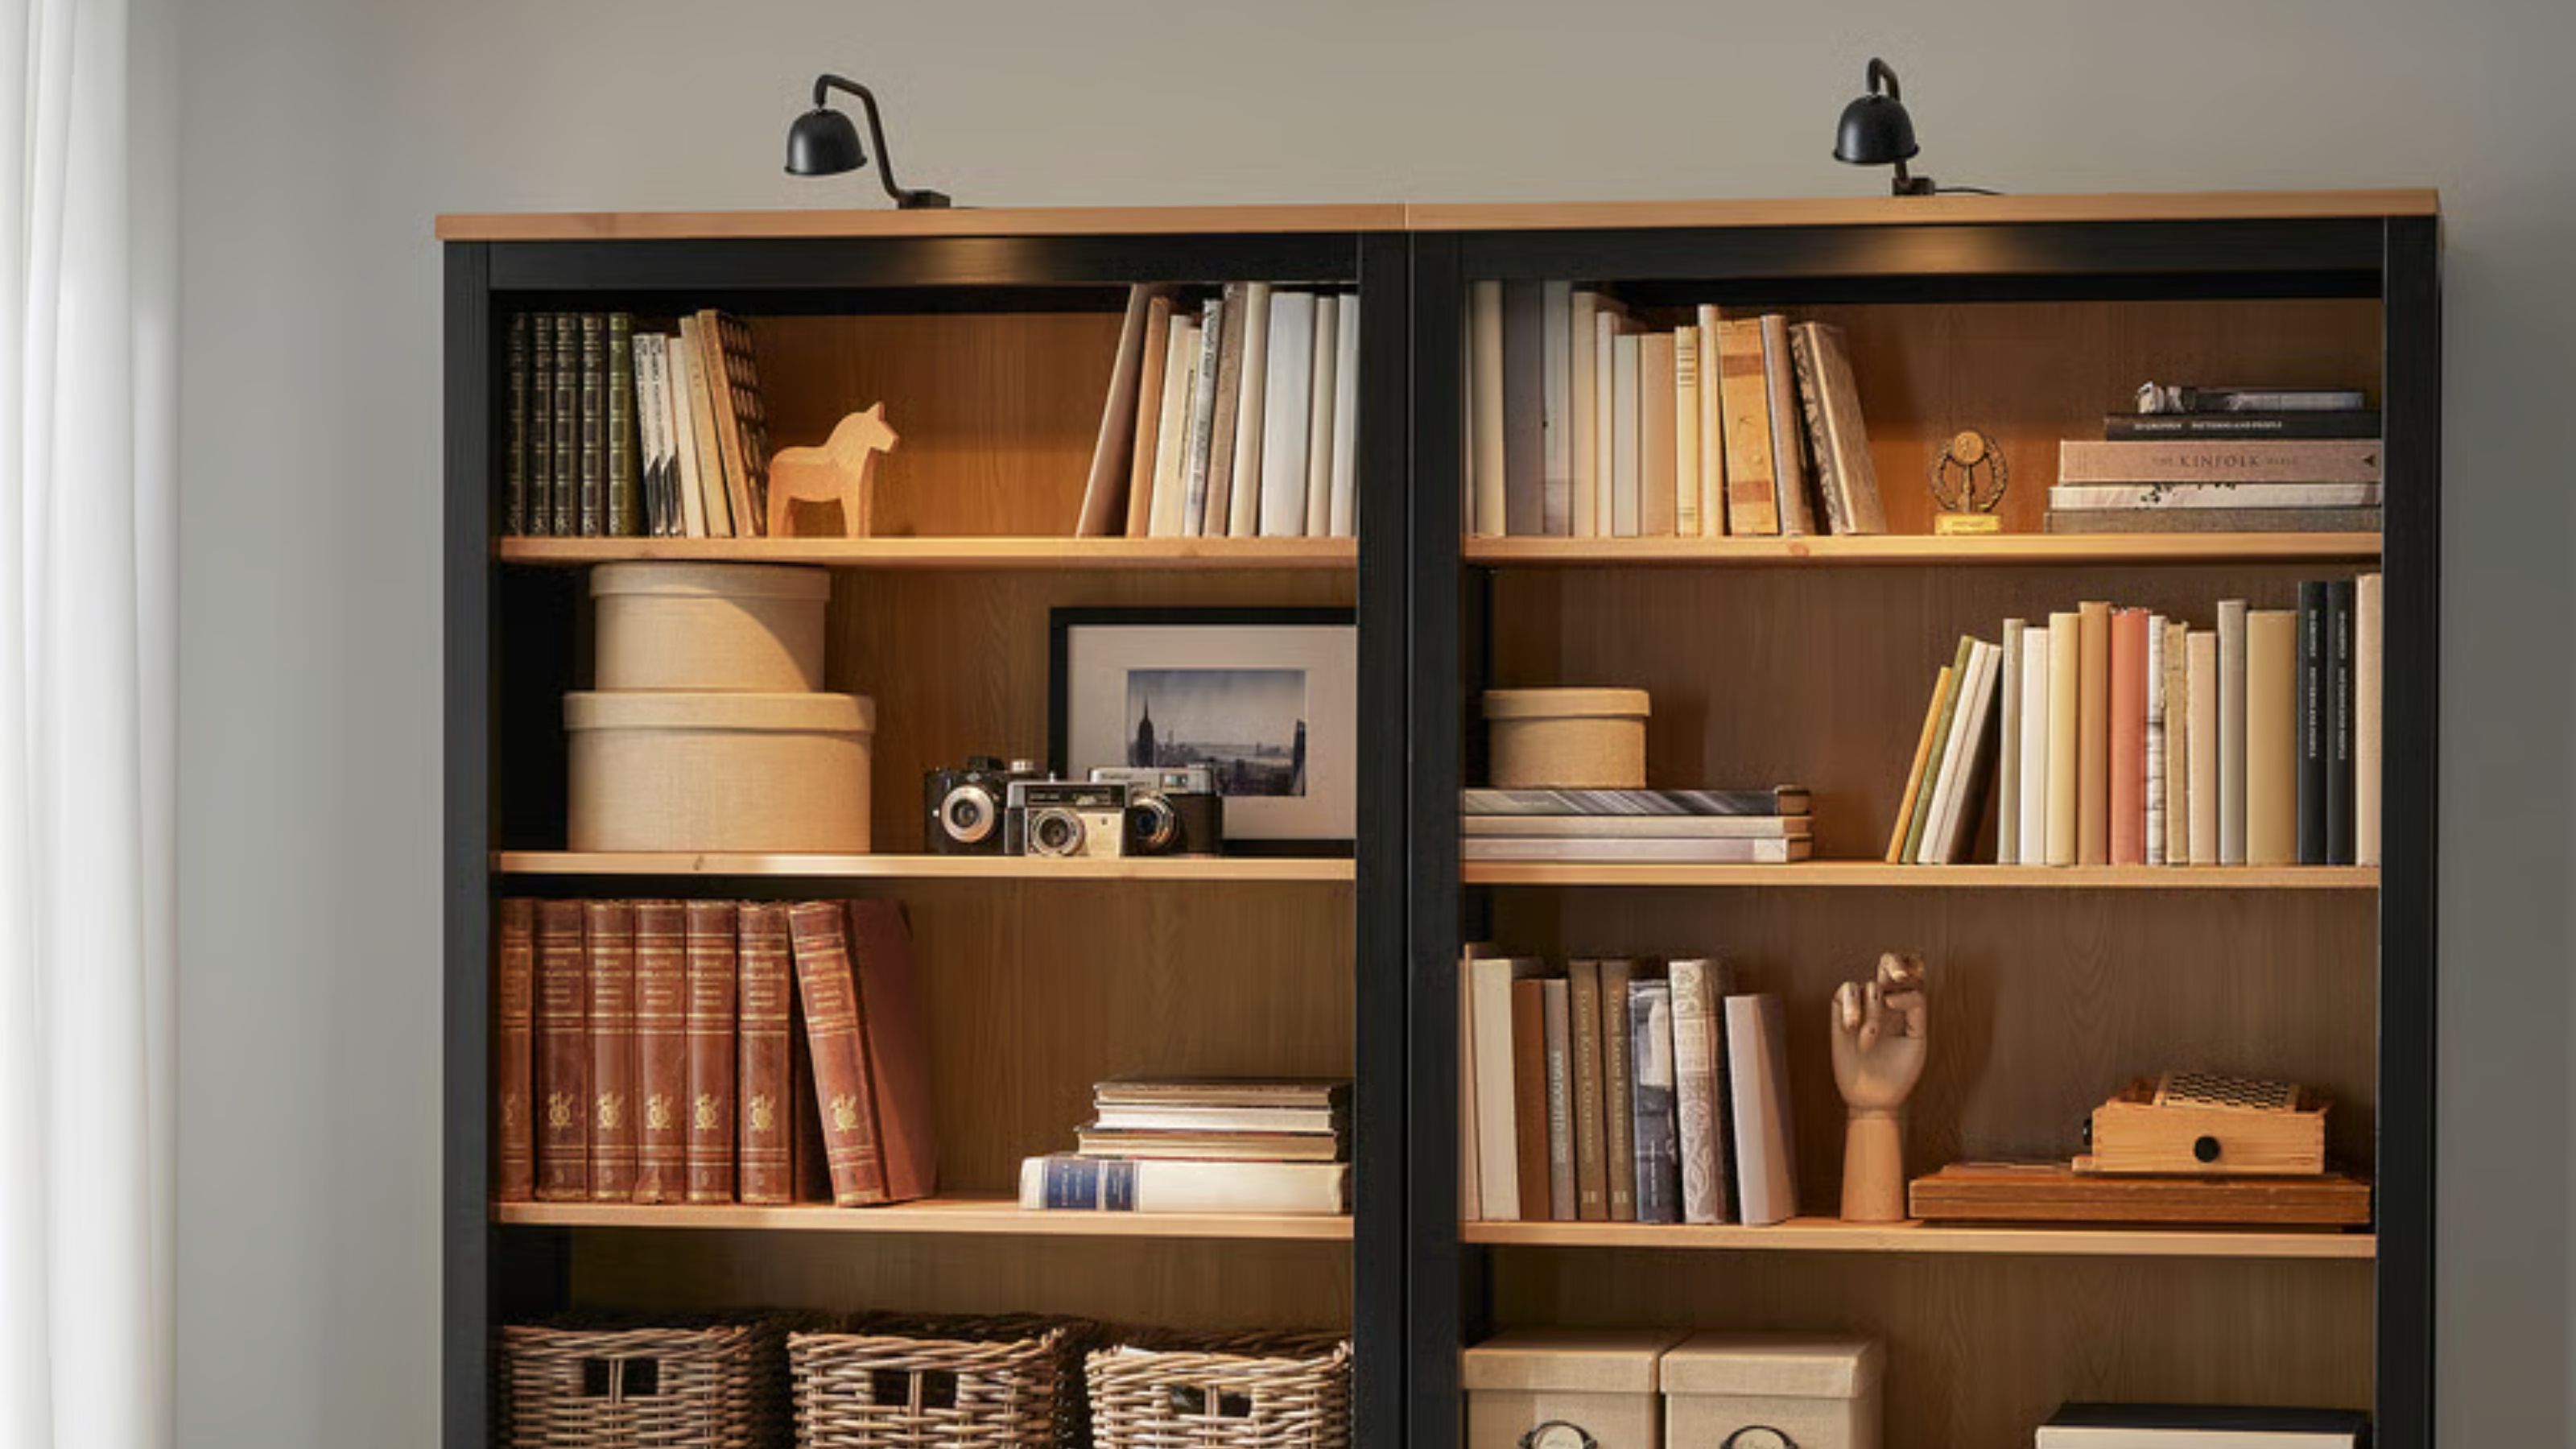
Hack 8: Add texture
Open grids are great, but too much visual noise can make a room feel busy. A mix of closed and open storage is what makes built-ins feel calm and curated.
Three ways to soften the grid
- Cane webbing: warm, vintage, and perfect with brass hardware.
- Linen curtains: dreamy and forgiving, especially for odd-shaped items.
- Panel doors: clean and classic, best when painted to match the unit.
If you are DIYing cane, keep it simple: one insert front, one texture, consistent spacing. Repetition looks intentional.
Style it high-end
This is the part I could talk about all day because styling is where Kallax becomes a room feature instead of a room solution.
My styling formula
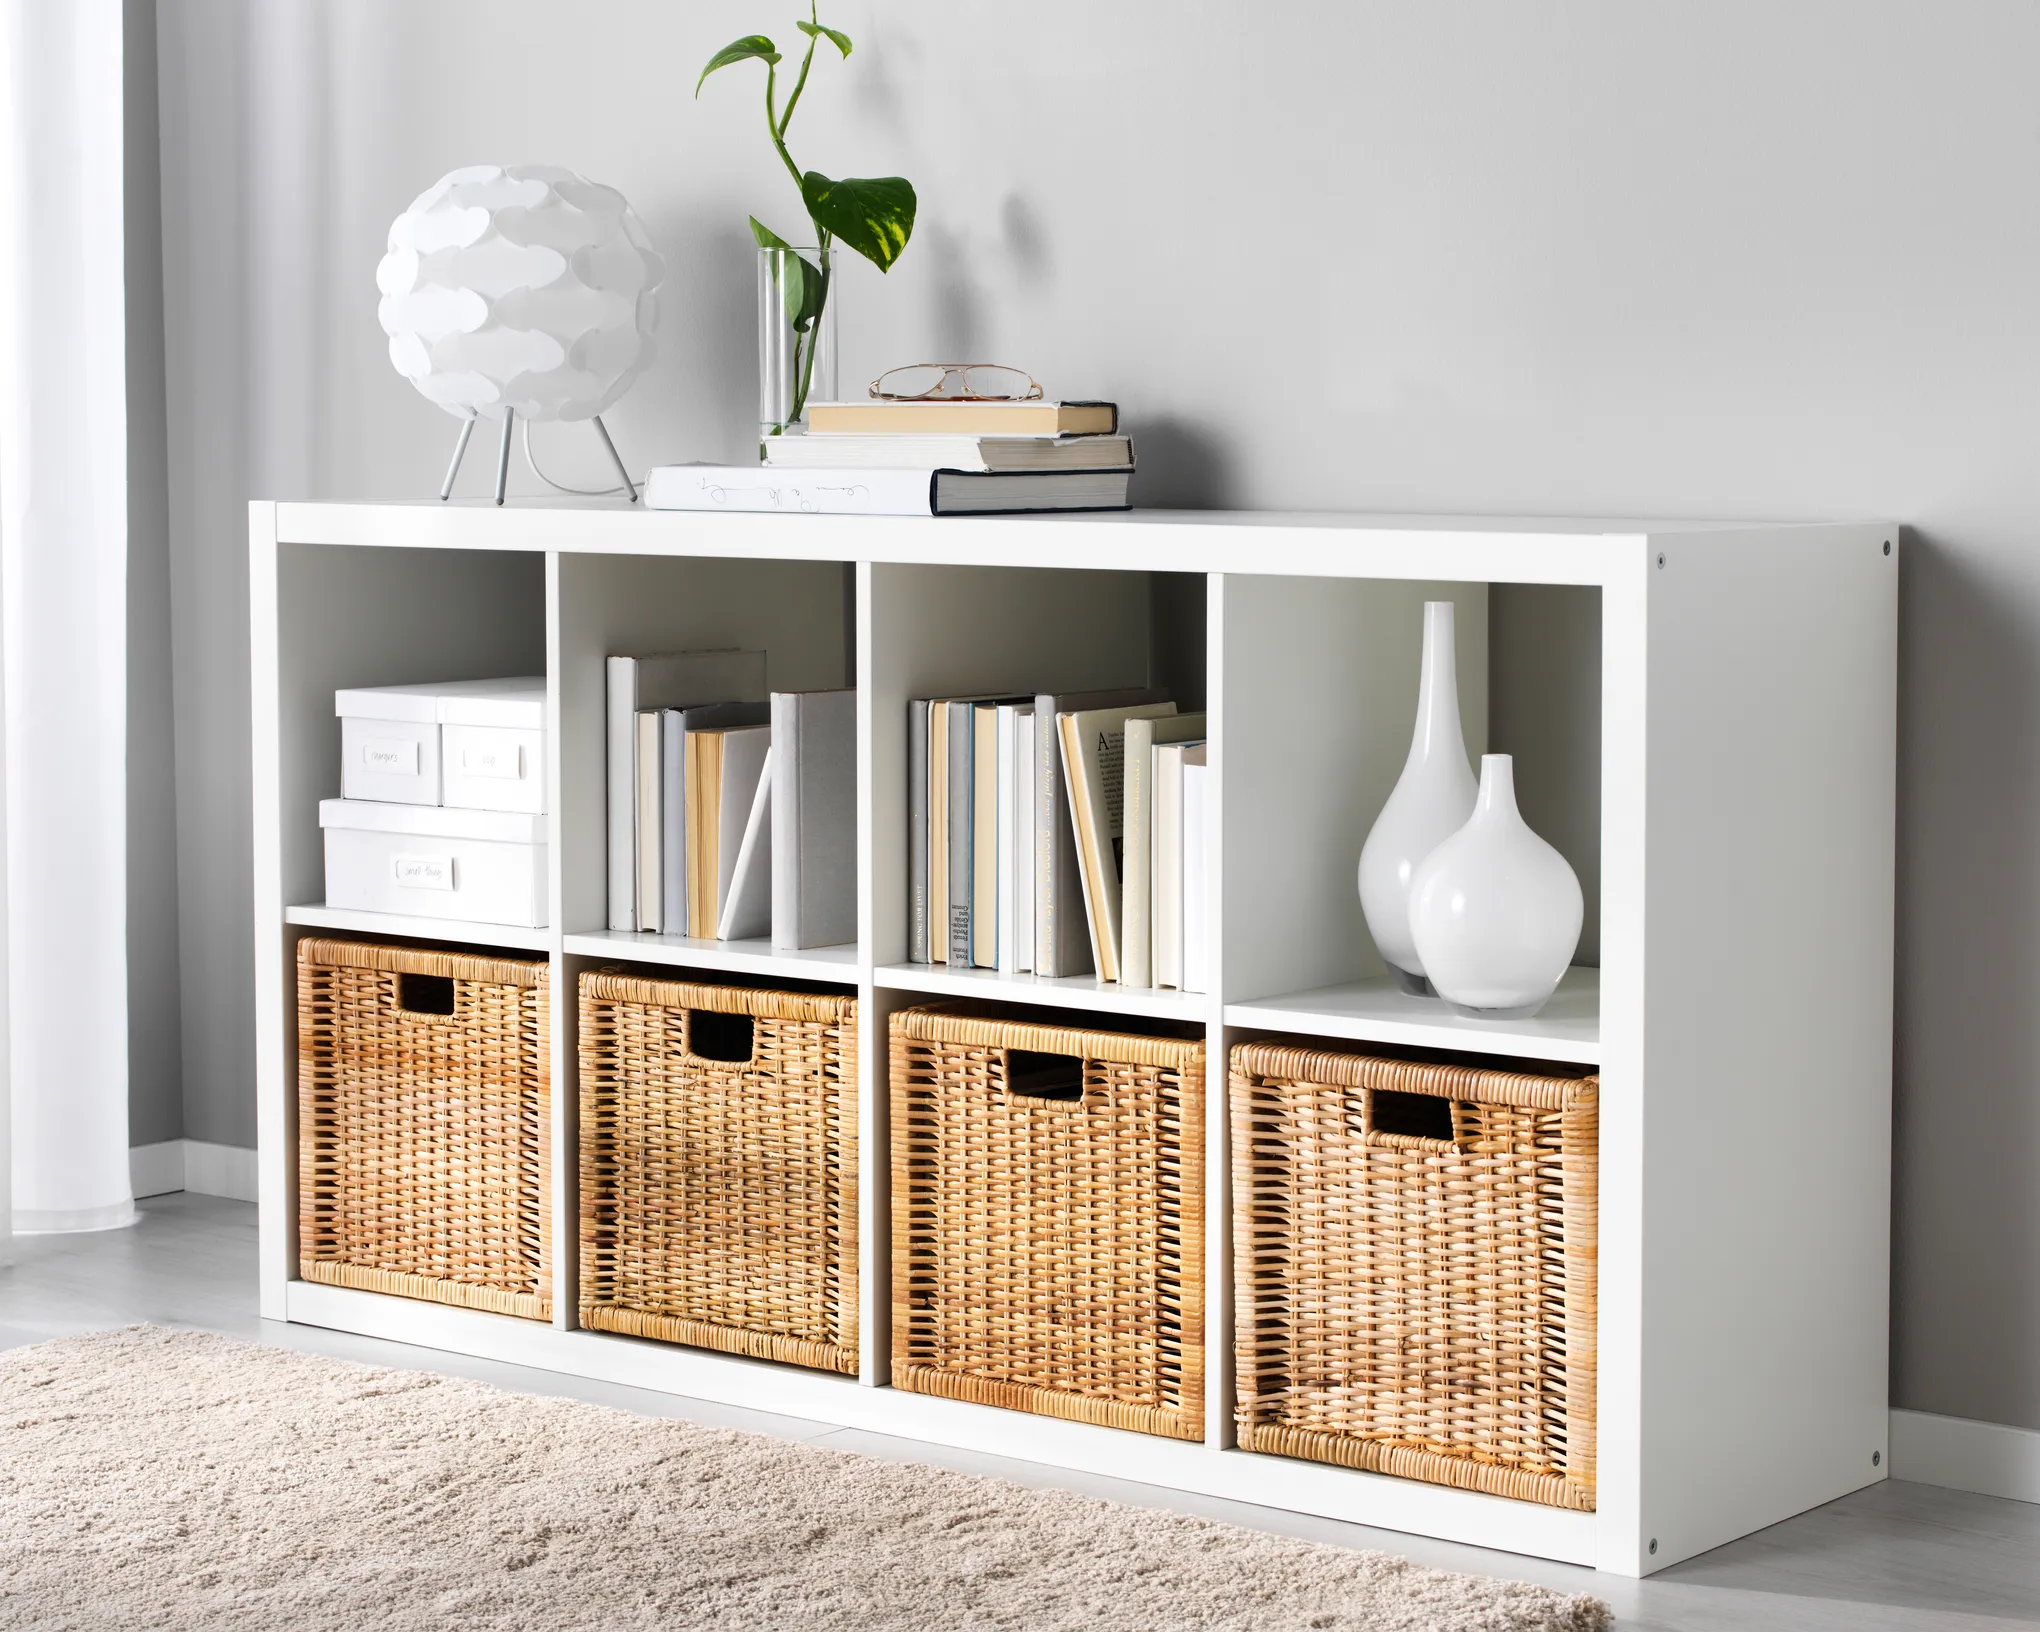
- Start with anchors: a stack of art books, a large ceramic vase, a woven basket.
- Add something with shine: brass, glass, or a glossy lamp for light-catching contrast.
- Bring in something soft: linen, boucle, or a small textile to warm up the grid.
- Leave breathing room: empty cubes are not wasted, they are restful.
- Repeat a color three times: it makes the whole shelf feel styled, not sprinkled.
Quick cube ideas
- A lidded basket plus one sculptural object on top
- Books stacked horizontally with a small amber glass lamp
- A framed photo leaning behind a low bowl
- Two matching storage boxes and one vintage paperweight
Common mistakes
- Mistake: Floating it directly on the floor. Fix: Add a base or legs for shadow and intention.
- Mistake: Visible gaps at the wall. Fix: Use filler strips, scribe if needed, then caulk and paint.
- Mistake: Overfilling every cube. Fix: Leave 20 to 30 percent open space.
- Mistake: Too many tiny objects. Fix: Go bigger. Fewer, larger pieces look more elevated.
- Mistake: Treating anchoring as optional. Fix: Follow IKEA instructions, anchor to studs when possible, and use wall-appropriate anchors.
Mini budget guide
Here is the rough reality of what makes the biggest visual difference per dollar.
- $10 to $30: better knobs or pulls, matching storage boxes, a single large basket.
- $30 to $80: trim boards and caulk, paint and primer, a simple leg kit (installed with proper reinforcement).
- $80 to $200: a proper platform base, multiple hardware upgrades, door or drawer inserts.
If you are choosing, I would spend first on base + paint. That combo changes the silhouette and the finish, which is basically the whole game.
FAQ
Can Kallax really look built-in?
Yes, especially when you add a continuous base, trim out the sides with fillers, and paint everything one color. The built-in look comes from removing gaps and making the installation feel permanent.
Do I need to paint it?
No, but paint is the fastest way to make the surface feel less like laminate. If you keep it white, focus on a base, legs, and elevated styling with matching bins.
What is the safest way to use Kallax for heavy items?
Follow IKEA’s instructions for your unit, anchor to studs when possible, keep heavy items low, and choose a base that distributes weight. For record storage, stability matters, so skip flimsy legs and opt for a sturdier platform base or reinforced leg system.
One last cozy nudge
The most high-end homes I have worked in are not perfect. They are personal. Your Kallax does not have to disappear. It just needs to feel chosen. Add the base, commit to the finish, and style it like you love it. That is the secret sauce.