How to Fix a Door That Won’t Close
Clara Townsend
Clara Townsend is an interior stylist, vintage furniture enthusiast, and the creative voice behind Velvet Abode. With over a decade of experience transforming both cramped city apartments and sprawling fixer-uppers, she believes that a beautiful home is built on personal stories rather than massive budgets. When she isn't hunting for the perfect brass sconce at a local flea market, she can usually be found rearranging her living room for the third time this month.
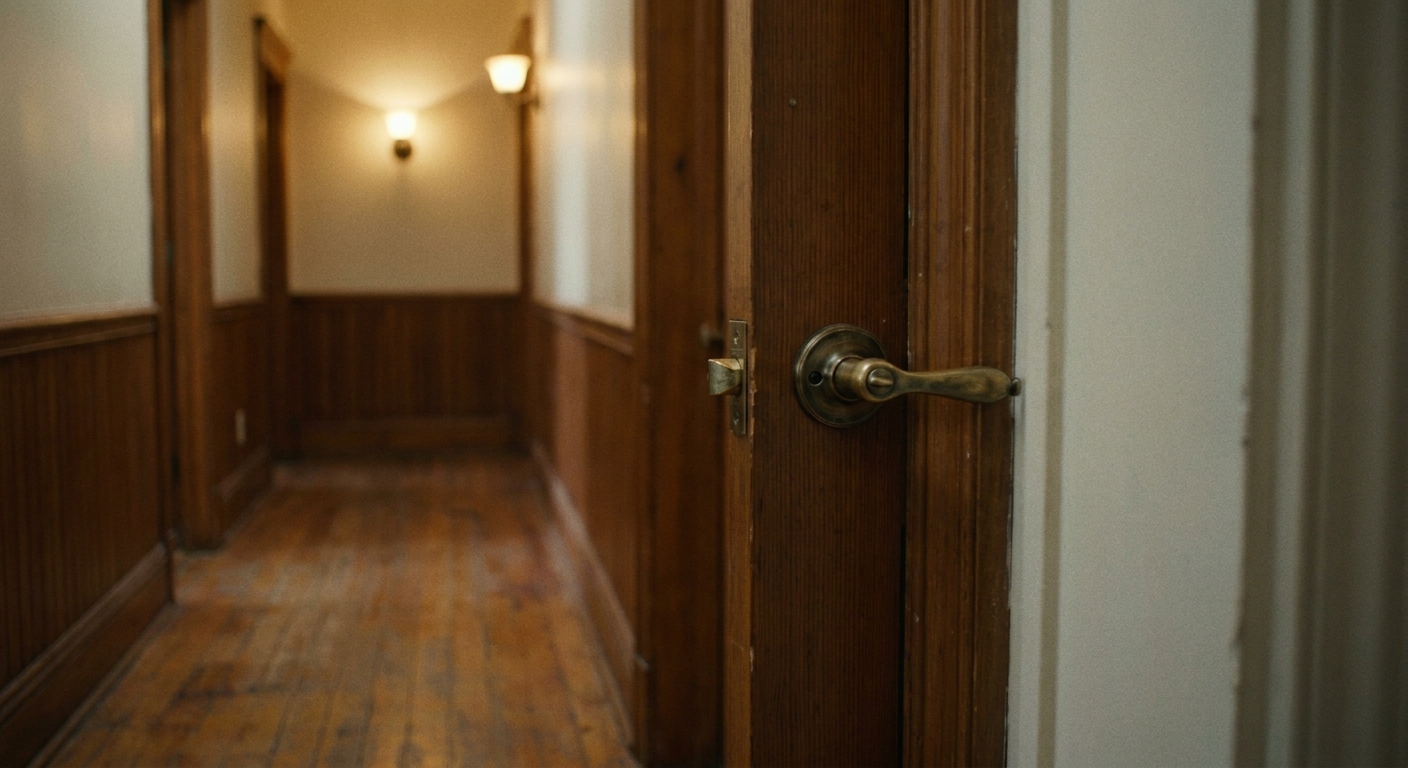
A door that refuses to close has a special talent for ruining the mood. One minute you are enjoying the warm glow of a lamp and the quiet click of a latch, and the next you are shoulder-checking a bedroom door like it’s a bouncer.
The good news: most “won’t close” doors are telling you something very specific. A hinge is loose, the door is sagging, the strike plate is off by a few millimeters, or the wood has swelled with humidity. We’ll figure out which one it is, then fix it with the least dramatic solution first.
Before you start: a 2-minute diagnosis
Grab a pencil, a Phillips screwdriver, and something that will leave a visible mark on the strike plate (usually metal). A dry-erase marker often works, but it can wipe off before it transfers and it may stain some finishes. Safer options: lipstick or chapstick, a bit of chalk, or painter’s tape plus a pencil. These tiny clues save you from random sanding and frustration.
Step 1: Notice what kind of “won’t close” you have
- It hits or rubs somewhere: You feel resistance before the latch meets the strike plate. This is usually swelling, paint buildup, or a sagging door scraping the frame.
- It closes, but won’t latch: The latch bolt is not lining up with the strike plate hole. This is the most common scenario.
- It latches sometimes: That “sometimes” is a big hint of hinge looseness or seasonal humidity changes.
- It clicks shut, then pops back open: The latch is not fully engaging, the strike is pushing it back out, or the door is slightly out of plumb.
Step 2: Find the rub spot
Close the door slowly and watch the gap between the door and the frame. Where the gap disappears, that’s your contact point. If you can’t see it, slide a strip of paper around the edges and feel where it pinches.
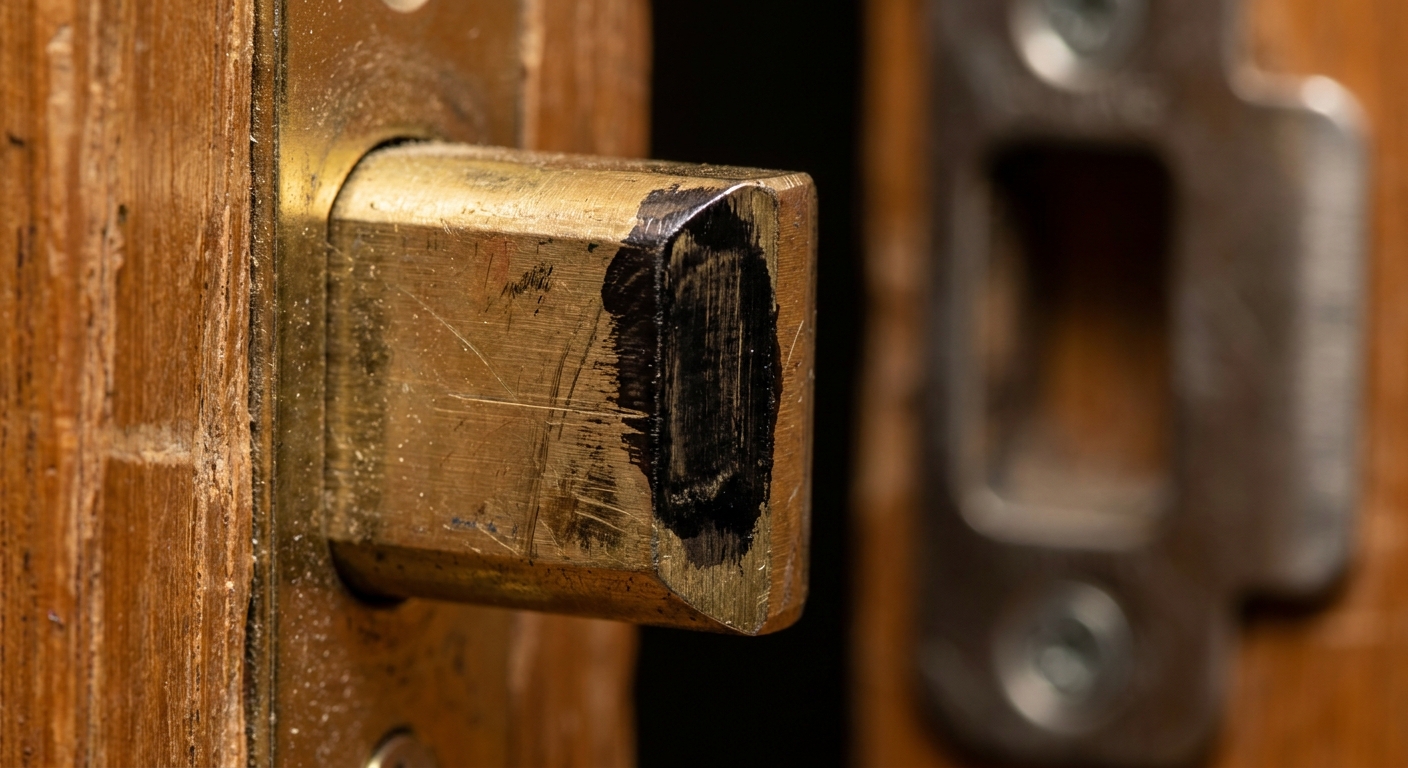
Step 3: Confirm latch alignment with a quick mark
Color the tip of the latch bolt with your marking method. Close the door gently until the latch hits the strike plate, then open it. You should see a mark on the strike plate showing if the latch is hitting high, low, or to one side.
What to fix first (in this order)
I know the temptation is to sand the door immediately. But sanding is permanent, messy, and often unnecessary. Start here instead.
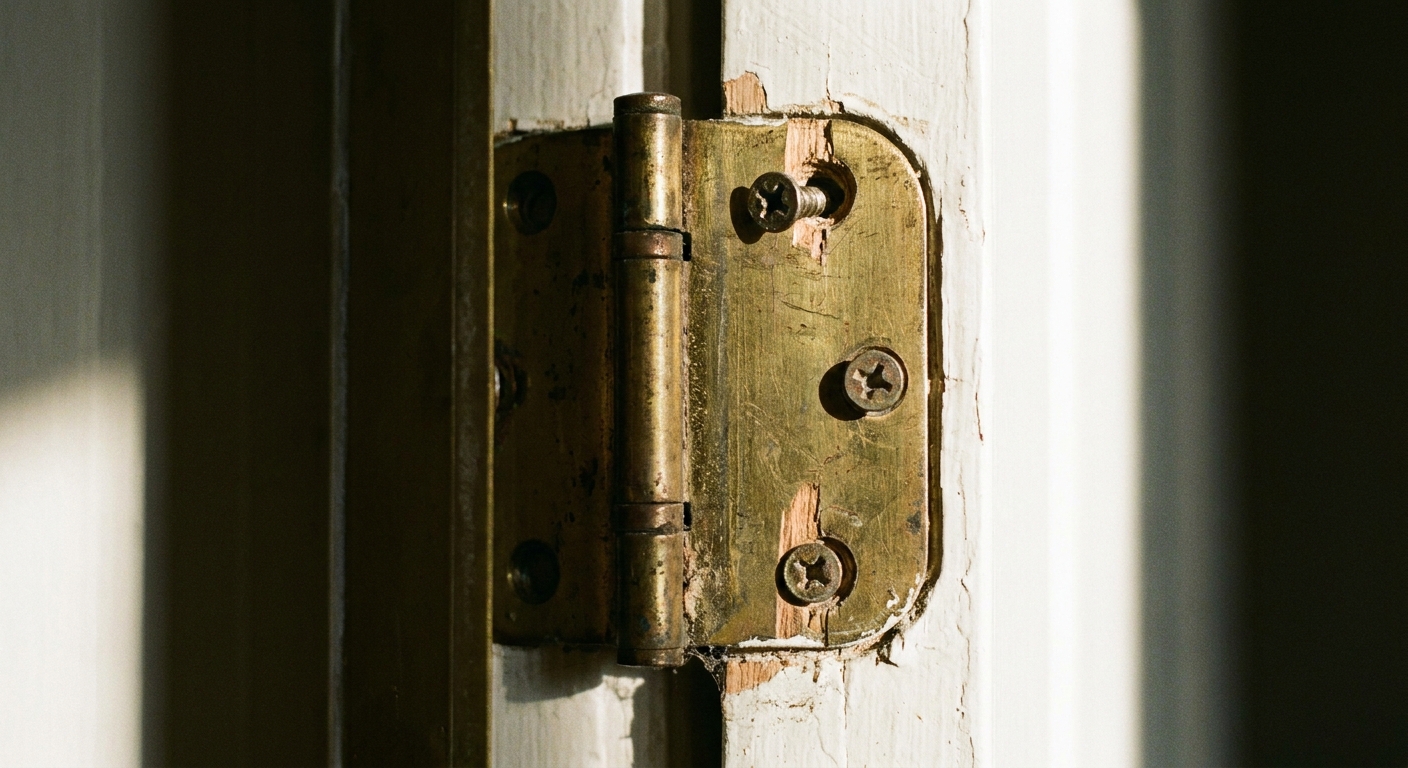
1) Tighten every hinge screw
Open the door halfway. Check each hinge on the door and the frame side. Tighten screws snugly, especially the top hinge. Loose hinge screws let the door sag, which throws off everything: rubbing at the top, latch missing the strike plate, and that slightly crooked look that makes a room feel “off.”
- If a screw just spins and never tightens, the hole is stripped. Jump down to the “Stripped screws” fix below.
2) Make sure hinges sit flush
“Spacing” problems are usually “the hinge is not seated right” problems. Look closely at each hinge leaf: it should sit flat in its mortise with no paint blobs, debris, or a visible gap behind it.
- Scrape paint buildup from the hinge mortise and the hinge leaf so it can sit flat.
- Check the reveal (the gap around the door). A suddenly tight spot near a hinge can mean that hinge is sitting proud.
- Quick shim option: If a hinge mortise is a bit too deep, a thin shim (cardstock or a purpose-made hinge shim) behind the hinge leaf can help bring the door back into line.
3) Check for a bent hinge
Look at the hinges from the side. If one hinge leaf looks bent or the hinge pin seems tilted, the door can bind against the frame. For most DIYers, replacing a noticeably warped hinge is safer and faster than trying to bend it back into shape.
Fix: Door won’t latch (strike plate alignment)
If the door closes but the latch won’t catch, you are in strike plate territory. This is usually a small adjustment that gives you an instant win.
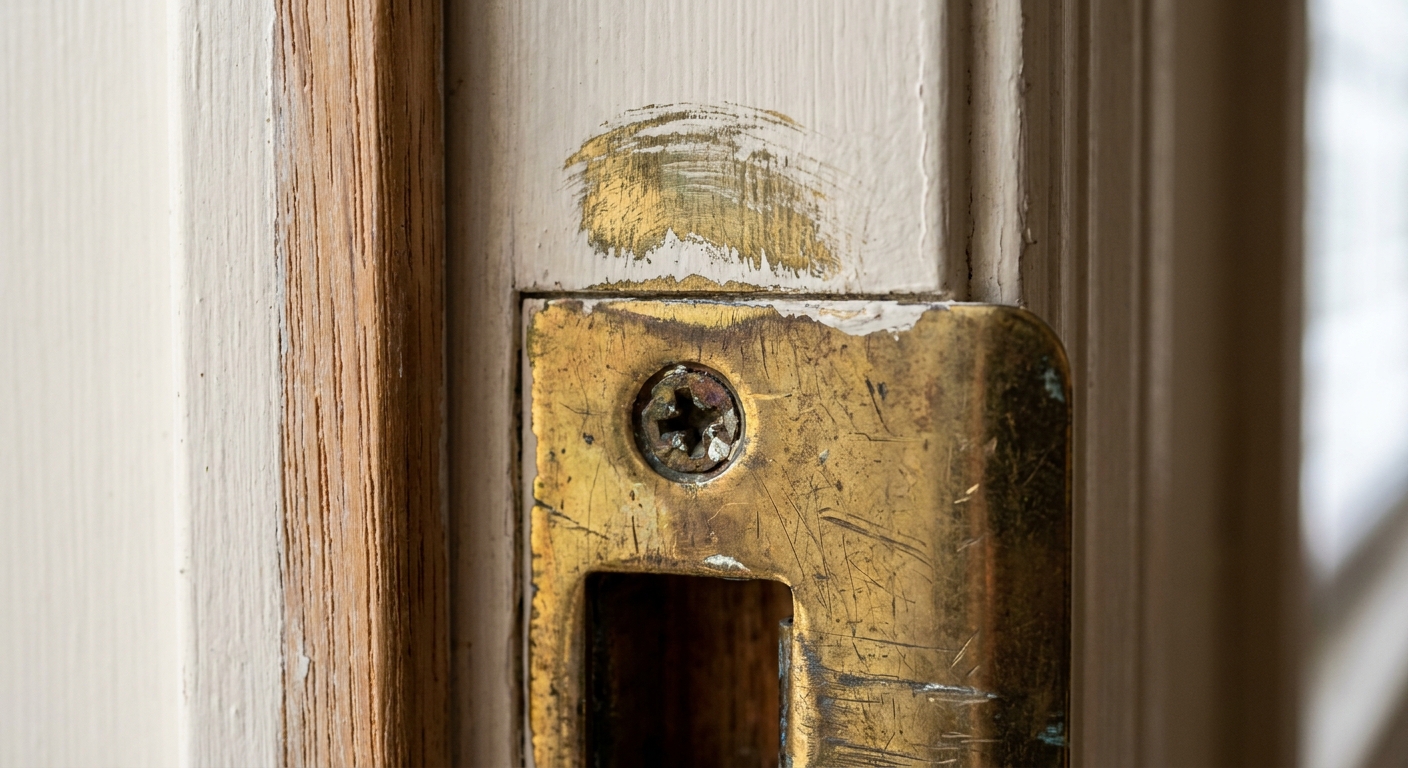
Option A: Tighten or reposition the strike plate
Sometimes the strike plate has shifted over time. Remove the two screws, hold the plate where the latch mark shows it should be, and re-screw. If the old screw holes don’t line up, fill them (toothpicks and wood glue work beautifully) and drive new screws.
Option B: Enlarge the strike plate opening (small, controlled filing)
If the latch is only off by a hair, you can file the strike plate opening in the direction of the latch mark.
- Remove the strike plate.
- Use a metal file to enlarge the opening slightly.
- Reinstall and test.
Go slowly. You can always file more. You cannot un-file metal.
Option C: Move the strike plate (adjust the mortise)
If the latch is off by more than roughly 1/8 inch, the strike plate may need to move. That is a rule of thumb, not a law of physics. You will likely have to chisel the recess (the mortise) in the door jamb so the plate sits flat in its new position.
Quick safety note: Use eye protection, keep your free hand behind the chisel, and always chisel away from your body. Scoring the outline first helps prevent splintering and chipped paint.
- Trace the strike plate in the new location with a pencil.
- Score the outline with a utility knife.
- Chisel shallowly within the outline until the plate sits flush.
- Pre-drill and screw in place.
Fix: Door rubs or sticks (swelling, paint, or sag)
When a door rubs, it can feel like the whole house is leaning. Most of the time it’s either humidity swelling, paint buildup, or a sagging hinge side.
Step 1: Identify where it rubs
- Top latch-side corner rubs: Classic sagging door. Usually hinge or screw related.
- Latch side rubs along the middle: Strike side alignment, swelling, or paint buildup.
- Near a hinge: Often a hinge sitting proud because of paint buildup or an uneven mortise.
- Bottom rubs: Flooring change, rug, or the door has dropped.
Step 2: Address sag first (before sanding)
If the door rubs at the top near the latch side, your door is likely sagging toward the handle. Try this:
- Tighten all hinge screws.
- Replace one screw in the top hinge on the jamb side with a longer 2.5 to 3 inch wood or construction screw so it can bite into framing.
A few caveats (so this stays a win): not every jamb has solid framing exactly where that screw lands. There can be shims and gaps. Pre-drill, drive slowly, and stop if you feel the screw pulling the jamb out of square. You want a gentle “pull,” not a twist.
This little trick fixes a lot of sticky doors without altering the door at all.
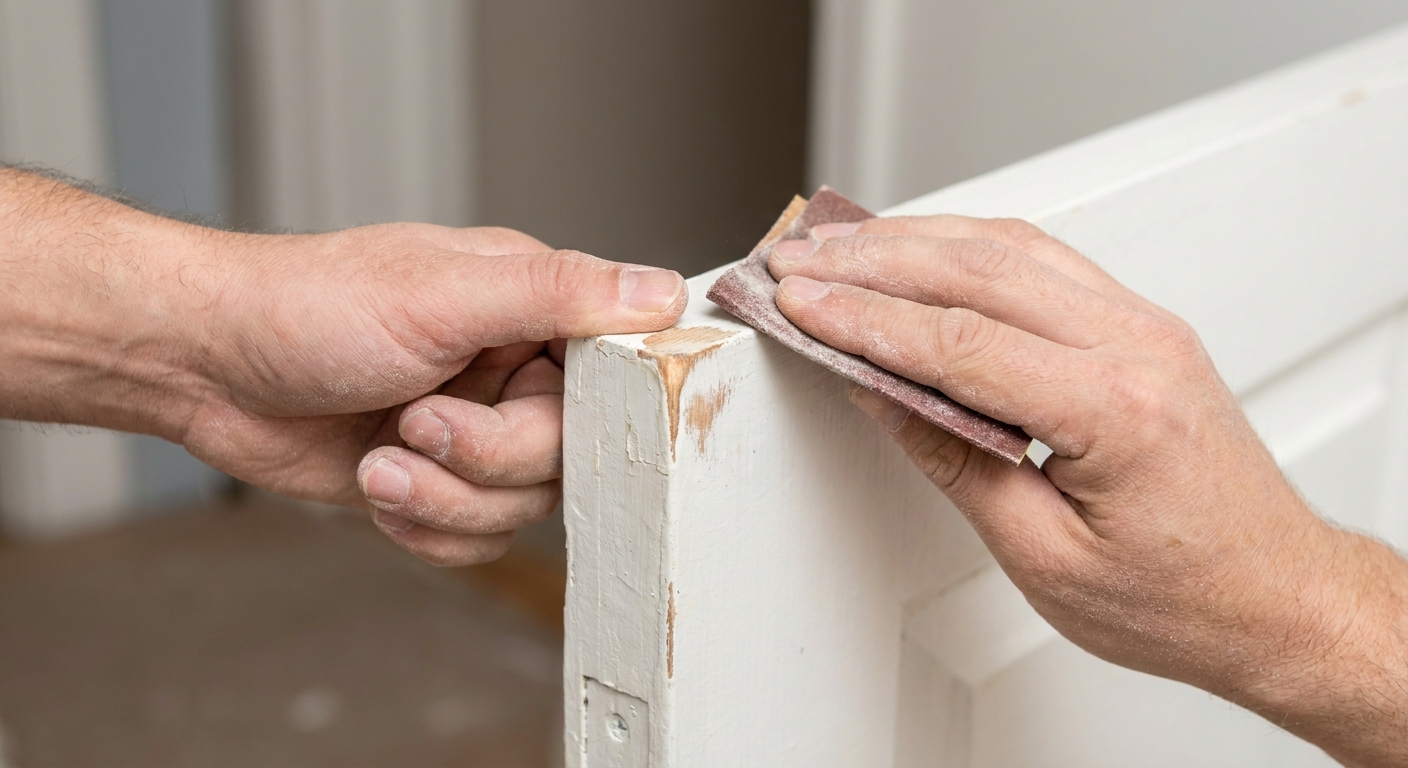
Step 3: If sanding is needed, sand the rubbing edge lightly
If the door is swollen or painted too thick, a light sand can help. Focus only on the rub area. Close the door, mark where it hits with a pencil, then sand gradually on the exact spot you marked (often the latch-side edge, but not always).
- Use 120 grit, then finish with 180 grit.
- Wipe dust, then seal the raw wood with paint, polyurethane, or at least primer. Unsealed wood swells again.
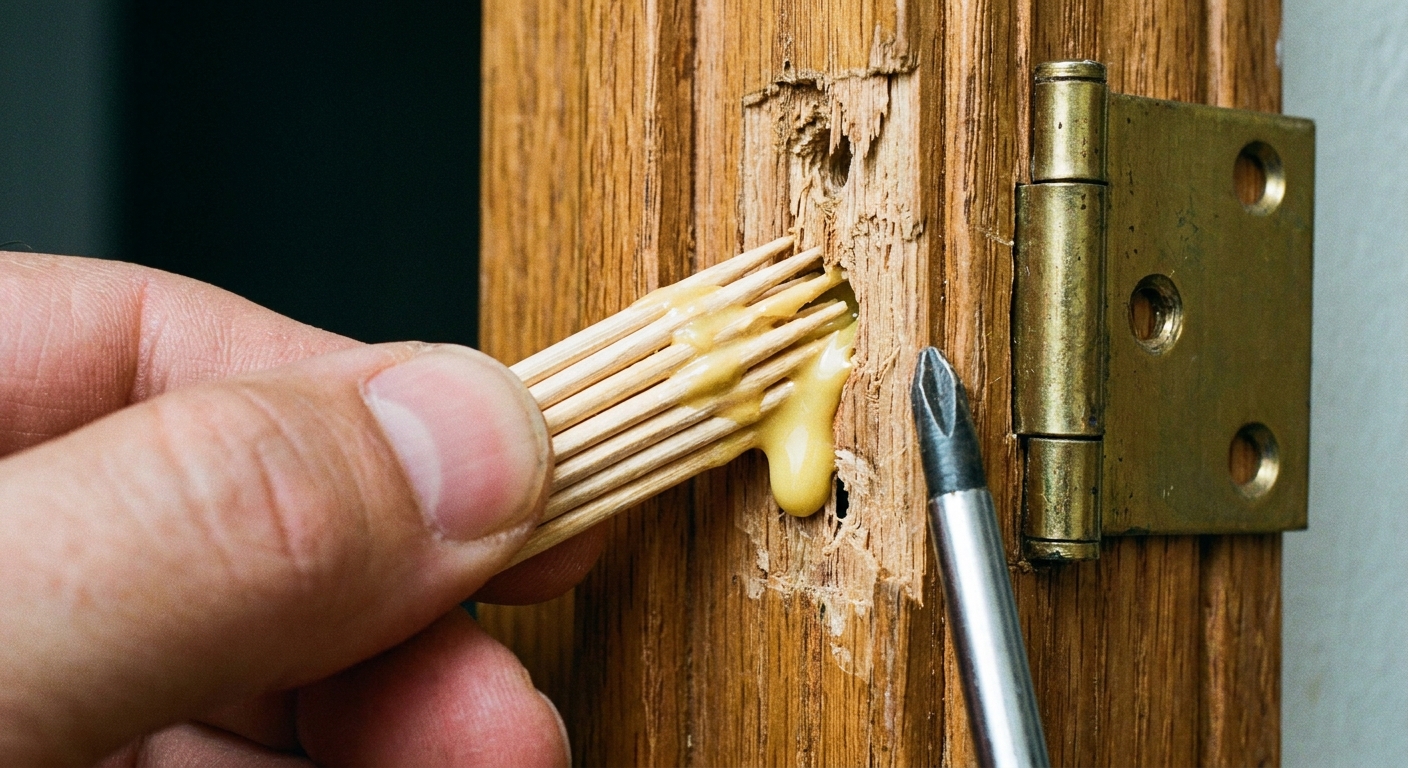
Fix: Stripped hinge screws (the sneaky culprit)
If tightening does nothing because the screws spin, the wood is stripped. This is why doors start sagging in the first place.
Quick fix: toothpicks and wood glue
- Remove the loose screw.
- Dip a few toothpicks in wood glue and pack them into the hole.
- Snap them flush.
- Let glue set (even 15 to 30 minutes helps, overnight is best), then re-drive the screw.
Even better: use longer screws in key spots
On the top hinge, a longer screw that bites into solid wood gives the door a stronger “shoulder” to hang on. This is especially helpful in older homes where the jamb wood is tired. Pre-drill and drive slowly so you do not distort the jamb.
Fix: Door closes but pops back open
If a door clicks shut then mysteriously reopens, the latch is not fully engaging or the door is being pushed by alignment.
Try these in order
- Tighten hinges to correct alignment.
- Confirm the latch bevel faces the strike. The angled side of the latch should meet the strike plate as the door closes. If it’s reversed (it happens), it can fight you and spring back.
- Adjust the strike plate so the latch fully seats.
- Check the latch itself: make sure it retracts smoothly when you turn the knob, the handle set screws are snug, and the latch is not gummed up with paint. A tiny amount of dry lubricant (graphite or PTFE) can help. Wipe any excess so it does not collect dust.
- Check weatherstripping on exterior doors. Too-thick new weatherstripping can push the door back open until it compresses over time.
Exterior doors: a few extra checks
Front and back doors deal with weather, sun, and shifting thresholds, so they can be a little more dramatic.
- Swelling from humidity: If it’s seasonal, a dehumidifier and sealing exposed wood edges can make a bigger difference than aggressive planing.
- Threshold too high: If the bottom drags after a new rug, new flooring, or a replaced threshold, you may need to adjust the threshold height (some are adjustable) or trim the door bottom.
- Deadbolt misalignment: Mark the deadbolt just like the latch, then reposition or file the strike accordingly.
When to call a pro
I am all for a confident DIY moment, but some situations are better handled with experienced hands:
- The door frame is visibly cracked, rotted, or pulling away from the wall.
- The house is settling dramatically and multiple doors suddenly won’t close.
- An exterior door has security or weather issues you cannot solve with hinge and strike adjustments.
A cozy-home finishing note
Once the door closes properly, take one extra minute to make it feel good. Tighten the handle set screws, wipe fingerprints off the hardware, and add a single drop of light machine oil or PTFE lubricant to a squeaky hinge pin. Wipe off the excess so it does not migrate onto paint or trim. The goal is not just a functional door. It’s that satisfying, quiet latch that makes the whole room feel cared for.
If your door is still being stubborn, share what it’s doing (rubbing where, missing the strike, popping open) and whether it’s an interior or exterior door in the comments. You will get more accurate advice with a few specifics, and you might save someone else an evening of unnecessary sanding.