How to Fix a Door That Won’t Close
Clara Townsend
Clara Townsend is an interior stylist, vintage furniture enthusiast, and the creative voice behind Velvet Abode. With over a decade of experience transforming both cramped city apartments and sprawling fixer-uppers, she believes that a beautiful home is built on personal stories rather than massive budgets. When she isn't hunting for the perfect brass sconce at a local flea market, she can usually be found rearranging her living room for the third time this month.
A door that will not close has a special talent for ruining the mood. It squeaks, it sticks, it bounces off the latch like it has opinions, and suddenly your cozy bedroom feels like a drafty hallway. The good news is that most “won’t close” doors are not dramatic problems. They are tiny alignment issues that add up.
Below is my favorite, no-fuss way to troubleshoot from easiest fix to slightly more involved, with just enough detail to keep you from spiraling into “I need a new door” panic.
Before you start: a 60-second diagnosis
First, figure out what kind of “won’t close” you have. It helps you skip straight to the right fix.
- It hits the frame and sticks: usually hinge sag, paint buildup, or humidity swelling.
- It closes but will not latch: strike plate and latch are not lining up, or the latch is not moving freely.
- It latches only if you lift or push the door: hinge screws are loose or the door has settled.
- It swings open by itself: house or frame is slightly out of plumb, hinges are set unevenly, or the door is binding on the stop.
Grab these basics: screwdriver (Phillips and flathead), pencil, tape measure, a small level if you have one, and a few toothpicks or wooden matches. If you might sand later, add sandpaper, eye protection, and a drop cloth.
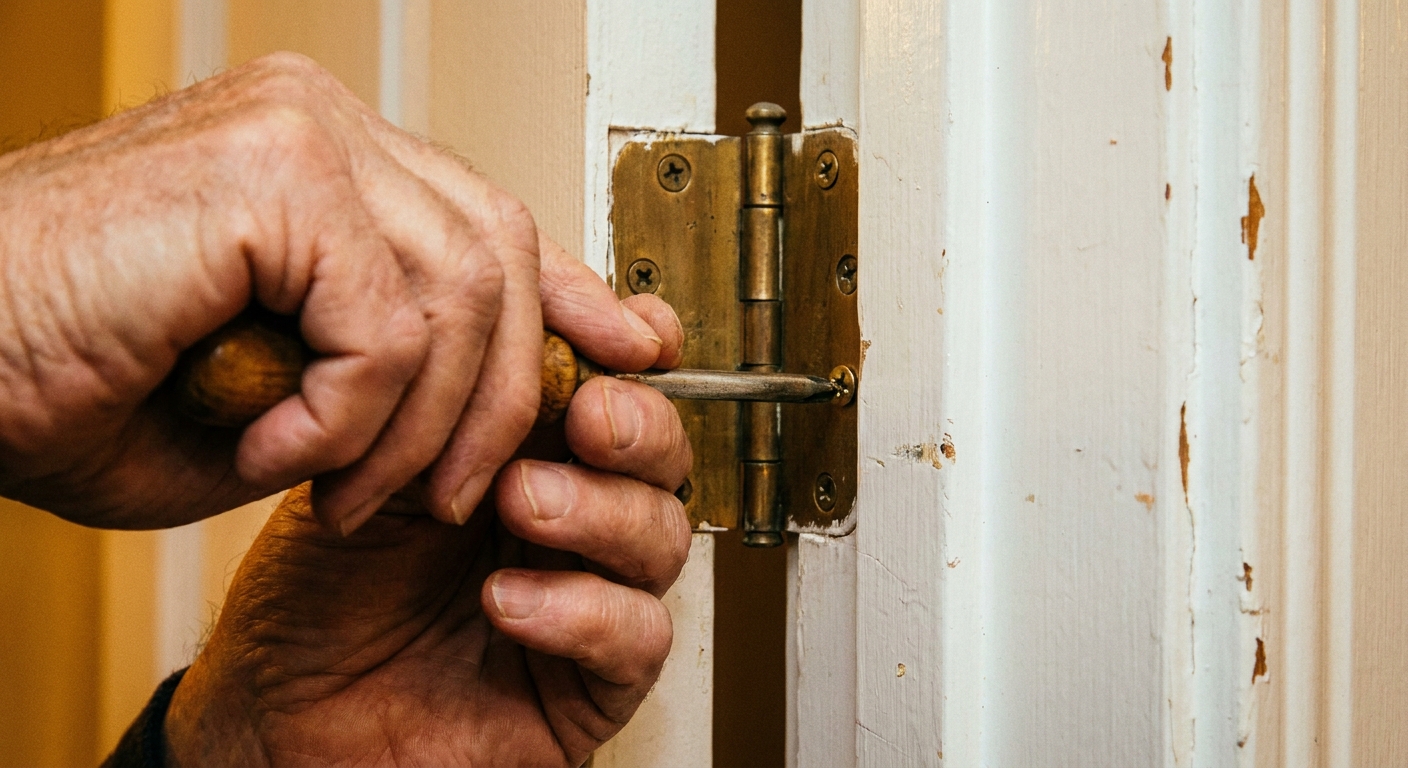
Step 1: Tighten hinge screws
Loose hinge screws let the door sag, even by a couple millimeters. That is enough to make the latch miss or the top corner rub the frame.
What to do
- Open the door halfway so it won’t swing while you tighten screws.
- Check all screws on all hinges. Tighten them snugly, especially the top hinge.
- If a screw spins without tightening, jump to the stripped screw fix below.
Quick clue: If the gap at the top of the door is tighter on the latch side than the hinge side, the door is sagging and hinge tightening is a great first move.
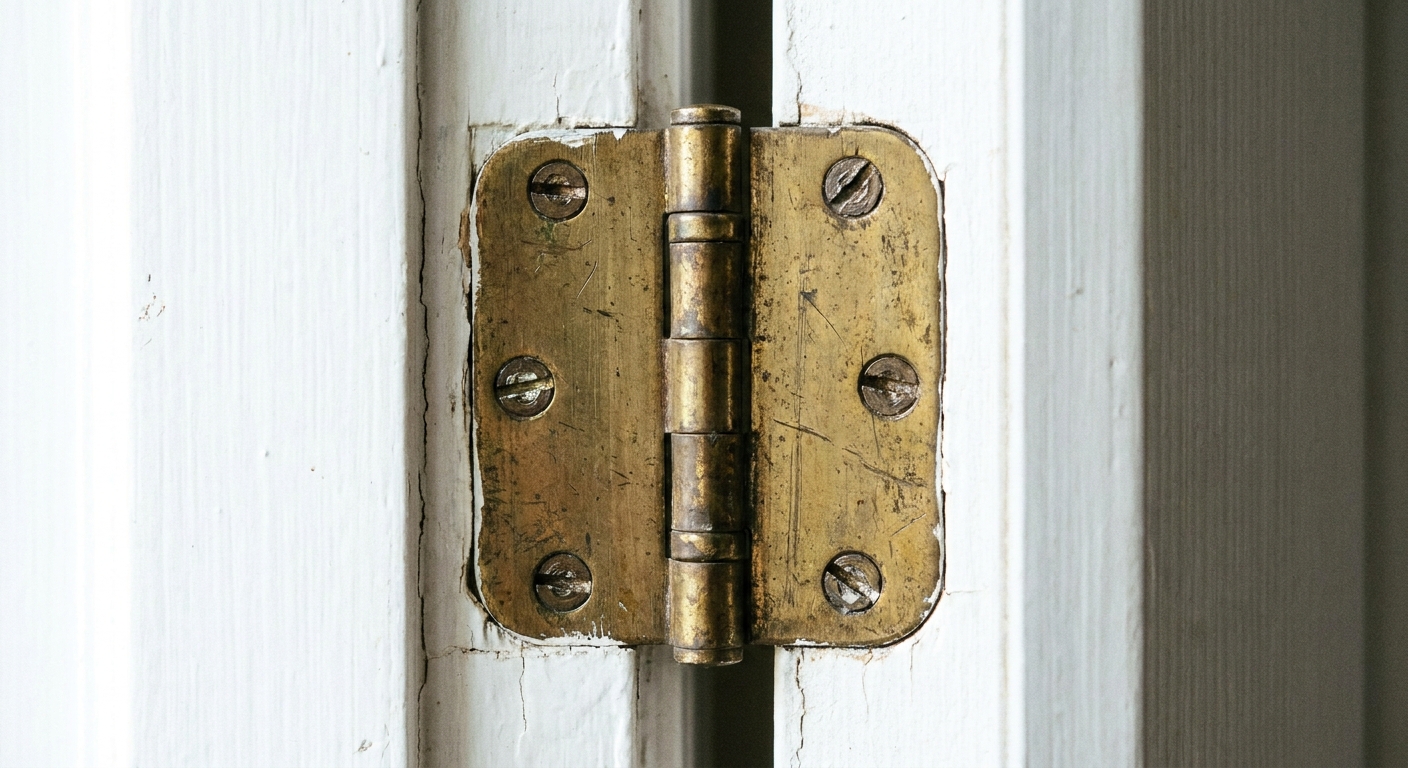
Step 2: Fix stripped hinge holes
If the screws will not bite, the hinge cannot hold the door in the right spot. This is one of those humble fixes that feels like magic.
The toothpick method
- Remove the problem screw.
- Dip a few toothpicks in wood glue (optional but helpful), then pack them into the hole.
- Snap them flush with the surface.
- Reinsert the screw and tighten.
If the door is heavy (solid wood, old vintage slab, or a door that feels like it was made to survive a tornado), consider replacing one short screw in the top hinge with a 2.5 to 3 inch screw that reaches the stud, if you have wood framing and a stud behind that hinge. This gently pulls the door back into alignment. If you hit metal or the screw will not bite, stop and use the toothpick method plus standard-length screws instead.
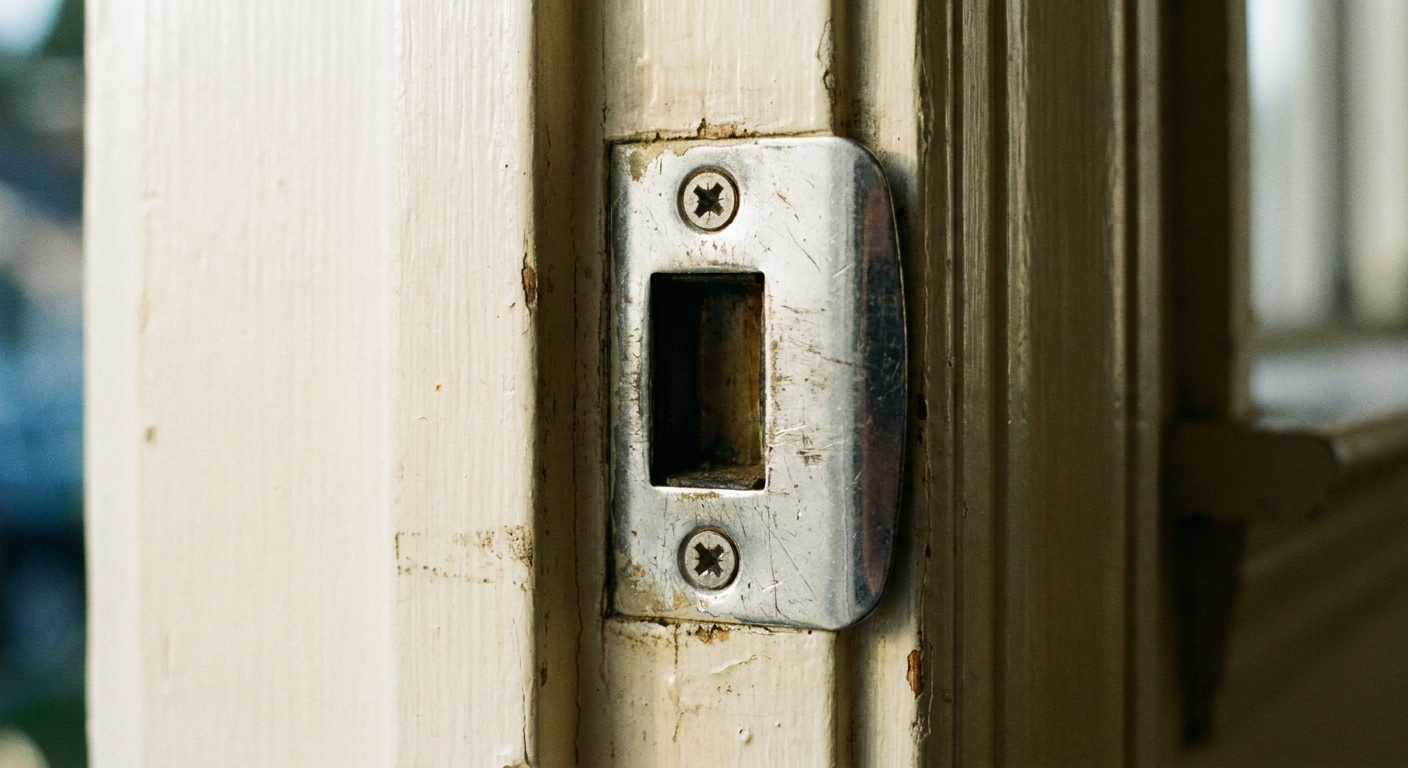
Step 3: If it closes but won’t latch, adjust the strike plate
When a door hits the latch area and refuses to “click,” the latch bolt is not entering the strike plate opening cleanly. You can confirm this in seconds.
Mark the latch position
- Rub a little lipstick or chalk on the latch bolt, or scribble pencil graphite over it until it looks slightly “dirty.”
- Close the door gently until it touches the jamb.
- Open it and look for the mark on the strike plate area.
If the mark is above, below, or to the side of the strike opening, you have your answer.
Small adjustment (the right way)
Here is the slightly annoying truth: because strike plates use countersunk screws, simply loosening and “nudging” often does nothing. The screws will pull the plate right back into the old holes.
- Remove the strike plate.
- Fill the old screw holes with toothpicks (and wood glue if you have it), snap flush, and let it set for a bit.
- Hold the strike plate where you actually need it, just a hair up, down, left, or right.
- Mark new screw holes with a pencil, drill small pilot holes, then reinstall and test.
Bigger adjustment (still very doable)
- Remove the strike plate.
- Use a metal file to widen the opening in the direction the latch needs to go.
- Deburr any sharp edges, then reinstall and test.
Tip from too many apartment doors: If the strike plate is sitting on layers of paint, it may be just thick enough to throw off alignment. Scrape paint buildup behind the plate so it sits flat. If you file down to bare metal, a quick touch-up with paint or clear nail polish can help prevent rust.
Step 4: If the door rubs, find the spot
Do not start sanding randomly. Let the door tell you where it is unhappy.
Easy ways to locate the rub
- Look for shine marks: rubbed paint often turns glossy or shows bare wood.
- Paper test: slide a piece of paper around the door edge while it is nearly closed. Where it snags is your problem area.
- Pencil shading: scribble pencil on the door edge, close the door, open it. The rubbed-off pencil shows the contact point.
Most commonly, rubbing happens at the top latch-side corner when a door is sagging, or along the latch-side edge when the door has swelled.
Step 5: Address seasonal swelling
Older wood doors and solid-core doors love to expand in humid months, especially if your home swings between dry heat and summer moisture. If the door was fine last month and suddenly sticks after a weather change, this is a strong suspect.
Try the gentle approach first
- Make sure hinges are tight (Step 1).
- If you have AC or a dehumidifier, run it for a day and see if the sticking eases.
- Check for fresh paint along the door edge or jamb. Paint can grab like Velcro when it is thick.
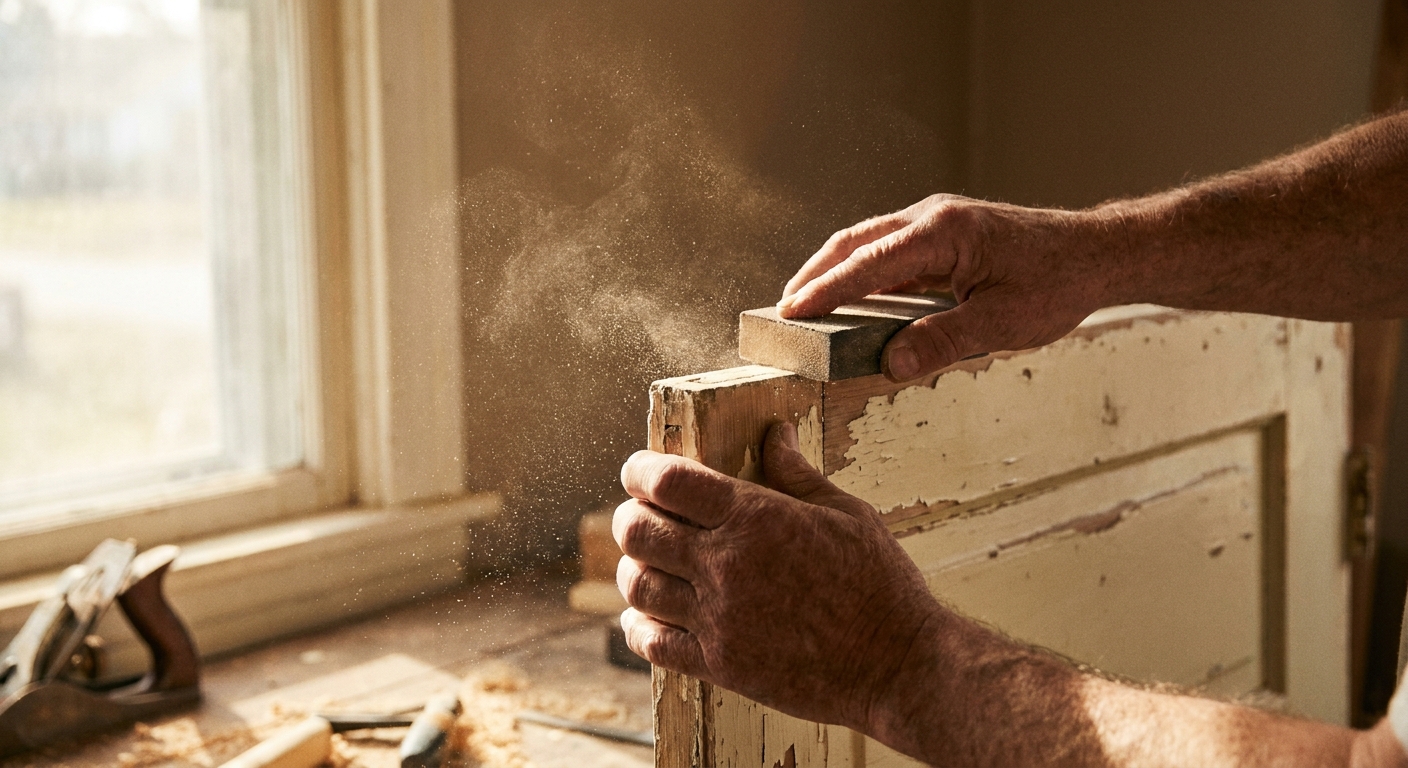
If you need to sand
- Remove the door if possible (or wedge it open securely).
- Wear eye protection and a dust mask, and keep dust contained with a drop cloth.
- Sand only the rubbing area, a little at a time.
- Test often. You want a smooth close, not a drafty gap.
- Seal the sanded edge with primer and paint or clear finish. Unsealed wood will swell again faster.
Vintage-home note: If your door and trim are older, consider lead-safe practices before sanding painted surfaces. When in doubt, use a lead test kit and follow local guidelines.
Step 6: Adjust the hinges
If tightening and hole repair did not solve it, the hinges themselves may be slightly out of alignment. This is where tiny tweaks make a big difference.
Two options
- Hinge shim: If the door is rubbing on the hinge side, you can add a thin shim (cardstock or a purpose-made shim) behind one hinge leaf to adjust the door’s angle. This is subtle, but effective.
- Hinge bend: If the latch side is too tight, you can gently bend the hinge knuckles to shift the door. An adjustable wrench works well for this. Go in very small increments, protect the finish with a thin cloth, and test often. This is the fix you do slowly, like you are convincing the door, not fighting it.
If your hinges are old and beautifully imperfect, I am all for keeping them. Just clean them, tighten them, and let them do their job.
Quick fixes by symptom
- Top latch-side corner hits the frame: tighten top hinge screws; replace one with a long screw into the stud (if you have wood framing and a stud behind that hinge side); then reassess.
- Door latches only when lifted: stripped hinge holes or sag. Do toothpick repair and tighten.
- Latch hits strike plate below the hole: reset strike plate with new pilot holes (toothpicks help), or file the opening down.
- Door sticks only in summer: sand lightly at the rub point and seal the edge.
- Door bounces back open: strike plate may be too tight around the latch, the stop may be set too tight, or the latch bolt is sticky. Loosen or reset the strike plate, check that the stop is not forcing the door back, and lubricate the latch with a dry lubricant.
Other sneaky causes
If you have tried the main steps and it is still acting up, check these quick culprits:
- Loose latch hardware: the screws on the latch plate (on the door edge) can loosen and shift the latch just enough to miss. Tighten them.
- Sticky or broken latch: press the latch bolt in with your thumb. It should move smoothly and spring back. If it sticks, refuses to spring, or feels crunchy, the doorknob or latch mechanism may need cleaning, lubrication, or straightforward replacement.
- Paint in the hinge knuckles: thick paint can make the door swing weirdly. If hinge pins look glued in place, gently tap them out, clean the knuckles, and reinstall.
- Door stop too tight: if the stop molding was nailed too close (or weatherstripping is too bulky), the door can “hit soft” and bounce. Sometimes the fix is as simple as repositioning the stop slightly.
When to call a pro
Most doors can be corrected in under an hour, but these cases are worth outside help:
- The door frame is visibly out of square, out of plumb, or cracked.
- The house has shifted enough that multiple doors suddenly will not close.
- The door is exterior and you are dealing with security, weatherstripping, or significant warping.
- You suspect lead paint and need safer remediation.
A good carpenter can rehang a door or adjust a jamb cleanly. Sometimes it is the difference between “fine” and “buttery smooth.”
Velvet Abode finishing touches
Once your door closes properly, give it the satisfying final polish:
- Swap in a warm metal: a vintage brass knob or an amber-toned backplate can make even a plain hollow-core door feel intentional.
- Quiet the click: add a small felt pad on the jamb where the door meets the stop, especially for bedroom doors.
- Refresh the trim line: touch up scuffed paint where rubbing happened. A crisp edge instantly makes the whole doorway feel calmer.
A door that closes smoothly is one of those small home comforts you feel every single day, like fresh sheets or the perfect lamp glow. It is worth the tinkering.
Quick FAQ
Why does my door not close all the way?
Most often it is hinge sag (loose or stripped screws), a misaligned strike plate, a door stop set too tight, or swelling from humidity. Start by tightening hinges, then check latch alignment.
Can I just sand the door until it closes?
You can, but it is best to diagnose first. If sag is the real problem, sanding treats the symptom and you may end up with uneven gaps. Sand only after hinge and strike adjustments.
What if the latch won’t go into the hole?
Reset the strike plate (often using the toothpick-and-new-pilot-holes trick), or file the strike opening slightly in the direction the latch needs to move. Paint buildup behind the strike plate can also cause issues. If the latch bolt itself does not spring smoothly, the latch mechanism may need replacement.