How to Fix a Door That Won’t Close
Clara Townsend
Clara Townsend is an interior stylist, vintage furniture enthusiast, and the creative voice behind Velvet Abode. With over a decade of experience transforming both cramped city apartments and sprawling fixer-uppers, she believes that a beautiful home is built on personal stories rather than massive budgets. When she isn't hunting for the perfect brass sconce at a local flea market, she can usually be found rearranging her living room for the third time this month.
There are few tiny home annoyances that can spiral so quickly as a door that will not close. It starts as a gentle nudge. Then it becomes a shoulder-check. Then suddenly you are living with a door that is always slightly ajar, like it has its own agenda.
The good news: most doors that will not close are dealing with one of a handful of very fixable issues. We are going to diagnose it in minutes, then fix it with the least invasive solution first. Think: tighten, shim, adjust, then only if needed, sand or plane.
One quick clarification up front: a door can fail in two main ways. Binding is when it physically hits the frame and cannot swing fully shut. Latching is when it swings shut, but the latch will not click into the strike plate.
Before you start: name your “won’t close”
Pick the symptom that matches your door. This will save you so much time.
- It closes but will not latch: the latch bolt is not lining up with the strike plate hole.
- It hits the frame and stops: the door is rubbing somewhere, often at the top latch side or along the hinge side.
- It used to close, but not in summer or after rain: humidity swelled the door, seasonal movement shifted the frame a touch, or the house settled and changed the opening.
- It swings open or will not stay shut: hinge alignment, hinge pin wear, or a slightly out-of-plumb frame is pulling it.
Grab a pencil, a Phillips screwdriver, and if you have them: a level, a hammer, a piece of cardboard or a thin shim, and a small wood chisel.
Quick safety and sanity checks
1) Make sure nothing is blocking the latch
It sounds obvious, but paint build-up inside the strike plate hole or a loose strip of weatherstripping can stop a latch from fully clicking in.
- Look at the strike plate hole. Is there paint, wood fuzz, or a loose metal tab in the way?
- Test the latch by pushing it in with your thumb. It should spring back smoothly.
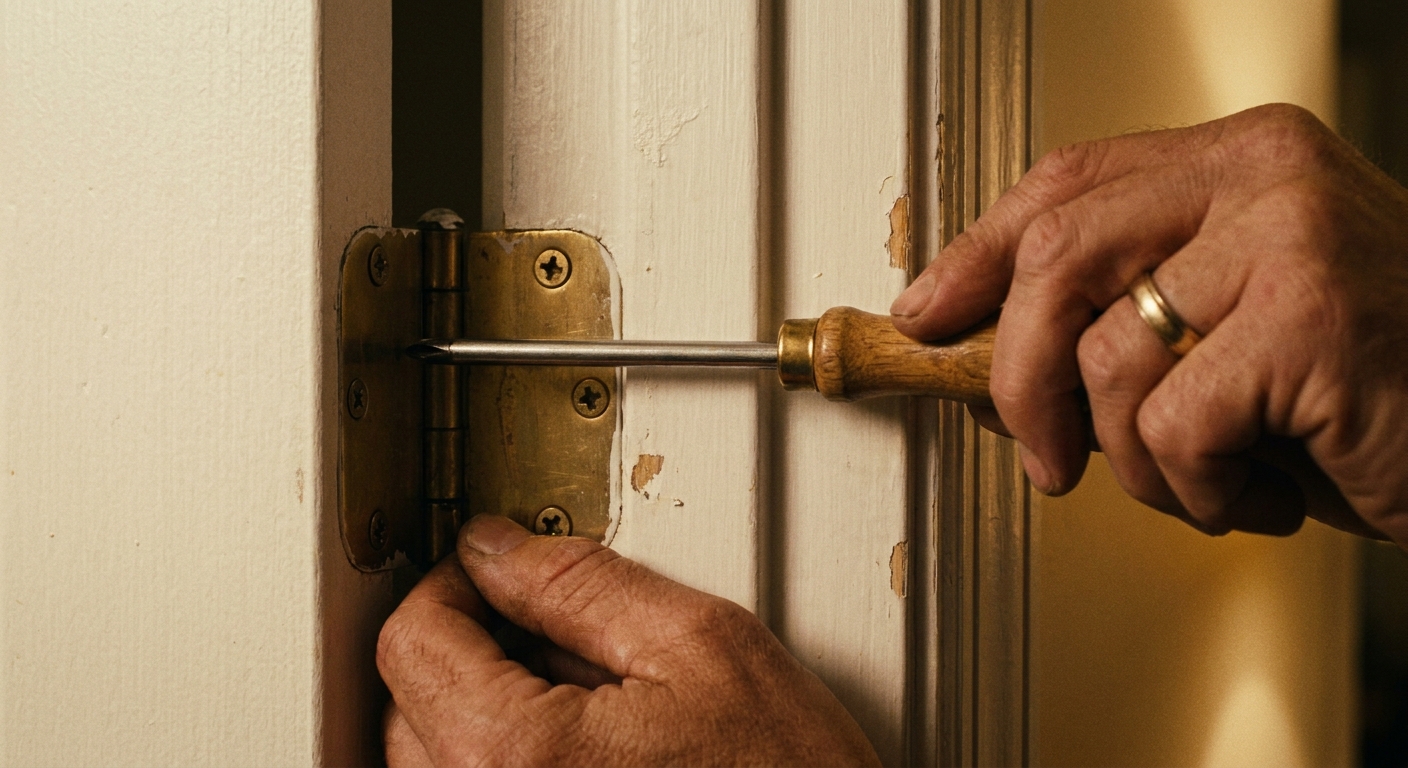
2) Check for a loose hinge (and proud screws)
If your door suddenly stopped closing, loose hinge screws are the most common culprit. A door is heavy. Gravity is persistent.
- Open the door halfway.
- Grab the knob and gently lift up. What you should feel: almost no play. If you feel a noticeable click or vertical movement, something is loose or worn.
- Tighten all hinge screws on the door side and the frame side.
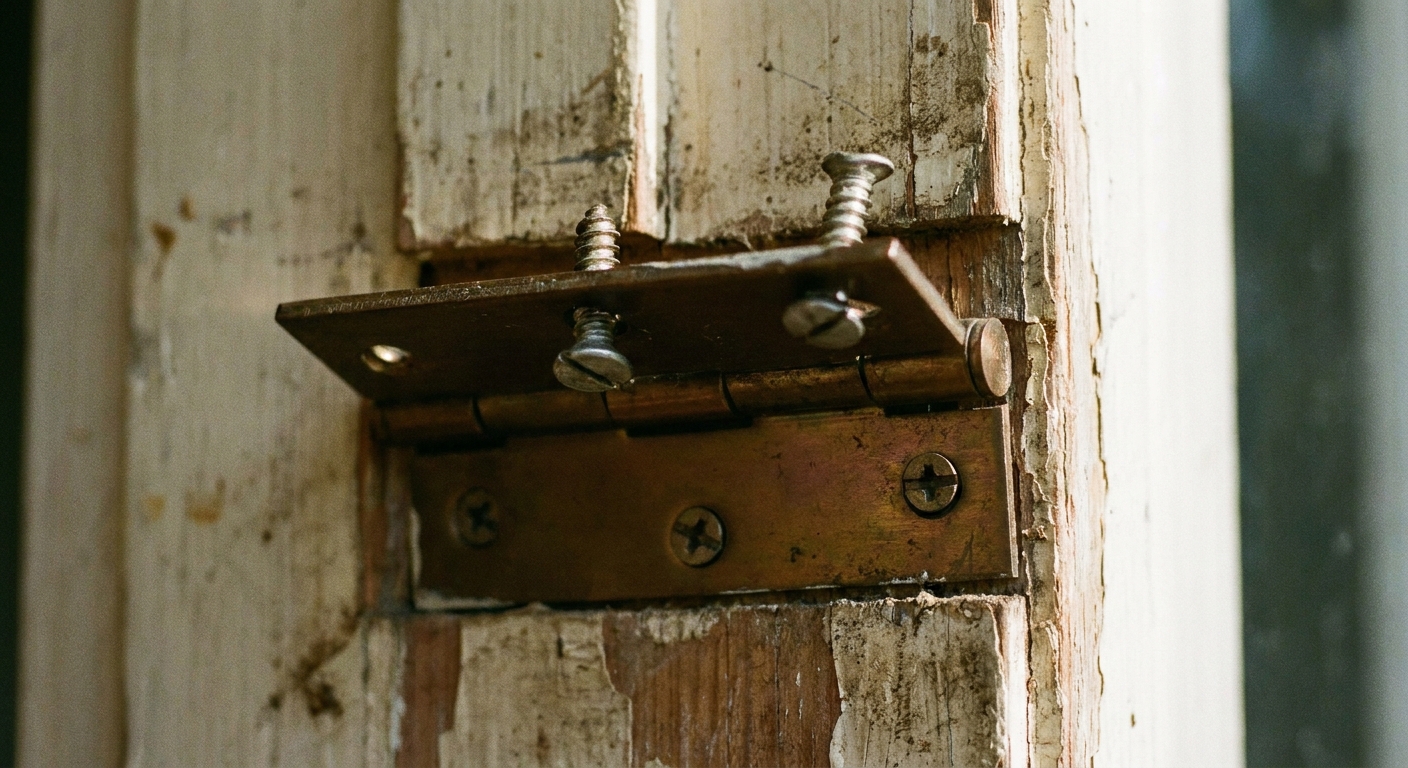
- Scan for a screw head that is sitting proud (not fully seated in the hinge countersink). A slightly raised head can cause rubbing and misalignment all by itself.
Note: if the screws are tight but you still feel play, the hinge pin or hinge knuckles may be worn. That is fixable too and we will get to it.
If the door won’t latch: adjust the strike plate
This is the fix for the classic situation: the door looks closed, but the latch bolt is hitting the strike plate instead of sliding into the hole.
Step 1: mark where it is hitting
- Close the door slowly until the latch meets the strike plate.
- Use a pencil to mark the spot on the strike plate where the latch is making contact.
- If you have lipstick, chalk, or a bit of painter’s tape, you can dab the latch and transfer the mark to the plate for a clearer read.
Step 2: shift the strike plate
Most of the time you only need to move the strike plate a hair.
- Unscrew the strike plate.
- Reposition it slightly toward your pencil mark.
- Before you retighten, check the mortise (the little recessed pocket in the jamb). If you moved the plate and it no longer sits perfectly flat, trim the mortise lightly with a wood chisel so the strike plate sits flush. A plate that sits proud can stop a door from closing cleanly.
- Retighten and test.
If the screws no longer bite because the holes are worn: fill the holes with wooden toothpicks plus a little wood glue, let it dry per the glue label (often 30 to 60 minutes before re-screwing, with full strength by the next day), then reinstall.
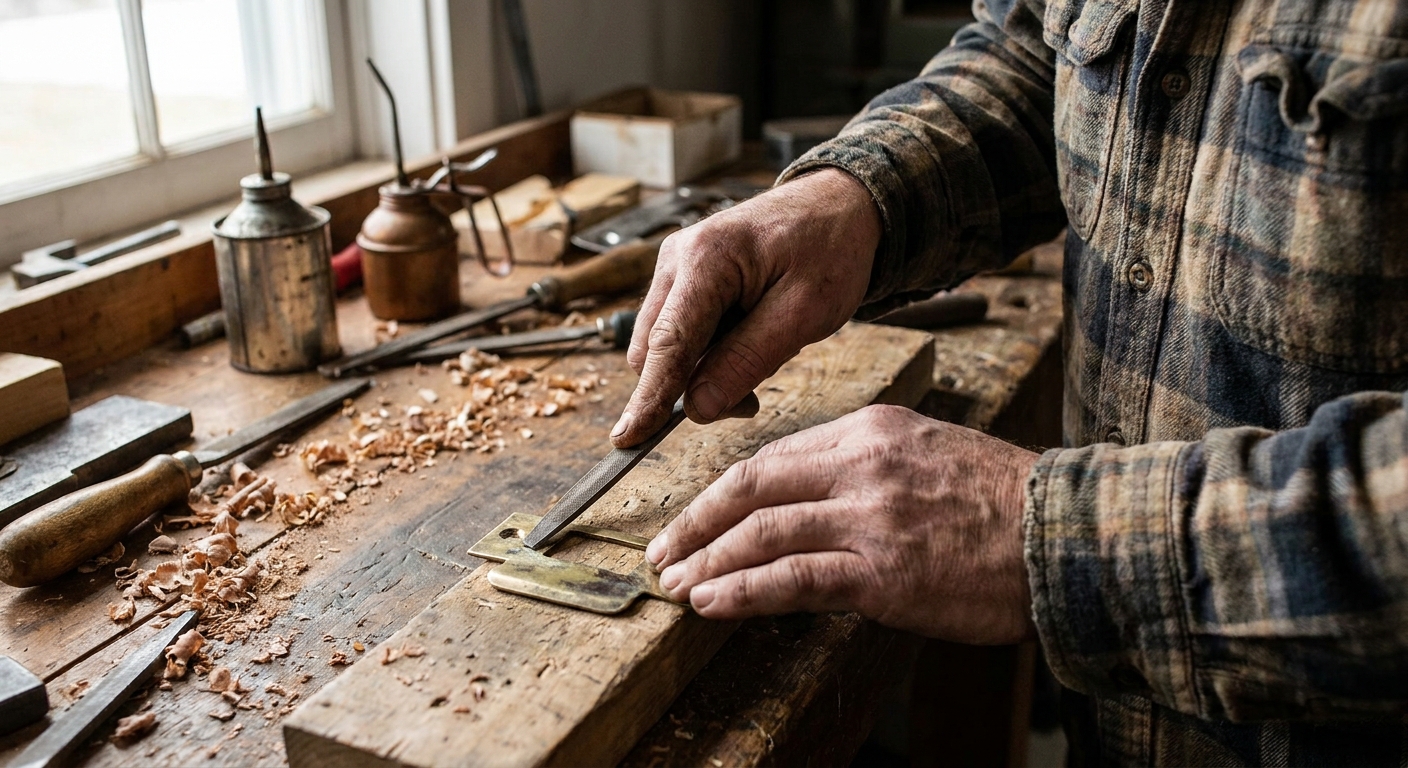
Step 3: file the opening if it is just barely off
If the plate cannot shift enough, you can enlarge the opening slightly.
- Remove the strike plate.
- Use a metal file to widen the opening in the direction you need.
- Reinstall and test.
If the door hits the frame: find the rub spot
Do not sand randomly. Let the door tell you where it is unhappy.
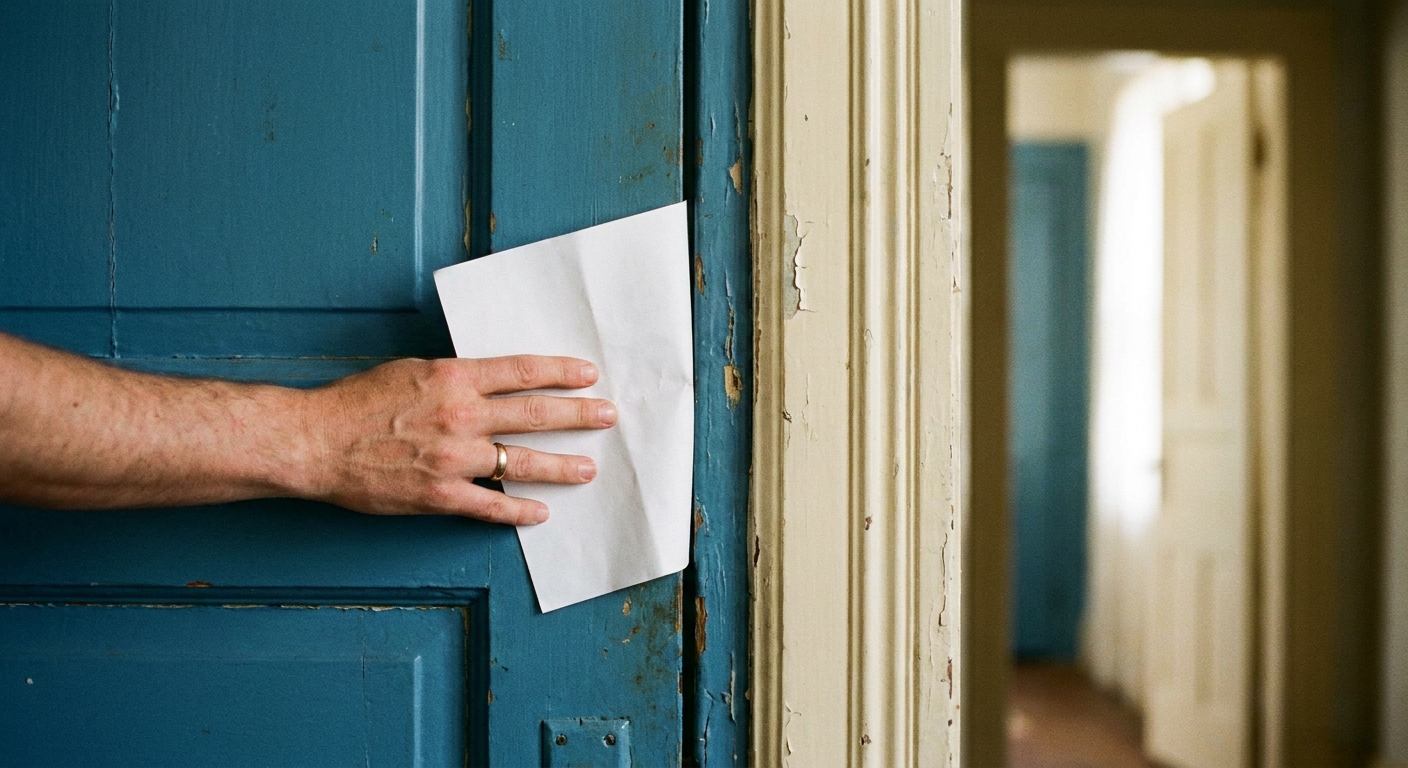
How to locate the sticking point
- Look for shiny spots: rubbed paint or a polished-looking patch on the door edge.
- Do the paper test: slide a sheet of paper between the door and the frame as you close it. Where it catches is your rub zone.
- Use a pencil: scribble lightly on the door edge, close it once, then look for where the pencil line got erased.
Fixes for rubbing doors
1) Tighten hinge screws (again, yes)
If the door rubs on the latch side near the top, the top hinge is often loose and letting the door sag.
- Tighten the top hinge screws first.
- Then tighten the middle and bottom hinges.
2) Replace one hinge screw with a longer screw
This is my favorite “old house” trick because it is simple and strangely satisfying. If the door frame wood is a little tired, a longer screw reaches deeper framing and pulls the jamb back into alignment.
- On the top hinge, remove one screw on the jamb side.
- Replace it with a 2.5 to 3 inch wood or structural screw (same head style if possible so it seats properly in the hinge).
- Predrill if the wood is hard.
- Tighten slowly and watch the gap along the latch side improve. Stop as soon as it lines up. You are aiming for “aligned,” not “cranked.”
Caution: if you feel the screw spinning without tightening, the hole is stripped. Use the toothpick-and-glue trick first, then try again.
3) Shim a hinge to change the door’s angle
If your door is rubbing on the hinge side or the gaps are uneven, a thin shim behind a hinge leaf can nudge the door into a better position.
- Unscrew one hinge leaf (usually start with the top hinge).
- Place a thin shim behind it. A piece of cardstock, a thin wood shim, or even a trimmed cereal box works for tiny adjustments.
- Reinstall and test.
Small changes make a big difference here. Add thickness gradually.
4) Sand the door edge lightly (only if needed)
If humidity swelled the door or the rub spot is obvious and persistent, sanding can be the right move.
- Mark the rub area.
- Use 120 grit sandpaper on a sanding block and remove a little at a time.
- Test often. You want “just enough” clearance, not a visible gap.
- Seal the sanded edge with paint or clear sealer so it does not soak up moisture and swell again.
5) Plane the edge for bigger problems
If the door is seriously binding, a hand plane (or power planer, if you are comfortable) is faster and cleaner than endless sanding. Remove the door, take off a whisper of wood, then seal the raw edge.
Safety note: remove or protect hardware, support the door on a stable work surface, and wear eye protection. If you are making dust, add a dust mask.
If the door swings open: the “ghost door” fix
If your door will not stay put and likes to drift open (or drift shut), you can add a little friction at the hinges. This is a classic, low-effort fix.
Option A: bend a hinge pin slightly
- Close the door most of the way.
- Tap the bottom of a hinge pin upward with a hammer and a nail set (or a small punch) and pull the pin out.
- Lay the pin on a hard surface and tap it gently in the middle with a hammer to put a slight bend in it.
- Reinsert the pin and test. Repeat with another hinge if needed.
Go easy. You are not trying to turn it into modern art, just adding a touch of resistance.
Option B: check the hinge pins for looseness
If you felt play when lifting the knob earlier and the screws are tight, watch the hinge knuckles as you lift. If the pin area shifts or looks sloppy, the hinge may be worn. Sometimes replacing a worn hinge is the cleanest fix.
If humidity is the culprit: make it last
Seasonal swelling is common, especially with solid wood doors and older frames. You can fix today’s problem and also set yourself up for fewer repeats.
- Seal all six sides: the top and bottom edges of doors are often unsealed and love to absorb moisture.
- Check airflow: bathrooms and laundry areas need good ventilation to keep doors from swelling.
- Use a dehumidifier: if your home feels sticky, your doors feel it too.
Exterior doors: two quick extras
Exterior doors have a couple of extra “won’t close” causes that interior doors do not.
- Weatherstripping compression: new or swollen weatherstripping can make the door feel like it is bouncing back. Look for spots where the seal is overly thick or folded.
- Threshold or door sweep interference: if the bottom edge is dragging, adjust or replace the sweep, or check whether the threshold has shifted upward.
When to call a pro
Most door issues are DIY-friendly. But if you see any of the following, it might be time for a carpenter or handyman, especially in very old homes where frames can shift.
- The frame is visibly cracked or pulling away from the wall.
- The door is severely warped or twisted.
- You have tried hinge and strike adjustments and the alignment keeps changing (possible framing or foundation movement).
- The door is exterior and you suspect a security or weather-sealing problem.
Quick troubleshooting cheat sheet
- Door won’t latch: adjust, chisel, or file the strike plate.
- Door rubs at top latch side: tighten top hinge, add a longer screw.
- Door rubs along hinge side: check for proud screws, add a hinge shim, or adjust hinges.
- Door rubs after rain or in summer: sand minimally, then seal the edge.
- Door swings open: bend a hinge pin slightly for friction.
If you do one thing first, do this: tighten every hinge screw. It is the design equivalent of fluffing the pillows before you buy new ones. Small, free, and surprisingly effective.
Tools and supplies you might need
- Phillips screwdriver or drill with a Phillips bit
- 2.5 to 3 inch wood or structural screws (for the top hinge jamb side)
- Pencil
- Sandpaper (120 grit, then 180 grit for smoothing)
- Wood glue and toothpicks (for stripped screw holes)
- Metal file (for strike plate adjustment)
- Cardstock or thin shims
- Small wood chisel
- Hammer
- Nail set or small punch (for hinge pins)
- Eye protection and dust mask (for sanding or planing)
Once your door clicks shut like it means it, take a second to enjoy that tiny victory. A home is made of these little moments. Quiet ones. Satisfying ones. The kind that make the whole space feel more settled.