How to Deep-Clean a Sectional
Clara Townsend
Clara Townsend is an interior stylist, vintage furniture enthusiast, and the creative voice behind Velvet Abode. With over a decade of experience transforming both cramped city apartments and sprawling fixer-uppers, she believes that a beautiful home is built on personal stories rather than massive budgets. When she isn't hunting for the perfect brass sconce at a local flea market, she can usually be found rearranging her living room for the third time this month.
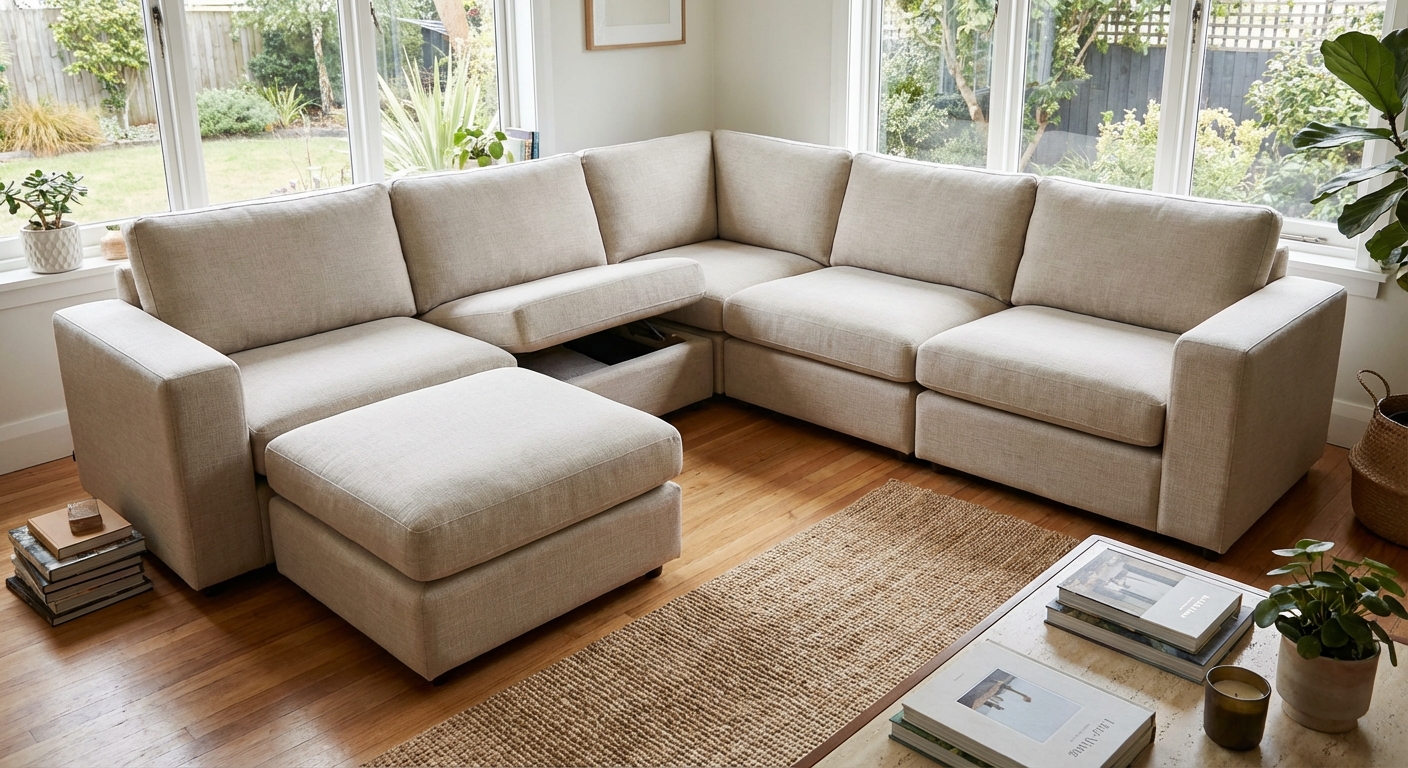
A sectional is basically a crumb storage system disguised as comfort. Between the chaise, the corner wedge, and all those seams where modules meet, dust and snacks migrate like they pay rent.
The good news: you can deep-clean a sectional indoors, even if you cannot drag it to a driveway or blast it with a garden hose. All you need is a little patience, a smart order of operations, and a plan for the gaps.
Before you start
Gather your supplies
- Vacuum with upholstery brush and crevice tool
- Lint roller (or a slightly damp rubber glove for pet hair)
- White microfiber cloths
- Spray bottle with warm water (distilled water helps reduce water rings)
- Dish soap (clear, gentle, low-suds)
- Enzyme cleaner (often effective for food, pets, and organic mystery smells)
- Baking soda
- Soft scrub brush or clean nail brush for seams
- A couple of towels for drying
- Optional: handheld steamer (test first and skip for “S” or “X” fabrics)
- Optional: small fan for faster drying
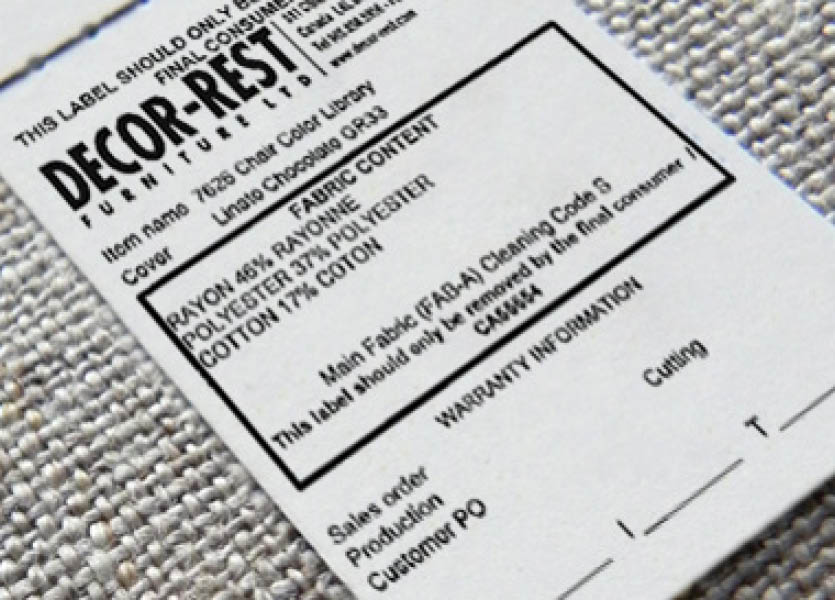
Do a quick fabric check
Look for the care tag, usually tucked under a seat cushion or along the underside of a module. You will often see:
- W: water-based cleaner is safe
- S: solvent-based cleaner only (no water)
- WS: either is okay
- X: vacuum only, no liquids
Quick reality check: codes vary by brand and some tags use additional symbols. Follow your specific tag and manual if you have one.
If you cannot find a tag, test anything you plan to use on an invisible spot first. Let it fully dry to make sure there is no ring or color change.
Special materials note: leather and faux leather need different products and techniques, and velvet, microfiber, and linen blends can water-mark easily. When in doubt, use distilled water, use less moisture, and test twice.
Step 1: Clear the zone
Pull your coffee table and side tables back, then lay down an old sheet or a couple of towels where you will place cushions. If you rent and have delicate floors, add felt pads under anything you will scoot.
Open a window if you can. Fresh airflow can help deodorizing work better and keeps cleaning smells from lingering.
Step 2: Remove and label
Sectionals feel identical until you put them back together and one cushion suddenly looks like it moved to a new zip code.
- Remove all seat cushions and back cushions.
- If covers come off, unzip and separate them into a “wash” pile and a “spot-clean” pile based on the tag.
- Use painter’s tape on the underside of cushions to label positions like “Left seat 1” or “Chaise back.”
This tiny step saves you from the lumpy “why does this not fit anymore” moment later.
Step 3: Separate pieces
Most sectionals connect with metal hooks, brackets, or latch systems. Instead of yanking, lift slightly and slide modules away from each other.
- Check underneath and along the sides for connectors.
- Many designs disengage when you lift one module slightly and pull straight back, but some unlock by lifting up and forward. If you have a manual, it is worth a quick glance.
- Move one piece at a time so you do not twist the frame.
If your sectional has a corner wedge, treat it like a little bridge that needs gentle handling. It is usually the crumb capital of the whole sofa, so we want it accessible.
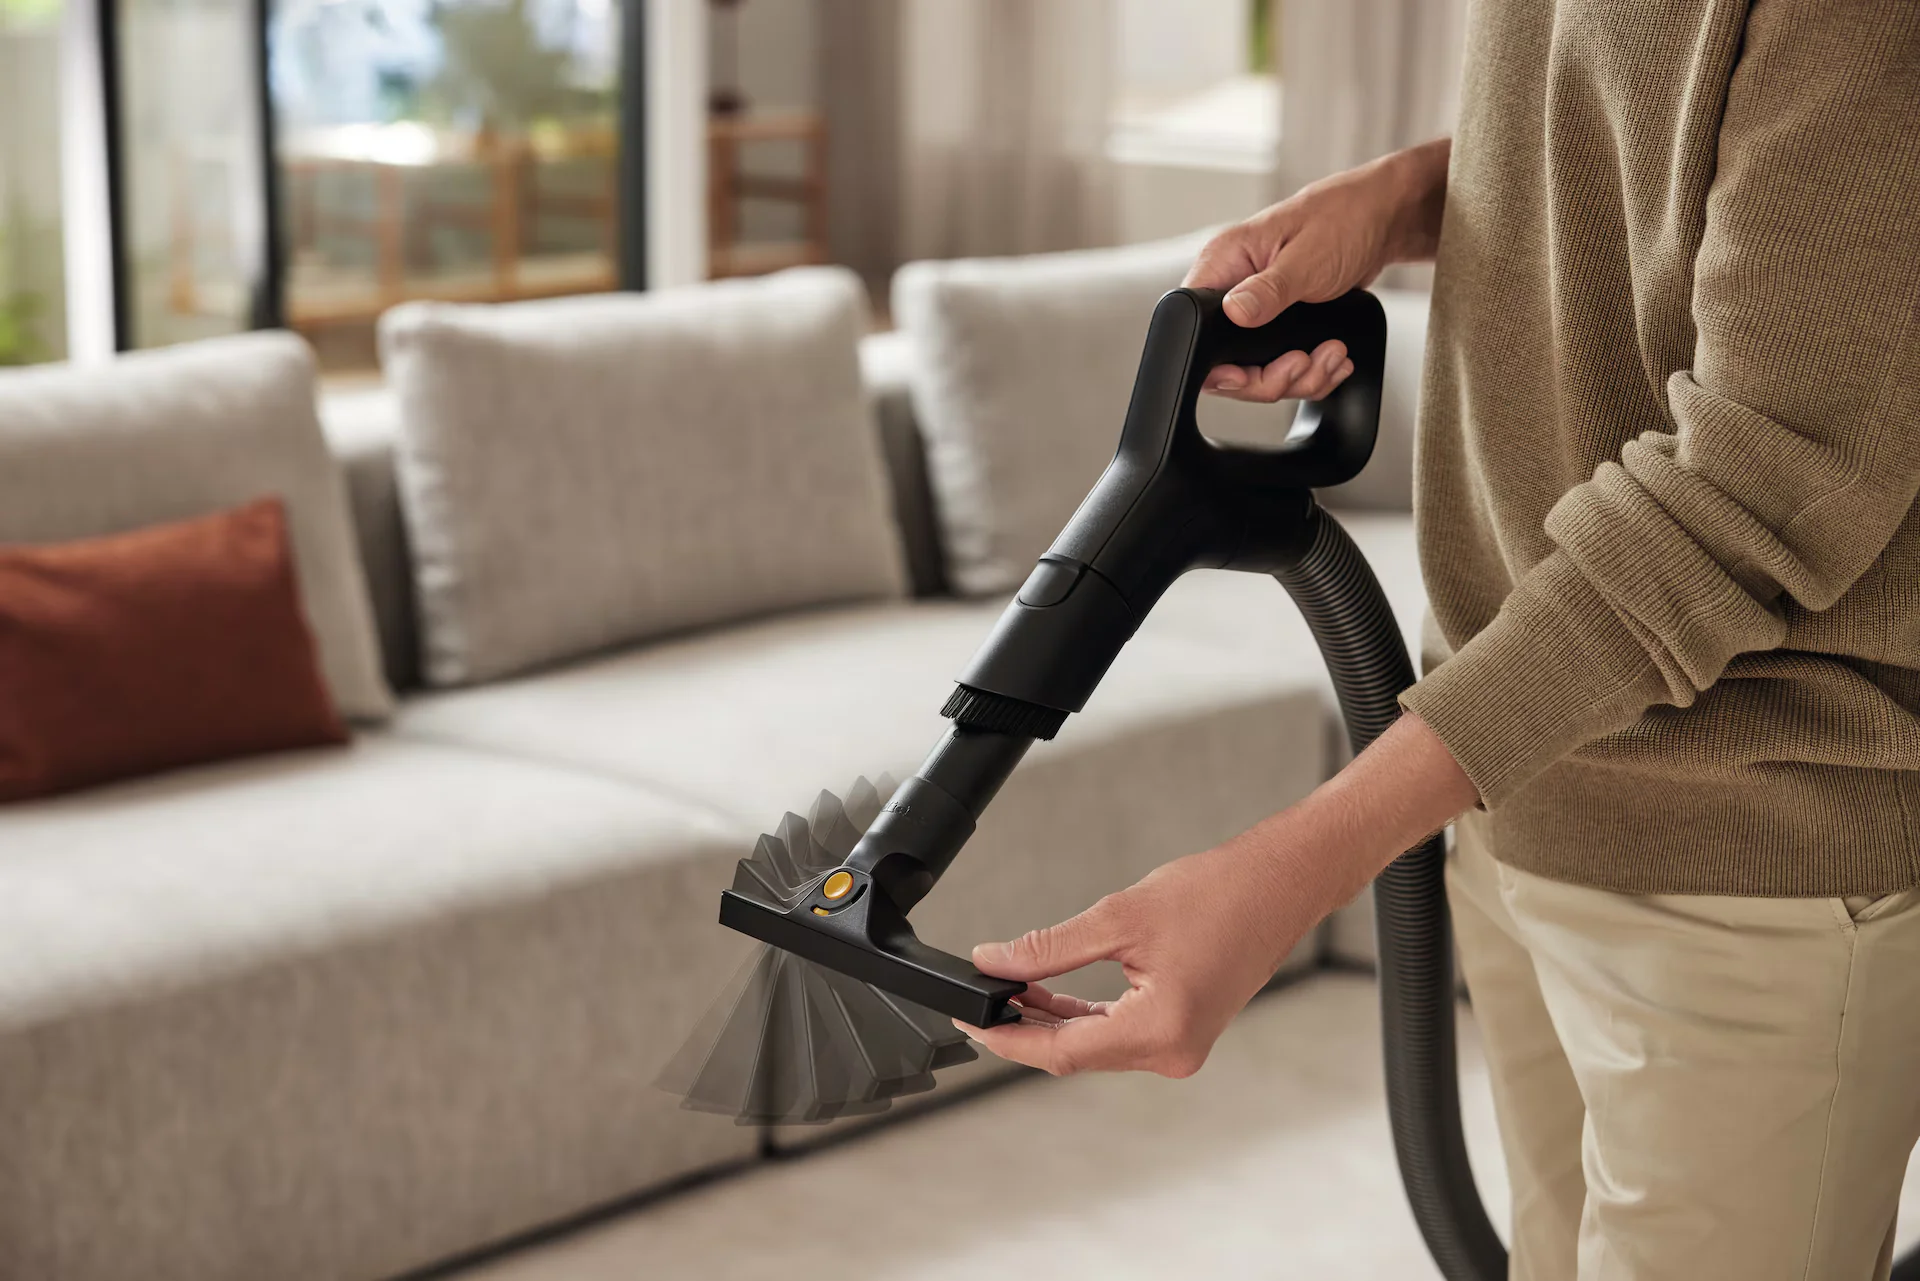
Step 4: Vacuum the gaps
This is the part that makes everything else easier. Dry debris first, always.
Start with the easy surfaces
- Vacuum the exposed frame, arms, and base with the upholstery brush.
- Use a lint roller for pet hair on fabric that grabs fuzz.
Then go after the gaps
Use the crevice tool for:
- Seams where the seat meets the back
- The “canyon” where the chaise cushion meets the arm
- The corner wedge seams and any tufting
- Where modules join, including the underside lip
My favorite trick: wrap a microfiber cloth around the crevice tool and secure it with a rubber band. You will pull out a shocking amount of fine dust that vacuum suction alone can leave behind.
Step 5: Clean the frame
With the modules separated, you finally have access to the places that make a sectional feel dingy even when the cushions look fine.
- Vacuum the floor beneath the sectional, including edges near baseboards.
- Vacuum the underside of each module, especially the fabric dust cover.
- If the dust cover is sagging, do not rip it. Just vacuum gently and consider stapling it back later if you are handy and allowed to do so.
If you find sticky spots on the frame (hello, soda splash), wipe with a barely damp cloth and a drop of dish soap, then immediately dry with a towel.
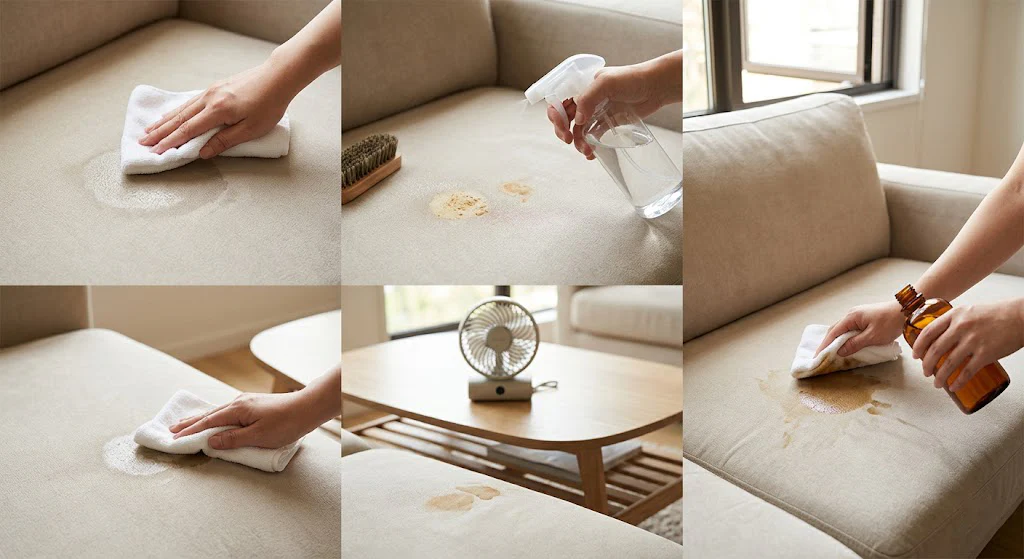
Step 6: Clean the cushions
General rule that will save your upholstery: blot, do not rub. Rubbing pushes grime deeper and can rough up the fibers.
If covers are removable
Check the tag. Many covers are technically “spot clean,” but some can be washed on cold, gentle. If you wash:
- Zip covers closed halfway to protect the zipper teeth.
- Wash cold on gentle with mild detergent.
- Skip fabric softener. It can leave residue that attracts soil.
- Air dry or tumble low only if the tag permits. Heat is how covers shrink and relationships end.
If covers are not washable
Make a simple upholstery solution (keep it low-suds):
- 2 cups warm water (distilled is ideal)
- 1 teaspoon clear dish soap
Lightly dampen a microfiber cloth, blot the fabric, and work in small sections. You are lifting grime, not soaking foam. Follow with a clean damp cloth (water only) to remove soap, then blot dry.
If your fabric is labeled “S”: skip this water mix and use a dedicated solvent-based upholstery cleaner, exactly as directed. Ventilate well.
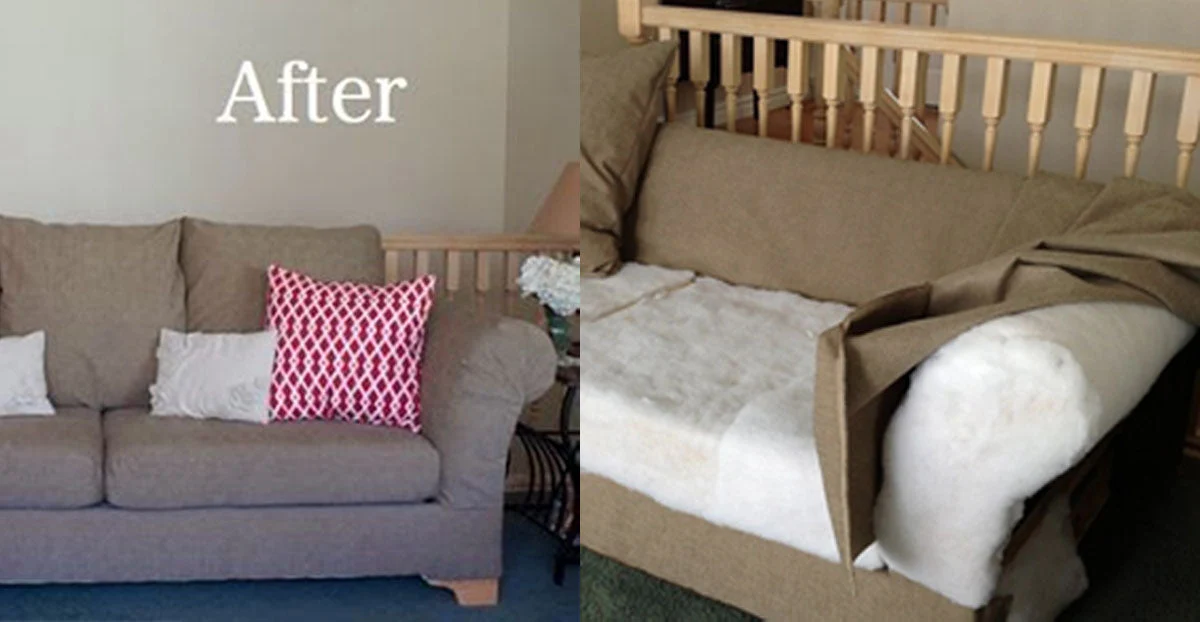
Do not ignore the inserts
Foam and fiber inserts hold odor. If they smell less than fresh:
- Sprinkle baking soda lightly on both sides.
- Let sit 30 to 60 minutes.
- Vacuum thoroughly using the upholstery brush.
Small caveat: on some delicate weaves, baking soda can lodge in fibers. Use a light hand and vacuum slowly and thoroughly. If you are dealing with a very nubby fabric, test on a hidden spot first.
If there is a true stain or pet accident on the insert, use an enzyme cleaner and follow the label instructions. Enzymes need dwell time to work, and they are best for organic messes, not everything.
Step 7: Clean the chaise
Chaises get body oils, snack fallout, and shoe marks faster than any other part of the sectional. Treat it like its own mini project.
- Vacuum the full length of the chaise, including the front edge where legs rest.
- Spot-clean darkened areas with a lightly damp cloth and a tiny bit of soap (or the right cleaner for your code).
- Use a soft brush on textured weaves to lift grime from the nap.
If the chaise cushion is attached and you cannot flip it, shift it as much as the design allows so you can vacuum along the back edge. That hidden strip collects dust that dulls the fabric over time.
Step 8: Deodorize
I love a warm amber lamp glow, not a floral chemical cloud. For a clean smell that reads as “fresh linens,” not “air freshener aisle,” do this:
Baking soda reset
- Once cushions are dry, sprinkle a thin layer of baking soda over seats, backs, and arms.
- Let it sit 30 minutes (or up to overnight if odors are stubborn).
- Vacuum thoroughly.
Target stubborn odors
If smells are coming from one specific spot, use an enzyme spray instead of adding more fragrance. Blot, let it work, then dry fully.
Steam, only if it is safe
Steam can freshen some upholstery, but it can also cause water marks, loosen adhesives, and set certain stains if you apply heat before removing the stain. If you steam, test first, keep the head moving, and avoid “S” and “X” code fabrics.
Important: do not trap moisture. A sectional that is “almost dry” will smell worse tomorrow. Aim for completely dry before reassembly, especially in humid apartments.
Step 9: Dry it out
Drying is not the glamorous part, but it is the difference between “clean” and “why does my sofa smell like a wet dog now.”
- Point a fan at the cushions and open windows if weather allows.
- Stand removable covers up so air can circulate, instead of leaving them in a damp pile.
- Do not sit on cushions until everything is fully dry, especially foam inserts.
Step 10: Reassemble
Once everything is clean and dry, put the sectional back together in a calm, methodical way.
- Start with the corner piece or the chaise, whichever is the anchor in your layout.
- Reconnect modules by aligning hooks and sliding into place, not forcing.
- Replace inserts into covers, then zip fully.
- Fluff cushions by gently punching the sides and patting the top flat.
Stand back and check alignment. If the sectional looks slightly “off,” it usually means one module is not fully latched. A small adjustment can make the whole thing look crisp again.
Stain cheats
- Greasy spots (pizza hands, lotion): sprinkle baking soda or cornstarch, let sit 15 minutes, vacuum, then blot with a mild soap solution if needed.
- Coffee or tea: blot immediately with cold water first, then use water with a tiny bit of dish soap. Rinse by blotting with water only. For lingering discoloration on suitable fabrics, an oxygen-based cleaner can help, but patch test and follow the label.
- Red wine: blot immediately, then blot with cold water to dilute. If your fabric allows it, follow with an oxygen-based cleaner for the dye (patch test). Enzyme cleaner can help with the organic part, but it is not always the main event for the color.
- Chocolate: gently lift any solids first. Then use a tiny bit of soap solution, blot, rinse by blotting with water only, and dry.
- Makeup (foundation): start with a dry microfiber cloth to lift what you can, then blot with the appropriate cleaner for your fabric code. Go slowly, makeup loves to smear.
- Ink or marker: do not add water first. For “S” or “WS” fabrics, a small amount of rubbing alcohol on a cloth can help lift ink, but test carefully and blot. If it spreads or lightens the fabric, stop and call a pro.
- Pet accidents: enzyme cleaner, dwell time, blot, repeat. Deodorize after it dries.
- Unknown stain: vacuum, then blot with plain water (or solvent for “S”). If color transfers to your cloth, keep blotting and do not scrub. When in doubt, stop before you make a small stain into a big one.
If your fabric is labeled “S,” stick to a solvent-based upholstery cleaner and follow the can exactly. Use ventilation and a light hand.
When to call a pro
DIY is great until it is not. Consider professional upholstery cleaning if:
- A spill soaked through to the foam and you cannot fully dry it
- You have a mildew smell, visible mold, or long-term dampness
- The piece is vintage, delicate, or has tricky fabrics like velvet or high-pile textures
- Pet urine odor keeps coming back after proper enzyme treatment and drying
Easy upkeep
You do not have to deep-clean monthly to keep a sectional looking good. Here is the low-drama rhythm I recommend:
- Weekly: quick vacuum of seats and seams (5 minutes).
- Monthly: lift cushions, vacuum the frame and gaps, rotate cushions if possible.
- Seasonally: full modular pull-apart deep-clean, deodorize, and spot-treat.
One last cozy-home tip: once your sectional is clean, add a washable throw in the “most lived-in” spot. It protects the fabric and makes the whole sofa feel intentional, like you meant for it to be the best seat in the house.