How to Clean Velvet Furniture Without Crushing the Nap
Clara Townsend
Clara Townsend is an interior stylist, vintage furniture enthusiast, and the creative voice behind Velvet Abode. With over a decade of experience transforming both cramped city apartments and sprawling fixer-uppers, she believes that a beautiful home is built on personal stories rather than massive budgets. When she isn't hunting for the perfect brass sconce at a local flea market, she can usually be found rearranging her living room for the third time this month.
Velvet is one of those materials that makes a room feel instantly finished. It catches lamplight, looks rich even in a tiny apartment, and somehow makes every movie night feel more intentional. The tradeoff is that velvet is not a “scrub it and forget it” fabric. The pile, also called the nap, is made of tiny upright fibers that can flatten, shine, or get weirdly patchy if you clean it like a regular upholstered couch.
The good news: you can absolutely keep velvet clean at home without crushing the nap. You just need the right direction, the right touch, and a quick little test before you go anywhere near it with water, solvent, or steam.

First, identify your velvet
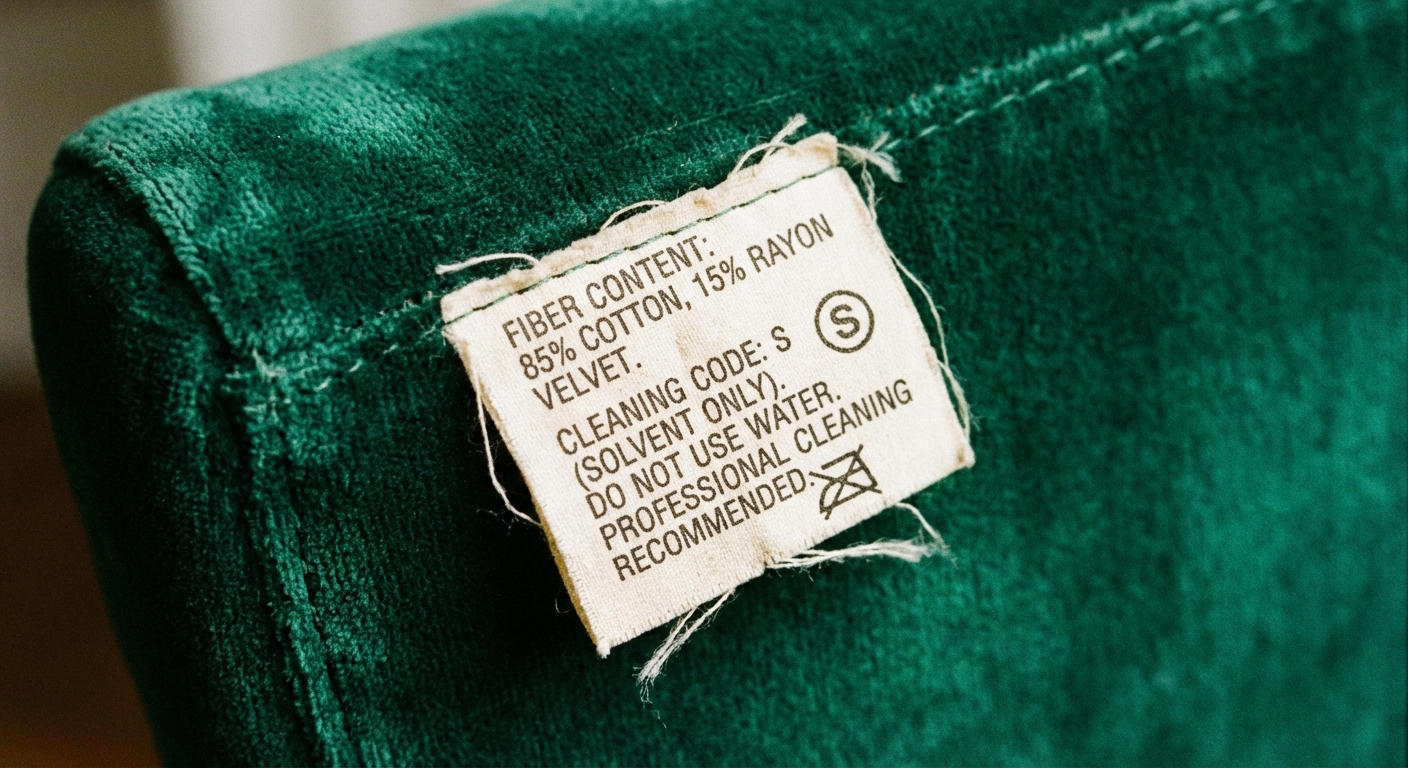
Cleaning depends on the fiber and the backing. Cotton velvet behaves differently than polyester velvet, and silk or rayon (viscose) velvet has its own set of rules. Before you do anything, check the manufacturer tag and look for cleaning codes.
Quick note: These codes are common, but not universal across every brand and country. The care tag wins if it conflicts with anything you read online.
- W: water-based cleaners are safe
- S: solvent-based cleaners only (no water)
- WS: either water-based or solvent-based cleaners
- X: vacuum only, no liquids (professional cleaning recommended)
If you cannot find a tag, assume a conservative default. Treat it like S or X until you confirm, especially for vintage pieces or anything that looks like rayon or silk. Yes, some velvets are water-safe, but guessing wrong can leave water rings or a crushed patch that never really comes back.
Common velvet types
Not all velvet is moody in the same way. Knowing what you are working with helps you choose the gentlest method that still works.
- Polyester performance velvet: often more stain-resistant and more forgiving, but still prone to pressure shine if you scrub.
- Cotton velvet: plush and classic, but can show water marks and can take longer to dry.
- Rayon or viscose velvet: the drama queen. It can watermark easily and dislike heat, moisture, and friction. Spot-test like your life depends on it.
- Silk velvet: gorgeous and delicate. Many pieces are best handled by a professional cleaner.
- Velour: looks similar but is usually knit, often synthetic, and can respond differently. Still, the friction rule applies.
The 30-second nap test
This is my favorite little sanity check, especially if you are cleaning a vintage piece or a velvet you did not choose yourself.
How to do it
Choose a hidden area, like the back lower corner or under a seat cushion.
Brush your fingertips back and forth lightly. One direction will feel smoother and look darker or more even. That smooth direction is with the nap.
Lightly dampen a white microfiber cloth (or use your intended cleaner), then press it to the spot for 5 seconds. Do not rub.
Let it dry completely. Then look at it from a few angles in daylight and lamplight.
What you are checking for
- Color transfer onto the cloth
- Water marks or rings after drying
- Nap change, like flattening, shiny patches, or roughness
If the pile looks different after drying, scale back. Use a drier method, less product, more blotting, or call a pro.
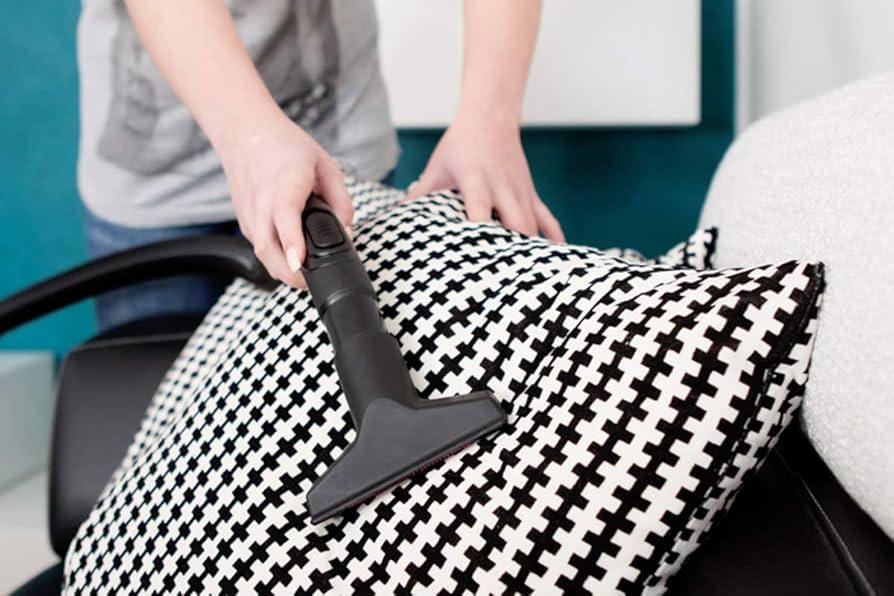
Weekly care
Most velvet “mystery wear” is just dust, skin oils, and crumbs settling into the pile. Regular, gentle vacuuming keeps the fibers upright and prevents that dingy look.
What you need
- Vacuum with a soft upholstery brush attachment
- A clean, dry microfiber cloth
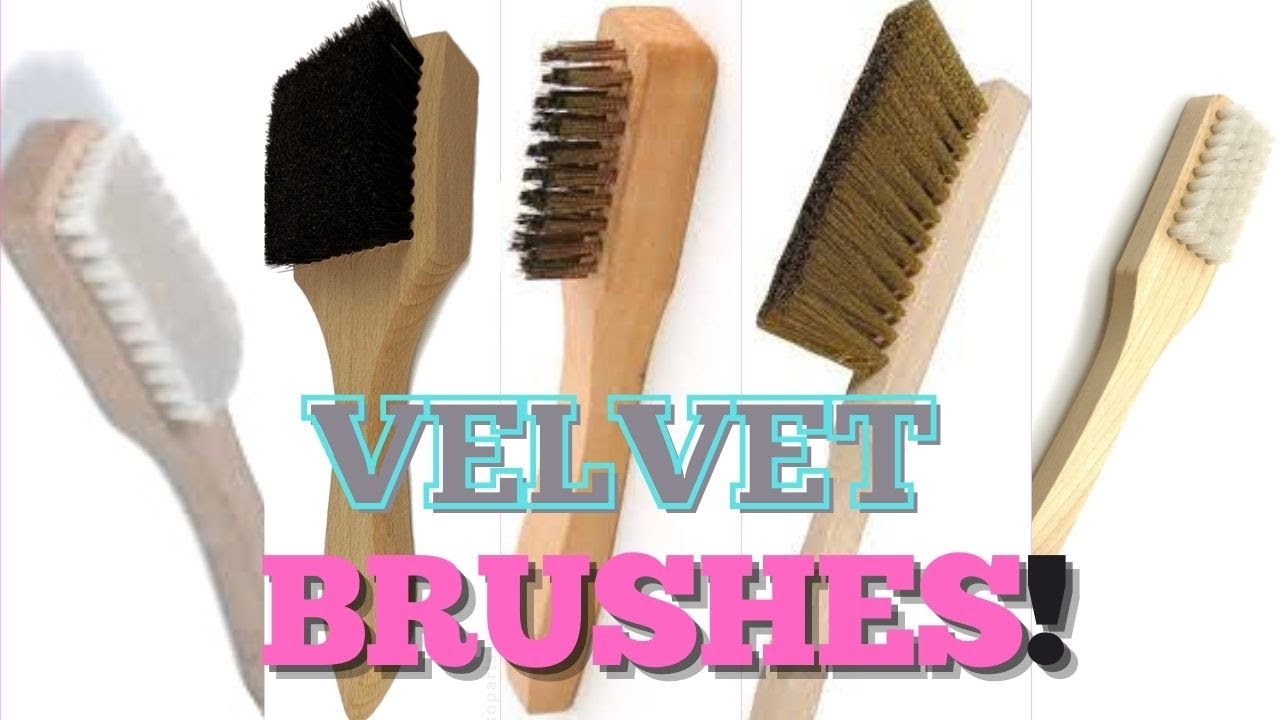
- Optional: a velvet upholstery brush or a soft baby hair brush
Step-by-step
Lower the suction if your vacuum allows it. High suction can tug the pile.
Vacuum with the nap using light passes. Think “skimming” rather than pressing down.
For seams and piping, use the crevice tool carefully. A good cue is to keep it just above the surface and let suction do the work, rather than digging into the fabric.
Finish by smoothing the velvet with your hand or a soft brush, moving with the nap.
Avoid: beater bars or rotating brush heads. They are great for carpet, not for velvet.
Pet hair, the velvet magnet
Velvet loves to hold onto pet hair like it is part of the design. The trick is to lift hair without roughing up the pile.
- Start with a vacuum upholstery brush on low suction.
- Use a rubber pet hair brush with very light strokes (spot-test pressure first). Stop if you see the nap going shiny.
- Try a barely damp microfiber cloth and wipe with the nap. This can gather fine hair without a sticky roller.
- Lint rollers: use gentle ones and do a quick test. Very aggressive adhesive can pull fibers or leave residue on some velvets.
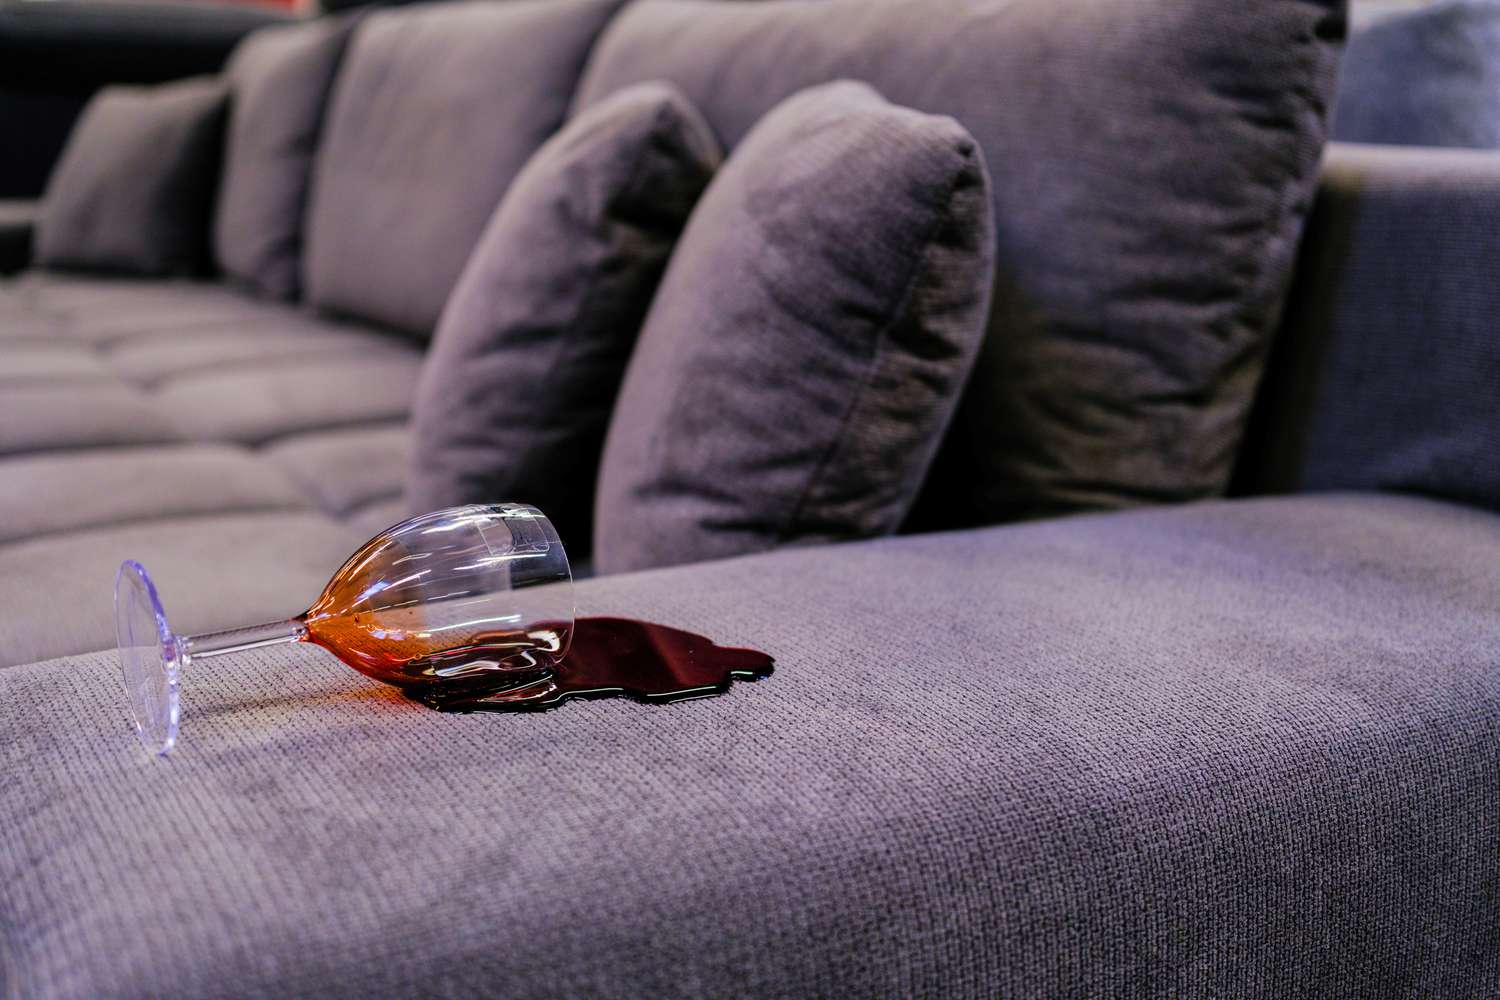
Spills
Velvet is dramatic in the best way, but it can also be dramatic about liquids. The goal is to lift the spill up and out before it spreads through the pile.
For fresh spills
Blot immediately with a clean, dry microfiber cloth or paper towel. Press down, lift, move to a clean area of cloth, repeat. Do not rub.
Work from the outside in to keep the spill from blooming outward.
Let it air dry if it is just water. Many water spots look worse while damp and then relax once fully dry.
If it is sticky, colored, or oily
Pause and check your cleaning code. For W or WS velvet, you can use a very small amount of water-based cleaner. For S velvet, use a solvent-based upholstery cleaner made for your fabric type. For X velvet, stop at blotting and call a professional.
Velvet rule: Rubbing is what turns a small stain into a flattened, shiny patch that catches the light forever.
Spot-cleaning
Spot-cleaning velvet is about using the least moisture possible and letting the fabric do the work. You are coaxing the stain out, not wrestling it.
What to use (often safe for many W or WS velvets)
- Distilled water (helps prevent mineral rings)
- A tiny drop of clear, dye-free dish soap diluted heavily in water (think: barely soapy)
- Upholstery cleaner that matches your code and fiber
- White microfiber cloths (colorfast)
If your velvet is S, choose a solvent-based upholstery cleaner designed for solvent-only fabrics and ventilate well. Always spot-test.
Step-by-step spot-clean
Vacuum first so you are not grinding dust into the pile.
Dampen the cloth, not the fabric. Your cloth should be barely damp, not wet.
Blot the stain gently, rotating to a clean part of the cloth often.
Rinse by blotting with a new cloth dampened with distilled water (for W or WS). This helps prevent soap residue that can attract dirt.
Dry with a dry cloth, pressing to lift remaining moisture.
Let it fully dry before judging. Then use a soft brush to lift the nap back up, brushing with the pile.
What not to do: soak the cushion, scrub in circles, use harsh stain removers, or reach for bleach. Velvet holds onto moisture longer than it looks like it should, especially on thick cushions.
Drying tips
Drying is where velvet either recovers beautifully or starts to smell a little haunted.
- Use airflow: open windows, run a fan, and give cushions space so air can circulate.
- Avoid heat: no hair dryers, space heaters, or direct sun blasting the damp area. Heat can set marks and change the pile.
- Do not put cushions back right away: let both sides dry fully if possible, especially if liquid soaked through.
- Watch for lingering odor: if it smells musty after drying, moisture may be trapped inside the cushion and a professional cleaning is the safer next step.
Steaming safely
Steam can be velvet’s best friend when you use it like a whisper, not a power washer. It can relax crushed fibers and may help soften the look of water marks, but too much heat or pressure can permanently change the pile.
When steaming helps
- Light crushing from sitting
- Water marks after careful blotting
- General “lived-in” flattening on arms and seat fronts
How to steam without crushing
Use a handheld steamer, not a garment iron pressed to the fabric.
Start farther back, around 6 to 8 inches away, especially on synthetic, rayon, or silk velvet. If the fabric responds well, you can slowly move closer. Do not get close enough to dampen the fabric.
Steam in short passes, moving constantly. The steam is just to relax the fibers, not to soak the surface.
Brush after steaming while the fibers are warm, using a velvet brush or soft brush and moving with the nap. Let it cool and dry completely.
Extra caution: silk or rayon velvet is more sensitive to heat and water. If your piece feels precious, antique, or unpredictable, professional cleaning is the safest route.
Fix shiny or flattened patches
Shiny patches happen when the fibers get pressed and laid down, often from rubbing during cleaning or from repeated contact points like armrests. You cannot always fully reverse shine, but you can often improve it.
Try this at home
Steam lightly from a safe distance to relax the fibers.
Brush with the nap using a velvet brush or soft brush, lifting the pile gently.
Let it dry, then reassess in natural light.
If the patch is still shiny, stop. More brushing can make it worse. At that point, a professional cleaner may be able to use specialized tools to lift the pile more evenly.
Velvet cleaning kit
If you want to feel calmly prepared instead of scrambling mid-spill, this is the little kit I keep at home for velvet pieces.
- Soft upholstery brush attachment for vacuum
- Velvet brush or soft baby hair brush
- White microfiber cloths
- Distilled water in a small spray bottle (spray cloth, not couch)
- Clear, dye-free gentle dish soap (for W or WS, very diluted)
- Solvent-based upholstery cleaner (only if code is S or WS and you spot-tested)
- Handheld steamer
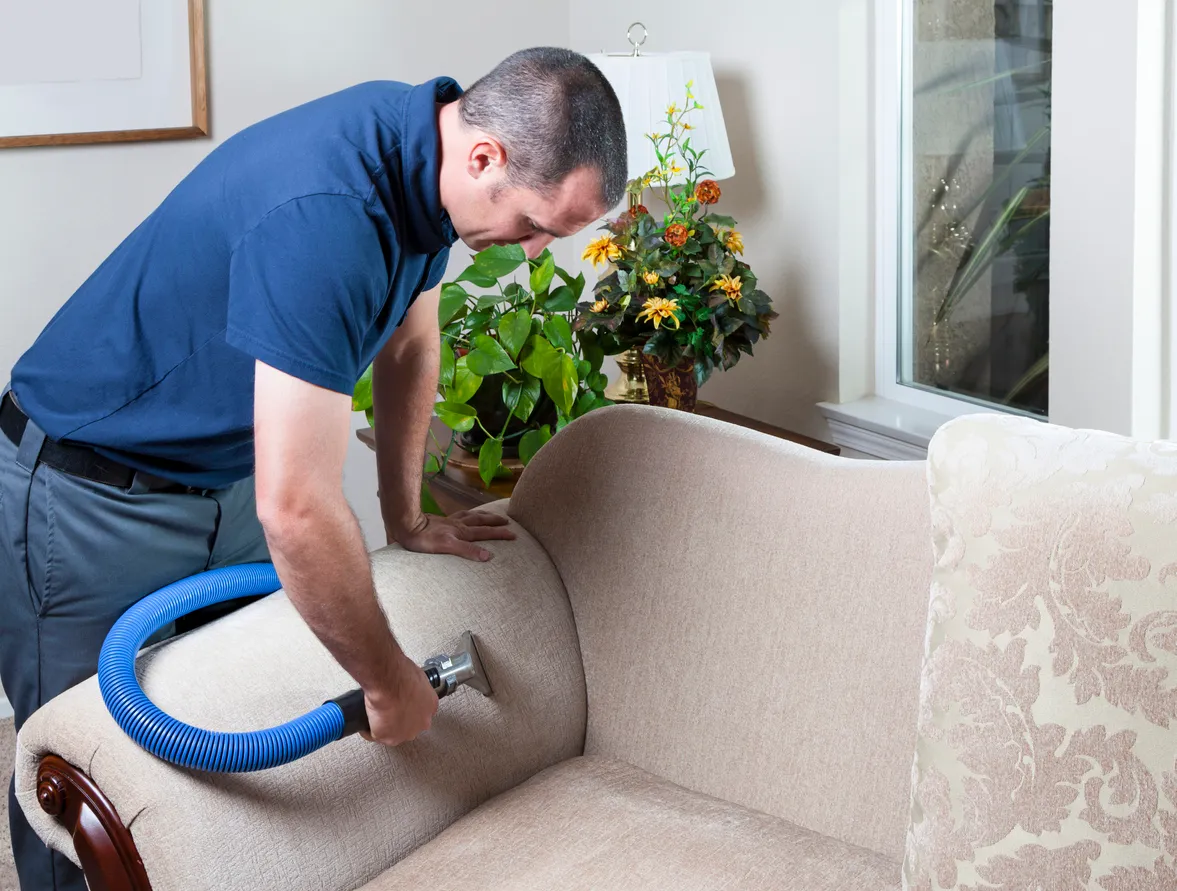
When to call a pro
Some velvet situations are simply above the at-home pay grade, and there is no shame in that. In fact, calling a pro early is often what preserves the fabric.
- Cleaning code is X, or you cannot confirm the fiber type
- Large stains (wine, coffee, pet accidents) that soaked into cushions
- Odors that keep returning
- Antique, silk, or rayon velvet
- Water rings that get worse with gentle cleaning
When you book, tell them it is velvet and ask what method they use. Look for an upholstery specialist who understands pile fabrics and will not treat it like flat weave.
Quick cheat sheet
- Vacuum weekly with a soft brush, always with the nap.
- Blot, do not rub, and use as little moisture as possible.
- Spot-test every time, even if you used the product before.
- Steam from a distance, then gently brush to lift the pile.
- Stop if the nap changes. Crushing is easier to create than to undo.
If you take nothing else from this, let it be this: velvet loves a light touch. Patient, gentle, and just a little reverent. That is how you keep it plush and glow-y for years.