Hang Heavy Mirrors and Art in a Rental Without Wall Damage
Clara Townsend
Clara Townsend is an interior stylist, vintage furniture enthusiast, and the creative voice behind Velvet Abode. With over a decade of experience transforming both cramped city apartments and sprawling fixer-uppers, she believes that a beautiful home is built on personal stories rather than massive budgets. When she isn't hunting for the perfect brass sconce at a local flea market, she can usually be found rearranging her living room for the third time this month.
There is a specific kind of heartbreak that comes from finding the perfect vintage mirror, carrying it home like a treasure, and then realizing your rental walls feel about as trustworthy as a soggy cardboard box.
Hanging heavy pieces is not like putting up a lightweight gallery wall. Safety matters more than aesthetics here, because a fallen mirror can crack, injure someone, or take a chunk of drywall with it on the way down. The good news: you can absolutely hang heavier art and mirrors in a rental with smart hardware choices, a little wall detective work, and a clear plan for patching when you move.
Start with two questions: wall type and rules
1) What are you hanging, really?
Before you buy hardware, gather three details:
- Weight of the piece (check the back label, manufacturer site, or weigh it on a bathroom scale by holding it carefully and subtracting your weight).
- Hanging method on the back (D-rings, wire, keyholes, cleat, or unknown).
- Size and “sail” factor (big pieces catch bumps and door slams more easily, so they need more stability even at the same weight).
2) Drywall or plaster?
Rentals tend to be one of these:
- Drywall: feels slightly hollow when you knock, usually newer builds or renovated units.
- Plaster: feels solid, older buildings, often with hairline cracks or subtle waves in the surface.
If you are not sure, you have options:
- Low-drama clues first: knock-test, look at a closet or utility wall, or ask building maintenance what the walls are.
- If you do check an outlet: only if you are comfortable doing so, and turn power off at the breaker. Drywall is typically a uniform gypsum board, plaster often looks thicker and layered over lath.
3) What does your lease allow?
Some leases allow “small picture hooks only.” Others ban anchors entirely. Heavy mirrors can push you into “alterations” territory even if you are careful. When in doubt, email your property manager with:
- the item weight
- the proposed method (example: “toggle anchors in drywall” or “hang from existing picture rail”)
- the number of holes
Getting a yes in writing can save your security deposit later.
Quick weight guidelines (realistic, not wishful)
Hardware packages love optimistic numbers. In rentals, I prefer conservative thresholds that account for old walls, imperfect installs, and everyday life.
Important fine print: Always follow the specific manufacturer rating for your wall thickness and load direction. Ratings often assume vertical shear (straight down). Mirrors can add pull-out force and torque if they sit off the wall, which is why bumpers and snug mounting matter.
- Up to 10 lb: quality picture hooks, small anchors, or adhesive systems (only when the item is not valuable or dangerous if it falls).
- 10 to 25 lb: better hooks into studs when possible, or appropriate anchors for your wall type. For mirrors, lean toward studs.
- 25 to 50 lb: studs, a French cleat into studs, or a properly installed toggle style anchor where allowed. Two fasteners minimum.
- 50 lb+: treat this like a mini construction project. Cleat into studs, consider professional install, and confirm building rules.
Mirror safety note: if it is glass and heavy, prioritize redundancy. Use two attachment points and add a discreet safety tether when possible, especially with kids, pets, or in earthquake-prone areas.
Option 1: Picture rails
If your place has picture rail molding (common in older apartments), you have hit the renter jackpot. Picture rails are designed to hold art without wall holes, using hooks that sit on the rail and cords that drop down.

Why picture rails work so well
- No new holes in plaster or drywall.
- You can move pieces around constantly, which I fully support.
- Weight can be surprisingly high when you use rated hardware and the rail itself is securely fastened into structure.
How to use them safely
- Confirm the rail is solid: give it a gentle test. If it wiggles, do not trust it with anything heavy until building maintenance checks it.
- Use two cords for anything medium to heavy, so the piece stays level and resists swinging.
- Choose strong cord (steel cable or rated perlon) and rated hooks, not decorative ones.
- Use a bottom wall bumper (clear rubber) so the frame does not scuff the wall and sits closer to the wall, reducing pull-out force.
- Do a gentle pull test before you walk away. If it shifts, redo it.
Best for: renters with picture rails, plaster walls you do not want to drill, and anyone who wants a flexible gallery look with minimal drama.
Option 2: French cleats
A French cleat is a two-part hanging system: one strip attaches to the wall, the other to the frame. They lock together like a tidy little handshake and distribute weight across a wider area than a single hook.
When cleats are the right move
- Large mirrors over a console or dresser
- Oversized art that sits in a high-traffic path
- Anything heavy that needs to sit flat and steady, not bounce or tilt on a wire
A quick frame reality check
Cleats need a frame that can actually take screws. If the frame is very thin, fragile, or the back edge is narrow, you may need a different hanging method, or you may need to add a mounting board to the back so the cleat has something sturdy to bite into.
Rental-friendly reality check
Cleats typically require screws, ideally into studs. That means holes. The tradeoff is safety and stability, and the holes are usually easy to patch later.
Install tips that prevent wall heartbreak
- Hit studs if you can. Use a stud finder, then confirm with a small pilot hole. Stud spacing is often 16 inches on center, sometimes 24, and in older buildings it can be irregular.
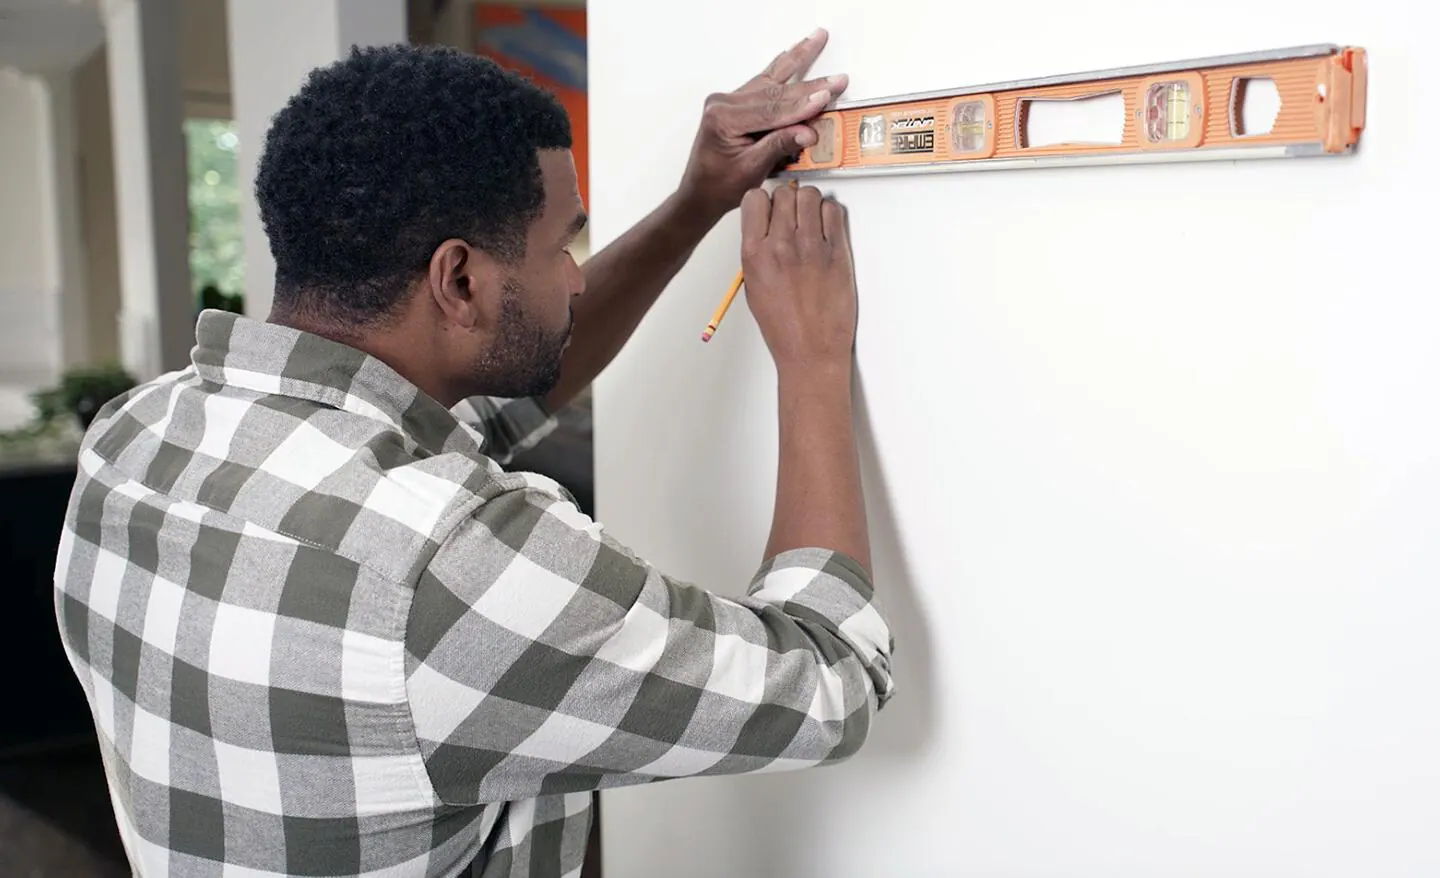
- Use a level. Cleats forgive a lot, but not a tilted starting line.
- Use two studs when possible. Especially for mirrors that are wide.
- Mind load direction. Add bumpers so the mirror stays closer to the wall. Less gap equals less leverage trying to pull hardware out.
Best for: heavy mirrors, statement art, and renters who want the most secure system and are comfortable patching later.
Option 3: Toggle anchors
Sometimes the studs are in the wrong place for your layout, or you are hanging something narrower than stud spacing. In drywall, toggle style anchors can be a strong alternative when the lease allows anchors.
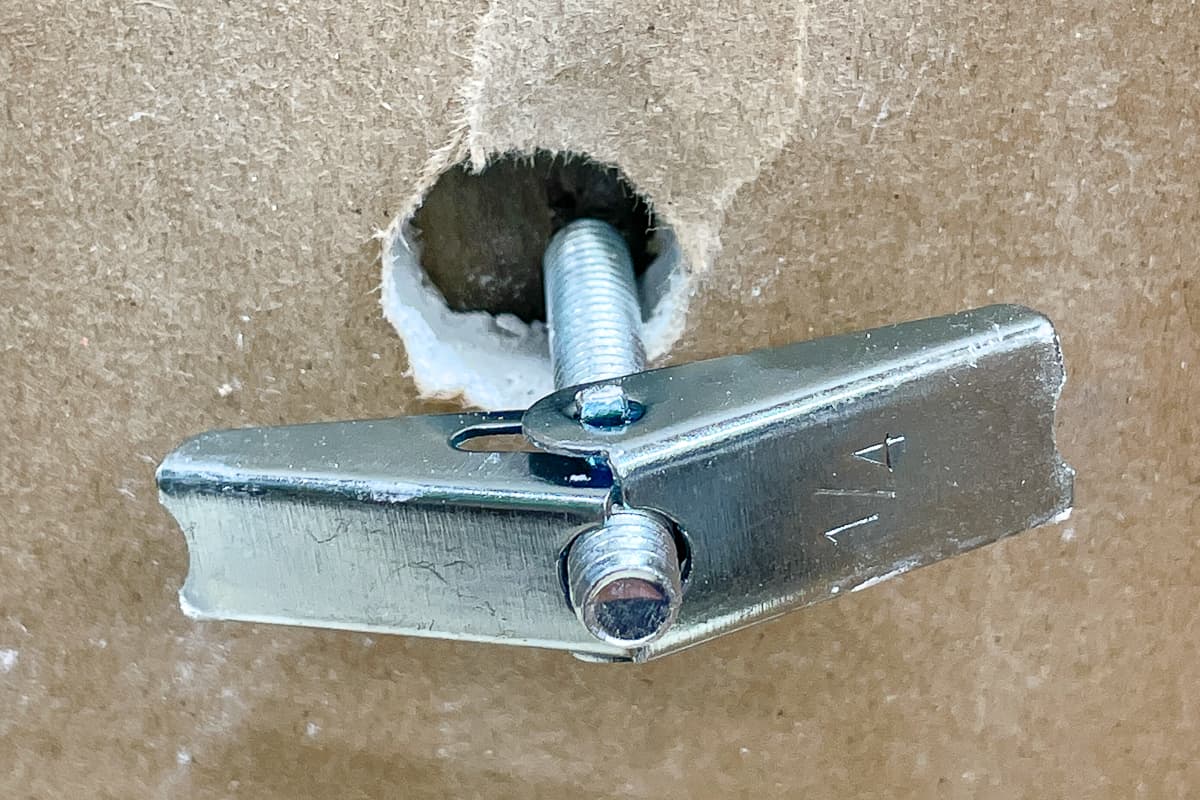
Toggle basics in plain English
A toggle spreads the load behind the drywall, like a little brace that grips from the back. It can hold far more than a plastic expansion anchor because it distributes weight across a larger area.
When toggles make sense
- Best in drywall. Plaster can sometimes take specialty toggles or molly-style anchors, but it requires extra care and the risk of cracking and blowout is real.
- Medium-heavy frames and mirrors when studs are not available at the desired location.
- When you can accept a slightly larger hole that will need patching later.
Important cautions
- Ratings vary by wall thickness and condition. Old, crumbly drywall does not perform like fresh drywall, and 1/2 inch drywall is not the same as 5/8 inch.
- Do not hang from a single point. For heavy pieces, use two toggles or a cleat system with multiple fasteners.
- Mind what is behind the wall. Avoid plumbing and electrical runs. If you are unsure, move the location.
Best for: drywall rentals where anchors are permitted and stud placement is inconvenient.
Option 4: Curved drywall hooks
If you have drywall and want a strong hold with a tiny, easy-to-patch hole, curved drywall hooks (often called Monkey Hooks or Gorilla Hooks) are a renter staple for a reason. They use the wall as a lever, not a big plastic anchor.
Where they shine
- Drywall walls when you cannot hit a stud
- Medium-weight frames and some mirrors, depending on the specific hook rating and your wall condition
- When you want minimal patching at move-out
Notes for real life
- Use the actual rating on the package and stay conservative for glass.
- Use two hooks for wide pieces to prevent swing and tilt.
- Not for plaster and not for crumbly drywall.
Drywall vs plaster: what changes
Drywall: predictable and patchable
- Studs are your gold standard for heavy pieces.
- Toggle anchors and curved drywall hooks can perform well when installed correctly.
- Small holes are easy to spackle and paint at move-out.
Plaster: strong, but fussy
Plaster can hold weight beautifully when the substrate is sound, but it does not like aggressive drilling or the wrong anchors. If you have plaster:
- Prefer picture rails if available.
- Locate studs or solid framing behind the plaster when you need serious strength.
- Drill slowly and start with a smaller pilot hole to reduce cracking.
- Avoid cheap expansion anchors that can wedge and stress the plaster.
Plaster red flags: if the wall sounds hollow in patches, shows spreading cracks, or crumbles when you try to drill, stop and involve your landlord or a pro. That is not you being dramatic. That is you being safe.
Mystery walls you might run into
Some rentals have drywall over plaster, metal studs, or masonry behind furring strips. If your stud finder is acting weird, your drill suddenly hits something that is not wood, or screws will not bite like you expect, pause. This is the moment to ask maintenance, switch locations, or choose a method designed for that wall type.
Damage-minimizing approaches
Approaches that can work
- Lean it safely: If you have a sturdy console or mantel, a large mirror leaned with anti-tip straps can be very renter-friendly. Add non-slip pads at the bottom and secure the top discreetly.
- Use existing fasteners: If there is already a properly placed anchor from a previous tenant, you can sometimes reuse it after checking it is tight and appropriate for the weight.
- Use two smaller holes instead of one stressed hole: Spreading weight reduces damage risk and makes patches easier.
What I do not trust for heavy pieces
- Adhesive strips for heavy mirrors: They can be fine for lighter frames on clean, smooth paint, but “fine” is not a word I want near glass. Humidity, textured paint, and imperfect prep all reduce performance.
- One nail and a prayer: A single hook for a heavy mirror is how you end up with a crater and a cracked corner.
- Wire as the only plan: Wire can be fine when properly rated and paired with two hooks, but it is more prone to tilt and bounce than D-rings on two hooks or a cleat. For heavy mirrors, I prefer D-rings or a cleat.
Step-by-step: my safe routine
- Choose placement and check the traffic zone. If a door will swing into it, pick a different spot.
- Mark center of the wall area with painter’s tape.
- Measure the hang point on the back of the frame. If you are using D-rings, measure from the top of the frame to the ring. If you are using wire, pull the wire taut to the same tension it will have when hung, then measure from the top of the frame to the taut wire at the hook points.
- Find studs if using screws. Mark with tape, not pen.
- Select hardware rated well above your item’s weight for your wall thickness and use-case.
- Install hardware carefully and level.
- Hang the piece, then do a gentle downward pull test.
- Add bumpers on the lower corners to protect the wall, steady the frame, and reduce the leverage that can pull hardware outward.
And then I step back, turn on one warm lamp, and let the room settle around it. Heavy pieces change a space in an instant. That is the magic.
When to call a pro
Call in backup if any of these are true:
- The item is 50 lb or more, especially if it is glass.
- You have plaster that is cracking, loose, or crumbling.
- You need to drill near tile, brick, concrete, or masonry.
- The piece will hang above a bed, crib, or seating and you want maximum assurance.
- Your building has strict alteration policies, or you are in a historic property.
If your landlord says “no anchors,” ask about alternatives: picture rails, approved contractors, or permission for a cleat into studs with patching at move-out. Most people are more flexible when you show you are prioritizing safety.
Move-out friendly patching
Even if you hang everything perfectly, rentals usually want “returned to original condition.” A few tips for a clean goodbye:
- Save a paint chip (or take a photo of the paint label if you find it in a utility closet).
- Use lightweight spackle for small nail holes. For larger anchor holes, use a patch kit if needed.
- Sand gently and spot-prime before paint if the patch flashes through.
- Match sheen (flat vs eggshell matters more than people think).
My renter mindset
There is a design myth that renters have to live with blank walls until some far-off day of homeownership. I do not buy it. Hang the mirror. Give the art the place of honor. Just do it like someone who wants their space to feel like a hug and also wants their security deposit back.
If you tell me what you are hanging (weight, wall type, and what is on the back), I can help you choose the safest method.