Hang Curtains to Make Any Window Look Bigger
Clara Townsend
Clara Townsend is an interior stylist, vintage furniture enthusiast, and the creative voice behind Velvet Abode. With over a decade of experience transforming both cramped city apartments and sprawling fixer-uppers, she believes that a beautiful home is built on personal stories rather than massive budgets. When she isn't hunting for the perfect brass sconce at a local flea market, she can usually be found rearranging her living room for the third time this month.
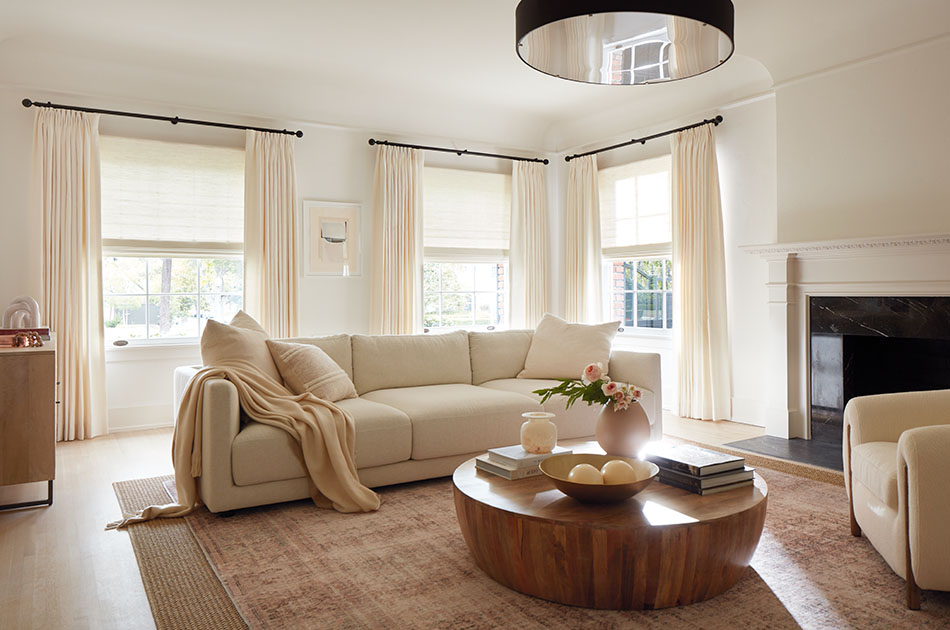
If you have ever looked at a window and thought, Why does this feel so… small? I promise it is usually not the window. It is the curtain placement. A few inches up, a few inches out, and suddenly the whole wall reads bigger, brighter, and a little more expensive. This is one of my favorite “tiny change, huge payoff” styling tricks, especially in rentals and older homes where the trim is charming but the window proportions are not.
The big idea: higher and wider
The goal is simple: let your curtains frame the window like a picture frame that is slightly oversized. When the panels sit mostly on the wall (not on the glass), your eye reads more wall-to-window continuity, which makes the window feel wider. When the rod is higher, your eye reads more height, which makes the window feel taller.
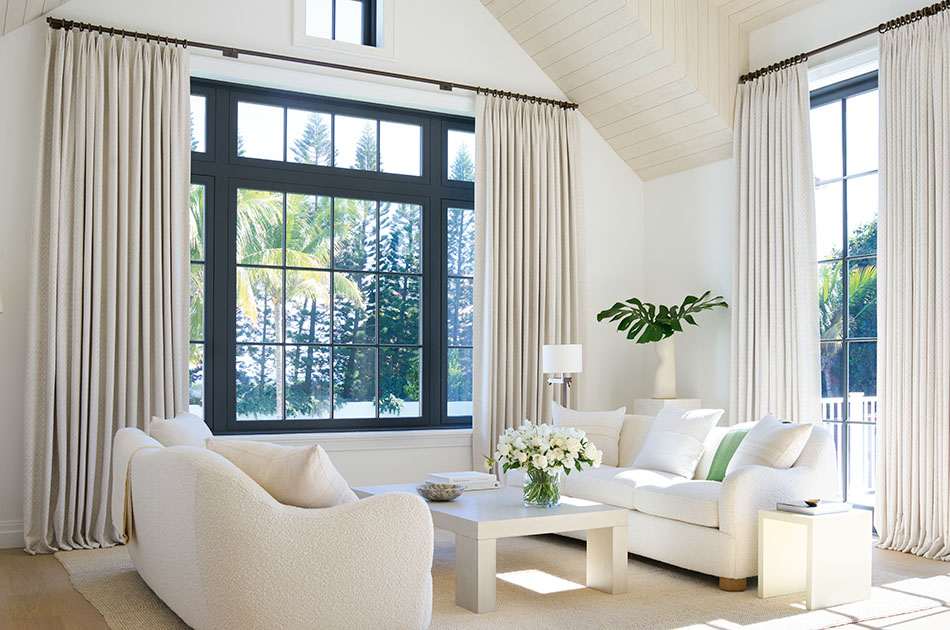
- Higher makes the window look taller and the ceiling feel higher.
- Wider makes the window look broader and lets in more light when curtains are open.
Step 1: Measure like a stylist
Before you buy anything (or drill a single hole), grab a tape measure and note these:
- Window width: outside edge of trim to outside edge of trim (or the visible frame if there is no trim).
- Window height: top of trim/frame to the sill. This is just to understand proportions.
- Space above the window: from the top of trim/frame to the ceiling, or to the bottom edge of crown molding.
- Clearance: anything that could interfere, like a radiator, baseboard heater, or a bulky sofa back.
Quick note: Curtain panel length is measured separately (from your hanging hardware down to the floor or stopping point). We will do that in Step 4 so you do not end up with “almost right” curtains.
Step 2: Place the rod higher
These are recommended starting ranges, not laws of physics. The right choice depends on your ceiling height, trim, and how much wall you have above the window.
Option A: The go-to rule
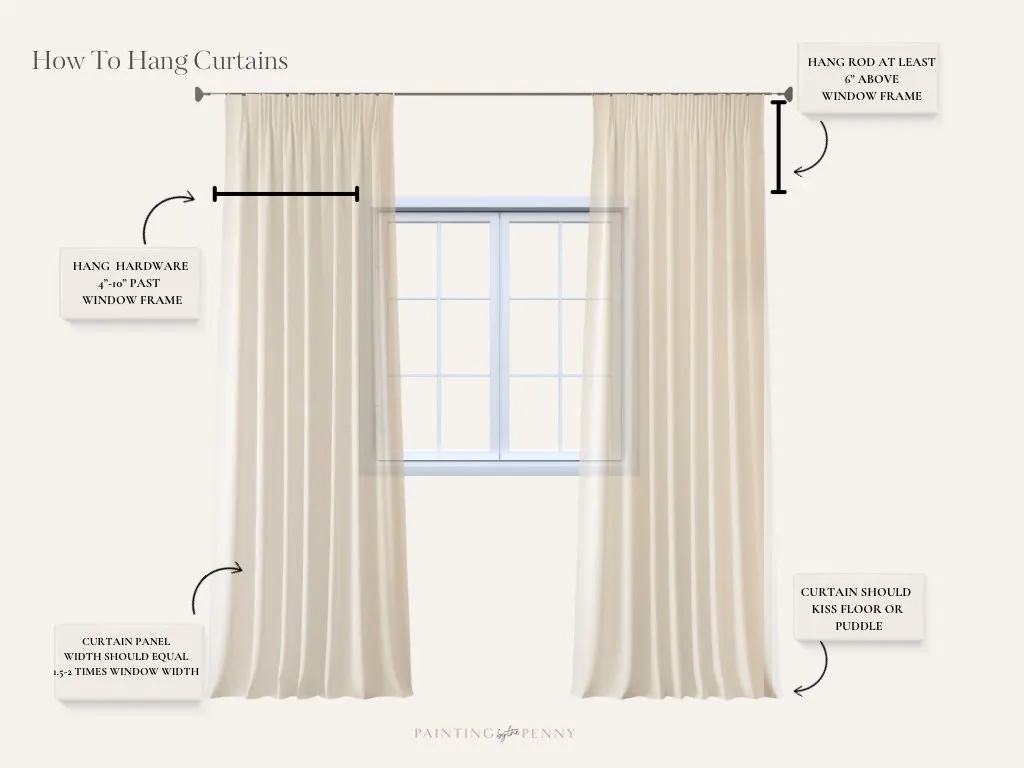
- Mount the rod 6 to 8 inches above the top of the window trim or frame.
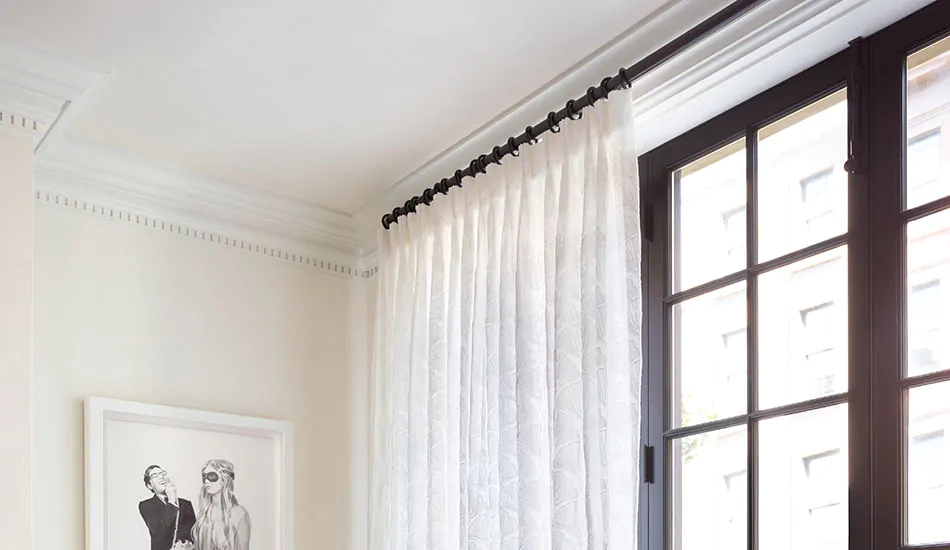
Option B: Near-ceiling
- Mount the rod 2 to 3 inches below the ceiling, or just below the bottom edge of the crown molding so it reads as one clean line.
Option C: Tight space above the window
- Mount the rod as high as you can while still allowing finials (if any) and rings to clear the ceiling or crown. Often this is 2 to 4 inches above the trim.
Sanity-check: If your rod ends up more than 10 to 12 inches above the trim, step back and check proportions. In some rooms (especially tall ceilings with short windows), going all the way up can create a long column of fabric that feels disconnected from the window. In those spaces, Option A often looks more intentional.
Visual tip: If you are unsure, hold your rod up with painter’s tape at two heights and step back. Choose the one that makes the wall feel calmer and taller. Higher usually wins, but “calm and balanced” wins every time.
Step 3: Extend the rod wider
This is the part people skip, and it is the part that changes everything. When curtains cover the glass even when open, you lose light and the window looks pinched.
How far past the trim
- Minimum: extend 8 to 10 inches beyond each side of the window trim.
- Sweet spot: extend 10 to 12 inches beyond each side.
- Big impact (only if you have wall space): up to 14 to 16 inches per side on wide blank walls, as long as it does not run into doors, cabinets, or an adjacent wall return.
Proportional shortcut: If measuring inches feels weird, aim to extend the rod about 20 to 30% of the window’s trim-to-trim width on each side, if your wall allows.
Rule of thumb: Aim for the curtains to sit mostly on the wall when open, leaving the glass almost fully exposed.
Rod length math
Rod length = window width (including trim) + (extension per side × 2)
Example: A 48-inch-wide window + 12 inches per side = 72-inch rod.
Quick stackback check
If you want a rough planning number, budget about one-third of the window width per side for stackback (where the curtains “park” when open). Full, lined, or pleated curtains need more room than thin sheers.
Step 4: Choose the right length
Curtain length is where a window can instantly look custom, or instantly look like an afterthought. If you want a bigger-looking window, long is your friend.
Floor-length
- Best for: most homes, most styles, especially if you want a crisp look.
- Look: panels should hover 1/4 inch above the floor to kiss the floor.
Tip: If your floors are uneven (old homes, I see you), kissing the floor can look more forgiving than a consistent hover that turns inconsistent.
Puddle
- Best for: bedrooms, formal living rooms, anywhere you want a relaxed, vintage vibe.
- Look: add 2 to 4 inches of extra length so the fabric gently pools.
Reality check: Puddling collects dust. If you have pets, kids, or allergies, do a micro-puddle (2 inches) or stick with floor-length.
How to measure panel length
- Rings with clips: measure from the bottom of the ring (where the clip grabs) to the floor, then adjust clips up or down to dial in the final “kiss.”
- Pinch pleat with hooks: measure from the eye of the ring (or the track clip) down to the floor. The hook placement lets you fine-tune height.
- Grommets: measure from the top of the rod to the floor. Grommets sit lower on the rod, so the header style matters here.
- Rod pocket: measure from the top of the rod to the floor, and know that rod pockets tend to sit a bit higher and bunch more.
Radiators and baseboard heaters
If you cannot go full-length, you can still fake height:
- Hang the rod high and wide.
- Use a tailored length that stops 1/2 to 1 inch above the radiator or heater cover.
- Safety first: keep fabric clear of heat sources and follow the heater manufacturer’s guidance. Clearance matters more than fabric weight here.
Step 5: Pick airy fabric
If your mission is “bigger window,” you want curtains that help light bounce around the room, not swallow it.
Best fabrics
- Linen and linen blends: texture without looking bulky, and they filter light beautifully.
- Cotton voile or lightweight cotton: bright, classic, easy to live with.
- Sheers: perfect for privacy without shrinking the room. Add a second layer if you need darkness.
Colors that open up a window
- Soft white, warm ivory, oatmeal, pale greige: makes the wall feel continuous and airy.
- Same color as the wall: a designer trick that visually stretches the wall plane.
- Subtle vertical texture or stripe: can emphasize height (keep it gentle, not busy).
Visual tip: If you want maximum “bigger window” energy, choose curtains that are lighter than or similar to the wall color. High-contrast dark curtains can be stunning, but they tend to outline the window and make it feel more finite.
Step 6: Get the fullness right
Skinny curtains make windows look small because they look like they are straining. Full curtains look generous, even on a budget.
How much fabric
- Minimum fullness: total curtain width = 2× your rod length.
- Dreamy fullness: total curtain width = 2.5× your rod length.
Example: If your rod is 72 inches wide, aim for 144 to 180 inches total fabric width. That could be two 72-inch panels (good) or two 90-inch panels (even better).
Header style note: That 2× to 2.5× guideline is a great target for a pleated, tailored look. Grommets and rod pockets often need a little more width to look equally full because the header controls the folds.
Grommet, rod pocket, or rings?
- Rings with clips: easiest to adjust height and creates pretty, even folds. Great for vintage vibes and rentals.
- Pinch pleat (with hooks): most polished and tailored if you love a classic look.
- Grommets: casual and modern, but they can look a bit stiff and limit how high you can cheat the rod depending on the header.
- Rod pocket: can bunch and drag, and it is harder to open and close. I use it only when I want a very relaxed look and I will not be moving the curtains daily.
Step 7: Install and fine-tune
Once your brackets are installed and the curtains are up, do a quick styling pass:
- Steam or iron the panels so they fall straight. Wrinkles can make curtains look smaller and less polished.
- Train the folds by gently accordion-folding the fabric and tying it loosely with ribbon overnight.
- Check your stackback: when open, the curtains should stack mostly on the wall, not on the glass.
- Level check: stand across the room and make sure the rod looks level relative to the ceiling line.
Hardware that saves you later
- Bracket placement: place brackets so the rod clears trim and the curtain header does not catch on the molding.
- Center support: if your rod is long (often over 60 to 72 inches, or if your curtains are heavy), add a center bracket to prevent sagging.
- Studs and anchors: hit a stud when you can. If you cannot, use the right wall anchors for your wall type and curtain weight.
Rental-friendly note
If you cannot drill, you can still improve the look by swapping to longer panels and using the widest rod you can on existing brackets. No-drill solutions can work in a pinch, but they usually cannot handle heavy curtains or a true high-and-wide placement without slipping, so keep it light and realistic.

Common mistakes
- Mounting the rod right on top of the trim: it emphasizes the true window height instead of stretching it.
- Rod that is too short: curtains cover the glass when open, blocking light and narrowing the window.
- Short panels: high-water curtains chop the wall and make the window feel squat. If you can only change one thing, change the length.
- Not enough fullness: skimpy panels read like you ran out of fabric, not like an intentional choice.
- Heavy, dark fabric in a dim room: it can feel cozy, but it often shrinks the visual footprint of the window.
- Long rods without support: sagging in the middle quietly ruins the whole effect.
- Layering on one skinny rod: everything bunches at the center and crowds the glass. If you want layers, consider a double rod or a track system.
Quick cheat sheet
- Rod height: start at 6 to 8 inches above trim, or go 2 to 3 inches below ceiling (just under crown). If you are more than 10 to 12 inches above trim, double-check proportions.
- Rod width: extend 10 to 12 inches past trim on each side (or about 20 to 30% of window width per side if space allows).
- Panel length: 1/4 inch above floor to kissing the floor, or puddle 2 to 4 inches.
- Fullness: 2× to 2.5× rod width in total panel width (sometimes more for grommets and rod pockets).
- Support: consider a center bracket around 60 to 72 inches and up, or anytime things feel heavy.
- Best vibe for “bigger”: light-filtering fabric in a light or wall-matching color.
If you tell me your window width, ceiling height, and whether you have trim or crown, I can suggest a specific rod height, rod length, and panel size that will look perfectly intentional in your space.