Grease and Body-Oil Stains on Upholstery
Clara Townsend
Clara Townsend is an interior stylist, vintage furniture enthusiast, and the creative voice behind Velvet Abode. With over a decade of experience transforming both cramped city apartments and sprawling fixer-uppers, she believes that a beautiful home is built on personal stories rather than massive budgets. When she isn't hunting for the perfect brass sconce at a local flea market, she can usually be found rearranging her living room for the third time this month.
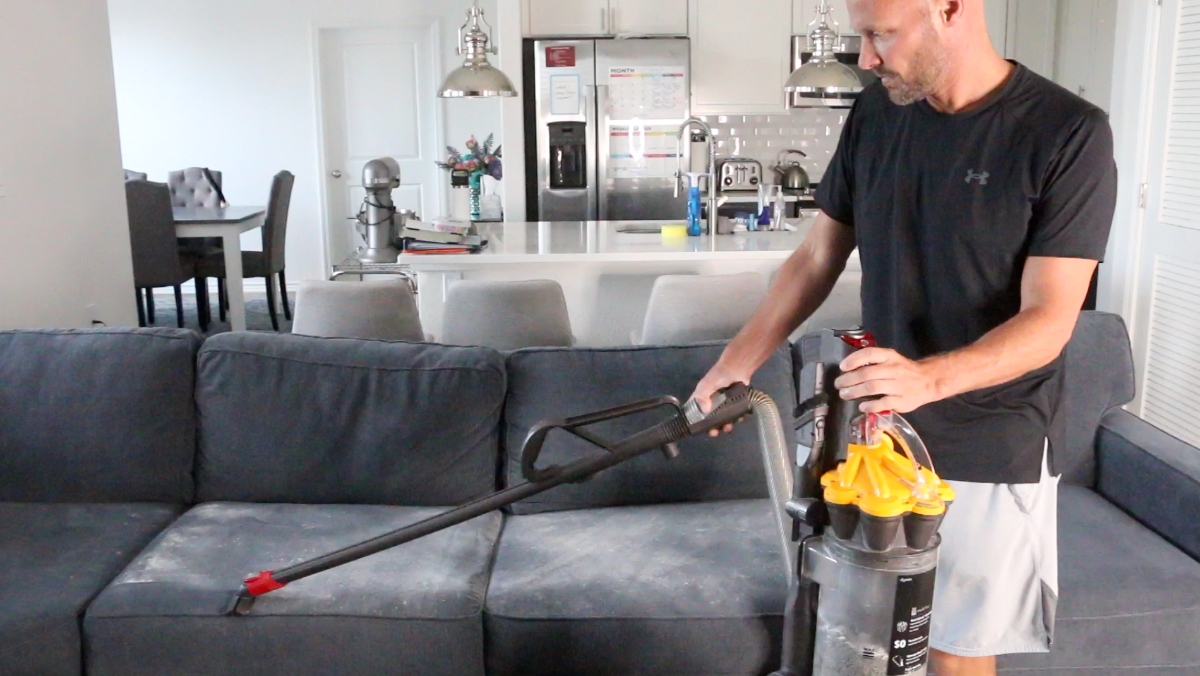
There is a particular kind of upholstery stain that feels personal. It is not the dramatic splash of red wine, or the obvious brown bloom of coffee. Grease and body-oil stains are quieter than that. They creep in slowly on armrests, headrests, and the exact spot where someone always sits. Then one day the light hits it just right and you think, oh no, my sofa has a shiny shadow.
The good news is that oily stains are very fixable at home. The trick is using an absorption-first workflow, meaning dry methods before wet methods, and keeping moisture controlled so you do not trade the grease mark for a water ring.

Grease is different than coffee
Before we jump in, it helps to name what you are dealing with:
- Grease and body oils do not mix well with water. Water alone rarely dissolves them, and over-wetting can push the oily residue and loosened soil outward, creating that familiar tide line.
- Wine, coffee, tea are mostly water-based dyes and tannins. Those workflows focus on dilution, lifting color, and controlled rinsing.
- Ink needs solvent-style approaches (often alcohol-based) and careful transfer, not general degreasing.
- Pet odor accidents require enzyme cleaners and saturation time to break down proteins, which is a totally different goal than avoiding a halo.
For oil, your priorities are simple: absorb, degrease, blot, barely rinse, then dry evenly.
Before you start: 60 seconds
Check the cleaning code
If your cushions have a tag, look for:
- W: water-based cleaners are allowed.
- S: solvent-based cleaners only. Avoid water-heavy methods.
- WS or SW: either water-based or solvent-based cleaners can be used if applied carefully.
- X: vacuum or light brushing only, no water and no solvent. For oil stains, treat this as “call a pro,” especially on delicate natural fibers.
If there is no tag, act as if it is more delicate than you hope and start with the gentlest option.
Gather your tools
- White paper towels or clean white cotton cloths
- A soft brush or clean dry toothbrush (optional)
- Vacuum with upholstery attachment
- Absorbent powder: cornstarch, baking soda, or plain talc (unscented)
- Mild dish soap (clear, grease-cutting, no lotion added)
- 70% isopropyl alcohol (optional, for some microfiber and solvent-safe fabrics)
- A small bowl of distilled water
- A spray bottle (optional, but helpful)
- A fan for drying
Patch test like you mean it
Choose a hidden spot. Apply your planned cleaner, blot, let it dry fully. Look for texture change, color shift, or a stiff feel. Oil stains are annoying, but bleach spots are forever.
A quick safety note
Ventilate the room if you use any solvent-style product (including rubbing alcohol). Do not mix cleaners. Keep products away from kids and pets, and always blot with clean white cloths to avoid dye transfer.
Step 1: Absorb first
This is the step that prevents rings. If the stain is fresh, you want to pull excess oil up and out before you try to break it down.
For fresh grease
- Blot, do not rub. Press a folded paper towel onto the spot for 5 to 10 seconds, lift, and move to a clean section.
- Work from the outer edge toward the center so you do not push oil outward.
For set-in body oils
Use an absorbent powder to drink the oil:
- Sprinkle a thin, even layer of cornstarch, baking soda, or talc over the area.
- Let it sit 30 minutes (or up to overnight for heavy build-up).
- Gently brush, then vacuum thoroughly.
If the spot looks lighter after vacuuming, you are already winning. Repeat this powder step once more before moving on if the stain is large or glossy.
Step 2: Pick a safe degreaser
Degreasing is where people go too strong, too wet, or too fast. Here is the gentle ladder I use, starting with the least risky.
Most synthetic upholstery
- Best first choice: a few drops of clear dish soap in warm distilled water. A simple ratio is 2 to 3 drops of soap per 1 cup (240 ml) of water. Think weak tea, not bubble bath.
- Why it works: dish soap is designed to surround oil and help lift it into your towel without needing a flood of water.
Microfiber
- Option A (start here if code allows water): the same dilute dish soap method, used very sparingly.
- Option B (often great for microfiber): 70% isopropyl alcohol can lift oils without the same water-wicking risk. Use it only if the tag indicates S or WS/SW, or you have patch tested successfully.
- Cautions: alcohol can cause dye transfer and can damage some finishes. Avoid experimenting on unknown delicate blends (especially rayon/acetate-heavy fabrics) and anything you cannot replace.
Wool, silk blends, vintage fabrics
- Safer approach: stick to the powder absorption step, then consider a tiny amount of a solvent-style spot cleaner labeled for upholstery, used sparingly.
- If you are unsure: do not experiment on heirloom textiles. Call a professional cleaner. Some vintage dyes and finishes can shift with water, soap, or solvent.
Leather and faux leather
- Do not use dish soap repeatedly. It can strip finishes over time.
- Use a leather cleaner designed for upholstery, then condition lightly if recommended by the product.
Solvent-only code “S” fabrics
- Skip water-based soap mixes.
- Use a dry-cleaning solvent upholstery spot remover per label directions, with excellent ventilation.
- Blot carefully and avoid over-wetting. Solvents can move dye if you scrub.
Step 3: Blot in a rhythm
This is the whole secret. You are not washing the cushion. You are coaxing the oil out in tiny increments.
How to do it
- Dampen a clean white cloth with your soap solution and wring it out well. It should feel barely damp, not dripping.
- Tap and press the stain in short, gentle presses. Hold for 3 to 5 seconds, then lift.
- Immediately blot with a dry towel to pull loosened oils and moisture back out.
- Repeat: damp cloth, then dry cloth. Work slowly. Change towels often.
If you are using alcohol on microfiber
- Lightly dampen a white cloth with 70% isopropyl alcohol (do not pour it directly on the fabric).
- Tap and press, then blot with a dry towel.
- Work in small sections and keep airflow going. If you see color on your cloth, stop.
What not to do
- No scrubbing. It roughs up fibers and spreads the stain.
- No soaking. Rings happen when moisture travels beyond the area you are controlling.
- Avoid high heat. Hot air can set residues, shrink some fibers, and stress synthetic finishes. If you use a hair dryer, keep it on cool or low and keep it moving to encourage even drying.
If you are working on an armrest, rotate your body and check the spot from multiple angles. Oil stains hide until they shine.
Step 4: Micro-rinse
Leaving soap behind can attract grime later, but rinsing is where most rings are born. The compromise is a micro-rinse.
Micro-rinse method
- Lightly mist a cloth with distilled water (or dampen and wring it out until nearly dry).
- Press over the treated area using the same tap-and-press motion.
- Immediately blot with a dry towel.
If you accidentally over-wet the area, do not panic. The fix is to feather out the dampness: lightly dampen a larger surrounding area with distilled water and blot evenly so it dries uniformly. This is the same concept as blending makeup into your neck. Evenness matters more than perfection.
Step 5: Dry evenly
Drying is half the cleaning job. Uneven drying is what leaves that tide line that makes you sigh every time you walk past the sofa.
Air-dry with intention
- Blot until towels come up nearly dry. This is your ring insurance.
- Stand cushions on edge if possible so air can circulate around them.
- Aim a fan across the surface, not directly blasting one tiny spot.
- Keep the room comfortably warm, but avoid direct sun that can fade fabric.
If the cover comes off
If your cushion has a removable, washable cover, you may have an easier path:
- Check the label for water temperature and drying instructions.
- Pre-treat the oily area with the powder step first, then a small amount of diluted dish soap, then blot.
- Wash as directed and air-dry if shrinking is a risk (many covers do not love high heat).
- Make sure the insert is fully dry before re-covering. Trapped moisture can create odor and water marks.
Attached cushions and deep stains
Tufted, attached, or tightly upholstered areas are more prone to wicking because you cannot remove the cover and you are working over padding.
- Use even less liquid than you think you need.
- Plan on repeating absorption cycles over a few days rather than trying to win in one soaking session.
- If the oil has soaked into foam, improvement is possible, but full removal can be hard without professional extraction.
Quick fabric guide
Polyester, nylon, olefin, performance fabrics
- Use: cornstarch or talc, dilute dish soap, distilled water micro-rinse
- Skip: heavy solvent use unless the tag says S or WS/SW and you have tested
Microfiber
- Use: absorption powder first, then minimal soap solution, or 70% isopropyl alcohol for solvent-safe microfiber (patch test)
- Skip: over-wetting, which can leave stiff patches
- After: brush lightly after drying to restore the nap
Wool and vintage upholstery
- Use: absorption powder, upholstery spot cleaner tested in a hidden area
- Skip: aggressive dish soap mixes, scrubbing, and casual experimenting with alcohol
Leather
- Use: leather cleaner, soft cloth, gentle buffing, optional conditioner per product
- Skip: vinegar, harsh degreasers, and repeated dish soap treatments
Troubleshooting
The spot spread out
This usually means moisture traveled beyond your control. Blot dry, then feather a slightly wider area with distilled water and blot evenly. Dry with a fan.
It feels stiff or crunchy
Likely soap residue. Do a micro-rinse and blot thoroughly. After it is fully dry, gently brush the fabric to lift fibers.
The stain is gone, but there is still a shadow
Body oils can be layered. Repeat the powder absorption step overnight, vacuum, then do one more gentle soap-and-blot pass.
It keeps coming back
This can happen when oil has soaked into padding. You can sometimes improve it with repeated absorption cycles, but if the cushion insert is saturated, professional cleaning or replacing the insert may be the best sanity-saving move.
When to call a pro
- Cleaning code X, or no tag and the fabric seems delicate
- Antique or irreplaceable upholstery
- Large, dark oil stains that have soaked into batting and foam
- Velvet, silk, or high-pile mohair where texture changes easily
A good upholstery cleaner can often extract oils with controlled solvents and professional drying, which is exactly what you are trying to mimic at home, just on a smaller scale.
Prevention for the favorite spot
If your sofa has a clearly beloved seat, you do not need to fight your household. You just need a plan.
- Vacuum weekly, especially along armrests and headrests.
- Optional: every month or two, do a light dusting of cornstarch on oily-prone areas, let sit 20 minutes, then vacuum extremely well. Patch test first, and skip this if powder tends to lodge in the weave of your fabric.
- Consider a washable throw on the armrest where hands naturally land.
- If you want a longer-term option, look into a fabric-safe upholstery protectant that matches your cleaning code and the manufacturer guidance.
A home should feel lived in. The goal is not perfection. It is keeping your space feeling fresh and touchable, like linen curtains catching late afternoon light, not a sofa you are afraid to sit on.