Glass Coffee Table Care
Clara Townsend
Clara Townsend is an interior stylist, vintage furniture enthusiast, and the creative voice behind Velvet Abode. With over a decade of experience transforming both cramped city apartments and sprawling fixer-uppers, she believes that a beautiful home is built on personal stories rather than massive budgets. When she isn't hunting for the perfect brass sconce at a local flea market, she can usually be found rearranging her living room for the third time this month.
Glass coffee tables are a little like white sneakers. They look effortless when they are pristine, and somehow they show everything five minutes after you finish fussing with them. The good news is that most “glass problems” are actually residue problems, microfiber problems, or habit problems, all of which are fixable with a calmer routine and the right cloth.
Below is my no-drama approach for streak-free cleaning, safe sticker residue removal, and the kind of scratch camouflage that renters can attempt without turning a small scuff into a permanent cloudy patch.
Tempered vs regular glass
Let’s untangle a few myths, because “tempered” gets treated like a magical force field.
- Tempered glass is stronger, not scratch-proof. Tempering helps the glass handle impact and temperature changes better. It does not prevent fine scratches from grit, ceramic, sand, or metal.
- They usually show streaks in similar ways. In most cases, streaking is leftover cleaner, hard-water minerals, or oily film from hands and furniture polish drifting through the room. (Special surfaces like frosted, etched, coated, tinted, or back-painted glass can reveal marks differently, so go gentler and avoid soaking edges.)
- Edges and corners still deserve respect. Tempered glass is tougher overall, but edge impacts are a known weak point. Chips can start at edges and corners, especially if you bump it with something hard (vacuum head, metal tray, a dropped remote).
- The safest approach is the same for both. Gentle cleaners, soft cloths, minimal moisture at seams, and no abrasives.
If you are not sure what you have: many coffee tables use tempered glass (often labeled in a corner or on the underside), but your cleaning routine should assume “treat it like it can scratch,” because it can.
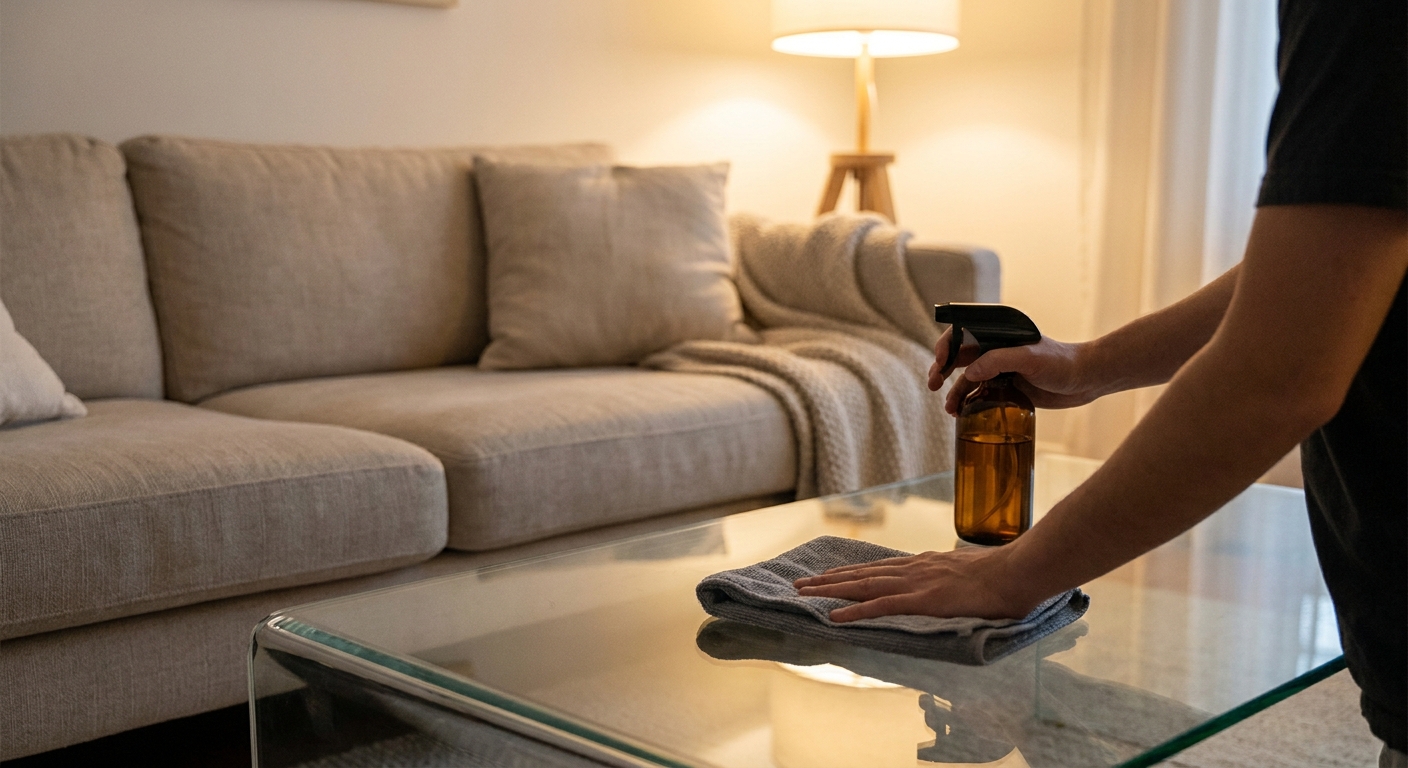
The streak-free routine
When glass looks “worse” after you clean it, it is most often one of these: too much product, the wrong cloth, or you are moving dust around instead of lifting it.
What you need
- Two microfiber cloths: one for cleaning, one for final buffing. If you only own one, grab a second and thank yourself later.
- Warm water in a small bowl or spray bottle.
- A tiny drop of dish soap (optional, for oily film).
- Isopropyl alcohol (70% or 91%) for smudges and stubborn haze (optional but wonderful). If your glass has a printed design, special coating, or back-painted underside, spot-test first and avoid letting alcohol pool at edges.
Quick do-not-use list
- No abrasives: scouring powders, gritty pastes, rough scrub sponges.
- No melamine foam (Magic Eraser style). It can micro-scratch and dull the shine.
- No razor blades or metal scrapers for stickers (save them for truly sacrificial glass, not a coffee table you love).
- Skip paper towels and newspaper if you are chasing a flawless finish. Paper towels lint, and newspaper can transfer ink. Microfiber wins here.
- Avoid ammonia-heavy cleaners around bases and seams, especially with plated metal finishes. If you do use a glass spray, keep it off the base and do not let it drip.
Step-by-step (my “no streak spiral” method)
- Dry dust first. Use a clean, dry microfiber and do one slow pass to pick up grit. This is how you avoid grinding tiny sand-like bits across the surface.
- Mist the cloth, not the table. One of the biggest streak culprits is overspray that pools at edges, catches dust, and dries unevenly.
- Wipe in a consistent pattern. I like straight lines, overlapping slightly. Circles can hide where you have been, which leads to over-wiping and more haze.
- Flip to a clean, dry quadrant. Microfiber has usable sides. If the section you are using feels damp or starts to drag, fold to a fresh one.
- Final buff with the second cloth. This is where the glass goes from “clean-ish” to “disappears.” Light pressure, quick passes.
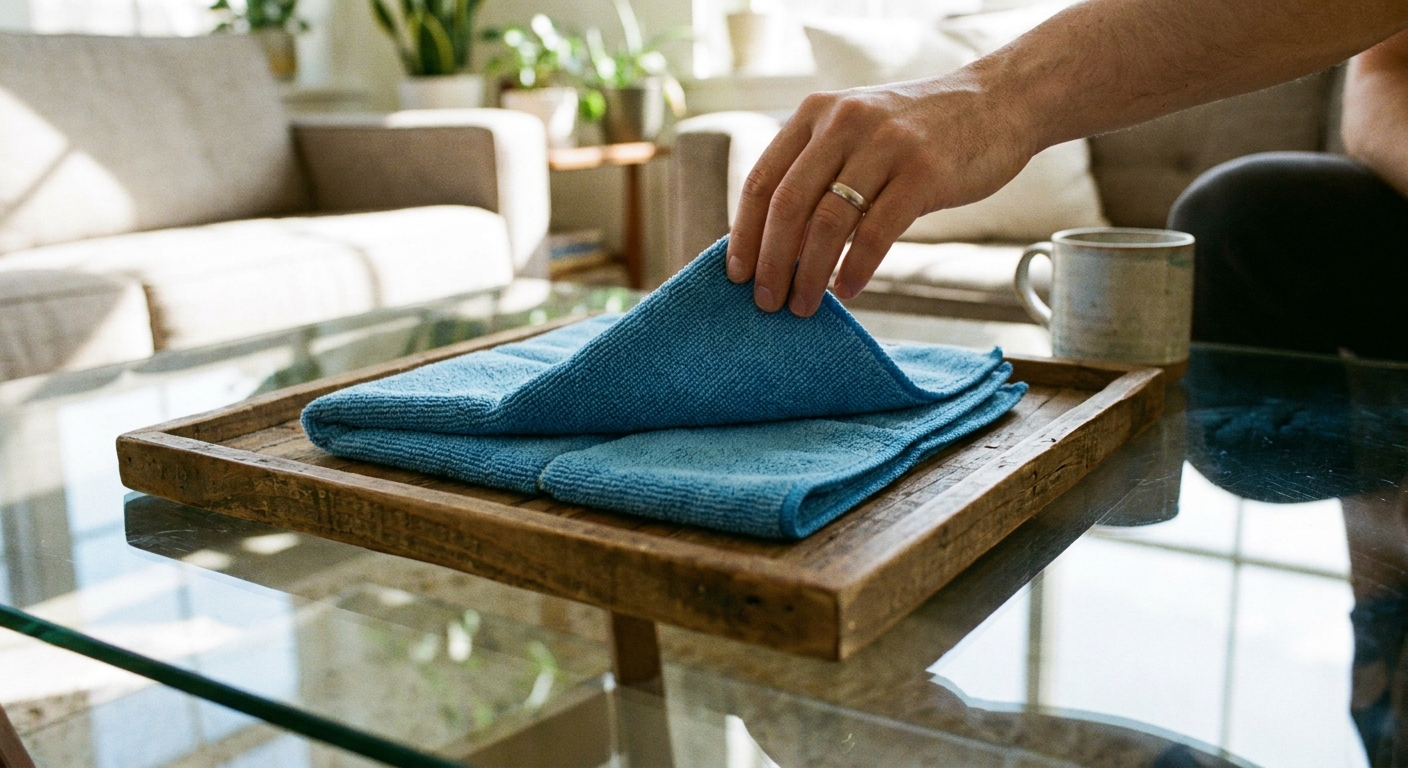
The microfiber detail people skip
Microfiber is amazing, but only when it is actually clean. Fabric softener coats fibers and makes them smear instead of grab.
- Wash microfiber separately or with other lint-free items.
- Use unscented detergent.
- Avoid fabric softener and dryer sheets.
- Dry on low heat (high heat can warp fibers).
If your cloth has been used for stainless steel polish, wood oil, multi-surface polish, silicone-based sprays, or anything waxy, retire it from glass duty. That mystery haze is often just old product coming back to haunt you.
Hard-water spots
Mineral spots are sneaky because they can look like “streaks” that never end. If dish soap and alcohol do not touch the cloudy dots or ring marks, treat it like minerals.
- For plain, uncoated glass: use a cloth lightly dampened with a 1:1 mix of white vinegar and water. Lay it on the spot for 1 to 2 minutes (do not flood), then wipe, rinse with a water-damp cloth, and buff dry.
- Be picky about where vinegar goes: keep it away from metal bases, seams, and any stone nearby (marble and limestone do not love acids). If your top is tinted, coated, or back-painted, skip vinegar unless the manufacturer says it is safe.
If you have heavy scale buildup that keeps returning, you are not failing. You are dealing with hard water. More frequent light cleaning beats occasional aggressive scrubbing.
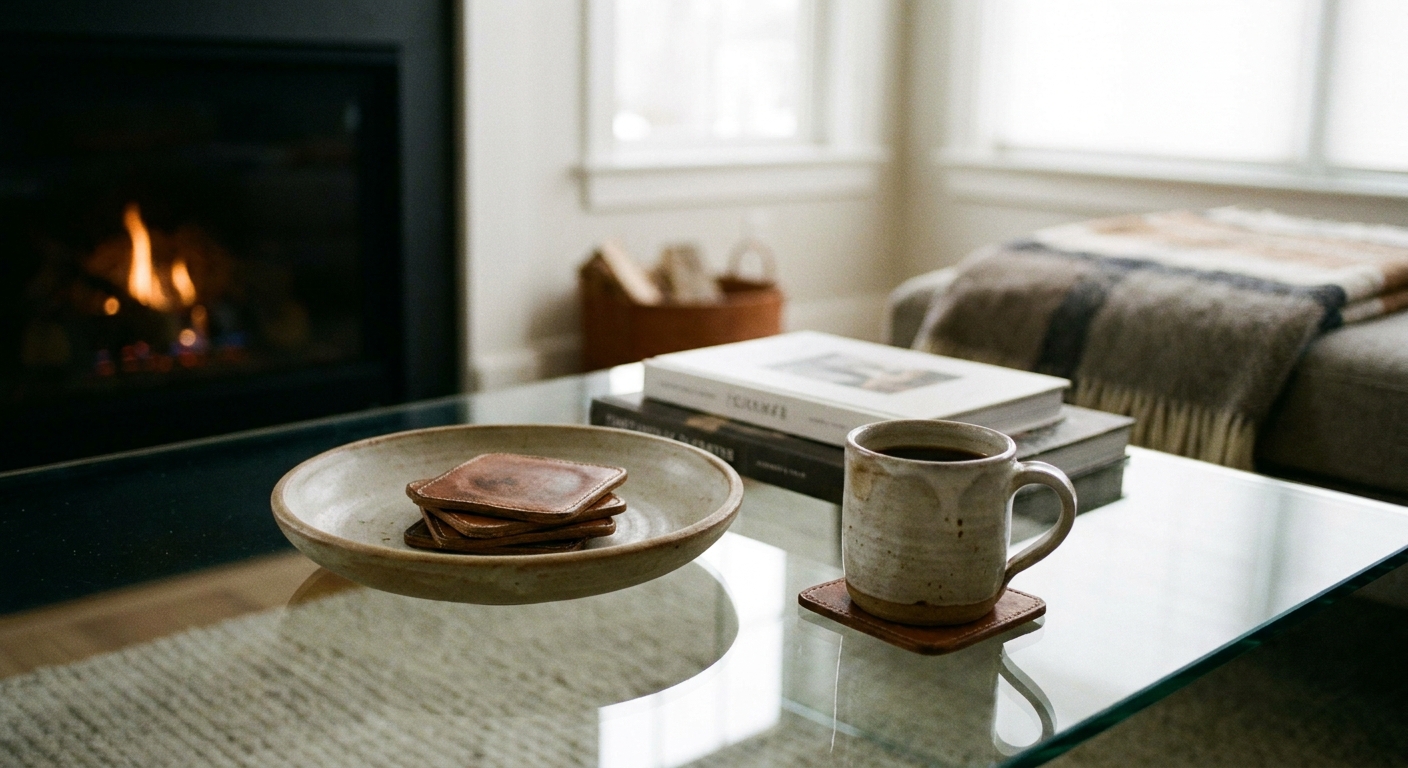
Coaster discipline
I love a beautiful table moment, but I love not seeing ring marks and micro-scratches even more. Coasters are not just about moisture. They are about grit, tiny bits of sand on the bottom of a mug, and the micro-drag of ceramic on glass.
Make coasters unavoidable
- Use a “coaster cluster.” Put 4 to 6 coasters in a small dish right where drinks naturally land.
- Choose the right underside. Cork, felt, leather, or silicone-backed coasters help prevent sliding and scratching.
- Go bigger than your biggest mug. Wide coasters catch drips and reduce the temptation to balance a drink on the edge.
- Add one catch-all tray. A tray corrals remotes, candles, and matchbooks so they are not scraping across the glass every day.
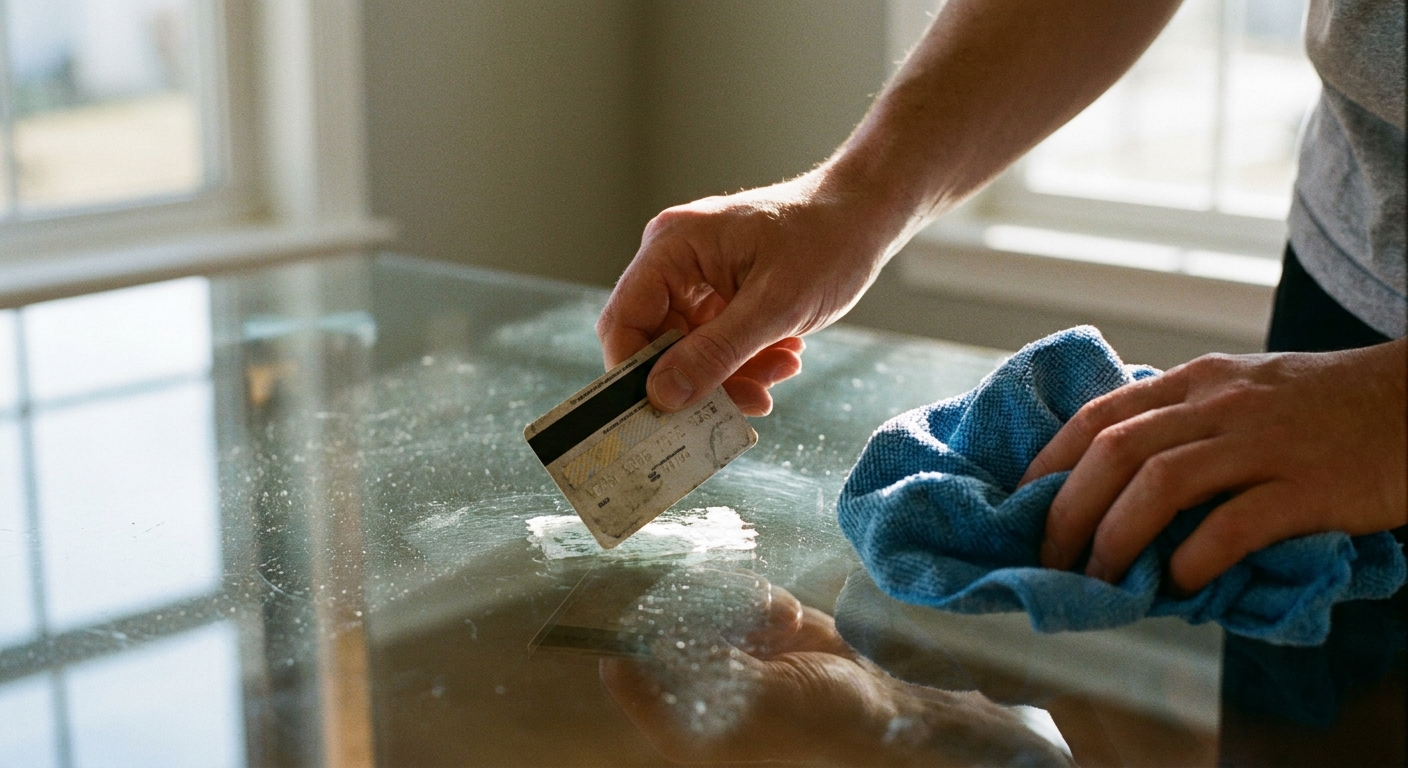
Sticker residue and price tags
Vintage finds love to arrive with a stubborn sticker that has been “marinating” for years. The goal is to dissolve adhesive without scratching or letting harsh solvents drip onto the base or wick into seams.
Do first: soften and lift
- Warm it up. Use a hair dryer on low for 20 to 40 seconds, moving constantly. You want warm, not hot.
- Lift with a plastic edge. A plastic scraper, old gift card, or even a fingernail works. Avoid metal blades.
- Wipe away loosened glue. Use a microfiber dampened with warm water and a drop of dish soap.
If residue remains: choose the gentlest solvent that works
- Isopropyl alcohol on a cloth is a great first upgrade for sticky film.
- Citrus adhesive remover can work well, but use it sparingly and keep it away from painted or lacquered bases. Also avoid soaking seams so it does not creep where you do not want it.
- A tiny bit of cooking oil can soften adhesive in a pinch, but it must be fully degreased afterward with dish soap and water or it will smear forever.
Important: Apply any solvent to the cloth, not directly to the glass. Then wipe, lift, and immediately follow with a mild soap-and-water wipe, then a dry buff.
Light scratch camouflage
First, a tiny reality hug: if you can feel a scratch with your fingernail, it is not “buff it out in five minutes” territory. True scratch removal means polishing the glass surface down to the depth of the scratch, which can create distortion if done unevenly.
Start with the simplest possibility
Many “scratches” are actually:
- Transfer marks from metal (think: watch clasp, decorative tray).
- Rubber or plastic scuffs from object feet.
- Mineral streaks from hard water.
Try this before anything else: clean the area with a 1:1 mix of water and isopropyl alcohol on a microfiber, then buff dry. Check it in different light. If it disappears, you just saved yourself a whole ordeal.
Tenant-friendly camouflage (low risk)
- Change the lighting. Scratches are most obvious in raking light (sun hitting at an angle). A soft lamp nearby and a slightly shifted table position can make them far less noticeable.
- Use a tray or book stack with intention. Not to hide the whole tabletop, but to break up the “mirror field” where scratches catch the eye.
- Add a fitted felt pad under decor. Anything that lives on the table should not be moving bare-bottom across glass.
Polishing: proceed carefully
If you are a tenant and you are thinking about polishing compounds, here is my honest advice: do a tiny test in an inconspicuous corner and stop the moment you see haze. Then clean the area and re-check in different light, because sometimes what looks like haze is just polishing residue that needs a thorough wipe.
- Cerium oxide polish is the standard for glass polishing, typically used with a felt pad. It can take significant time and it needs even pressure. Done poorly, it can leave a cloudy patch or lens-like distortion.
- Toothpaste and baking soda are common internet suggestions. They can create fine swirls and haze because they are mild abrasives with inconsistent grit. I do not recommend them for a coffee table you want to look crisp.
If the scratches are widespread or in the center viewing area, polishing is rarely satisfying at home. At that point, the best “fix” is either camouflage through styling or replace the glass top.
When replacing the top makes sense
- The scratch catches your nail.
- There are many scratches that create a cloudy overall look.
- You have edge chips (these can worsen and also feel sharp).
- The table is a simple base with a removable glass panel.
Take measurements (length, width, thickness), note whether corners are square or rounded, and check if the edges are polished. Many glass shops can cut a new tempered top, often for less than you expect, and it instantly makes the whole room feel refreshed.
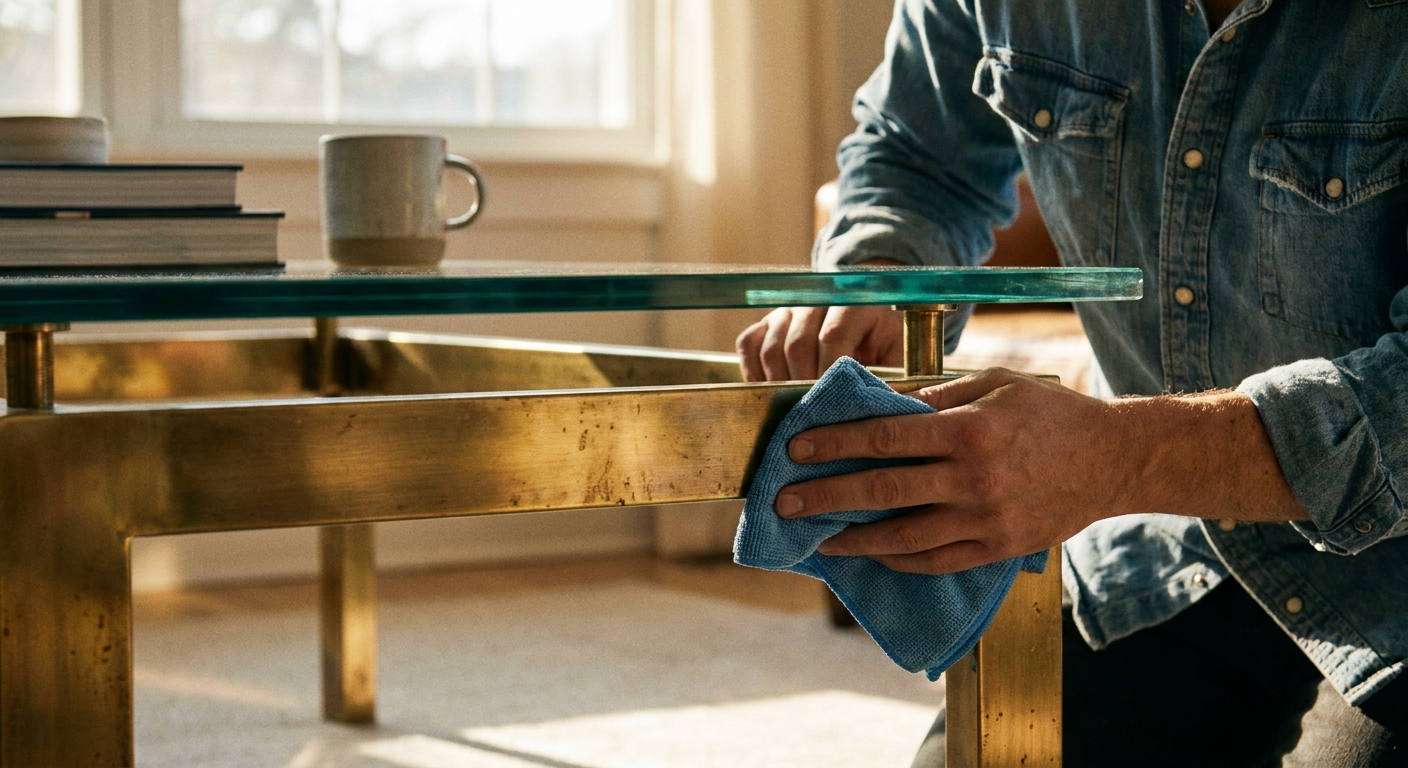
Protect the base
This one is sneaky. You clean the glass, the table looks great, and a week later the metal base has dull spots or weird streaks. Cleaner runoff is a common culprit, especially on plated finishes.
How to prevent damage
- Never saturate the glass near seams. Spray the cloth, not the tabletop.
- Wipe edges last with a barely damp cloth. Then dry immediately.
- Put a towel under the edges if you are doing a deep clean and need more moisture.
- Know your finish. Brass-plated, chrome-plated, and powder-coated bases can react differently to ammonia, acids, and harsh degreasers.
Quick base care
- Dust with a dry microfiber.
- For fingerprints, use mild soap and water on a cloth, then dry fully.
- Avoid abrasive pads and “miracle” metal polishes unless you know the finish is solid metal, not plating.
Little habits that help
- Lift, do not drag. Trays, vases, and candleholders should be lifted, not slid.
- Felt pads are your best friend. Add them to anything that lives on the table, especially ceramic decor.
- Watch the “crumb zone.” If you eat on the coffee table, do a quick dry dust after. Tiny crumbs can scratch when wiped later.
- Do a fast weekly buff. A dry microfiber pass once a week prevents the build-up that makes you reach for harsher cleaners.
Glass is honest, but it is not high maintenance once you stop fighting it. Gentle cleaning, clean cloths, and a few protective habits will keep your table looking like it belongs in a glossy magazine, even if your living room is being lived in the way it should be.