Front-Load Washer Gasket Mold: Clean and Prevent It
Clara Townsend
Clara Townsend is an interior stylist, vintage furniture enthusiast, and the creative voice behind Velvet Abode. With over a decade of experience transforming both cramped city apartments and sprawling fixer-uppers, she believes that a beautiful home is built on personal stories rather than massive budgets. When she isn't hunting for the perfect brass sconce at a local flea market, she can usually be found rearranging her living room for the third time this month.
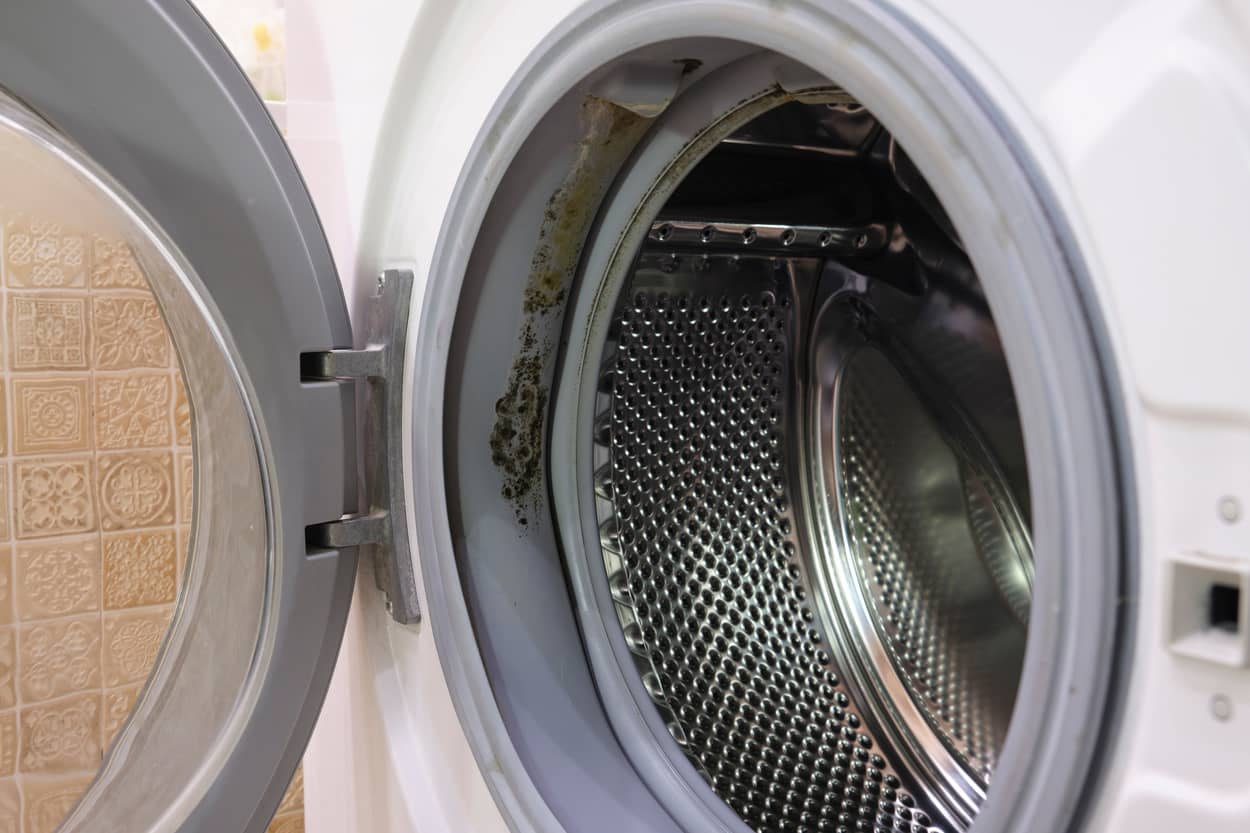
If you have ever opened your front-load washer and caught that sour, swampy smell, you are not alone. That gray rubber ring around the door is called the gasket (or door boot), and it is basically a little moisture trap: folds, warmth, detergent residue, lint, and the occasional missing sock tag all tucked into a cozy cave. Mold loves cozy caves.
The good news: you can usually improve this in one focused cleaning session, then keep it under control with a few small habit changes. No expensive parts. No dramatic “replace the whole machine” panic.
Before you start: safety and setup
Mold is not something to casually scrub while you hold your breath. Set yourself up like you are doing a tiny, very satisfying home reset.
What you need
- Gloves (nitrile or rubber)
- Good ventilation (open a window, run the exhaust fan, or place a fan nearby)
- Mask if you are sensitive to odors, have allergies, are immunocompromised, or the mold is heavy (an N95 is a solid choice)
- Microfiber cloths or disposable shop towels
- Soft toothbrush or small detailing brush
- Spray bottle (optional)
- One cleaning agent: either distilled white vinegar or a diluted bleach solution (more below). Many manufacturers also recommend washer cleaner tablets or other specialty products for deep cleaning.
Choose your cleaner (do not mix)
You have two common options. Pick one and stick with it for this session.
- White vinegar: Helpful for odor, soap film, and light mildew. Its effectiveness on established mold can be mixed, so if you have stubborn black staining, you may need a different method or a repeat session.
- Diluted bleach solution: Often more effective on visible black mold staining, but harsher and needs careful handling. Some manuals advise against bleach on rubber components, so check your manufacturer guidance first.
Important: Never mix bleach with vinegar, ammonia, or other cleaners. That can create dangerous fumes. If you have used any other cleaner in the gasket area recently (especially ammonia-based), rinse thoroughly with water and wipe first, then use your chosen method.
If your washer is under warranty, check your manual first. Many manufacturers recommend specific cleaners and may discourage bleach use on rubber parts. When in doubt, follow the brand’s care guidance to avoid warranty issues.
Avoid: abrasive pads or harsh scouring powders. They can rough up the gasket surface and make it easier for gunk to cling later.
Step 1: Find the mold hotspots
Most people wipe the visible part of the gasket and call it a day. The real action is inside the folds.
- If you will be reaching deep into tight creases, unplug the washer if you can do so easily and safely. (If unplugging is inconvenient, leave it off and keep your hands clear of controls while you work.)
- Open the door wide.
- Use a cloth to pull the gasket lip back and look inside the inner groove.
- Check the bottom portion especially. That is where water and lint like to settle.

Step 2: Dry wipe first
Before you spray anything, do a quick dry wipe to remove loose lint, hair, and sludge. It is not glamorous, but it prevents you from smearing debris deeper into the fold.
- Wipe around the entire gasket.
- Pay attention to the bottom channel where water pools.
- If there is standing water, soak it up with a cloth.
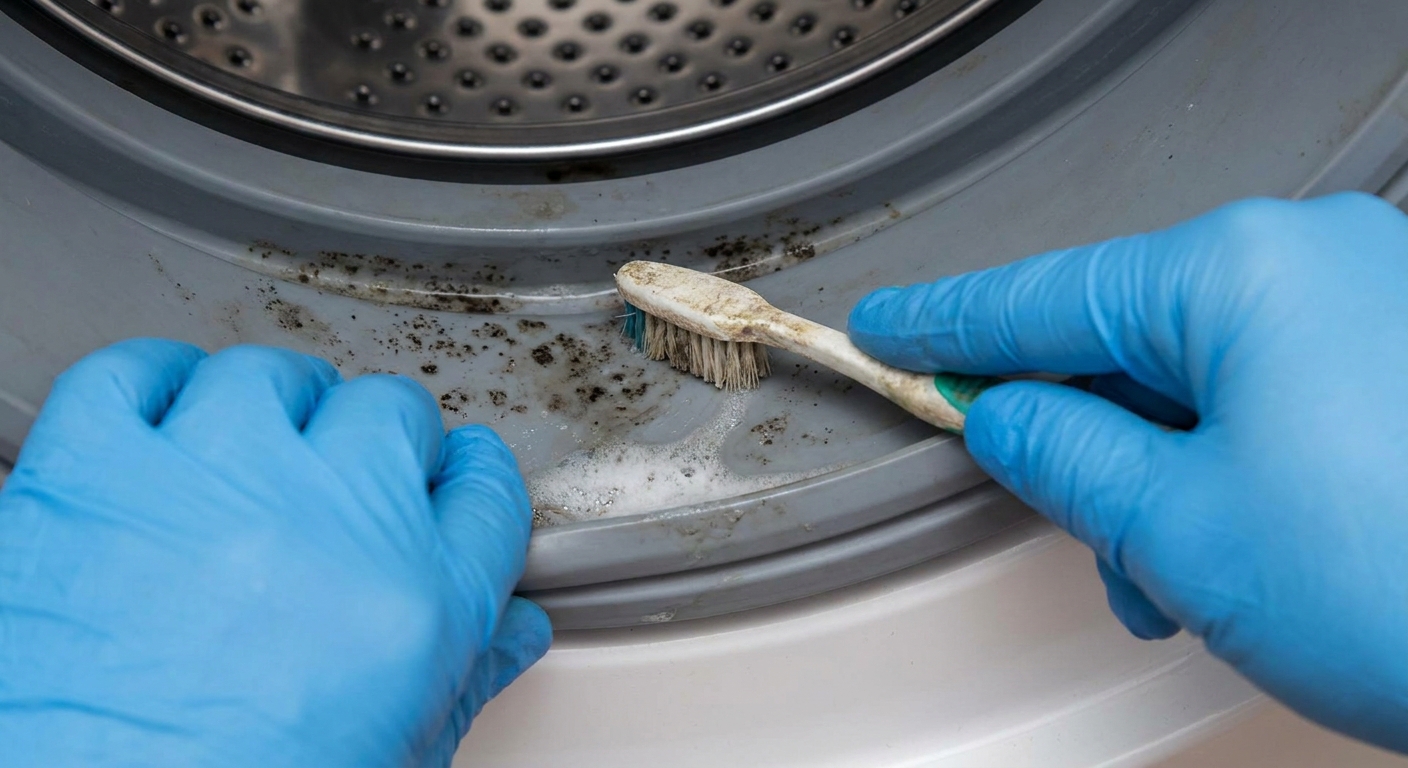
Step 3: Clean the gasket
This is the part that turns “I tried” into “this actually worked.” Work in sections and keep the gasket pulled back so your cleaner reaches what is hiding in the crease.
Option A: Vinegar method
Best for light mildew, odor, and routine cleanup. If staining is stubborn, you may need a repeat session or a manufacturer-approved washer cleaner.
- Spray or apply undiluted white vinegar onto the affected areas.
- Let it sit for 10 to 15 minutes.
- Scrub the spots gently with a toothbrush.
- Wipe clean with a damp cloth.
- Dry thoroughly with a clean towel.
Option B: Bleach solution
Use this only with strong ventilation and care, and follow your washer manual if it specifies a different approach.
- Mix a diluted bleach solution, commonly 1 tablespoon of bleach per 1 quart of water. This is a mild, commonly used dilution. Ratios and contact times vary by product and manufacturer, so use your manual’s guidance if provided.
- Apply with a cloth so you control drips. Avoid splashing.
- Let it sit for about 5 minutes (or the time stated in your manual).
- Scrub with a toothbrush in the folds.
- Wipe with clean water until no cleaner residue remains.
- Dry the gasket completely.
Note: Bleach can discolor fabrics and irritate skin and lungs. Keep kids and pets out of the laundry area while you work, and never combine bleach with other cleaners or lingering residues.
Step 4: Clean the drawer and glass
If the gasket is moldy, it is worth giving two nearby spots a quick refresh so you are not reintroducing grime.
Detergent drawer
- Remove it (most pull out and then release with a tab).
- Rinse with hot water and scrub corners with a brush.
- Dry before reinserting.
Door glass and frame
- Wipe the inside glass and the metal or plastic frame where the gasket seals.
- Dry everything you wipe. Moisture is the enemy here.

Step 5: Run a cleaning cycle
Now that the gasket is clean, run a hot cycle to rinse out loosened residue and freshen the rest of the machine.
- Run the washer empty on the hottest cycle it has, ideally a tub clean or drum clean setting if available.
- Use a washer cleaner tablet if you have one, or follow your manufacturer’s instructions for approved cleaning agents.
- When the cycle finishes, wipe the gasket dry again. You will often catch a little leftover residue.
If the smell persists after one cycle, run a second maintenance cycle before returning to regular laundry.
Step 6: Check the pump filter
If odors keep hanging on, the drain pump filter (also called a coin trap) is a common culprit. Many front-loaders have one behind a small access panel near the bottom front.
- Check your manual for the filter location and the exact steps.
- Place a shallow pan and towels under the access area. Water may spill out.
- Open the panel, drain any water (some models have a small drain tube), then remove the filter.
- Clear lint, coins, hair, and debris. Rinse the filter and wipe the housing.
- Reinstall the filter tightly and close the panel.
This step is messy in a very specific way, but it can make a dramatic difference in smell.
Keep it from coming back
This is where you win long-term. Mold thrives on moisture plus leftover soap film. Your goal is to remove one or both.
Leave the door ajar
After the last load of the day, leave the washer door cracked open so the gasket can dry. Even an inch helps. If you have pets or toddlers, use a laundry room gate or close the door to the room instead of sealing the washer shut.
Use less detergent
Too much detergent is a top cause of that slippery buildup that feeds mildew. Use HE detergent and follow the bottle, but err on the low side. A simple rule of thumb for many loads is 1 to 2 tablespoons, adjusted for soil level and water hardness. Pods can also be easy to overdose, so consider switching to liquid or powder if you keep getting buildup.
Skip softener when you can
Liquid softener can leave a waxy film inside the drum and in the gasket folds. If you love softness, try wool dryer balls in the dryer or use less softener and clean more regularly.
Wipe the gasket weekly
This is the lowest-effort, highest-payoff habit. Keep a small cloth in the laundry room and do a quick sweep around the gasket after you move laundry to the dryer.
Check pockets and the gasket moat
Lint, hairpins, receipts, and coins collect in the bottom fold and hold moisture. A 10-second check prevents a week of funk.
When cleaning is not enough
Sometimes the gasket is beyond a simple scrub, or the issue is deeper than the visible mold.
Consider service if:
- The gasket has tears, warping, or permanent deformation that prevents a good seal.
- Mold returns quickly even with door-open drying and weekly wiping.
- You see water leaking from the door area.
- The odor is strong but the gasket looks clean, which can indicate buildup elsewhere (often the filter, hoses, or internal components).
Consider professional help sooner if:
- Mold coverage is extensive, keeps spreading, or you cannot fully access it.
- Anyone in your home has asthma, severe allergies, or is immunocompromised.
Replacing a gasket can be straightforward for a technician, but it is also easy to install incorrectly. If your machine is under warranty or you are not confident, avoid DIY replacement and book service instead.
A simple maintenance rhythm
- After every wash day: remove laundry promptly, wipe the gasket if it looks wet, leave the door ajar
- Weekly: quick gasket wipe and check the bottom fold for debris
- Monthly: run a tub clean cycle or hot empty cycle with an approved washer cleaner
A front-loader can absolutely stay fresh. Think of it like linen curtains or a vintage mirror: a little consistent care keeps it beautiful, functional, and quietly luxurious in your everyday life.