Fix Dents in Hollow-Core Doors (Renter-Friendly)
Clara Townsend
Clara Townsend is an interior stylist, vintage furniture enthusiast, and the creative voice behind Velvet Abode. With over a decade of experience transforming both cramped city apartments and sprawling fixer-uppers, she believes that a beautiful home is built on personal stories rather than massive budgets. When she isn't hunting for the perfect brass sconce at a local flea market, she can usually be found rearranging her living room for the third time this month.
Hollow-core doors are basically the fast-fashion tee of the building world: lightweight, affordable, and prone to showing every little bump. If you are renting, that can feel personal. The good news is most dents are cosmetic and very fixable with a small tub of filler, a bit of patient sanding, and a paint touch-up that does not scream “patch job.”
Below is my renter-friendly, low-drama method for getting a smooth finish that blends into the slightly tired, slightly shiny paint most rental doors wear.
Quick safety note: If your building is older (pre-1978 in the US), assume paint could contain lead. Avoid dry sanding unless you know it is lead-free. Use a respirator, contain dust, and follow local guidance for lead-safe work. Even in newer places, wear a dust mask and ventilate when sanding and priming.
First: Dent or split?
Hollow-core doors typically have a thin outer skin over a lightweight core (often a honeycomb or cardboard lattice, sometimes foam). That means you will usually see one of two problems:
- Shallow dent (no crack): The surface caves in but the paint film is mostly intact. This is the easiest repair.
- Split or puncture (cracked skin): The skin has torn, lifted, or has a hole. You need to stabilize the edges before you fill.
Quick test: Run your fingertip lightly over the damage. If your nail catches on a sharp edge or you feel a flap, treat it as a split.
Also, about “popping it out”: These door skins are usually hardboard, not solid wood. Steam-and-iron tricks are unreliable here and can swell the skin or loosen glue. For most hollow-core dents, filler is the cleanest path.
What to use (and what to skip)
Best fillers for hollow-core doors
- Lightweight spackle for small, shallow dents in low-stress areas. It sands easily and is plenty strong for a door skin, but it can dent again if this spot gets bumped a lot.
- Two-part auto body filler (like Bondo-style filler) for deeper dents, punctures, missing skin, or anywhere you want a tougher rebuild. It cures fast and hard and can recreate a crisp flat surface.
Helpful extras that make it look invisible
- Putty knife (2 to 4 inch). A flexible one feathers better.
- Sandpaper: 120 or 150 grit to shape, then 220 grit to smooth, and 320 grit if you want a truly seamless edge.
- Sanding block or sponge to avoid finger grooves.
- Primer (especially important if the filler is porous or if you use auto body filler).
- Degreaser or dish soap to remove hand oils near the handle zone.
- Painters tape + drop cloth to protect the floor, hinges, and hardware. If you feel like being extra: pop the knob off first.
Skip these for most door dents
- Wood filler for thin door skins. Many wood fillers sand a bit crumbly on large, flat planes and can telegraph through paint.
- Expanding foam unless you are experienced. It can bulge and create a worse bump than the dent.
Shallow dent repair
1) Clean and lightly scuff
Wipe the area with mild soap and water or a gentle degreaser. Let it dry. If the door paint is glossy, lightly scuff a few inches around the dent with 220 grit so the filler and later paint can grip.
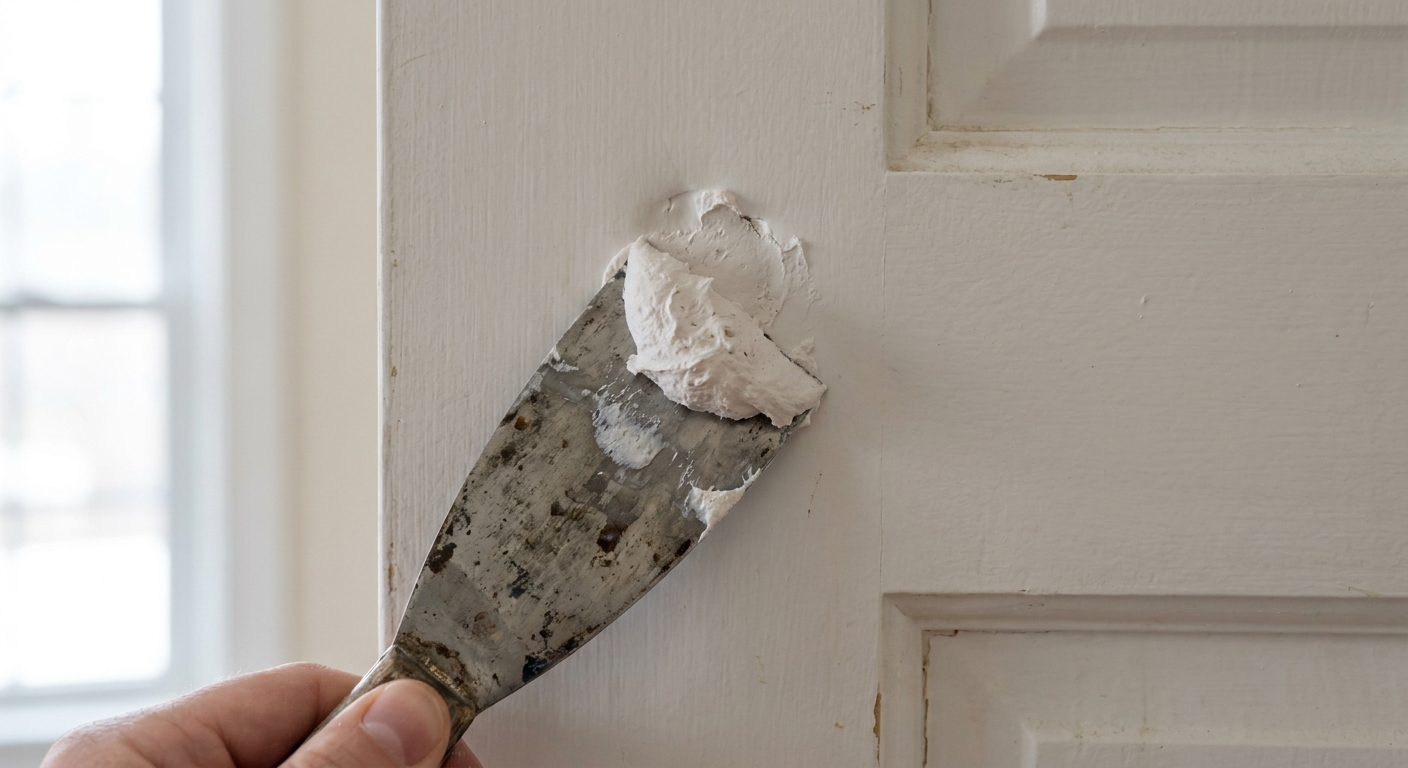
2) Fill in thin layers
Press lightweight spackle into the dent, then pull the knife outward so the edges taper into the surrounding door. Aim for slightly proud of the surface, not a big mound.
Let it dry fully. Thin layers dry faster. Deeper dents can take longer and may need a second coat or an overnight dry to avoid shrink-back.
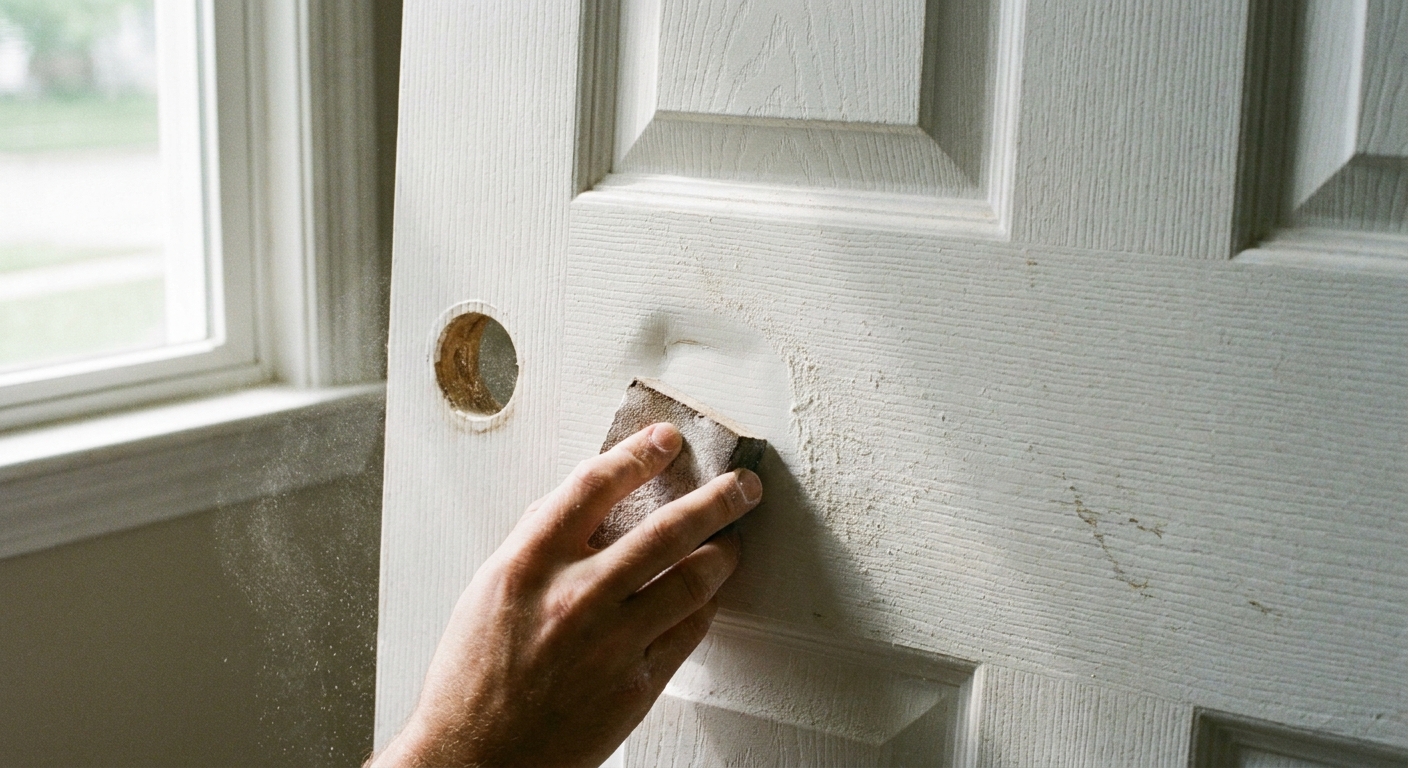
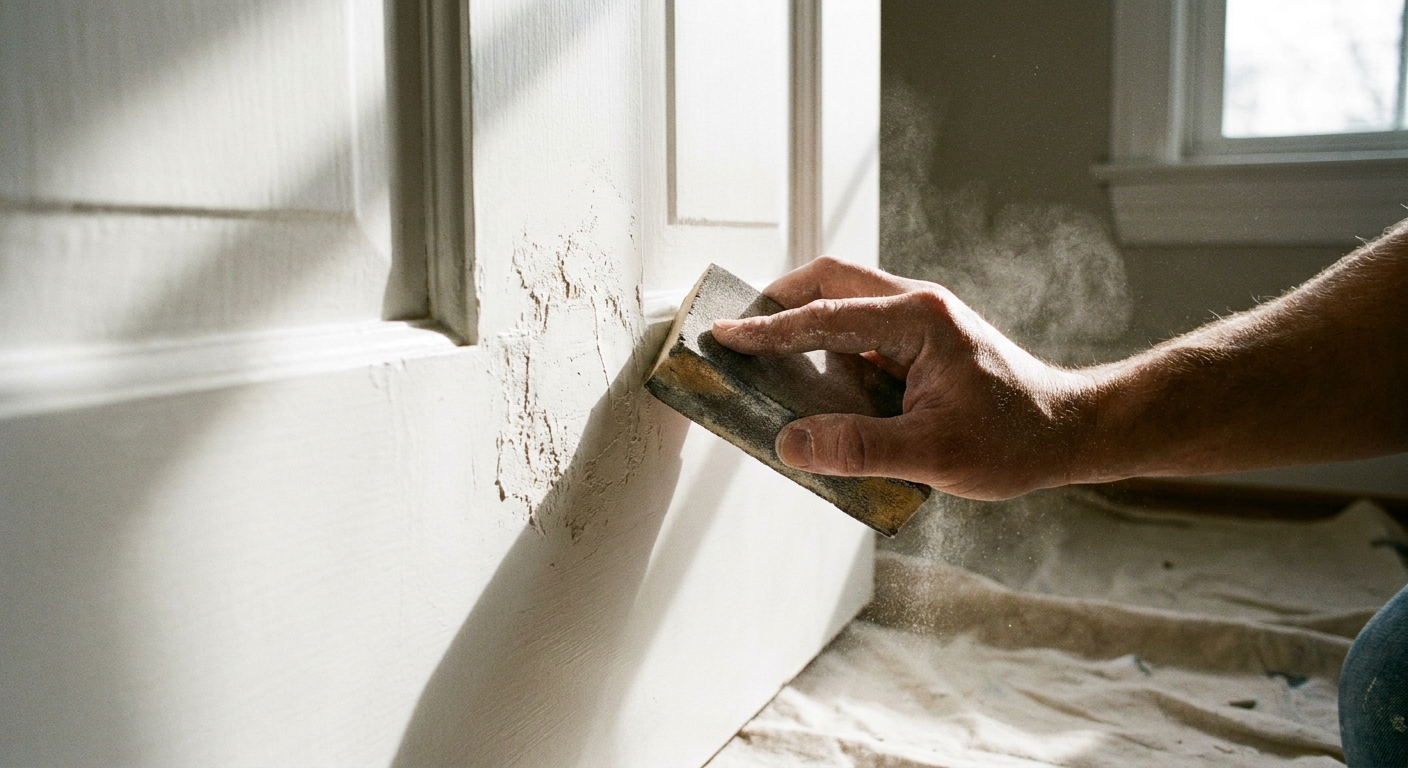
3) Sand to feather
This is the part that makes the repair disappear. Sand the patch with 150 grit, then 220, using a sanding block. Focus on the transition zone, not just the center.
What “feather” means: You are creating a gentle slope where the patch meets the original paint, so there is no sharp edge for light to catch.
Check your work: Close one eye and look across the door with a lamp angled from the side. Raking light reveals bumps instantly.
Split or puncture repair
If the door skin is torn, treat it like a tiny crater.
1) Trim and stabilize
- Use a utility knife to remove loose paint flakes and any lifted, paper-thin door skin.
- If there is a flap that wants to lift, press a small amount of wood glue or construction adhesive under it, flatten it, and tape it down until dry.
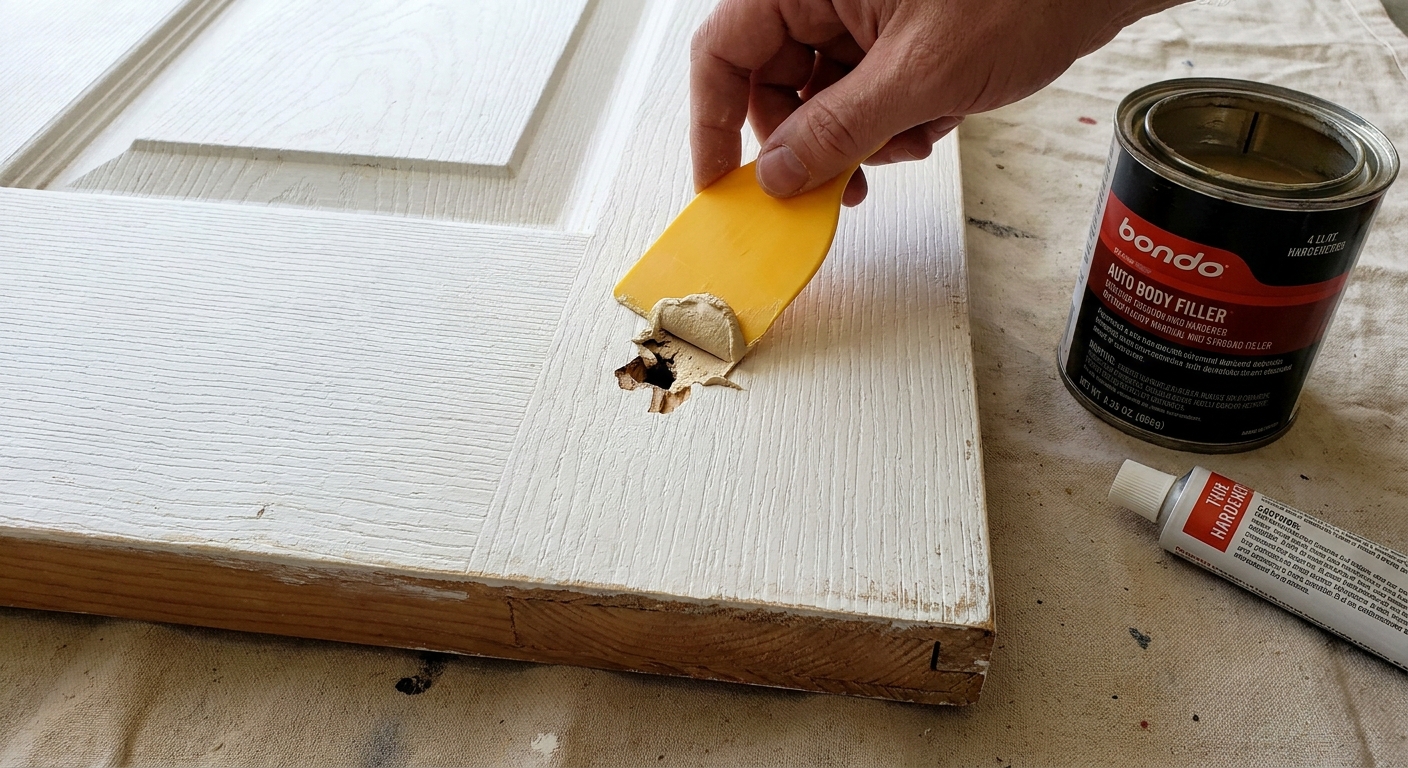
2) Rebuild with auto body filler
For holes, crushed corners, or missing skin, a two-part auto body filler is usually worth it. Mix small batches because it sets quickly. Press it firmly into the damaged area and skim it slightly higher than the door surface.
When it reaches a “cheddar cheese” stage, not fully rock-hard, you can shave high spots with the putty knife. Then sand once cured.
3) Sand, then skim if needed
Start with 120 or 150 grit to shape. If you see tiny pinholes, skim a whisper-thin layer of lightweight spackle over the cured filler, let dry, then sand again with 220.
Prime properly
Rental doors often have layers of paint with slightly different sheen. Filler areas are porous and can “flash” through topcoat as a dull spot.
- Spot-prime the sanded patch and a small margin around it.
- If the door is stained or you used auto body filler, choose a stain-blocking primer.
Let primer dry, then lightly sand with 320 grit for a smooth, paint-ready surface. Wipe dust with a damp cloth or tack cloth.
Touch-up paint that blends
This is where most repairs go sideways. It is rarely the color that gives you away, it is the sheen and texture.
Match sheen first
Most interior rental doors are satin or semi-gloss. If you patch with matte paint, it will look like a bandaid forever. If you can, bring a small chip of paint (from an inconspicuous edge) to be color-matched and ask for the closest sheen.
Test before you commit: Paint a small swatch on a hidden edge and let it dry fully. Color and sheen can shift as it cures.
Brush or roller?
- Mini foam roller: best for mimicking the subtle orange-peel texture many doors have. Great for larger blended areas.
- Angled sash brush: best for crisp control on small spots, but can leave brush marks on glossy paint if you overwork it.
Blend out, do not paint a circle
Instead of painting only the patch, paint a slightly larger area and feather the edges. For very visible doors, the cleanest result is often painting the entire panel (or even the whole side of the door) so the finish is uniform.
My favorite renter trick: If the door has a bit of roller texture already, use a mini foam roller with light pressure and stop before it starts to tack up. Over-rolling is what creates shiny ridges.
Dry time and handling
- Keep the door open while paint cures so it does not stick to the jamb.
- Most paints are dry to touch in hours, but cure time can be several days. Treat the area gently, especially around knobs and latch zones.
Renter notes
Every lease is different. Cosmetic repairs are usually fine, but if your building is strict about paint, ask maintenance for the door paint brand and color. If they will not share it, you can still do a near-invisible repair by focusing on feather sanding and painting the full panel for uniform sheen.
If you can only do one thing to make a patch disappear, do this: sand wider than you think you need to. A perfect filler job with a sharp edge will always show under light.
Troubleshooting
The patch looks like a dull spot
- You likely skipped primer or used a lower sheen paint. Spot-prime, then repaint the panel with the correct sheen.
I can see a ridge around the repair
- Sand the transition wider with 220 or 320. Wipe dust, spot-prime if you break through, then repaint.
My filler cracked
- The door skin may be moving, or the fill was too thick. Remove loose filler and rebuild in thinner layers. If the area needs a tougher rebuild, switch to a two-part auto body filler and keep the patch shallow and well-feathered at the edges.
The color is close but not perfect
- Paint the entire panel or the full door side. Uniformity beats perfection in a rental hallway with overhead lighting.
Quick shopping list
- Lightweight spackle (small tub)
- Two-part auto body filler (optional for splits or holes)
- Putty knife
- Sandpaper: 150, 220, 320 grit
- Sanding block or sponge
- Primer
- Mini foam roller and tray, or angled brush
- Matching paint in satin or semi-gloss
- Painters tape and a drop cloth
Once you patch a hollow-core door successfully, you will start seeing them differently. Not as flimsy nuisances, but as blank canvases that just need a little patience and the right sheen to look fresh again.