Fix a Wobbly Dining Chair or Table
Clara Townsend
Clara Townsend is an interior stylist, vintage furniture enthusiast, and the creative voice behind Velvet Abode. With over a decade of experience transforming both cramped city apartments and sprawling fixer-uppers, she believes that a beautiful home is built on personal stories rather than massive budgets. When she isn't hunting for the perfect brass sconce at a local flea market, she can usually be found rearranging her living room for the third time this month.
There are few things that ruin a cozy dinner faster than a chair that does a tiny dance every time someone shifts their weight. The good news is that most wobbly dining chairs and tables are not “done for”. They are just asking for the right kind of attention.
This guide is about furniture wobble, meaning loose joinery, tired screws, racked frames, or uneven feet. It is not the same detective work as squeaky floors (where the noise often comes from subfloor movement and friction between layers). Here, we are focused on movement at the furniture itself, and how to tighten, brace, and glue wisely so you fix it once.
First: Diagnose the wobble in 3 minutes
Before you reach for a screwdriver, figure out what kind of problem you have. The fix depends on whether the furniture is uneven or loose.
Step 1: Check the floor and the feet
- Move the chair or table to a different spot. If the wobble disappears, your floor is uneven, not the furniture.
- Rock it gently on a flat surface. A tile floor or a countertop (for a chair only) is helpful for testing.
- Look at the feet. Missing glides, worn felt pads, or one leg that is slightly shorter can cause a dramatic wobble.
Step 2: Check for loose joinery
Now hold the furniture still and test each connection:
- On a chair, grab the seat with one hand and a leg with the other. Try to twist. If you feel movement at a joint, that is loose joinery.
- On a table, hold the top and push side-to-side. Then check where the apron meets the legs.
Clue: If the wobble feels like a “hinge” at one corner, that corner joint is likely the culprit. If the whole frame feels sloppy, multiple joints may be loose.
Step 3: Look for racking (a frame that is out of square)
Racking happens when a chair or table base shifts so it is no longer perfectly square. This often shows up as wobble plus a subtle skew, especially on older pieces that have been dragged across floors for years.
Quick test: Set the piece down, press on opposite corners, and watch if the frame “settles” into different positions. That usually means the structure needs bracing or re-gluing, not just tightening.
Tools and supplies you actually need
You do not need a full workshop. You need the right few things.
Basic toolkit
- Phillips and flathead screwdrivers
- Allen keys (hex keys) or a hex bit set
- Adjustable wrench or a small socket set
- Soft cloths and cotton swabs
- Flashlight
- Zip-top bags for hardware
For bracing and glue repairs
- Wood glue (PVA) for raw wood-to-wood joints
- Optional: liquid hide glue for antiques or future reversibility
- Small clamps (bar clamps or strap clamp for chair frames)
- Corner braces and short wood screws (for certain tables, see below)
- Sandpaper (180 to 220 grit) for cleaning old glue on bare wood only
Finish protection tip: Keep an old towel, scrap cardboard, or a moving blanket under your piece while you work. A chair upside down on a hard floor is a recipe for fresh scratches.
Tighten first (but do it in the right sequence)
If your piece uses bolts or screws, tightening is the least invasive fix. The trick is doing it in a way that does not twist the frame and create a new wobble.
Find the right wrench size and avoid stripping
- Hex bolts: Use the correct Allen key. If it feels sloppy in the head, stop and try the next size up or down. A nearly-correct key will round it out fast.
- Nuts and bolts: A socket set grips better than an adjustable wrench and is less likely to slip.
- Wood screws: Use a driver that fits the screw head snugly. If the tip wobbles, it will cam-out and chew the screw.
Tightening sequence for chairs
- Set the chair upside down on a soft surface.
- Snug, do not fully tighten, each bolt or screw first.
- Then tighten in a cross pattern (like you would with lug nuts): front-left, back-right, front-right, back-left.
- Stop when firm. Over-tightening can split wood, crush fibers, or strip threads.
Tightening sequence for tables
- With the table upside down, check bolts that connect the top to the base and the apron to the legs.
- Snug everything first.
- Tighten gradually, moving around the table so the base stays square.
If a screw just spins: The hole is stripped. Jump ahead to the section on strengthening fasteners.
When tightening is not enough: strengthen the connection
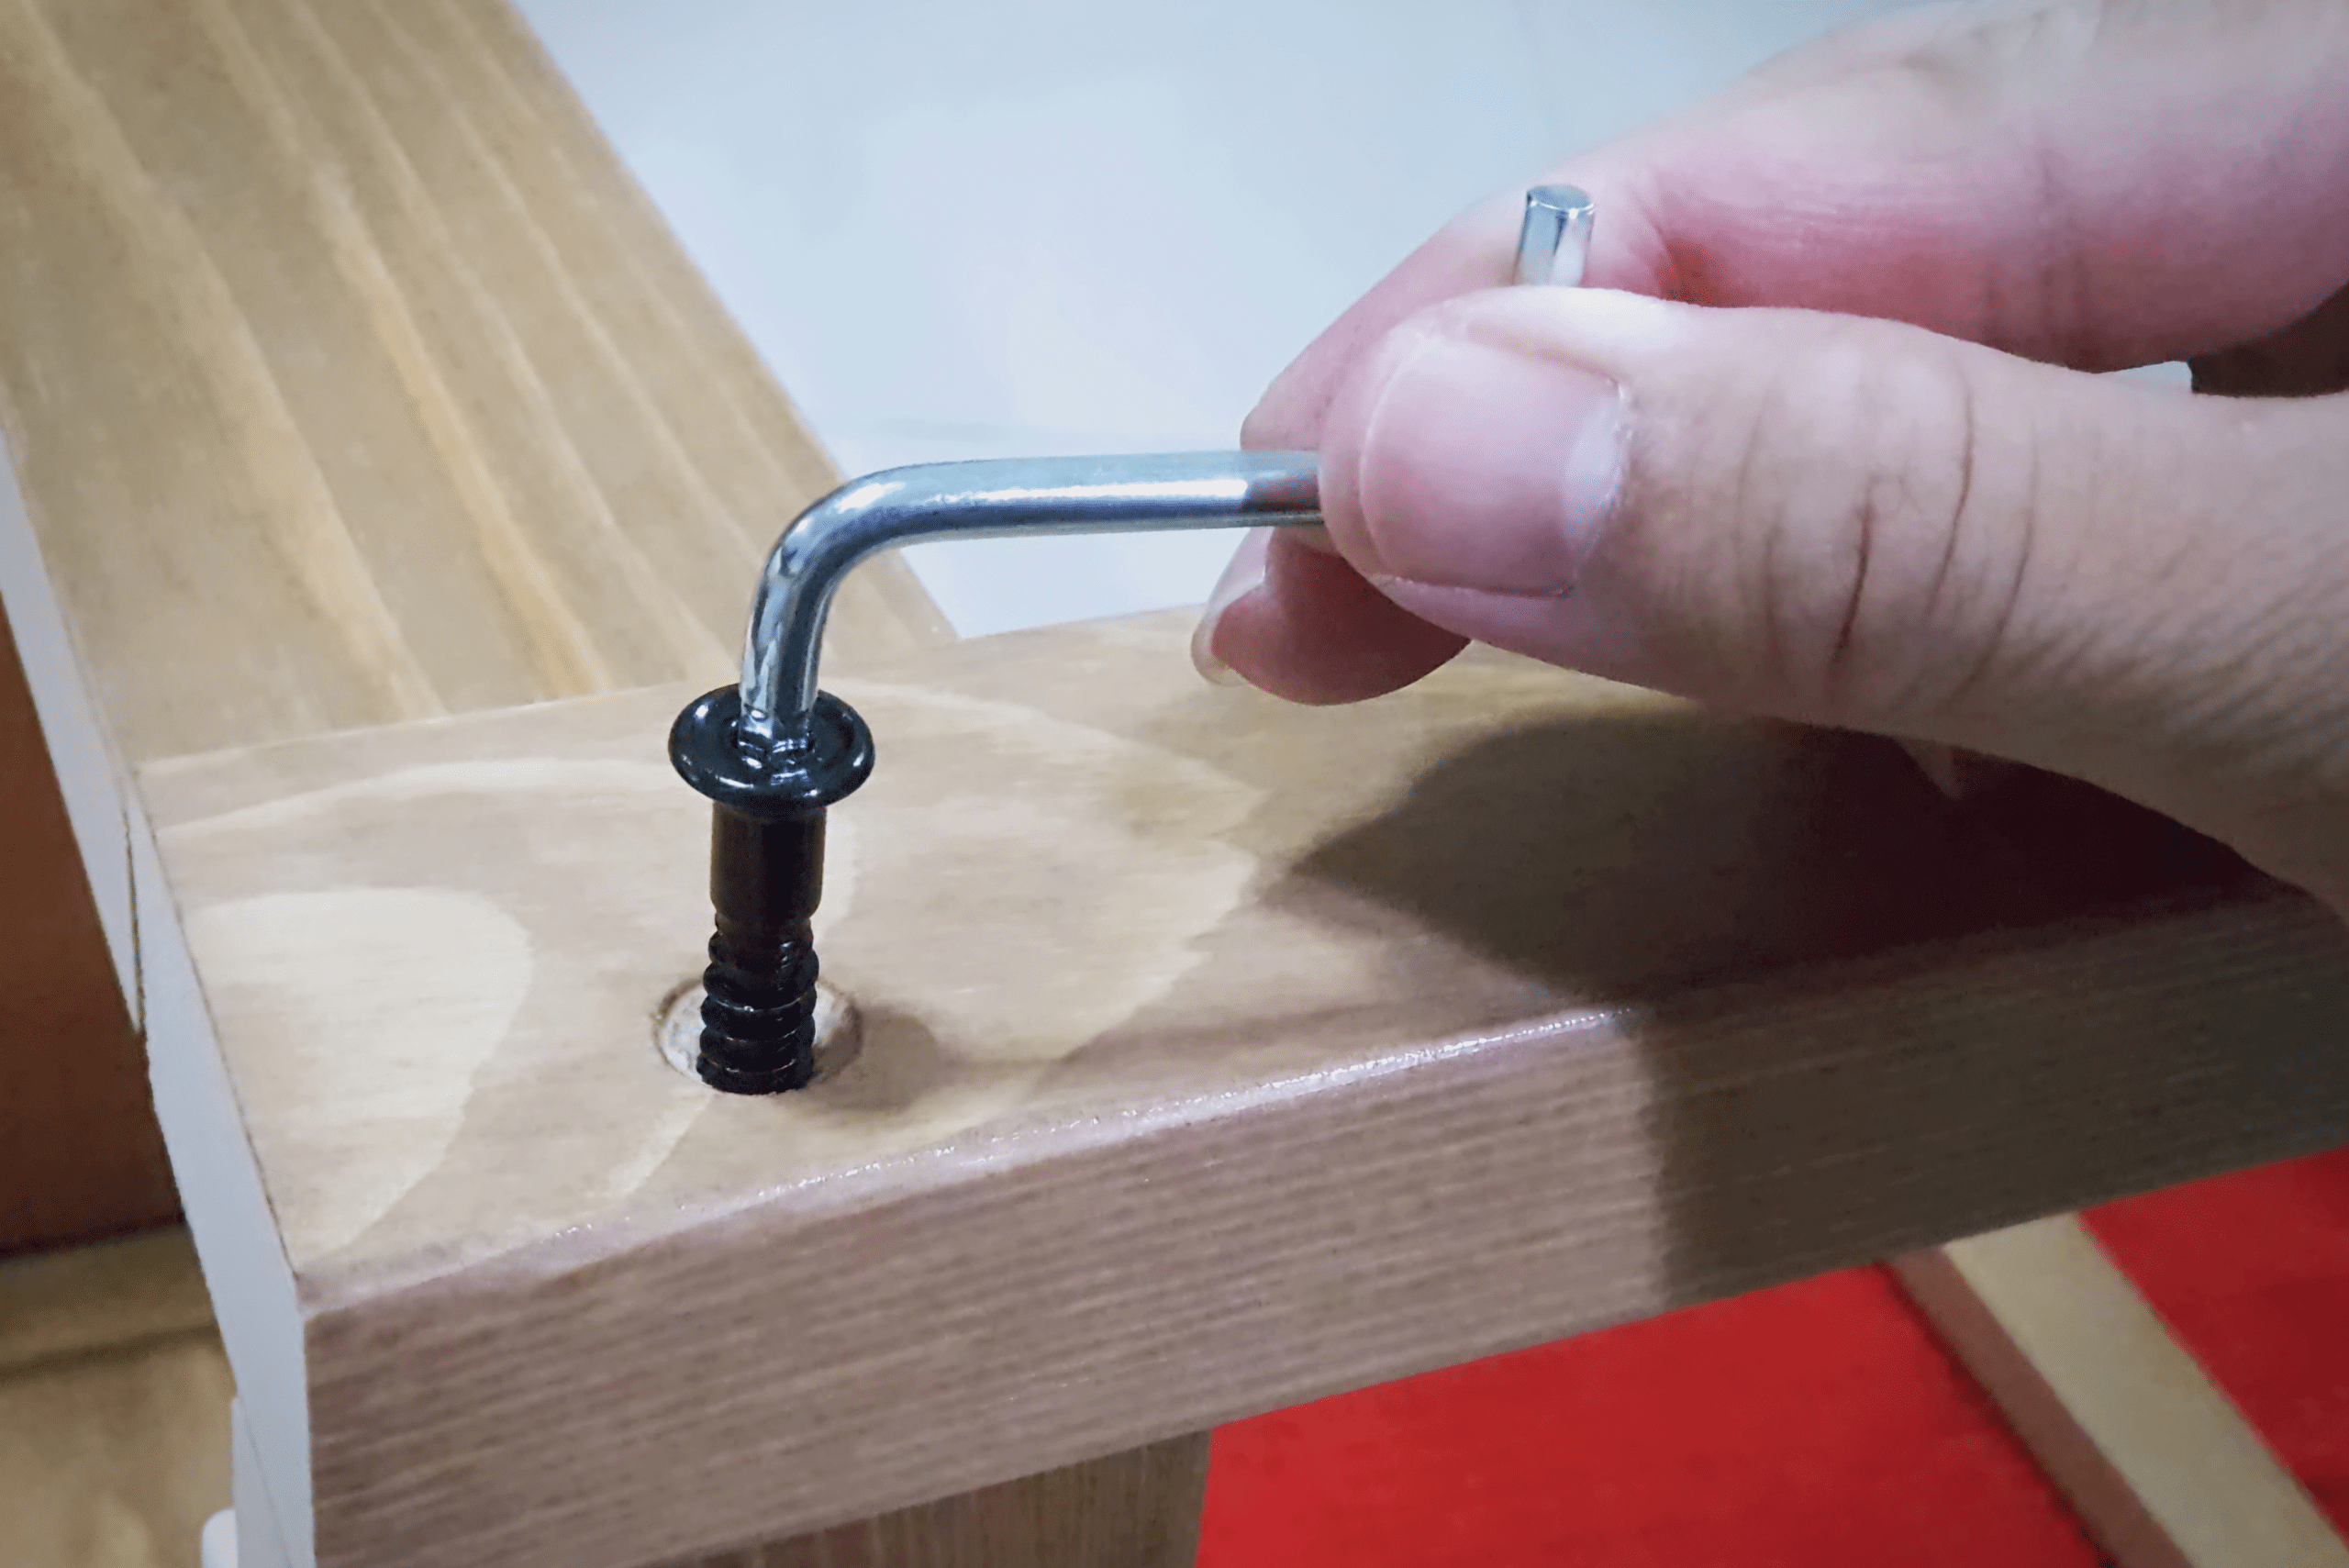
Fix a stripped screw hole (quick and sturdy)
If a screw will not bite anymore, you have options that keep the repair neat.
- Toothpicks and wood glue method: Dip a few toothpicks in wood glue, pack them into the hole, snap flush, let dry, then re-drive the screw.
- Dowels (best for bigger holes): Drill the hole slightly larger, glue in a wood dowel, let cure, then pre-drill a pilot hole for the screw.
Important: Pre-drill your pilot hole. Most furniture damage happens when a screw is forced into wood that cannot accommodate it.
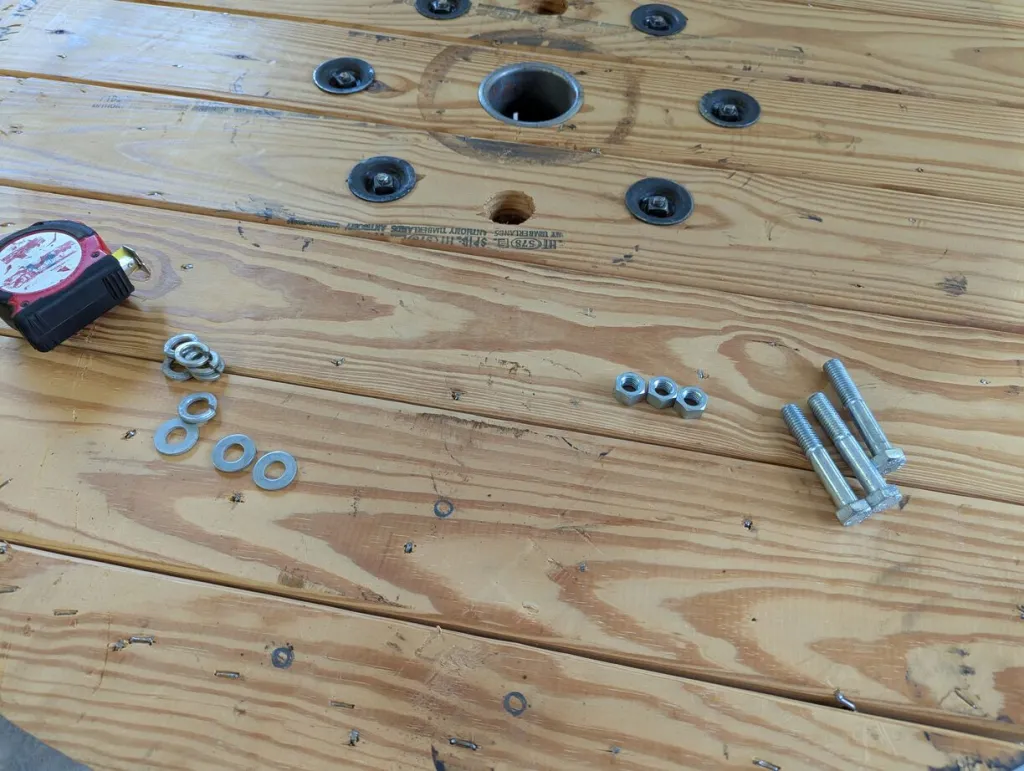
Replace missing or worn hardware
Dining chairs especially love to lose washers over time. A missing washer can make a bolt feel tight while still allowing tiny movements. Take one bolt to the hardware store and match:
- bolt diameter and thread pitch
- washer size
- bolt length (do not guess here)
Glue wisely: fixing loose joints without ruining the finish
If the wobble comes from a joint that has loosened, glue is often the correct long-term fix. But the best glue job is not just “squeeze and hope”. You want glue to bond wood to wood, not old glue to old glue, and you want to protect the finish while you work.
Choose the right glue
- PVA wood glue (yellow or white): Great for most modern chairs and tables with bare wood inside the joint.
- Liquid hide glue: A favorite for antiques and vintage pieces because it is more reversible with heat and moisture, which matters if someone needs to repair it again in 30 years.
- Avoid polyurethane “foaming” glues for chairs: They can expand and push joints apart if clamping is not perfect.
- Avoid super glue for structural joints: It is brittle and not ideal for furniture stress.
Prep the joint (the step people skip)
To re-glue well, you need to remove what is failing.
- Gently disassemble the loose joint if it will come apart without forcing.
- Remove crumbly old glue. Use a chisel carefully, a scraper, or sandpaper on bare wood only.
- Dry-fit the joint. Make sure it seats fully before you add glue.
If the joint will not come apart: You can sometimes work glue into a hairline gap using a thin blade, a syringe, or a small brush. It is not as strong as a full disassembly and clean, but it is better than ignoring the movement.
Protect the finish while gluing
- Use painter’s tape around the joint edges if you are worried about squeeze-out touching a stained or painted surface.
- Keep a damp cloth ready, but do not flood the wood. Too much water can dull certain finishes.
- Wipe glue squeeze-out immediately. Dried glue can leave a cloudy patch that resists stain and finish touch-ups.
Clamp like you mean it (gently)
Clamping is about holding the joint closed, not crushing it.
- Use scrap wood pads between clamp jaws and the furniture to prevent dents.
- A strap clamp is wonderful for chair frames because it applies even pressure around the perimeter.
- Check alignment before walking away. A chair can dry slightly twisted if it is clamped crooked.
How long to let glue cure
Read your glue label, but these are safe general guidelines:
- Clamp time: often 30 to 60 minutes for PVA, longer for hide glue
- Light handling: usually after a few hours
- Full strength: typically 24 hours
Translation: do not host game night in a freshly glued chair tonight, even if it feels “fine”. Let it fully cure.
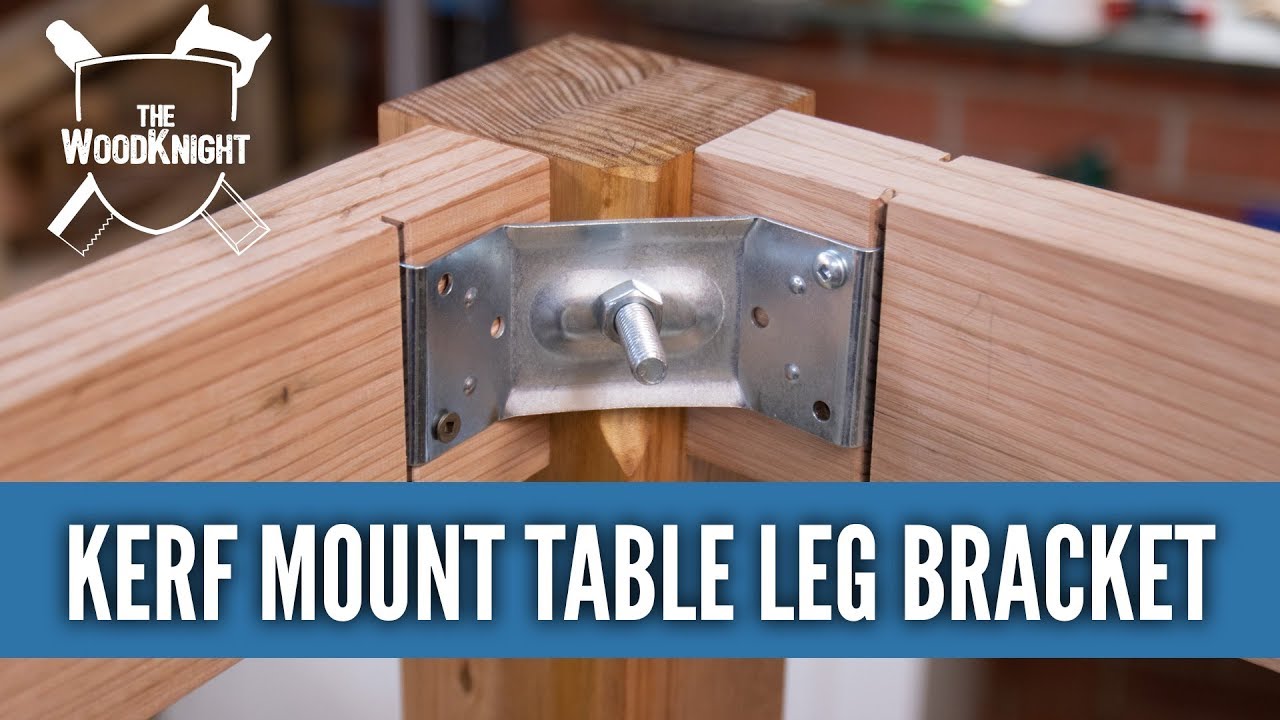
Bracing: when corner braces help and when they are a mistake
Corner braces can be a lifesaver, but they are not a universal fix. Think of them as support for a frame that needs help staying square, especially on tables.
Good uses for corner braces
- Wobbly table base where the apron-to-leg joints are sound but the structure needs extra rigidity
- Utility tables and casual pieces where you prioritize sturdiness over pristine originality
- After a glue repair when the design allows hidden reinforcement
When to avoid braces
- Fine antiques where added hardware reduces value and can split older wood
- Chairs in most cases. A chair’s stresses are complex, and metal braces can create new stress points. Better to fix the joinery properly.
- Cracked legs or aprons. Braces do not solve broken wood. They just hide it for a while.
How to install braces cleanly
- Choose a brace size that fits fully on solid wood surfaces.
- Position it so screws will not poke through the finished side.
- Pre-drill pilot holes to prevent splitting.
- Use short screws. If you are unsure, measure the thickness of the wood and choose a screw length that is safely shorter.
Fix uneven feet without cheating the structure
If your joints are solid but the piece rocks, the fix is usually at the floor contact points.
Simple fixes
- Add felt pads or nail-on glides to the short leg to stop rocking and protect floors.
- Replace missing glides so all feet have the same “shoe”.
More permanent fixes (use care)
- Leveling feet are great for tables in older homes with uneven floors, especially if you do not want to keep stacking felt pads forever.
- Do not sand a leg shorter unless you are absolutely sure. It is easy to overdo it, and it is hard to put wood back.
Stylist note: If you are adding pads, choose ones that match your floor tone. A bright white pad peeking out under a warm oak chair will catch your eye every time you walk past. Quiet details make a room feel calmer.
Troubleshooting: what the wobble is telling you
The chair still wobbles after tightening
- Likely a glued joint is loose, not a bolt connection.
- Check stretchers (the horizontal bars between legs). One loose stretcher can make the whole chair feel unstable.
The table wobbles only when you lean on one corner
- Often a single apron-to-leg joint is loose or the corner block is cracked.
- Look for corner blocks (triangular wood pieces under the corners). If they are split, replace them or add new ones.
It wobbles and creaks
- Creaking plus movement usually means friction at a loose joint. Tighten or re-glue. Do not just lubricate it. Lubricants can interfere with future gluing.
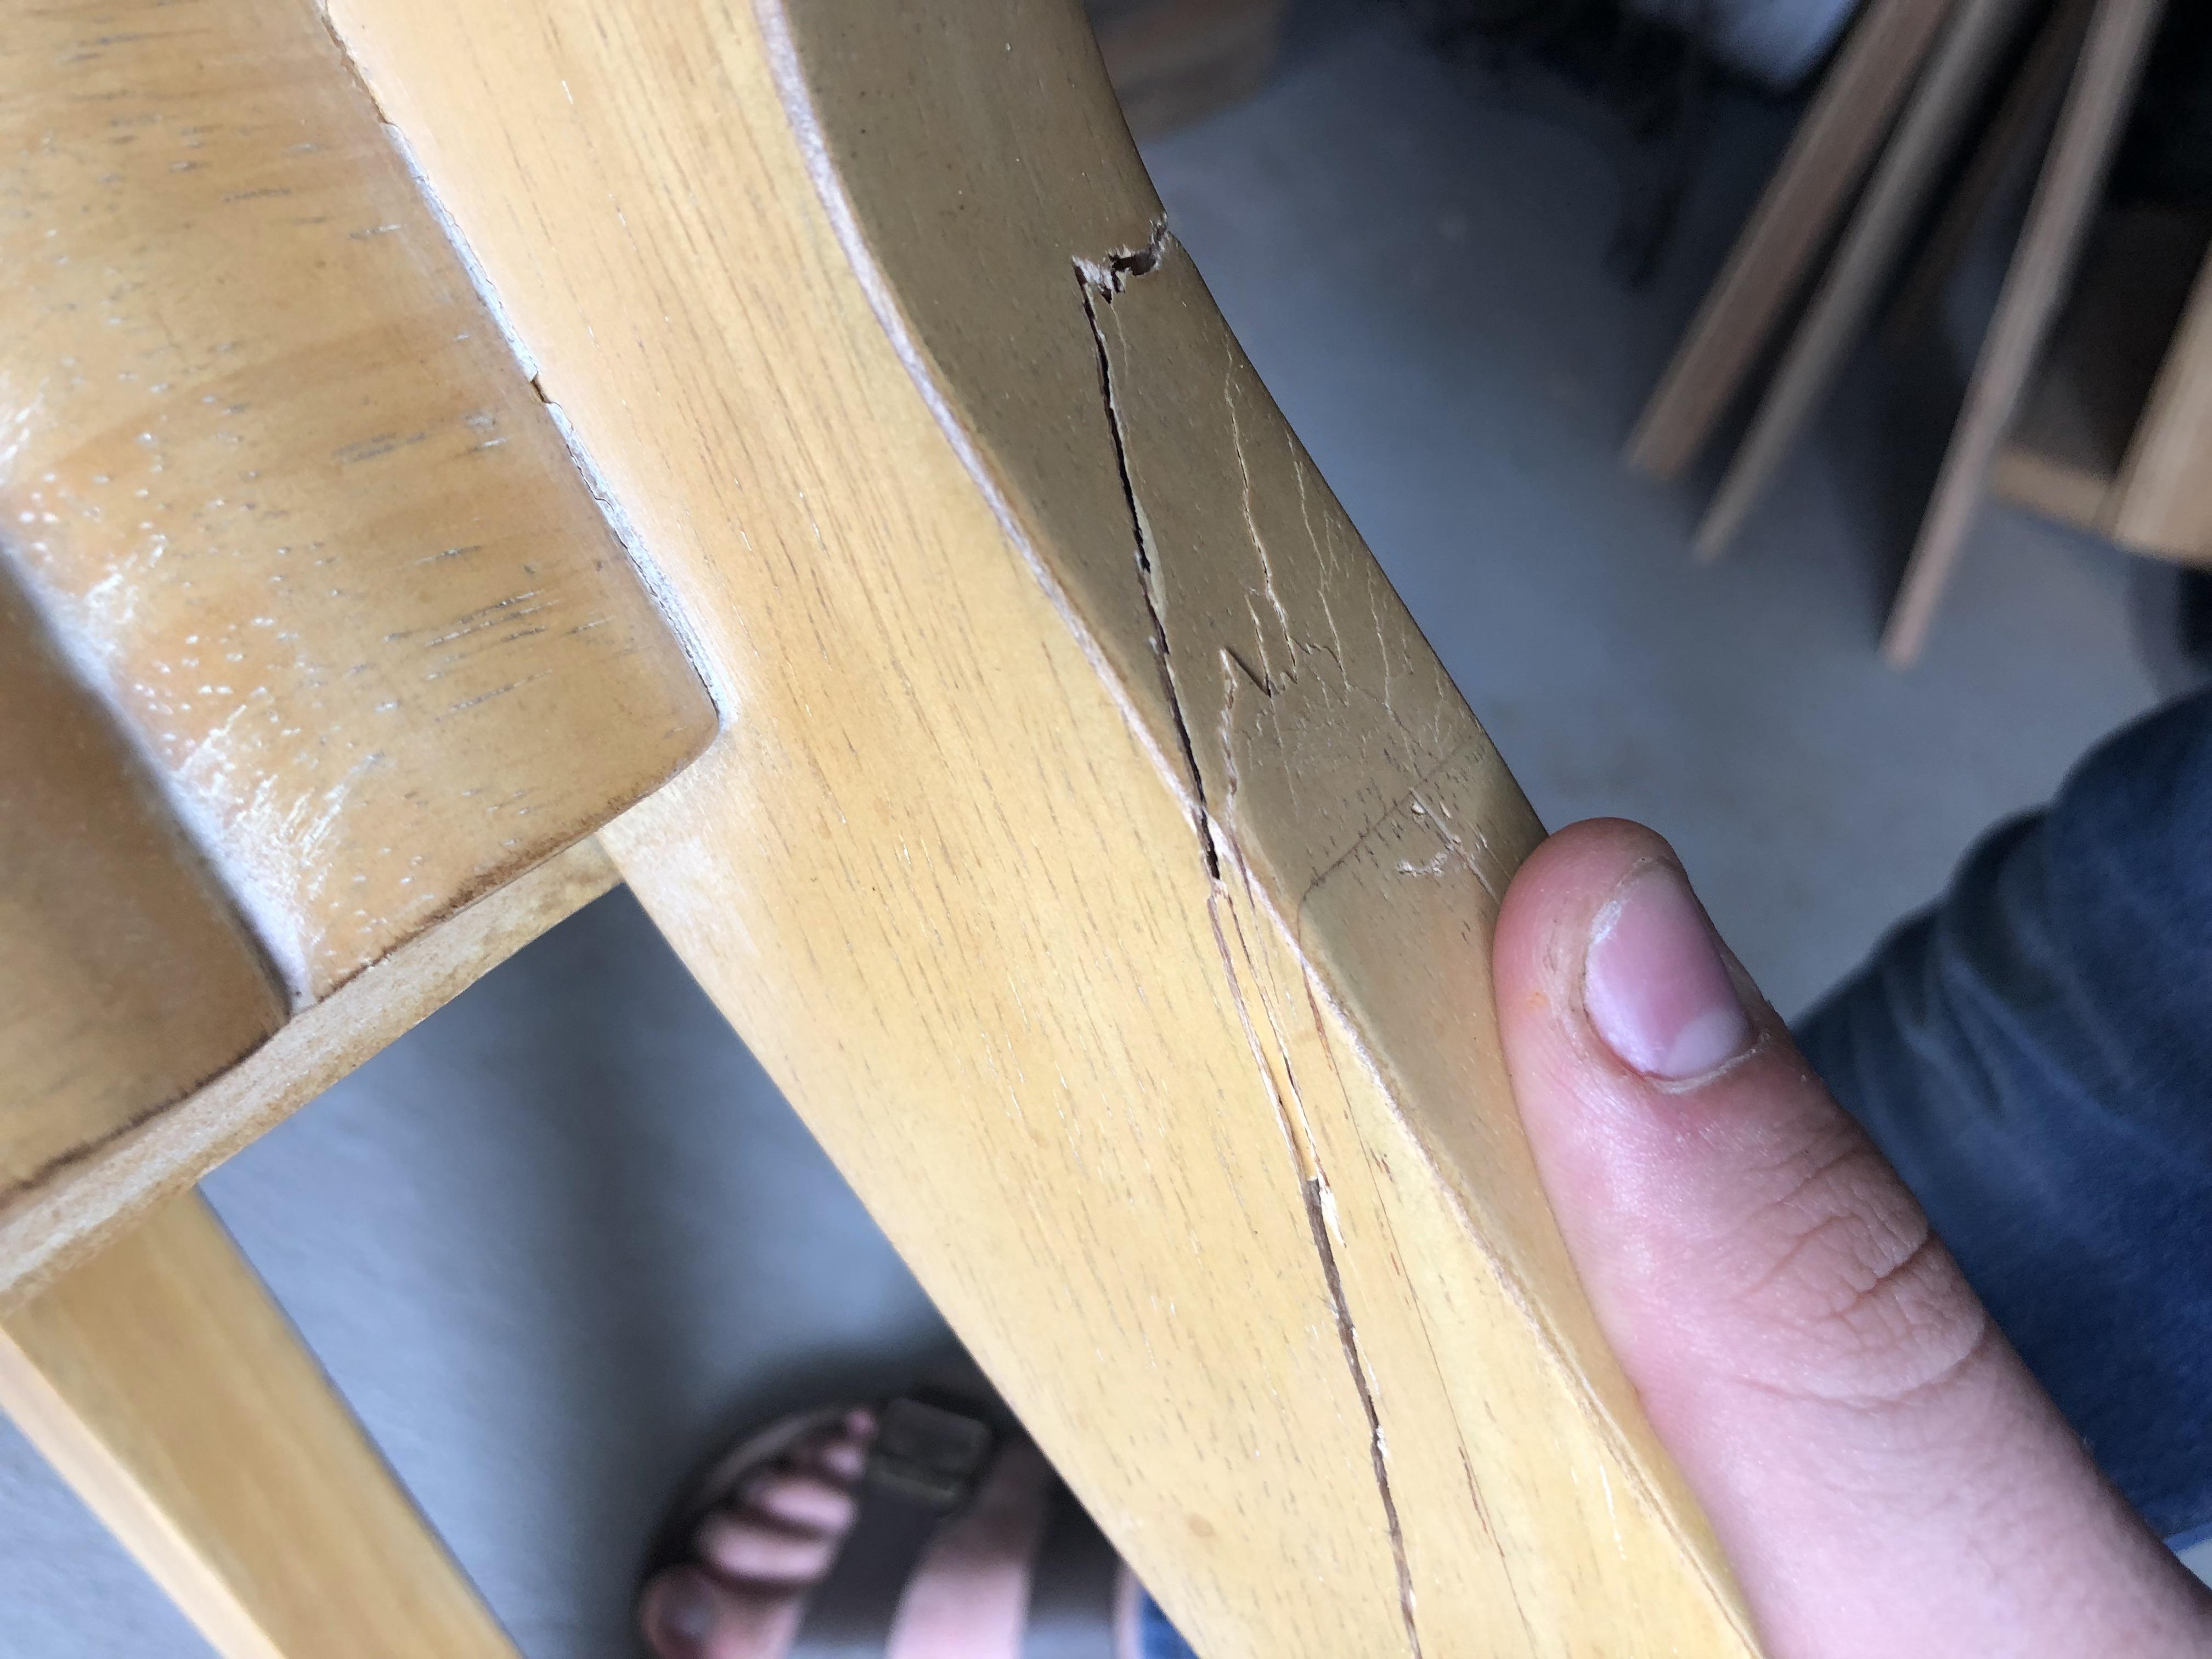
You see cracks in the wood
- Stop and reassess. Cracks may need wood repair, not just tightening.
- If it is a valuable piece, consider a professional furniture restorer, especially for antique chair legs and carved joints.
A quick “do this, not that” summary
- Do: diagnose uneven feet vs loose joinery first. Not: tighten randomly and hope.
- Do: snug everything, then tighten in a sequence. Not: crank one bolt down fully while others are loose.
- Do: clean out failing old glue when possible. Not: glue over dust and crumbs.
- Do: clamp with pads and patience. Not: over-clamp and dent the wood.
- Do: use corner braces thoughtfully on tables. Not: slap brackets on a vintage chair and call it “reinforced”.
When to call in help
If the piece is an heirloom, has carved details, uses complex joinery (like exposed mortise-and-tenon), or has multiple failed joints at once, a pro repair can be surprisingly affordable compared to replacing the furniture. And more importantly, it keeps a good piece out of the landfill.
But for the everyday wobbly dining chair that makes you grit your teeth every night? You can absolutely fix that at home, and it is deeply satisfying in the way only a steady, quiet chair can be.