Denim Dye Transfer on a White Mattress

Clara Townsend
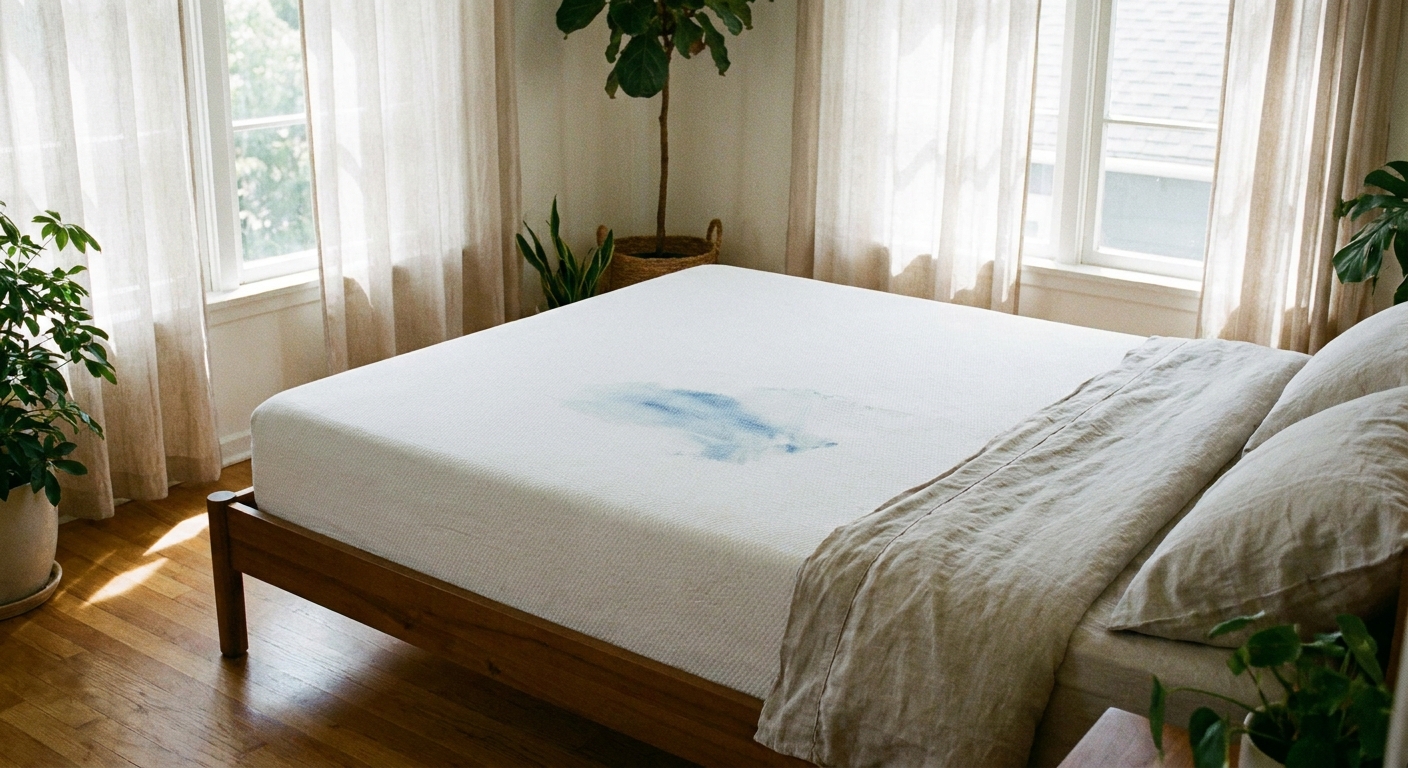
I learned this one the unglamorous way: a friend crashed on my guest bed in brand-new dark jeans, and by morning there was a soft, cloudy blue shadow right where his hip had been. It looked harmless until I remembered the cardinal rule of mattresses: you cannot rinse the daylights out of them the way you can with sheets. Too much water sinks into the foam, then you are not just fighting dye, you are fighting damp.
The good news is denim dye transfer is often a surface problem. If you move quickly and keep moisture controlled, you can lift a surprising amount without turning your mattress into a sponge. The catch is some covers and pillow-top quilting can wick that blue deeper than you would expect, so the earlier you intervene, the better.
First, figure out what got stained
The approach changes depending on what the dye landed on.
- Removable mattress cover: Some mattresses have a zippered outer cover. Some are washable, many are not. Check the care label before doing anything wet.
- Mattress protector: This is the removable waterproof or water-resistant layer you add. Many are washable, but care varies by material (PU-backed vs vinyl, for example), so follow the label so the backing does not crack or delaminate.
- Mattress surface itself: This is usually a knit fabric over foam or quilting. Treat it like upholstery with a very strict water budget.
If you are unsure, gently feel for a zipper around the side panel. If there is no zipper and you are looking at the actual sleep surface, assume it cannot be soaked.
Quick warranty and safety note: Only remove and clean what the manufacturer says is removable. Do not unzip deeper layers, inner socks, or liners. On some mattresses, disturbing interior fire barrier materials can create a mess you cannot undo and may void your warranty. When in doubt, clean the exterior surface only, lightly.
What you need (keep it simple)
- White cotton cloths or paper towels
- A small bowl
- Cold water
- Clear dish soap (a few drops only)
- White vinegar (optional but helpful)
- 3% hydrogen peroxide (optional for stubborn stains on white fabric)
- Baking soda (for drying and deodorizing)
- A fan, hair dryer on cool, or a dehumidifier
A quick caution from your overprotective homebody friend: skip bleach and skip heavy scrubbing. Bleach can yellow fabric and weaken fibers, and scrubbing can push dye deeper.
Rules of thumb: keep liquids minimal, work from the outside toward the center, and pair every damp blot with a dry blot.
Do this immediately if the transfer is fresh
1) Blot, do not rub
Press a dry white cloth firmly onto the blue area for 10 to 15 seconds, then lift. Move to a clean section of cloth and repeat. Rubbing creates heat and friction, which helps indigo migrate.
2) Cold-water micro-blot
Dampen a clean cloth with cold water, then wring it until it feels almost dry. You want “barely damp,” not wet.
Blot the stain from the outside toward the center. Follow each damp blot with a dry blot. This little two-step is what keeps moisture from sinking into the mattress.
3) Pause and reassess
If the blue is already lifting, keep going with controlled cold-water blotting. If it is barely moving, step up to a gentle solution below.
Foam-safe cleaning solutions (pick one)
Always test your chosen solution on a hidden area first, like along the edge near the side panel.
Option A: Dish soap solution (best first step)
Mix 1 cup cold water with 1 to 2 drops of clear dish soap. Less soap is better because leftover suds attract dirt.
- Dampen a cloth in the solution and wring it nearly dry.
- Blot the dye, rotating to a clean area of cloth often.
- Use a second cloth dampened with plain cold water (also wrung out well) to blot away any soap residue.
- Finish with dry cloth blotting.
Option B: Vinegar mix for lingering blue haze
If you are left with a faint bluish cast, vinegar can help release dye from some fabric surfaces.
Mix 1 part white vinegar with 3 parts cold water.
- Blot lightly with the vinegar mix.
- Blot with a plain-water cloth to remove vinegar.
- Dry blot thoroughly.
Material note: With latex mattresses and “natural fiber blend” covers, keep vinegar use minimal and rinse blot well. Latex and natural fibers do not love lingering acids.
Option C: Hydrogen peroxide for stubborn transfer on white fabric
Use this only on white mattress fabric or a white protector where you have tested for color safety. Peroxide is a mild oxidizer and can lighten materials, weaken some fibers, and in rare cases cause yellowing with certain finishes, foams, or adhesives if it is overused or not rinsed well.
- Apply a small amount of 3% hydrogen peroxide to a cloth, not directly onto the mattress.
- Blot the stain gently.
- Let it sit 3 to 5 minutes, then blot with a cloth dampened with plain water.
- Dry blot.
If your mattress has wool, silk, rayon/viscose, or a “natural fiber blend” cover, skip peroxide and stick to Option A.
If the stain is on a removable protector
This is the easiest scenario and also the one where people accidentally ruin the protector.
1) Pre-treat without soaking the backing
Lay the protector flat with the stained side up. Using the dish soap solution (above) or a small amount of liquid laundry detergent, blot the stain. Try to keep liquids concentrated on the fabric side, not puddling through to the waterproof layer.
2) Wash cool and gentle
- Water: cold or cool, not hot
- Cycle: gentle
- Detergent: a normal amount, no need to overdo it
- Extras to avoid: chlorine bleach, high-heat sanitizing cycles, and heavy fabric softener
3) Dry low or air dry, then finish thoroughly
High heat can warp waterproof backings. If the label allows machine drying, use low heat and remove promptly. Otherwise air dry.
Mildew prevention tip: even if the top feels dry, the inner layers can hold moisture. Hang it with airflow on both sides and give it extra time.

If the stain is on the mattress cover or surface
Keep your moisture budget tiny
The goal is to clean the fibers at the surface, then pull moisture back out immediately. Here is the rhythm I use: damp blot, dry blot, repeat.
Step-by-step: controlled lift
- Vacuum first (optional but helpful). If there is any lint or grit, vacuum with the upholstery attachment so you do not grind it in.
- Blot with dish soap solution. Use Option A above. Work in small sections, 2 to 3 inches at a time.
- Rinse blot. Plain cold water on a wrung-out cloth, then blot again with a dry cloth.
- Repeat once or twice. Indigo can be stubborn. Two gentle passes beat one aggressive one.
- Set the area up to dry immediately. Details below, because this is where mildew happens.
For old or set-in transfer
If the stain is days or weeks old, expect improvement rather than perfection. You can try the vinegar mix after the soap pass. If it is still obvious, peroxide can help on white materials if your spot test is clean.
About alcohol and specialty cleaners
You will sometimes see isopropyl alcohol recommended for dye transfer. I do not love it for mattresses because it can affect some adhesives and finishes, and it is easy to overdo. If you choose a commercial upholstery cleaner instead, pick one labeled for water-safe fabrics, apply it to a cloth (not the mattress), and keep the same damp blot, dry blot discipline.
Dry it fast to avoid mildew
A mattress can look dry on top and still be damp underneath. That trapped moisture is what creates that sour, musty smell no one wants near their pillows.
The drying setup I trust
- Strip the bed completely. No sheets, no protector until the area is truly dry.
- Blot with dry towels. Stand on a folded towel and apply body weight for 20 to 30 seconds, then swap towels.
- Airflow for at least a few hours. Aim a fan directly at the cleaned spot. If you have a dehumidifier, run it in the room with the door closed.
- Use cool air if you use a hair dryer. Heat can make some stains harder to remove and it adds risk for foams and adhesives.
Baking soda finishing layer
Once the spot is only slightly damp (not wet), sprinkle a light layer of baking soda over the area and let it sit 4 to 8 hours. Vacuum it up thoroughly. Baking soda helps pull lingering moisture and odors.

What not to do
- Do not pour water directly onto the mattress. That is how dye spreads and foam gets waterlogged.
- Do not steam clean. It adds heat and moisture, which can make staining harder to remove and can raise the risk of mildew inside the mattress.
- Do not use bleach. It can yellow whites and weaken the fabric.
- Do not aggressively scrub. Rubbing drives dye deeper and roughs up the surface fibers, which can look worn afterward.
- Do not remake the bed too early. Trapping dampness under a protector can create mildew faster than you think.
When to call a pro
If the stain is large, the mattress is expensive or under warranty, or you can smell dampness after drying, a professional upholstery or mattress cleaning service is worth it. Ask for a low-moisture approach with extraction, meaning they remove moisture rather than flooding the area.
Also stop DIY and get help if the stain keeps spreading, the area feels wet deep down, or you still detect a musty odor after 24 hours of airflow and dehumidifying.
How to prevent denim transfer next time
- Use a protector. If you already have one, make sure it actually covers the full sleep surface and stays flat.
- Wash new dark jeans before lounging in bed. Even one wash helps remove excess dye.
- Keep a light throw at the foot of the bed. It is a simple barrier if someone sits down in jeans to put on socks or scroll their phone.
Quick FAQ
Will denim dye come out of a white mattress?
Often, yes, at least partially. Fresh transfer tends to lift best with gentle soap-and-water blotting and fast drying. Older stains may lighten rather than disappear completely, especially if the cover fabric wicked dye into quilting.
Can I use Oxi powder or oxygen bleach?
On a removable protector, usually yes if the label allows it. On the mattress itself, I avoid it because it is easy to over-wet the area while dissolving and rinsing, and residue can be difficult to remove.
What if the blue spread into a bigger ring?
That is usually too much liquid. Lightly dampen a cloth with plain cold water and feather-blot the outer edge of the ring, using small, light dabs that overlap the clean area so the boundary fades. Then dry blot. The goal is to soften the edge, not soak the whole area.
How do I know the mattress is dry enough to put the protector back on?
Press a clean, dry paper towel firmly on the spot for 15 seconds. If it picks up any moisture or feels cool and damp, keep drying. When in doubt, give it another hour with a fan.