Denim Dye Transfer on a Light Sofa
Clara Townsend
Clara Townsend is an interior stylist, vintage furniture enthusiast, and the creative voice behind Velvet Abode. With over a decade of experience transforming both cramped city apartments and sprawling fixer-uppers, she believes that a beautiful home is built on personal stories rather than massive budgets. When she isn't hunting for the perfect brass sconce at a local flea market, she can usually be found rearranging her living room for the third time this month.
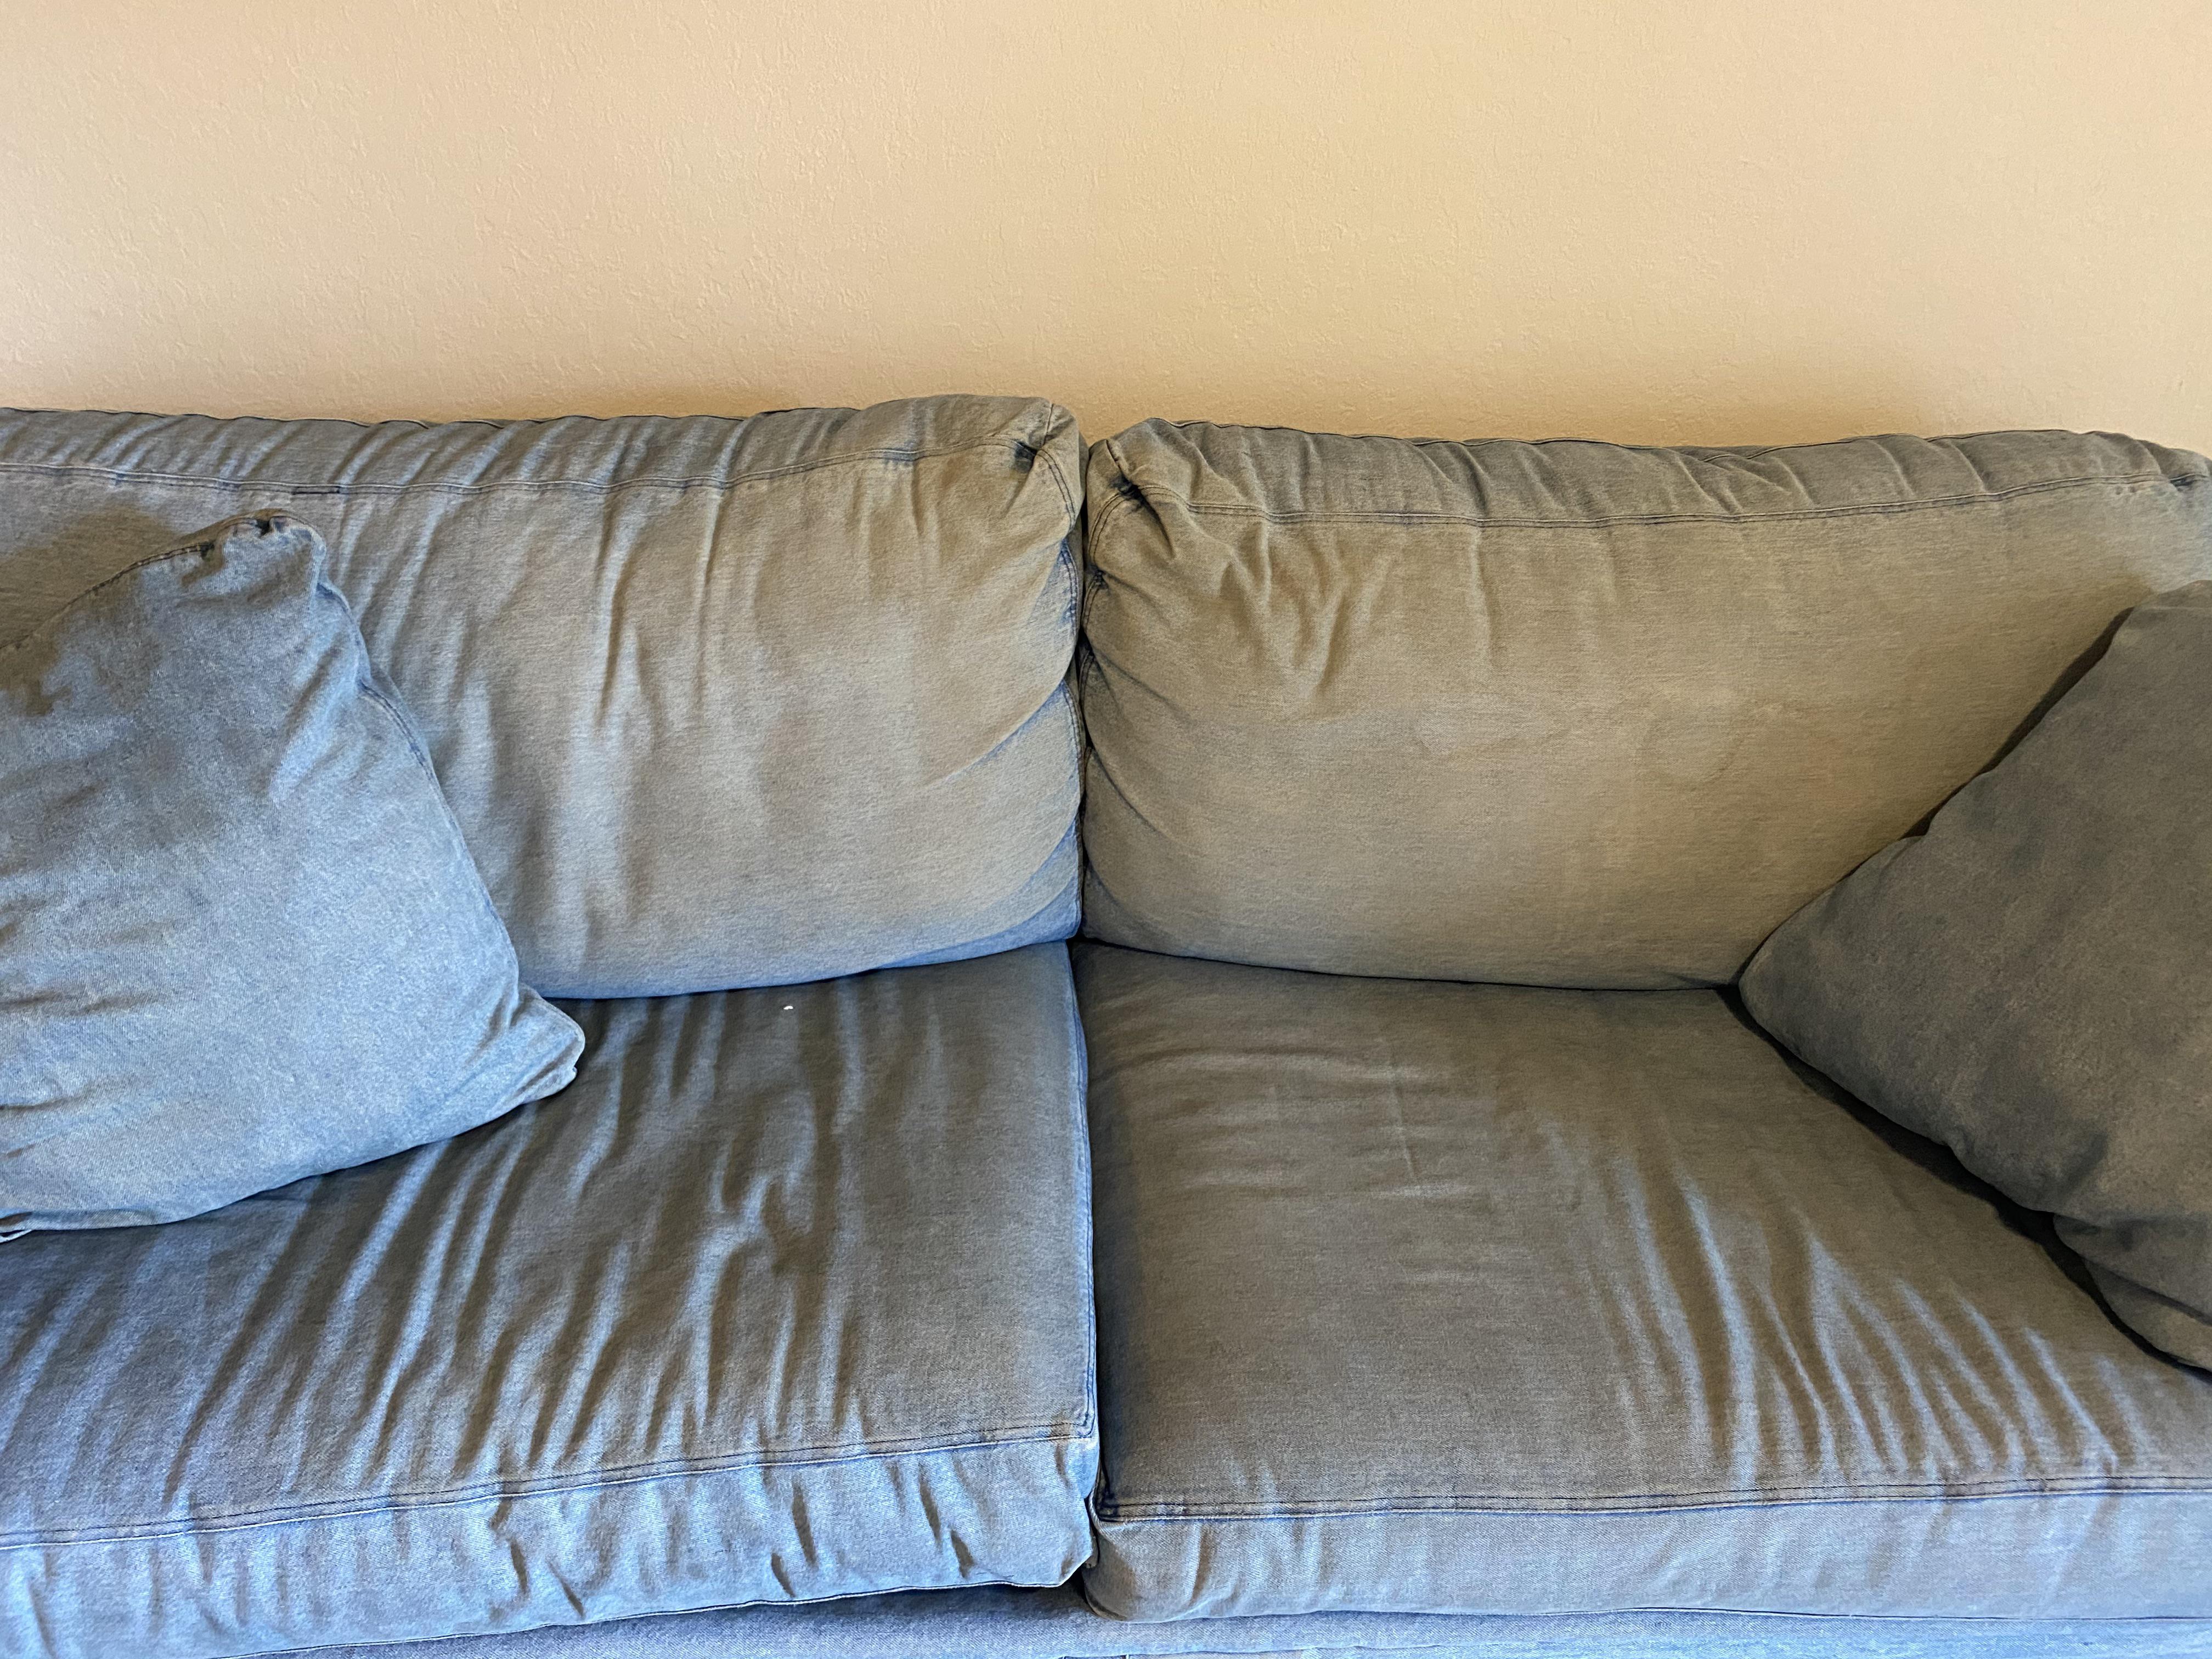
There are few things more rude than standing up from your sofa and realizing your jeans left a blue shadow behind. The good news is denim dye transfer is often loose dye sitting on the surface of the fibers, especially when it is fresh. The tricky part is that once dye wicks in, dries repeatedly, or gets warmed up by heat, it can become much harder to fully remove. And the wrong move can push dye deeper, spread it outward, or lighten the fabric in a way you cannot unsee.
This is a no-bleach, fabric-first approach for lifting blue jean dye from light upholstery, with the exact order I use when I am styling a home and someone has a “new dark denim” moment on a cream cushion.
Time note: Plan on 10 to 20 minutes of active blotting, then drying time (often a few hours with good airflow).
First, what kind of transfer is it?
Denim dye shows up on upholstery in two main ways. Knowing which one you are dealing with tells you how gentle or aggressive you can be.
Dry transfer (crocking)
Crocking is dry rubbing. Think: you sat down in new jeans, shifted around, and the dye lightly “dusts” onto the fibers. It often looks like a hazy blue cast or a streak that sits on the high points of the fabric texture.
- Usually easier to remove because the dye has not been carried deep by moisture.
- Often improves with dry lifting and careful, minimal moisture.
Wet transfer
Wet transfer happens when moisture gets involved. Rainy jeans, a damp swimsuit, spilled drink, sweaty summer legs, or a just-cleaned cushion that was not fully dry. Water helps dye migrate into the weave and it can wick outward into a soft-edged stain.
- Harder because the dye can penetrate more deeply.
- Requires controlled rinsing to pull dye back out without spreading it.
If you are not sure, look at the edges. Crocking is often more linear and sits on the surface. Wet transfer often has a cloudier edge and looks like it soaked in.
Before you touch it: 60 seconds that prevent disasters
Check your care tag (if you have one)
Look for the care tag under the cushion or under the sofa. Common codes:
- W: water-based cleaners are generally safe.
- S: solvent-only cleaning. Water can cause rings, distortion, or dye movement.
- WS or SW: water or solvent is allowed, with care.
- X: vacuum only. No DIY wet cleaning.
Quick reality check: Not every piece of upholstery is tagged, and codes are guidance, not a guarantee. If your manufacturer has specific instructions, those win.
Gather your gentle tools
- White cotton cloths or plain white paper towels (no prints)
- A soft upholstery brush or a clean, soft toothbrush
- Cold water
- A small bowl
- A spray bottle (optional, but helps you control moisture)
- Mild, dye-free dishwashing liquid or a clear, fragrance-light liquid laundry detergent
- A wet-dry vacuum or upholstery extraction machine if you have one (optional)
Do a quick colorfast test
In a hidden spot, dab your chosen solution and blot with a white cloth. If you see the sofa’s color on the cloth, stop. That fabric is telling you it is not in the mood for DIY chemistry today.
Golden rule: Work from the outside edge toward the center, and always blot more than you rub. Rubbing is how a small problem becomes a fuzzy, lightened halo.
Special cases to check first
Removable cushion covers
If your cover zips off and the label says it is washable, take it off and treat the cover separately. Slide a towel between the cover and the insert as you work so the dye does not migrate into the cushion. Wash cold, by itself, and skip heat drying until the transfer is fully gone (heat makes dye more stubborn).
Microfiber and performance fabrics
Many microfiber and “performance” fabrics tolerate careful water-based spot cleaning, but they can be ring-prone if you over-wet. Use the same minimal-moisture blotting approach below and feather your damp area outward so you do not create a hard edge.
Leather and faux leather
This guide is for fabric upholstery. Dye transfer on leather and faux leather is a different situation and can go sideways fast. Start by gently wiping with a barely damp white cloth, then dry immediately. If blue remains, use a leather-safe cleaner and conditioner per the manufacturer, or call a leather specialist. Do not use dish soap, alcohol, or “magic eraser” style abrasion on finished leather unless you are comfortable risking dull spots.
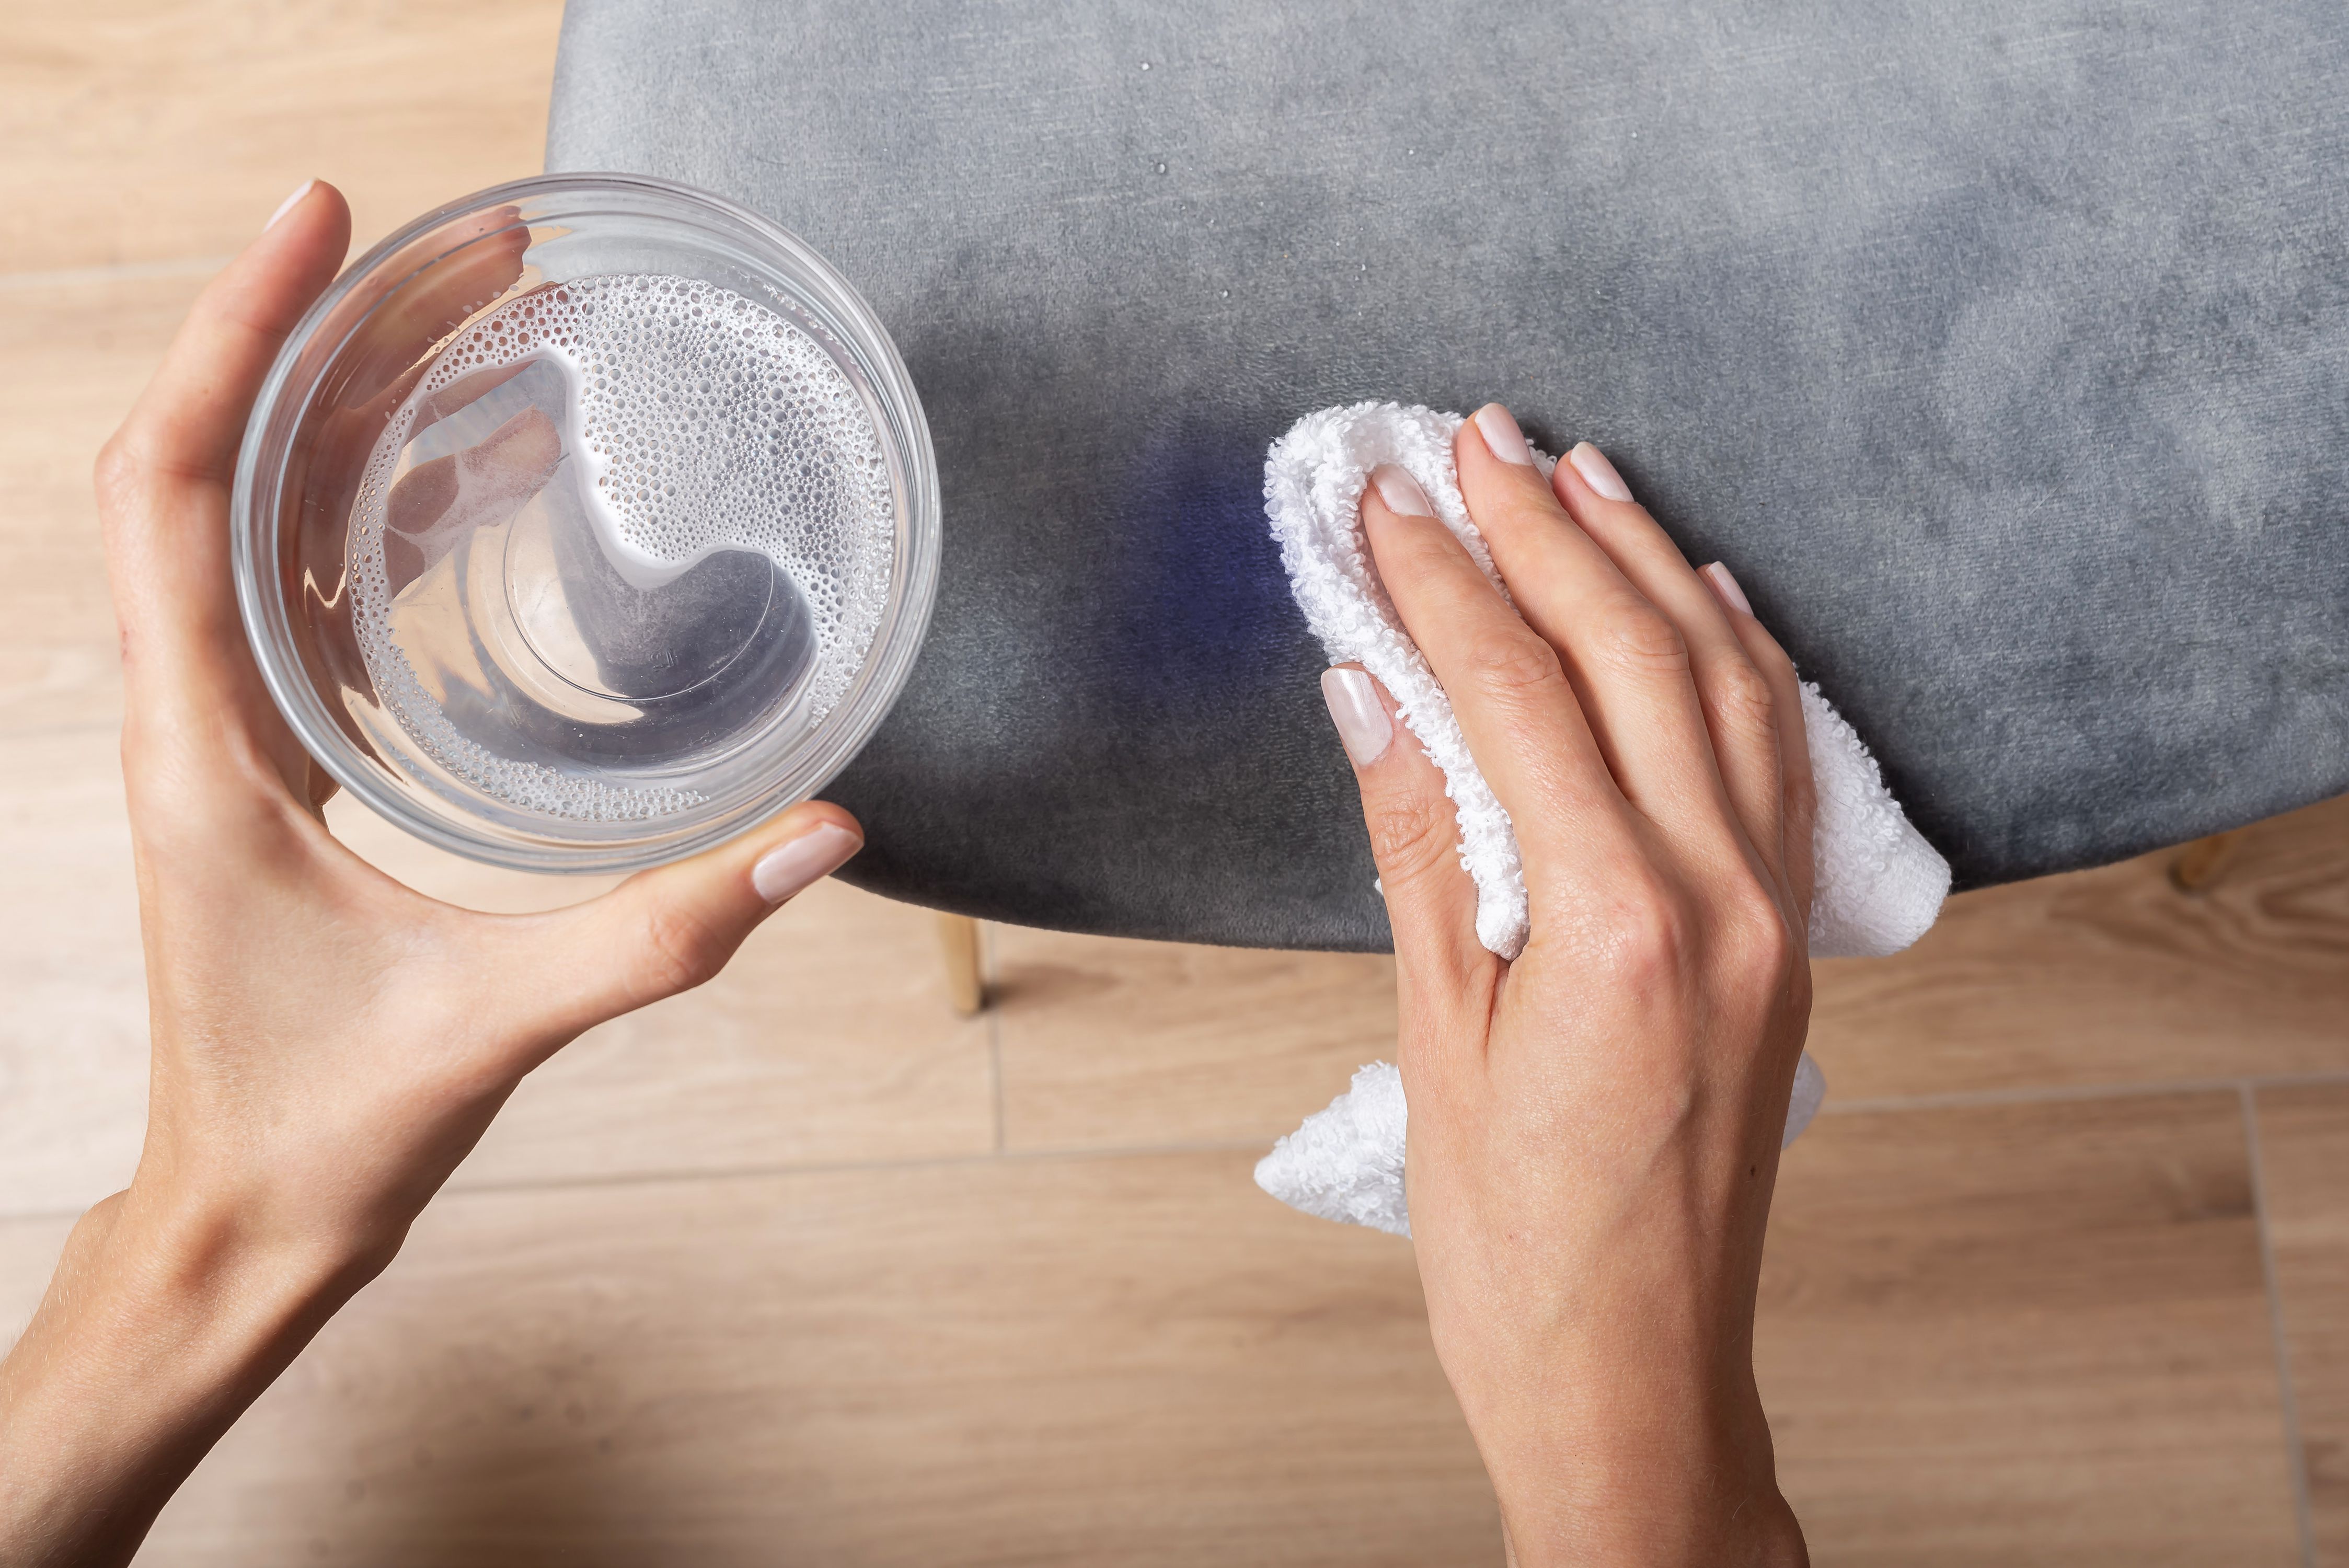
The right order: lift, rinse, lift again
Denim dye responds best to a cycle: blot to lift, then cold rinse to dilute, then blot again. The goal is to move dye out of the fabric and into your towel, not to redistribute it across the cushion.
Step 1: Dry blot first (yes, even if it looks dry already)
Press a dry white cloth onto the blue area with firm, even pressure for 10 to 15 seconds. Lift straight up. Move to a clean section of cloth and repeat.
- Why: if any loose dye is sitting on the surface, you want it off before you introduce water.
- Avoid: scrubbing. Denim dye can smear.
Step 2: Cold water blot, minimal moisture
Dampen a fresh cloth with cold water, wring it well so it is not dripping, then blot the stain from the outer edge inward. Immediately follow with a dry cloth to pick up what you just loosened.
- Why cold: warmth and heat can increase dye movement and make removal harder.
- Why wrung out: flooding increases the chance of rings and spreading.
- Reminder: blot, do not wipe. Wiping is just a polite word for spreading.
Step 3: Add a gentle cleaner if water alone is not enough
If the blue still hangs on after a few cold-water blots, add a tiny bit of cleaning power. A mild soap (a surfactant, meaning it helps lift dye and soil off fibers) can help detach the dye so you can blot it away.
Mixing guide (for W and WS fabrics)
- Option A: 1 to 2 drops of clear dishwashing liquid in 2 cups of cold water
- Option B: 1 teaspoon of clear liquid laundry detergent in 2 cups of cold water (stronger, use sparingly)
Dampen a cloth with the solution (do not pour it on), blot gently, then follow with a plain cold-water blot to rinse, then a dry blot.
Fabric codes and what is actually safe
“Safe” depends on the upholstery code, the fiber, and any finish on the fabric. Here is the practical version.
Code W (water-safe upholstery)
- Best approach: cold-water blotting, then mild soap solution, then rinse blots.
- What to skip: bleach of any kind unless the manufacturer explicitly allows it. Chlorine and oxygen bleach can both alter dyes and finishes, and they can leave pale patches even when the fabric looks “white.”
Code WS (water or solvent allowed)
- Start with: cold-water blotting and a very mild soap mix.
- If rings appear: stop adding moisture and jump to the troubleshooting note below. WS can still be ring-prone depending on weave, backing, and cushion fill.
Code S (solvent-only)
Be careful. Water can create a permanent tide line on some S-coded fabrics. If the mark is light and clearly crocking, you can try dry lifting first:
- Vacuum with upholstery attachment
- Gently brush with a clean, dry, soft brush to lift surface dye
- Blot with a dry cloth
If it needs more than that, a professional with the right solvent products and extraction tools is usually the cleanest path. DIY solvent use is easy to overdo and can spread dye.
Code X (vacuum only)
This is your sign to stop. Any wet cleaning can permanently change the fabric. Call an upholstery cleaning pro and tell them you have denim dye transfer.
Cold rinses: how to do them without a ring
Rinsing is what separates “it’s lighter” from “it’s gone.” But you want controlled rinses, not a soggy cushion.
Controlled rinse method
- Lightly mist a cloth with cold water (or dampen and wring very well).
- Blot the cleaned area and slightly beyond it, meaning you feather your dampness outward so there is no sharp wet edge.
- Immediately press with a dry cloth to pull moisture and dye upward.
- Repeat until your rinse cloth stops picking up any blue tint.
If a ring starts forming
Do not panic-scrub. Instead, lightly dampen a wider area around the spot (just enough to blend), then blot dry thoroughly and speed-dry with airflow. If the ring continues to sharpen or expand, stop and call a pro. At that point you are fighting physics.
Speed drying matters
Slow drying is how wicking happens, and wicking is how a faint blue spot becomes a larger, blurry bloom. After your final rinse:
- Blot firmly with dry towels.
- Stand the cushion on its side for airflow, if possible.
- Use a fan aimed across the surface (not a hot hair dryer close-up).
When to stop
There is a point where persistence stops being helpful and starts becoming damage. Call a pro if you notice any of the following:
- The blue keeps spreading as you work (classic wet-transfer wicking).
- A pale ring or water line appears around the cleaned area.
- The fabric texture changes (fuzzing, pilling, rough patches from friction).
- Color is lifting from the sofa itself onto your cloth during testing.
- The cushion feels saturated and you cannot pull moisture back out with towels.
- The sofa is velvet, viscose, or silk-blend (these can be heartbreakingly temperamental).
Ask specifically for a technician experienced with dye transfer. Many will use extraction, and sometimes specialized dye-removal products as well, depending on the fabric and how long the dye has had to settle in. The win is getting suspended dye and moisture out of the cushion layers, which is difficult to achieve with towels alone.
What not to do
- Do not use chlorine bleach. It can permanently lighten upholstery and weaken fibers, and it may not remove the dye evenly.
- Do not reach for oxygen bleach unless approved. It is gentler than chlorine, but it can still shift finishes and dyes on upholstery.
- Do not use hot water or heat. Warmth can increase dye movement and make removal harder.
- Do not scrub. You will rough up the fabric and spread dye.
- Do not soak the cushion. It invites wicking, rings, and mildew.
- Do not mix random cleaners. Especially anything with peroxide, ammonia, or unknown “miracle” ingredients.
- Be cautious with commercial “dye transfer removers.” Many are solvent or reducer-based and can lighten the upholstery itself. If you use one, patch-test like your sofa depends on it, because it does.
How to prevent denim transfer next time
I love dark denim. I also love light sofas. They can coexist with a little strategy.
- Break in new jeans: wash them a few times before lounging on pale upholstery.
- Throw blanket habit: keep a washable throw where you naturally sit. Bonus points if it adds texture.
- Fabric protectors: can help with some spills, but they are not a guarantee against dye. Test first and follow your fabric code and manufacturer guidance.
- Mind moisture: avoid sitting on light upholstery in damp clothing.
If you want, you can treat this as permission to add one beautiful vintage textile throw to your sofa rotation. Practical and pretty is my favorite category.