Decorate a Christmas Tree Like a Pro
Clara Townsend
Clara Townsend is an interior stylist, vintage furniture enthusiast, and the creative voice behind Velvet Abode. With over a decade of experience transforming both cramped city apartments and sprawling fixer-uppers, she believes that a beautiful home is built on personal stories rather than massive budgets. When she isn't hunting for the perfect brass sconce at a local flea market, she can usually be found rearranging her living room for the third time this month.
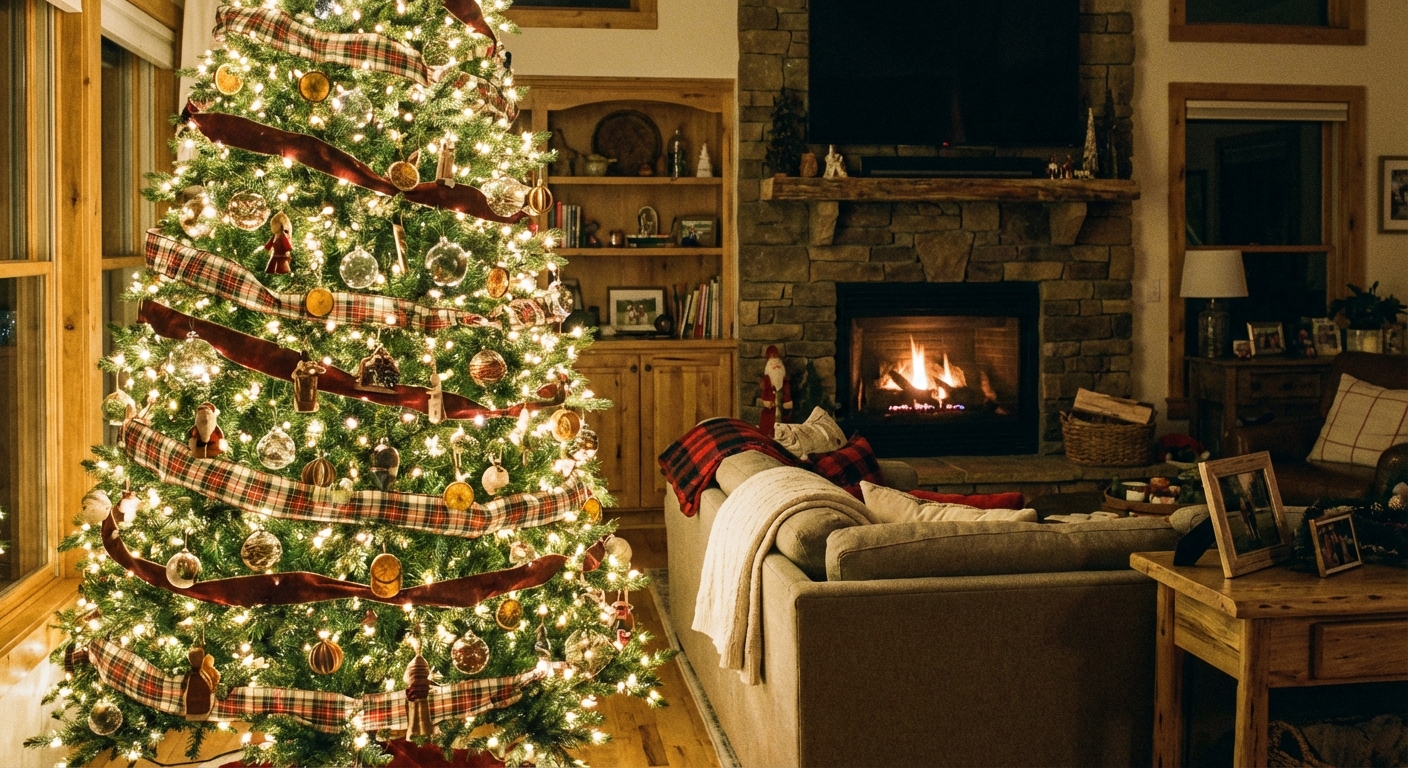
There is a very specific moment when a Christmas tree goes from “nice!” to “wait, did you hire someone?” And it is almost never about having expensive ornaments. It is about layering, spacing, and a few tiny choices that make the whole thing look curated.
I have styled trees in tiny apartments where the only free corner was basically next to the radiator, and in big old houses where the tree could practically have its own zip code. The method stays the same. If you follow the steps below in order, you will get that full, glowy, magazine-worthy tree without the stress spiral.
Quick safety note: If your tree is near a radiator or heat vent, scoot it a little farther away if you can. For real trees, keep the water topped up. Use LED lights when possible and do not overload outlets.
Before you start: pick a simple plan
Professional-looking trees have a point of view. Not a theme that feels like a department store aisle, just a gentle plan you can stick to when your arms get tired.
Choose your palette (keep it tight)
- 2 main colors + 1 metal is the easiest recipe. Example: cream and deep green with brass, or blush and burgundy with gold.
- If you love “collected” ornaments, make your unifier the metal. Mixing shiny and matte is fine if the undertone matches.
Choose your finishes
Designers mix finishes to keep a tree from looking flat:
- Shiny (reflects light, adds sparkle)
- Matte (reads cozy and modern)
- Textured (felt, velvet, beadwork, paper, straw)
Think of finishes like fabric in a room. A tree needs a little linen and a little velvet, not just one thing repeated.
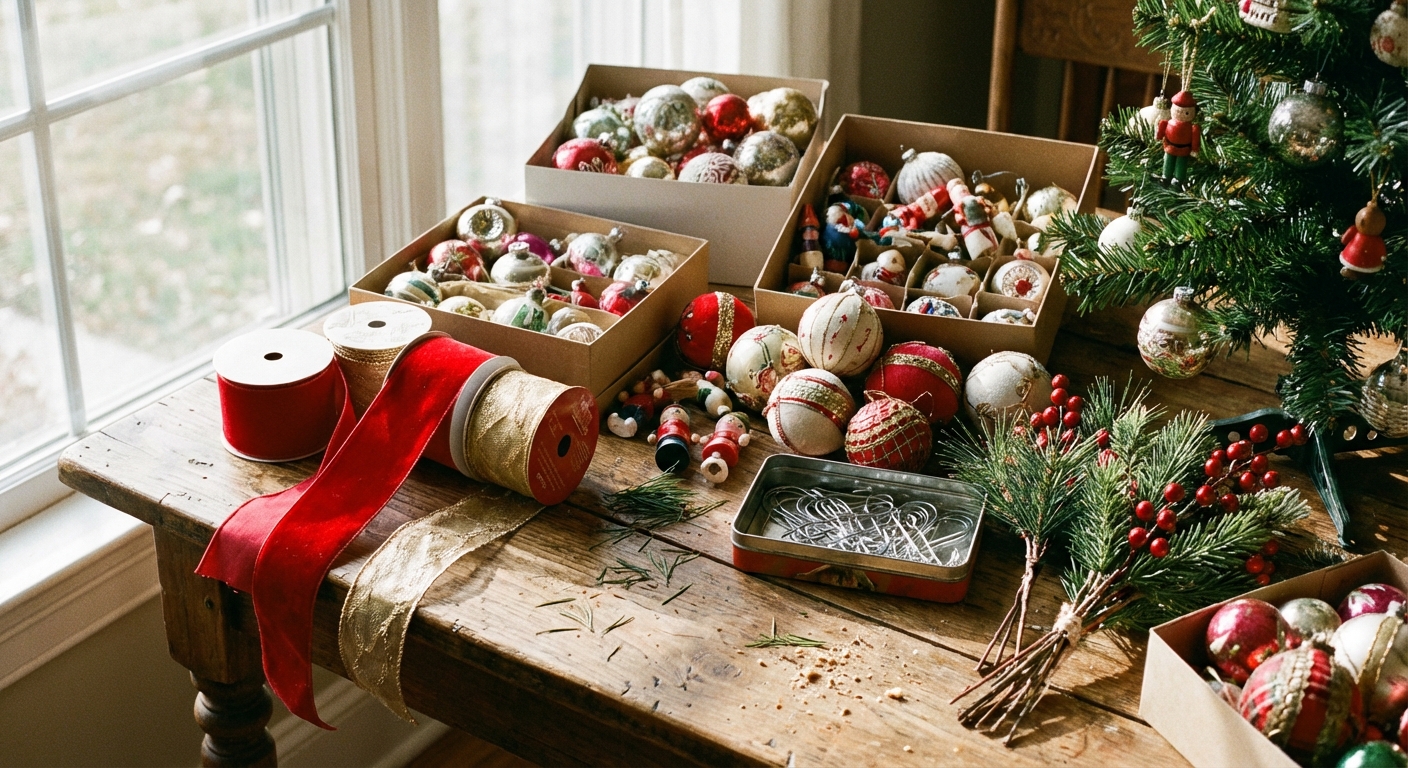
What you need (and what you can skip)
The essentials
- Lights (plug-in or battery). Warm white looks best in most homes.
- Ribbon (wired is forgiving, but unwired can look softer)
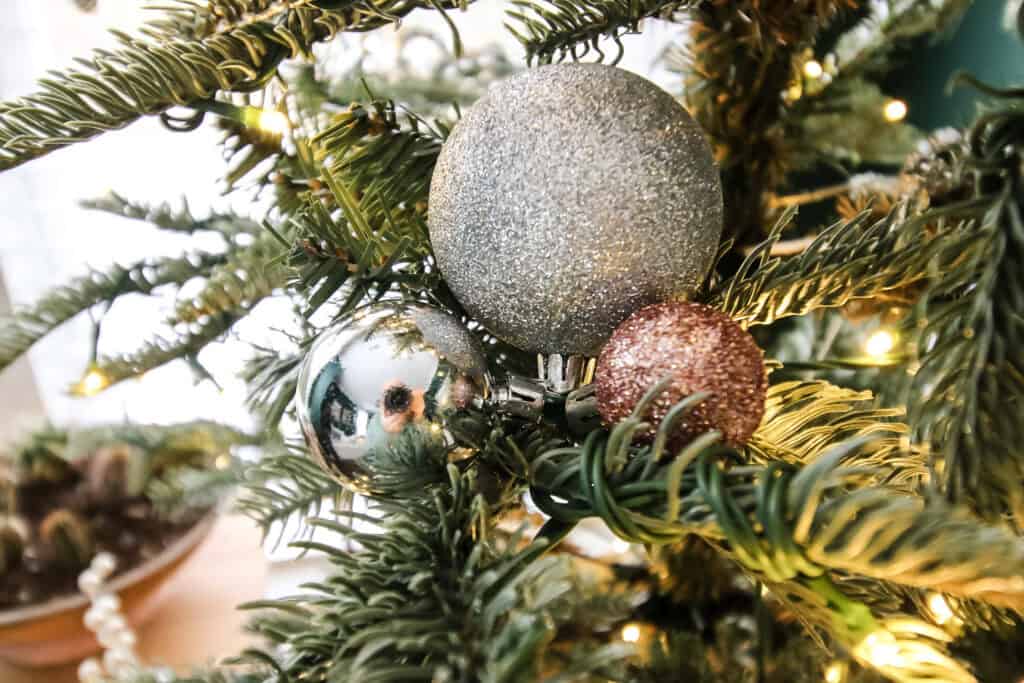
- Ornaments in 3 sizes: small, medium, large
- Tree picks (stems of faux berries, metallic sprays, frosted leaves) for depth
- A topper (star, bow, finial, or an airy cluster of stems)
Nice-to-haves
- Ornament hooks in a matching metal. They often hold more securely than string, and they are faster.
- Floral wire for anchoring ribbon and heavy ornaments.
- Tree collar (woven, metal, or fabric) or a skirt.
You can skip: bead garland unless you genuinely love it. If it feels fussy to you, it will look fussy on the tree.
How much to buy (quick guide)
You can absolutely decorate with whatever you have. But if you want a calm, one-trip-to-the-store plan, these ranges are a solid starting point.
- Lights: about 50 to 100 lights per foot of tree height, depending on bulb size, tree fullness, and how “glowy” you like it. Pre-lit trees often need fewer added strands.
- Ribbon: plan on 1 to 2 rolls per ribbon style for a 6-foot tree, and 2 to 3 rolls per style for a 7- to 9-foot tree (varies by width and how ribbon-forward you go).
- Picks and stems: roughly 6 to 12 for subtle dimension, 12 to 24 for a styled, layered look (especially if they are small sprays).
- Ornaments (total): about 50 to 80 for a 6-foot tree, 80 to 120+ for a 7- to 9-foot tree, depending on size and spacing. If you cluster, you can often use fewer pieces and get more impact.
Pets and kids tip: Use shatterproof ornaments on the lower third, and consider securing the tree to a wall with clear line if you have an enthusiastic climber (human or otherwise).
Step 1: Fluff like you mean it
If you do one unglamorous thing today, let it be this. Fluffing is where “full” comes from, especially on an artificial tree.
Pro fluffing technique
- Start at the bottom and work up.
- Separate every branch so you are not seeing “layers” like a staircase.
- On each branch, fan tips outward and slightly upward. Avoid the flat “table” look.
- Create a few intentional openings deeper in the tree. Those little pockets are where you will tuck lights and ornaments for depth.
If your tree is sparse, do not panic. A sparse tree can look gorgeous when you decorate deeper into it. You are basically about to style it like a room, not like a craft project.
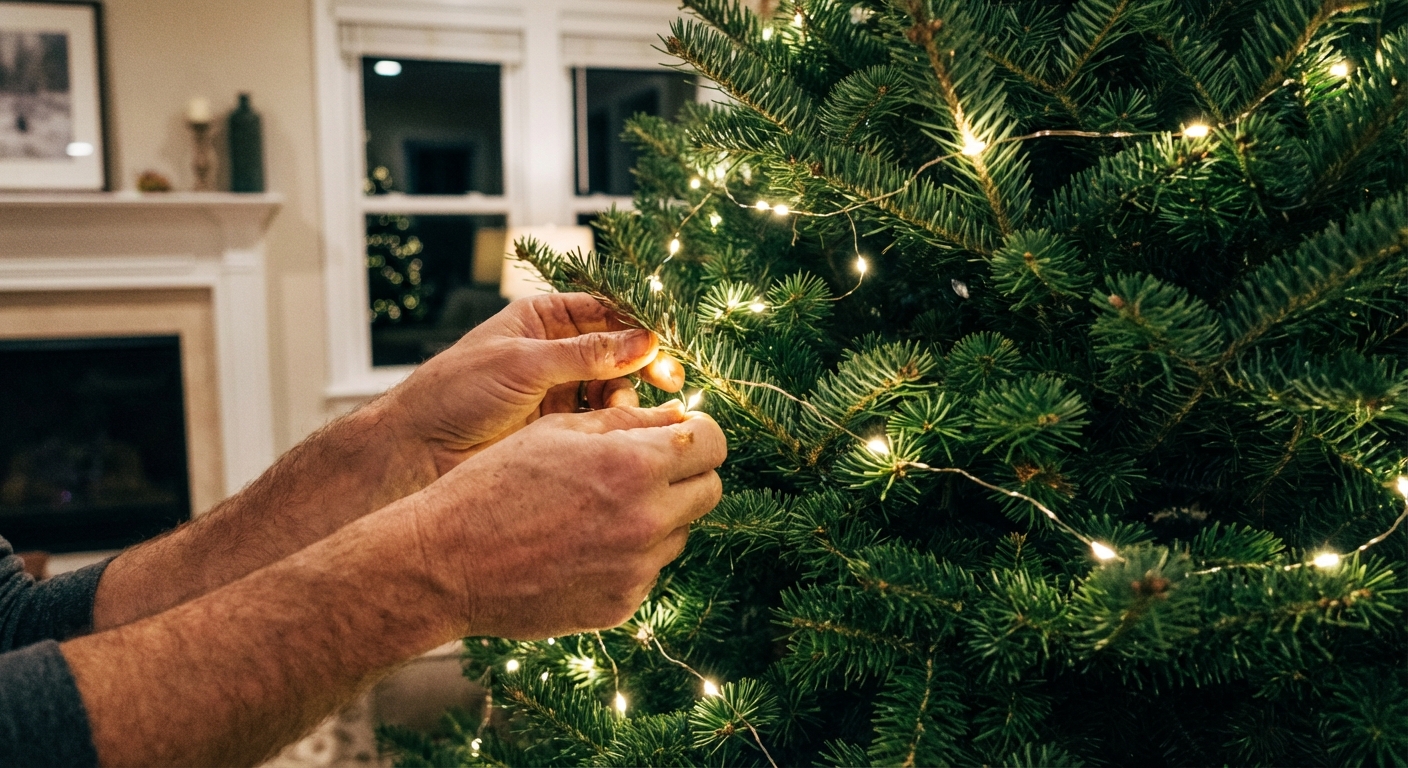
Step 2: Lights, layered inside and out
Lights are the tree’s ambient lighting. If the glow is wrong, everything else looks a little sad.
How many lights?
- For a full, designer look: many stylists aim for roughly 75 to 100 lights per foot of tree height.
- For a softer look: 50 to 75 per foot can work, especially on a pre-lit tree that already has a base layer.
Note: Bulb type matters. Mini incandescent reads brighter and warmer per bulb. Many LED strands are softer, so you might prefer the higher end of the range.
The pro placement method
Instead of wrapping lights around the tree like a candy cane, use the “in and out” technique:
- Start near the trunk and weave outward to the tip, then back in again.
- Repeat around the tree, moving upward in a gentle spiral.
- Every so often, step back and look for dark pockets, then fill them.
My visual test: turn off the room lights. If your tree looks like a cozy lamp, you are there. If it looks like a bright outline, you need more lights deeper in the branches.
Step 3: Add picks and stems
This is the step that makes trees look professionally styled, because it creates dimension before you ever hang an ornament.
Where picks go
- Tuck some deep near the trunk for shadow and sparkle.
- Angle others outward to break up the outline.
- Repeat your pick style in small doses around the tree so it feels deliberate.
If you are using berry stems or metallic sprays, place them first. They act like punctuation marks that help the rest of the decorating read clearly.
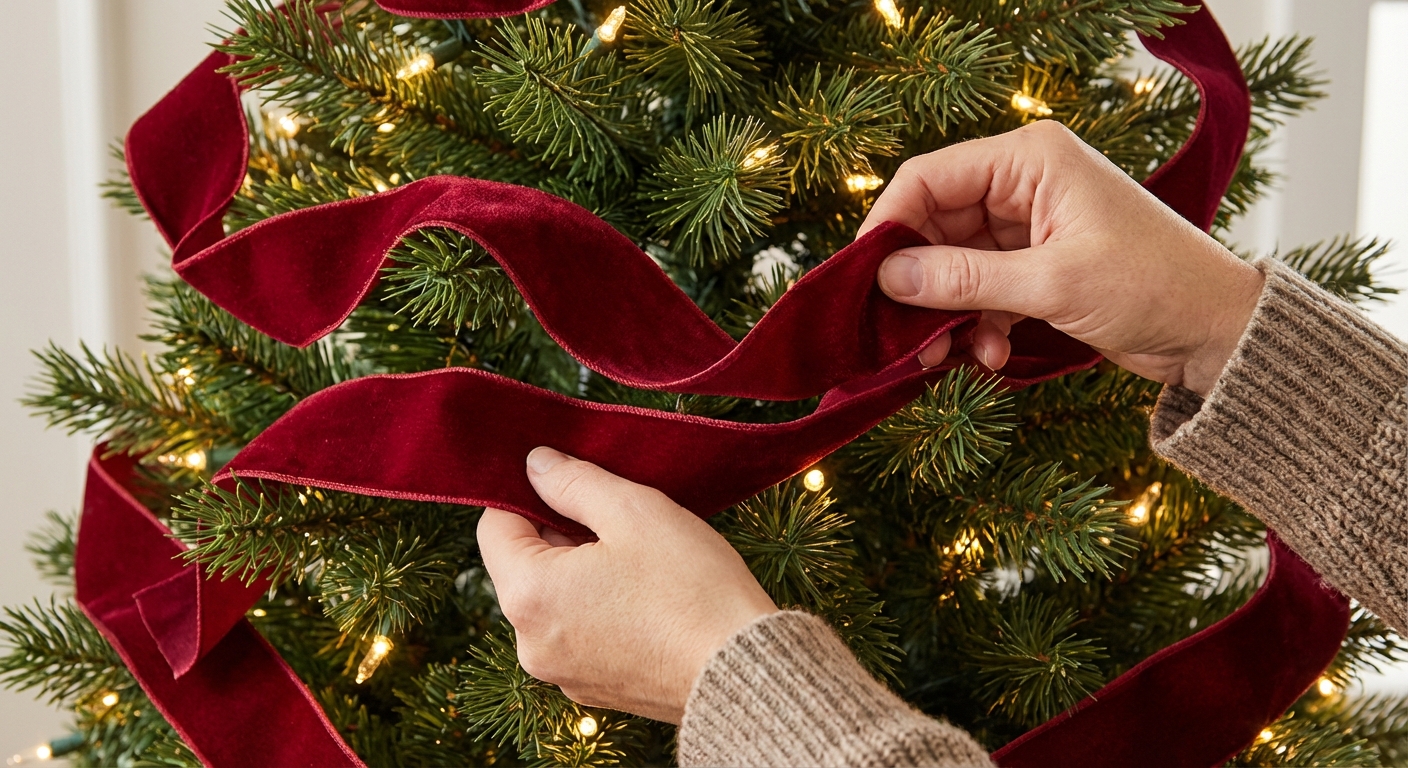
Step 4: Ribbon weaving (the designer swoop)
Ribbon is where most trees go sideways, not because ribbon is hard, but because we try to do it in one continuous loop and then wrestle with it like it is a garden hose.
Choose ribbon width
- 7- to 9-foot tree: 2.5- to 4-inch ribbon looks lush.
- 4- to 6-foot tree: 1.5- to 2.5-inch ribbon feels proportional.
Use these as starting points. If your ornaments are oversized, go a little wider. If your branches are fine and airy, go a little narrower.
Use the cut-and-tuck method
This is the trick designers use for those effortless cascades.
- Cut ribbon into lengths (about 3 to 5 feet each for a standard tree).
- Plan your count: try 6 to 8 sections on a 6-foot tree, and 8 to 12 sections on a 7- to 9-foot tree, depending on how ribbon-heavy you want it.
- Make a loose loop with your hands, like you are forming a soft bow without tying it.
- Tuck the end deep into the tree, then pull the ribbon outward into a swoop.
- Tuck again 8 to 12 inches away, creating a second dip.
- Repeat around the tree, spacing ribbon sections evenly.
Spacing rule: aim for ribbon to appear on all sides and at multiple heights. If it is only on the front, it will always look a little flat.
Step 5: Ornaments, spaced like a stylist
Ornaments are your furniture and artwork. They need balance, not sameness.
The three-size rule
- Large ornaments: placed deeper and slightly lower for weight
- Medium ornaments: your main layer, spread evenly
- Small ornaments: fill gaps and add sparkle near the tips
The “triangle balance” trick
Pick your most noticeable ornament color or finish. Place it in a loose triangle around the tree: one high, one mid, one low. Then repeat with another triangle. This keeps your eye moving and prevents the “all the good stuff on one side” problem.
Depth is what makes it look expensive
- Hang some ornaments close to the trunk. This creates that layered, twinkly depth you see in designer trees.
- Then add a layer near the tips so the tree still feels festive from across the room.
Cluster for impact (keep it airy)
Instead of spacing everything perfectly, create a few small clusters:
- Group 3 ornaments together (one large, one medium, one small) within a 10- to 12-inch area.
- Try 5 to 9 clusters on an average tree, then fill in between with single ornaments.
- Leave breathing room between clusters so it does not look crowded.
Real tree note: If you are decorating a real tree with softer tips, hang heavier ornaments deeper on sturdier branches and keep the outer tips lighter so you do not get droop.
Step 6: Fill the gaps (finishing pass)
This is the step where professionals earn their keep. We step back, squint a little, and then fix what the tree is quietly asking for.
Do a slow walk-around
- Look at the tree from the doorway, from the couch, and from the side.
- Find any “holes” where you see too much branch base or a dark pocket.
- Fill with a small ornament, a pick, or a shorter ribbon tuck.
Pro move: add a few ornaments that are slightly darker than your palette deeper inside. The shadow makes the brighter ornaments pop.
Step 7: Topper and base
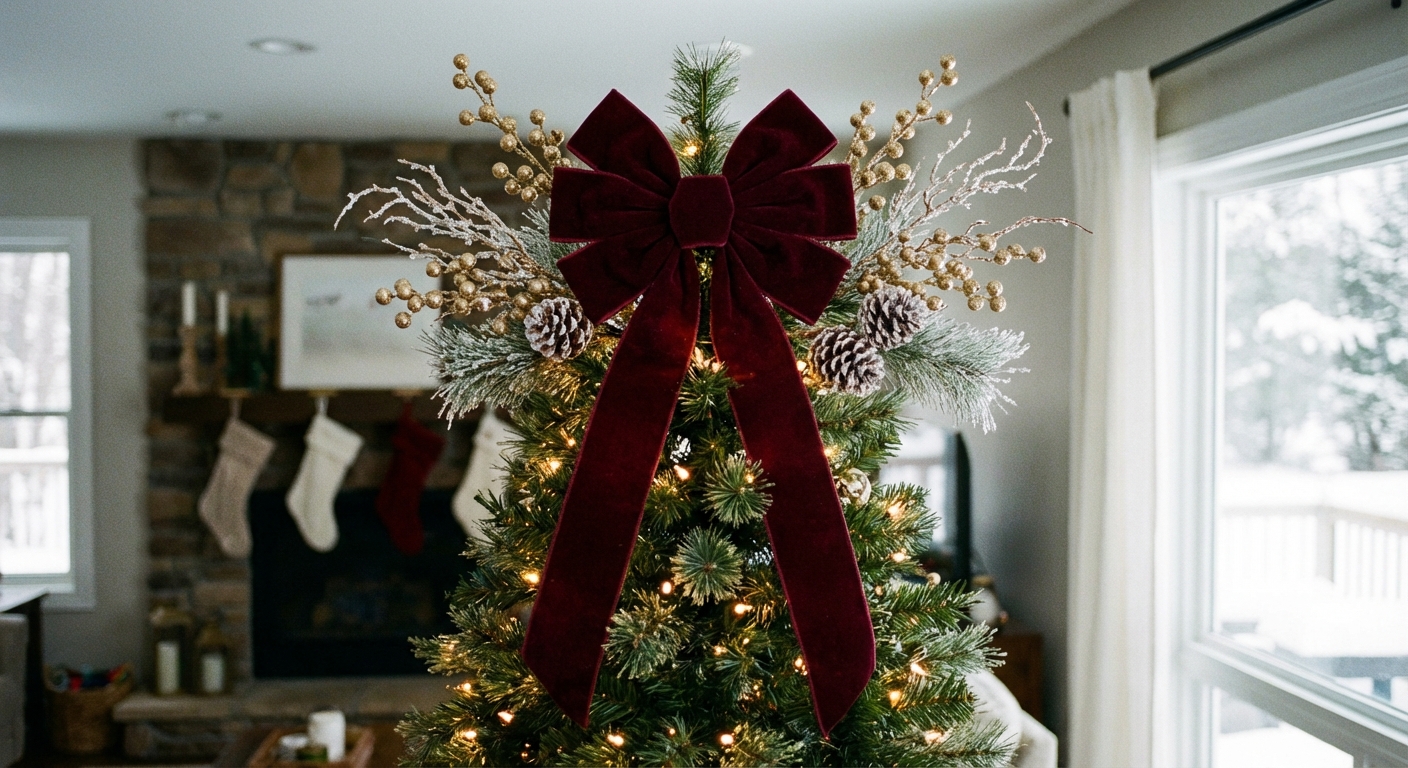
Topper options that always look polished
- An oversized bow (especially in velvet or satin)
- A star or finial that matches your metal accents
- A cluster of stems that sprays upward for height
If your topper feels wobbly, wire it to the top branch. No one wants a leaning star situation at 10 p.m. on December 23.
Base styling
- Use a tree collar for a clean, tailored look.
- If you love a skirt, choose one with texture: quilted cotton, faux fur, linen, or velvet.
- Add gifts (real or empty boxes) early. They visually “finish” the tree.
Designer rules of thumb
- Glow first: if the lights are beautiful, the tree will be beautiful.
- Work in layers: lights, picks, ribbon, ornaments, then filler.
- Vary the finish: shiny, matte, and textured is the trio.
- Add depth: some ornaments go near the trunk, always.
- Repeat, do not match: repeat colors and shapes around the tree instead of making everything identical.
Quick fixes
“My tree looks flat.”
Add ornaments deeper inside and tuck a few picks near the trunk. Flat trees are usually missing depth, not more stuff.
“My ribbon looks messy.”
Cut it into sections and do the tuck method. Also, reduce the number of loops. A few deliberate swoops beat a ribbon tornado.
“It feels too busy.”
Remove one category, not one ornament. For example, take off all bead garland, or remove one color and keep the rest.
“It looks bare at the top.”
Add a topper with height and place a few medium ornaments just under the top third. Many people decorate heavy at eye level and forget the upper cone.
A cozy pep talk
Your Christmas tree does not need to look like a showroom. The most beautiful trees always have at least one ornament that makes someone say, “Oh my gosh, where did you get that?” and you get to answer, “It is from my grandmother,” or “My kid made it,” or “I found it in a dusty antique shop and could not leave without it.”
Use the pro technique, then let your own story be the sparkle.
Checklist: the 7 steps
- Fluff and shape branches
- Add lights (in and out)
- Add picks and stems
- Weave ribbon (cut-and-tuck)
- Hang ornaments (large deeper, then medium, then small)
- Final walk-around and edits
- Topper and base styling